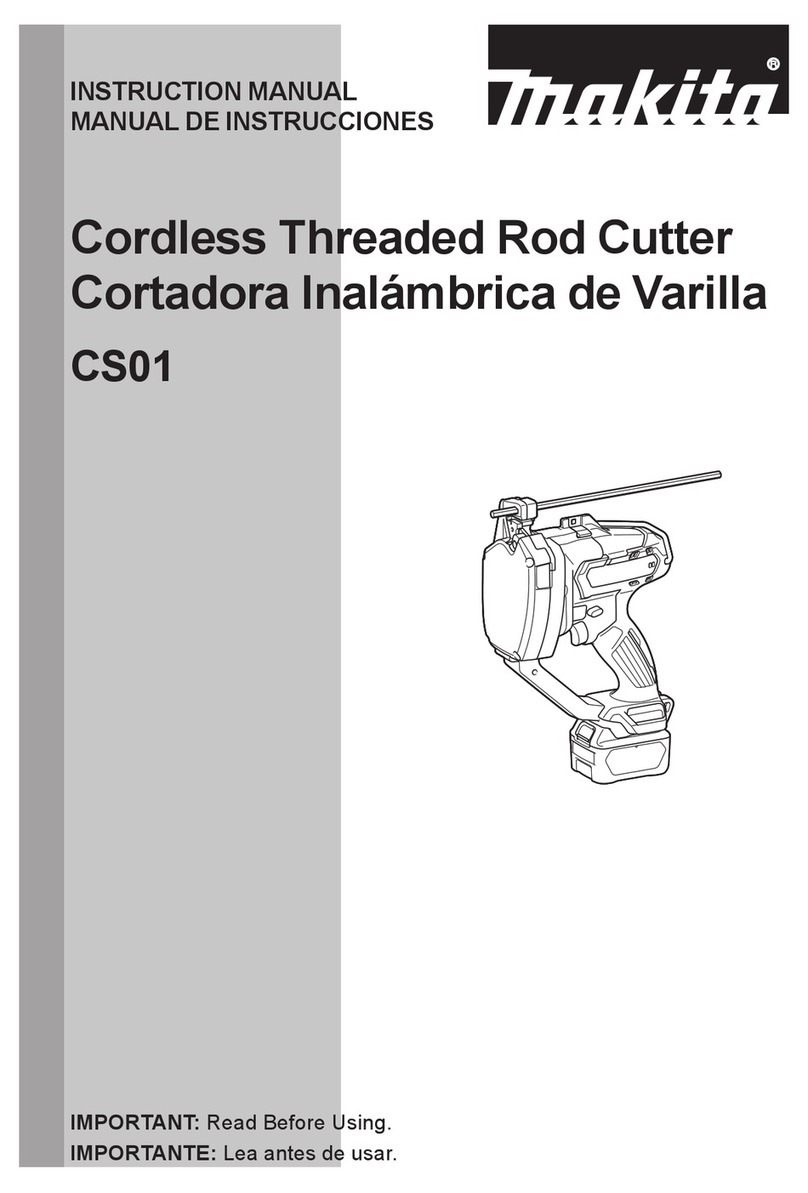
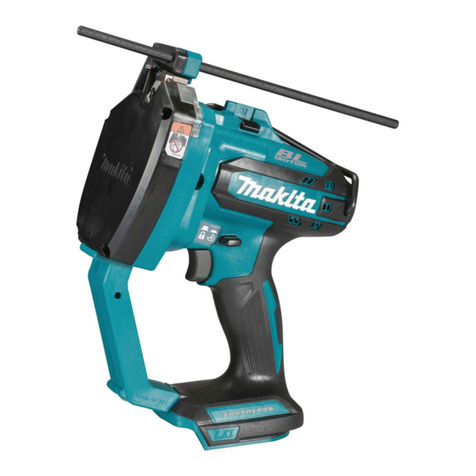
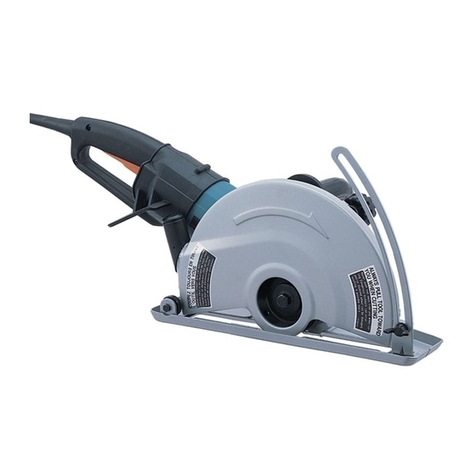
Makita DSC102 User manual

DSC102
EN Cordless Threaded Rod
Cutter INSTRUCTION MANUAL 7
ID Mesin Pemotong Batang
Berulir Tanpa Kabel PETUNJUK PENGGUNAAN 15
VI Máy Chấn Thép Ren Cầm Tay
Hoạt Động Bằng Pin TÀI LIỆU HƯỚNG DẪN 24
TH 32

13
14
5
7
12
9
11
10
6
15
8
1
2
3
4
4
Fig.1
1
2
3
Fig.2
1
2
Fig.3
1
Fig.4
1
2
3
Fig.5
2

1
234
Fig.6
1
Fig.7
1
2
Fig.8
2
1
3
Fig.9
21
Fig.10
1
Fig.11
Fig.12
3

1
Fig.13
1
2
3
2
Fig.14
1
Fig.15
1
1
2
2
5
3
64
Fig.16
1
2
3
4
Fig.17
1
Fig.18
4

1
2
Fig.19
12
Fig.20
1 2
Fig.21
4
1
2
3
Fig.22
12
Fig.23
1
2
3
Fig.24
5

1
Fig.25
6

7ENGLISH
ENGLISH (Original instructions)
SPECIFICATIONS
Model: DSC102
Cutting
capacities
Mild steel W3/8, W5/16, W1/4, 3/8-16UNC, 5/16-18UNC, 1/4-20UNC, M10, M8, M6
Stainless steel W3/8, 5/16-18UNC, M8, M6
Overall length 199 mm
Rated voltage D.C. 18 V
D.C. 14.4 V
Net weight 2.8 - 3.2 kg
• Duetoourcontinuingprogramofresearchanddevelopment,thespecicationshereinaresubjecttochange
without notice.
• Specicationsmaydifferfromcountrytocountry.
• Theweightmaydifferdependingontheattachment(s),includingthebatterycartridge.Thelightestandheavi-
estcombination,accordingtoEPTA-Procedure01/2014,areshowninthetable.
Applicable battery cartridge and charger
Batterycartridge D.C.14.4 V Model BL1415N / BL1430 / BL1430B / BL1440 /
BL1450 / BL1460B
D.C.18 V Model BL1815N / BL1820 / BL1820B / BL1830 /
BL1830B / BL1840 / BL1840B / BL1850 /
BL1850B / BL1860B
Charger DC18RC/DC18RD/DC18RE/DC18SD/
DC18SE/DC18SF
• Someofthebatterycartridgesandchargerslistedabovemaynotbeavailabledependingonyourregionof
residence.
WARNING: Only use the battery cartridges and chargers listed above.Useofanyotherbatterycartridges
andchargersmaycauseinjuryand/orre.
Symbols
Thefollowingsshowthesymbolsusedfortheequip-
ment.Besurethatyouunderstandtheirmeaningbefore
use.
Read instruction manual.
Wearsafetyglasses.
Do not touch the cutting dice during
operation.
Payattentiontoacutthreadedrod.
Donotcloseyourfacetothetoolduring
operation.
Ni-MH
Li-ion
OnlyforEUcountries
Donotdisposeofelectricequipmentor
batterypacktogetherwithhouseholdwaste
material!
InobservanceoftheEuropeanDirectives,
onWasteElectricandElectronic
EquipmentandBatteriesandAccumulators
andWasteBatteriesandAccumulators
and their implementation in accordance
withnationallaws,electricequipmentand
batteriesandbatterypack(s)thathave
reachedtheendoftheirlifemustbecol-
lectedseparatelyandreturnedtoanenvi-
ronmentallycompatiblerecyclingfacility.
Intended use
The tool is intended for cutting threaded rods.

8ENGLISH
SAFETY WARNINGS
General power tool safety warnings
WARNING: Read all safety warnings, instruc-
tions, illustrations and specications provided
with this power tool.Failuretofollowallinstructions
listedbelowmayresultinelectricshock,reand/or
seriousinjury.
Save all warnings and instruc-
tions for future reference.
Theterm“powertool”inthewarningsreferstoyour
mains-operated(corded)powertoolorbattery-operated
(cordless)powertool.
Work area safety
1. Keep work area clean and well lit. Cluttered or
dark areas invite accidents.
2. Do not operate power tools in explosive atmo-
spheres, such as in the presence of ammable
liquids, gases or dust.Powertoolscreatesparks
whichmayignitethedustorfumes.
3. Keep children and bystanders away while
operating a power tool. Distractions can cause
youtolosecontrol.
Electrical Safety
1. Power tool plugs must match the outlet. Never
modify the plug in any way. Do not use any
adapter plugs with earthed (grounded) power
tools. Unmodiedplugsandmatchingoutletswill
reduce risk of electric shock.
2. Avoid body contact with earthed or grounded
surfaces, such as pipes, radiators, ranges and
refrigerators. There is an increased risk of elec-
tricshockifyourbodyisearthedorgrounded.
3. Do not expose power tools to rain or wet con-
ditions. Water entering a power tool will increase
the risk of electric shock.
4. Do not abuse the cord. Never use the cord for
carrying, pulling or unplugging the power tool.
Keep cord away from heat, oil, sharp edges
or moving parts. Damaged or entangled cords
increase the risk of electric shock.
5. When operating a power tool outdoors, use an
extension cord suitable for outdoor use. Use of
acordsuitableforoutdoorusereducestheriskof
electric shock.
6. If operating a power tool in a damp location
is unavoidable, use a residual current device
(RCD) protected supply. Use of an RCD reduces
the risk of electric shock.
7. Power tools can produce electromagnetic
elds (EMF) that are not harmful to the user.
However, users of pacemakers and other similar
medical devices should contact the maker of their
deviceand/ordoctorforadvicebeforeoperating
this power tool.
Personal Safety
1. Stay alert, watch what you are doing and use
common sense when operating a power tool.
Do not use a power tool while you are tired or
under the inuence of drugs, alcohol or med-
ication.Amomentofinattentionwhileoperating
powertoolsmayresultinseriouspersonalinjury.
2. Use personal protective equipment. Always
wear eye protection.Protectiveequipmentsuch
asadustmask,non-skidsafetyshoes,hardhator
hearing protection used for appropriate conditions
willreducepersonalinjuries.
3. Prevent unintentional starting. Ensure the
switch is in the off-position before connecting
to power source and/or battery pack, picking
up or carrying the tool.Carryingpowertoolswith
yourngerontheswitchorenergisingpowertools
that have the switch on invites accidents.
4. Remove any adjusting key or wrench before
turning the power tool on.Awrenchorakeyleft
attachedtoarotatingpartofthepowertoolmay
resultinpersonalinjury.
5. Do not overreach. Keep proper footing and
balance at all times.Thisenablesbettercontrol
of the power tool in unexpected situations.
6. Dress properly. Do not wear loose clothing or
jewellery. Keep your hair and clothing away
from moving parts.Looseclothes,jewelleryor
longhaircanbecaughtinmovingparts.
7. If devices are provided for the connection of
dust extraction and collection facilities, ensure
these are connected and properly used. Use of
dust collection can reduce dust-related hazards.
8. Do not let familiarity gained from frequent use
of tools allow you to become complacent and
ignore tool safety principles.Acarelessaction
cancausesevereinjurywithinafractionofa
second.
9. Always wear protective goggles to protect
your eyes from injury when using power tools.
The goggles must comply with ANSI Z87.1 in
the USA, EN 166 in Europe, or AS/NZS 1336
in Australia/New Zealand. In Australia/New
Zealand, it is legally required to wear a face
shield to protect your face, too.
It is an employer's responsibility to enforce
the use of appropriate safety protective equip-
ments by the tool operators and by other per-
sons in the immediate working area.

9ENGLISH
Power tool use and care
1. Do not force the power tool. Use the correct
power tool for your application. The correct
powertoolwilldothejobbetterandsaferatthe
rate for which it was designed.
2. Do not use the power tool if the switch does
not turn it on and off.Anypowertoolthatcannot
becontrolledwiththeswitchisdangerousand
mustberepaired.
3. Disconnect the plug from the power source
and/or remove the battery pack, if detachable,
from the power tool before making any adjust-
ments, changing accessories, or storing power
tools.Suchpreventivesafetymeasuresreduce
theriskofstartingthepowertoolaccidentally.
4. Store idle power tools out of the reach of chil-
dren and do not allow persons unfamiliar with
the power tool or these instructions to operate
the power tool.Powertoolsaredangerousinthe
hands of untrained users.
5. Maintain power tools and accessories. Check
for misalignment or binding of moving parts,
breakage of parts and any other condition that
may affect the power tool’s operation. If dam-
aged, have the power tool repaired before use.
Manyaccidentsarecausedbypoorlymaintained
power tools.
6. Keep cutting tools sharp and clean.Properly
maintained cutting tools with sharp cutting edges
arelesslikelytobindandareeasiertocontrol.
7. Use the power tool, accessories and tool bits
etc. in accordance with these instructions, tak-
ing into account the working conditions and
the work to be performed. Use of the power tool
for operations different from those intended could
result in a hazardous situation.
8. Keep handles and grasping surfaces dry,
clean and free from oil and grease.Slippery
handles and grasping surfaces do not allow for
safe handling and control of the tool in unexpected
situations.
9. When using the tool, do not wear cloth work
gloves which may be entangled. The entangle-
mentofclothworkglovesinthemovingpartsmay
resultinpersonalinjury.
Battery tool use and care
1. Recharge only with the charger specied by
the manufacturer.Achargerthatissuitablefor
onetypeofbatterypackmaycreateariskofre
whenusedwithanotherbatterypack.
2. Use power tools only with specically desig-
nated battery packs.Useofanyotherbattery
packsmaycreateariskofinjuryandre.
3. When battery pack is not in use, keep it away
from other metal objects, like paper clips,
coins, keys, nails, screws or other small metal
objects, that can make a connection from one
terminal to another.Shortingthebatterytermi-
nalstogethermaycauseburnsorare.
4. Under abusive conditions, liquid may be
ejected from the battery; avoid contact. If con-
tact accidentally occurs, ush with water. If
liquid contacts eyes, additionally seek medical
help.Liquidejectedfromthebatterymaycause
irritationorburns.
5. Do not use a battery pack or tool that is dam-
aged or modied.Damagedormodiedbatteries
mayexhibitunpredictablebehaviourresultingin
re,explosionorriskofinjury.
6. Do not expose a battery pack or tool to re or
excessive temperature.Exposuretoreortem-
peratureabove130°Cmaycauseexplosion.
7. Follow all charging instructions and do not
charge the battery pack or tool outside the
temperature range specied in the instruc-
tions.Chargingimproperlyorattemperatures
outsidethespeciedrangemaydamagethe
batteryandincreasetheriskofre.
Service
1. Have your power tool serviced by a qualied
repair person using only identical replacement
parts.Thiswillensurethatthesafetyofthepower
tool is maintained.
2. Never service damaged battery packs. Service
ofbatterypacksshouldonlybeperformedbythe
manufacturer or authorized service providers.
3. Follow instruction for lubricating and chang-
ing accessories.
Cordless threaded rod cutter safety
warnings
1. Hold the tool rmly.
2. Secure the workpiece rmly.
3. Keep your face and hands away from moving
parts. During cutting, the fraction of the threaded
rodmayyoff.
4. Always wear gloves when handling threaded
rods.Edgesandchipsoftheworkpiecearesharp.
5. Do not put the tool on the chips of the work-
piece. Otherwise it can cause damage and
trouble on the tool.
6. Always be sure you have a rm footing. Be
sure no one is below when using the tool in
high locations.
7. Do not touch the cutting edge or the workpiece
immediately after operation; they may be
extremely hot and could burn your skin.
8. Avoid cutting electrical wires. It can cause
serious accident by electric shock.
9. Always hold the threaded rod during and after
cutting to prevent the cut threaded rod from
falling off.Acutthreadedrodmaycauseserious
personalinjuryiffallenofffromahighlocation.
10. Keep a safe distance between your body and
the moving parts. Do not operate the tool if
the working area is too narrow to keep a safe
distance.
11. Never leave the tool on a high location or a
potentially unstable surface.
SAVE THESE INSTRUCTIONS.
10 ENGLISH
WARNING: DO NOT let comfort or familiarity
with product (gained from repeated use) replace
strict adherence to safety rules for the subject
product.
MISUSE or failure to follow the safety rules stated
in this instruction manual may cause serious
personal injury.
Important safety instructions for
battery cartridge
1. Before using battery cartridge, read all instruc-
tions and cautionary markings on (1) battery
charger, (2) battery, and (3) product using
battery.
2. Do not disassemble battery cartridge.
3. If operating time has become excessively
shorter, stop operating immediately. It may
result in a risk of overheating, possible burns
and even an explosion.
4. If electrolyte gets into your eyes, rinse them
out with clear water and seek medical atten-
tion right away. It may result in loss of your
eyesight.
5. Do not short the battery cartridge:
(1) Do not touch the terminals with any con-
ductive material.
(2) Avoid storing battery cartridge in a con-
tainer with other metal objects such as
nails, coins, etc.
(3) Do not expose battery cartridge to water
or rain.
A battery short can cause a large current
ow, overheating, possible burns and even a
breakdown.
6. Do not store the tool and battery cartridge in
locations where the temperature may reach or
exceed 50 °C (122 °F).
7. Do not incinerate the battery cartridge even if
it is severely damaged or is completely worn
out. The battery cartridge can explode in a re.
8. Be careful not to drop or strike battery.
9. Do not use a damaged battery.
10. The contained lithium-ion batteries are subject
to the Dangerous Goods Legislation require-
ments.
Forcommercialtransportse.g.bythirdparties,
forwardingagents,specialrequirementonpack-
agingandlabelingmustbeobserved.
Forpreparationoftheitembeingshipped,consult-
inganexpertforhazardousmaterialisrequired.
Pleasealsoobservepossiblymoredetailed
national regulations.
Tape or mask off open contacts and pack up the
batteryinsuchamannerthatitcannotmove
around in the packaging.
11. Follow your local regulations relating to dis-
posal of battery.
12. Use the batteries only with the products
specied by Makita.Installingthebatteriesto
non-compliantproductsmayresultinare,exces-
siveheat,explosion,orleakofelectrolyte.
SAVE THESE INSTRUCTIONS.
CAUTION: Only use genuine Makita batteries.
Useofnon-genuineMakitabatteries,orbatteriesthat
havebeenaltered,mayresultinthebatterybursting
causingres,personalinjuryanddamage.Itwill
alsovoidtheMakitawarrantyfortheMakitatooland
charger.
Tips for maintaining maximum
battery life
1. Charge the battery cartridge before completely
discharged. Always stop tool operation and
charge the battery cartridge when you notice
less tool power.
2. Never recharge a fully charged battery car-
tridge. Overcharging shortens the battery
service life.
3. Charge the battery cartridge with room tem-
perature at 10 °C - 40 °C (50 °F - 104 °F). Let
a hot battery cartridge cool down before
charging it.
4. Charge the battery cartridge if you do not use
it for a long period (more than six months).
PARTS DESCRIPTION
►Fig.1
1Stationarymount 2Movablemount 3Cutting die 4Bolt
5Hook 6Shoulderstrapbase
(foroptionalaccessory)
7Hex Wrench 8Lamp(inside)
9Frontface 10 Switch trigger 11 Reversing switch lever 12 Rod guide
13 Guide scale 14 Clamping screw 15 Cover - -

11 ENGLISH
FUNCTIONAL
DESCRIPTION
CAUTION: Always be sure that the tool is
switched off and the battery cartridge is removed
before adjusting or checking function on the tool.
Installing or removing battery
cartridge
CAUTION: Always switch off the tool before
installing or removing of the battery cartridge.
CAUTION: Hold the tool and the battery car-
tridge rmly when installing or removing battery
cartridge.Failuretoholdthetoolandthebattery
cartridgermlymaycausethemtoslipoffyourhands
andresultindamagetothetoolandbatterycartridge
andapersonalinjury.
►Fig.2: 1. Red indicator 2. Button 3.Batterycartridge
Toremovethebatterycartridge,slideitfromthetool
whileslidingthebuttononthefrontofthecartridge.
Toinstallthebatterycartridge,alignthetongueonthe
batterycartridgewiththegrooveinthehousingandslip
itintoplace.Insertitallthewayuntilitlocksinplace
withalittleclick.Ifyoucanseetheredindicatoronthe
uppersideofthebutton,itisnotlockedcompletely.
CAUTION: Always install the battery cartridge
fully until the red indicator cannot be seen. If not,
itmayaccidentallyfalloutofthetool,causinginjuryto
youorsomeonearoundyou.
CAUTION: Do not install the battery cartridge
forcibly.Ifthecartridgedoesnotslideineasily,itis
notbeinginsertedcorrectly.
Tool / battery protection system
Thetoolisequippedwithatool/batteryprotectionsys-
tem.Thissystemautomaticallycutsoffpowertothe
motortoextendtoolandbatterylife.Thetoolwillauto-
maticallystopduringoperationifthetoolorbatteryis
placed under one of the following conditions.
Overload protection
When the tool is operated in a manner that causes it to
drawanabnormallyhighcurrent,thetoolautomatically
stopswithoutanyindication.Inthissituation,turnthe
tool off and stop the application that caused the tool to
becomeoverloaded.Thenturnthetoolontorestart.
NOTE:Overloadprotectionactivateswhenyoutryto
cut the following kinds of threaded rods.
— Athreadedrodwhichislargerthanthecutting
dice size.
— Athreadedrodwhichisharderthanthecutting
capacityofthecuttingdice.
Overheat protection
Whenthetoolisoverheated,thetoolautomatically
stopsandtheLEDlightwillblink.Letthetoolcooldown
beforeturningthetoolonagain.
Overdischarge protection
Whenthebatterycapacitybecomeslow,thetoolstops
automatically.Iftheproductdoesnotoperateeven
whentheswitchesareoperated,removethebatteries
fromthetoolandchargethebatteries.
Indicating the remaining battery
capacity
Only for battery cartridges with the indicator
►Fig.3: 1. Indicator lamps 2.Checkbutton
Pressthecheckbuttononthebatterycartridgetoindi-
catetheremainingbatterycapacity.Theindicatorlamps
light up for a few seconds.
Indicator lamps Remaining
capacity
Lighted Off Blinking
75% to 100%
50% to 75%
25% to 50%
0% to 25%
Charge the
battery.
Thebattery
mayhave
malfunctioned.
NOTE: Depending on the conditions of use and the
ambienttemperature,theindicationmaydifferslightly
fromtheactualcapacity.
Switch action
CAUTION: Before installing the battery car-
tridge into the tool, always check to see that the
switch trigger actuates properly and returns to
the “OFF” position when released.
To start the cutting operation, continue to pull the switch
trigger.Thecuttingdieonthemovablemountwill
overlapwiththedieonthestationarymountandthen
returns.Ifyoureleasetheswitchtriggerbeforecomplet-
ing the cut, the cutting dice will stop.
►Fig.4: 1. Switch trigger
►Fig.5: 1.Stationarymount2. Cutting die 3.Movable
mount
NOTICE: Do not operate the tool at no-load
unnecessarily.

12 ENGLISH
Auto-stop function
Whenyoucontinuetopulltheswitchtrigger,thejawof
thediceonceclosesandreturnstofullyopenedposi-
tion then stops. Release the trigger and pull it again to
beginthenextcuttingsequence.
Reversing switch lever
WARNING: When not operating the tool,
always set the reversing switch lever to the lock
position.
CAUTION: Always make sure the position of
the reversing switch lever before operating.
NOTICE: Do not move the reversing switch lever
when the switch trigger is being pulled.Thismay
cause a damage to the tool.
To start the cutting operation, set the reversing switch
lever to cutting position.
Toreversethecuttingsequence,setthereversing
switchlevertothereversingposition.Whenyoucon-
tinuetopulltheswitchtrigger,thejawofthecuttingdice
opensandstopsatfullyopenedposition.
To lock the switch trigger, set the reversing switch lever
tothelockposition.Theswitchtriggercannotbepulled
in this position.
►Fig.6: 1. Reversing switch lever 2. Cutting position
3. Lock position 4. Reversing position
NOTICE: When the reversing switch lever is
in the reversing position, run the tool only as
needed. To prevent the damage to the tool, the tool
willautomaticallystopswhenitisruninthereversing
positioncontinuously.
NOTE:Aftercutting,ifyoureleasetheswitchtrigger
whilethejawofthecuttingdiceisopeningandthen
set the reversing switch lever to the reversing posi-
tion,thejawwilloncecloseandthenopenwhenyou
pull the switch trigger again.
LED light
CAUTION: Do not look in the light or see the
source of light directly.
Pulltheswitchtriggertolightupthelamp.Thelamp
keepsonlightingwhiletheswitchtriggerisbeingpulled.
Thelampgoesoutapproximately15secondsafter
releasing the switch trigger.
►Fig.7: 1.Lamp(inside)
NOTE:Useadryclothtowipethedirtoffthelensof
the lamp. Be careful not to scratch the lens of lamp, or
itmaylowertheillumination.
NOTE: When the tool is overheated, the lamp will
blink.Letthetoolcooldowninthiscase.
Guide scale
Usetheguidescaleifyouwishtocutthreadedrodsin
the same length. Insert the guide scale into the hole as
showninthegure.
►Fig.8: 1. Guide scale 2. Clamping screw
Alignthevalueofyourdesiredlengthontheguidescale
with the cutting line. Then tighten the clamping screw.
►Fig.9: 1. Guide scale 2. Cutting line 3. Clamping
screw
CAUTION: Do not hold the guide scale to
carry or handle the tool.Thetoolmayfalloffand
causepersonalinjuryand/ordamagetothetool.
Rod guide
Foraprecisecutting,settherodguideinposition
dependingonthediameterofthethreadedrodtobe
cut.
►Fig.10: 1.Rodguide(Position1)2. Rod guide
(Position2)
There are two rod guide positions.
Position Size of threaded rod
1W3/8, 3/8-16UNC, M10
2W5/16, W1/4, 5/16-18UNC, 1/4-20UNC,
M8, M6
Hook
CAUTION: Never hook the tool on a windy
location or a potentially unstable surface.
CAUTION: Do not use the hook when it is
deformed or damaged.
CAUTION: When not operating the tool,
always fold the hook.
Thehookisconvenientforhangingthetooltemporarily.
►Fig.11: 1. Hook
CAUTION: Do not hang the hook from the
waist belt.Itmayresultinpersonalinjuriesand/or
damage to the tool if dropped.
►Fig.12
Hex wrench storage
When not in use, store the hex wrench as shown in the
guretokeepitfrombeinglost.
►Fig.13: 1. Hex wrench
Shoulder strap
Optional accessory
Shoulderstrapisusefulforcarryingthetool.
►Fig.14: 1. Shoulder strap 2. Belt end 3. Buckle

13 ENGLISH
CAUTION: Always wear the shoulder strap
crossed over your body and adjusted in proper
length.
CAUTION: Do not use the shoulder strap if it
is damaged.
CAUTION: Leave an sufcient length between
the buckle and belt end to prevent the belt end
from slipping through the buckle.
ASSEMBLY
CAUTION: Always be sure that the tool is
switched off and the battery cartridge is removed
before carrying out any work on the tool.
Installing the cutting dice
CAUTION: Always install the cutting dice in
the correct directions and secured rmly. Incorrect
orlooseattachmentmaycausebreakageofthe
cuttingdice,resultingpersonalinjurybyownoff
fractions.
NOTICE: Remove the burr on the cutting dice
using a le if any.
1. Checkifthejawofthecuttingdiceisfullyopened.
Ifnot,installthebatteryandpulltheswitchtriggeruntil
thejawisfullyopened.
CAUTION: Be sure to remove the battery
cartridge if you installed.
2. Set the reversing switch lever to the lock position.
►Fig.15: 1. Reversing switch lever
3. Unscrewtheboltswiththesuppliedhexwrench.
CAUTION: Use only the Makita wrench pro-
vided with the tool.Usingotherwrenchesmay
resultinovertighteningorinsufcienttighteningwhich
causespersonalinjury.
4. Set the cutting dice onto the mounts so that the
twocoloredmarkingscanbeseen.
►Fig.16: 1. Bolt 2. Cutting die 3.Stationarymount
4.Movablemount5. Colored marking
6. Hex wrench
5. Securethecuttingdicewiththeboltsrmly.
Thecuttingdicearecorrectlyinstalledifthearrowson
them point each other. The dimensions of the cutting
dicearethesamebuttheirthicknesslookdifferent
whenseenfromabove.
►Fig.17: 1.Arrow2. Cutting die 3. Thin side 4. Thick
side
OPERATION
CAUTION: Make sure that the correct size of
the cutting dice are installed to the tool. Check
the cutting capacity written on the the cutting dice
before cutting.
CAUTION: Before pulling the switch trigger,
be sure to set the threaded rod so that its thread
ts with those of cutting dice. Incorrect alignment
ofthethreadsmaybreakthecuttingdiceandcause
personalinjurybyownofffractions.
CAUTION: Replace the cutting dice if the
cutting edge is chipped or deformed.
When cutting, place the threaded rod perpendicular to
thecuttinglineasshowninthegure.
►Fig.18: 1. Cutting line
NOTE: When cutting a threaded rod made of ductile
metalsuchasstainlesssteel,burrsmaybegenerated
onthecutend.Removeburrswithaleinthiscase.
►Fig.19: 1. Threaded rod 2. Burr
Cutting secured threaded rods
When cutting a threaded rod which is secured to the
buildingstructuresuchastheceiling,wall,oor,etc.,
followtheprocedurebelow:
►Fig.20: 1. Threaded rod 2. Cutting die on the sta-
tionarymount
1. Bring the tool so that the threaded rod is posi-
tionedbetweenthecuttingdice.
2. While the threaded rod contacting with the rod
guide,tthethreadoftherodwiththatofthecuttingdie
onthestationarymount.
3. Pullandholdtheswitchtriggeruntilthecuttingis
nishedandthejawofthecuttingdicecomestofully
opened position.
NOTICE: Clean the front face of the tool and the
tip of the guide scale before operation.Theymay
dirtythecontactingsurface.
Cutting loose threaded rods
Whencuttingaloosethreadedrodontheoorora
worktable,followtheprocedurebelow:
►Fig.21: 1. Threaded rod 2. Cutting die on the sta-
tionarymount
1. Positionathreadedrodbetweenthecuttingdice.
2. While the threaded rod contacting with the rod
guide,tthethreadoftherodwiththatofthecuttingdie
onthestationarymount.
3. Pullandholdtheswitchtriggeruntilthecuttingis
nishedandthejawofthecuttingdicecomestofully
opened position.

14 ENGLISH
When cutting a long threaded rod which is hard to hold
byhand,placethetoolasillustrated.Thetoolcanbe
placedat.Thecoveralsocanbeusedforsupporting
the end of the threaded rod.
►Fig.22: 1.Cover(Position1)2. Rod guide
(Position1)3.Cover(Position2)
4.Rodguide(Position2)
The cover has markings to indicate its position.
Depending on the size of the threaded rod, put the
coverinthepositionasshowninthetableaswellasthe
rod guide.
Position Size of threaded rod
1W3/8, 3/8-16UNC, M10
2W5/16, W1/4, 5/16-18UNC, 1/4-20UNC,
M8, M6
Quitting the cutting in the middle
CAUTION: Never try to pull out the tool forci-
bly from the threaded rod. Itmaycauseunexpected
startupwhichcausepersonalinjuryordamagetothe
cutting dice and tool.
Whenquittingthecuttinginthemiddle,settherevers-
ing switch lever to the reversing position and pull the
switchtriggeruntilthethreadedrodiscompletely
released from the cutting dice.
MAINTENANCE
CAUTION: Always be sure that the tool is
switched off and the battery cartridge is removed
before attempting to perform inspection or
maintenance.
NOTICE: Never use gasoline, benzine, thinner,
alcohol or the like. Discoloration, deformation or
cracks may result.
Replacing the cutting dice
NOTICE: Replace the both cutting dice at the
same time. Replacing the one side of the cutting die
maygenerateburronthethreadedrod.
Replace the cutting dice when it is chipped, deformed,
or the cutting gets dull. To replace, follow the instruc-
tions in “Installing the cutting dice”.
►Fig.23: 1. Chipping 2. Deformation
One cutting die has two cutting edges and thick side
and thin side. Switch the installation positions of the
cuttingdiceifyouhavenotusedtheothersidesofthe
cutting edges.
►Fig.24: 1. Cutting edge 2. Thin side 3. Thick side
Carrying/storing the tool
CAUTION: When the tool is not used, always
attach the supplied cover to the cutting portion.
Attachthecoverwhencarryingthetool.
Whenstoringthetool,removethebatterycartridgeand
the guide scale from the tool. Clean dust on the cutting
diceandthemovingpart.Afterthat,attachthecover.
►Fig.25: 1. Cover
TomaintainproductSAFETYandRELIABILITY,
repairs,anyothermaintenanceoradjustmentshould
beperformedbyMakitaAuthorizedorFactoryService
Centers,alwaysusingMakitareplacementparts.
OPTIONAL
ACCESSORIES
CAUTION: These accessories or attachments
are recommended for use with your Makita tool
specied in this manual.Theuseofanyother
accessories or attachments might present a risk of
injurytopersons.Onlyuseaccessoryorattachment
for its stated purpose.
Ifyouneedanyassistanceformoredetailsregard-
ingtheseaccessories,askyourlocalMakitaService
Center.
• Cutting dice
• Shoulder strap
• Makitagenuinebatteryandcharger
NOTE:Someitemsinthelistmaybeincludedinthe
toolpackageasstandardaccessories.Theymay
differfromcountrytocountry.

15 BAHASA INDONESIA
BAHASA INDONESIA (Petunjuk Asli)
SPESIFIKASI
Model: DSC102
Kapasitas
pemotongan
Bajalunak W3/8, W5/16, W1/4, 3/8-16UNC, 5/16-18UNC, 1/4-20UNC, M10, M8, M6
Bajatahankarat W3/8, 5/16-18UNC, M8, M6
Panjangkeseluruhan 199 mm
Tegangan terukur D.C. 18 V
D.C. 14,4 V
Beratbersih 2,8 - 3,2 kg
• Karenakesinambunganprogrampenelitiandanpengembangankami,spesikasiyangdisebutkandisinidapat
berubahtanpapemberitahuan.
• Spesikasidapatberbedadarisatunegarakenegaralainnya.
• Beratalatmungkinberbedatergantungperangkattambahanyangdipasang,termasukkartridbaterai.
Kombinasialatterberatdanteringan,sesuaiProsedurEPTA01/2014,ditunjukkanpadatabel.
Kartrid dan pengisi daya baterai yang dapat digunakan
Kartridbaterai Model D.C.14,4 V BL1415N / BL1430 / BL1430B / BL1440 /
BL1450 / BL1460B
Model D.C.18 V BL1815N / BL1820 / BL1820B / BL1830 /
BL1830B / BL1840 / BL1840B / BL1850 /
BL1850B / BL1860B
Pengisidaya DC18RC/DC18RD/DC18RE/DC18SD/
DC18SE/DC18SF
• Beberapakartridbateraidanpengisidayayangtercantumdiatasmungkintidaktersedia,tergantungwilayah
tempattinggalAnda.
PERINGATAN: Hanya gunakan kartrid dan pengisi daya baterai yang tercantum di atas.Penggunaan
kartriddanpengisidayabaterailaindapatmenimbulkanrisikocederadan/ataukebakaran.
Simbol
Berikutiniadalahsimbol-simbolyangdigunakanpada
peralatanini.PastikanAndamengertimaknamasing-
masingsimbolsebelummenggunakanalat.
Bacapetunjukpenggunaan.
Gunakan kaca mata pengaman.
Jangan sentuh pemotong ulir selama
pengoperasian.
Perhatikanbatangberuliryangdipotong.
JangandekatkanwajahAndapadamesin
selama pengoperasian.
Ni-MH
Li-ion
Hanyauntuknegara-negaraUE
Janganmembuangperalatanlistrikatau
paketbateraibersama-samadengan
bahanlimbahrumahtangga!
DenganmemerhatikanPetunjukEropa,
tentangLimbahPeralatanListrikdan
ElektroniksertaBateraidanAkumulator
sertaLimbahBateraidanAkumulatordan
pelaksanaannyasesuaidenganketentuan
hukum nasional, peralatan listrik dan
bateraidanpaketbateraiyangtelahhabis
umurpakainyaharusdikumpulkansecara
terpisahdandikembalikankefasilitasdaur
ulangyangkompatibelsecaralingkungan.
Penggunaan
Mesininidigunakanuntukmemotongbatangberulir.

16 BAHASA INDONESIA
PERINGATAN
KESELAMATAN
Peringatan keselamatan umum
mesin listrik
PERINGATAN: Bacalah semua peringatan
keselamatan, petunjuk, ilustrasi dan spesikasi
yang disertakan bersama mesin listrik ini.
Kelalaianuntukmematuhisemuapetunjukyang
tercantumdibawahinidapatmenyebabkansengatan
listrik,kebakarandan/ataucederaserius.
Simpanlah semua peringatan
dan petunjuk untuk acuan di
masa depan.
Istilah “mesin listrik” dalam semua peringatan mengacu
padamesinlistrikyangdijalankandengansumberlistrik
jala-jala(berkabel)ataubaterai(tanpakabel).
Keselamatan tempat kerja
1. Jaga tempat kerja selalu bersih dan
berpenerangan cukup.Tempatkerjayang
berantakandangelapmengundangkecelakaan.
2. Jangan gunakan mesin listrik dalam
lingkungan yang mudah meledak, misalnya
jika ada cairan, gas, atau debu yang mudah
menyala.Mesinlistrikmenimbulkanbungaapi
yangdapatmenyalakandebuatauuaptersebut.
3. Jauhkan anak-anak dan orang lain saat
menggunakan mesin listrik. Bila perhatian
terpecah, anda dapat kehilangan kendali.
Keamanan Kelistrikan
1. Steker mesin listrik harus cocok dengan
stopkontak. Jangan sekali-kali mengubah
steker dengan cara apa pun. Jangan
menggunakan steker adaptor dengan mesin
listrik terbumi (dibumikan). Stekeryang
tidakdiubahdanstopkontakyangcocokakan
mengurangi risiko sengatan listrik.
2. Hindari sentuhan tubuh dengan permukaan
terbumi atau yang dibumikan seperti pipa,
radiator, kompor, dan kulkas. Risiko sengatan
listrikbertambahjikatubuhAndaterbumikanatau
dibumikan.
3. Jangan membiarkan mesin listrik kehujanan
atau kebasahan.Airyangmasukkedalammesin
listrik akan meningkatkan risiko sengatan listrik.
4. Jangan menyalahgunakan kabel. Jangan
sekali-kali menggunakan kabel untuk
membawa, menarik, atau mencabut mesin
listrik dari stopkontak. Jauhkan kabel dari
panas, minyak, tepian tajam, atau bagian
yang bergerak.Kabelyangrusakataukusut
memperbesarrisikosengatanlistrik.
5. Bila menggunakan mesin listrik di luar
ruangan, gunakan kabel ekstensi yang
sesuai untuk penggunaan di luar ruangan.
Penggunaankabelyangsesuaiuntuk
penggunaan luar ruangan mengurangi risiko
sengatan listrik.
6. Jika mengoperasikan mesin listrik di lokasi
lembap tidak terhindarkan, gunakan pasokan
daya yang dilindungi peranti imbasan arus
(residual current device - RCD).Penggunaan
RCD mengurangi risiko sengatan listrik.
7. Mesin listrik dapat menghasilkan medan
magnet (EMF) yang tidak berbahaya bagi
pengguna. Namun, pengguna alat pacu
jantungatauperalatanmedissejenisnyaharus
berkonsultasidenganprodusenperalatantersebut
dan/ataudoktermerekasebelummengoperasikan
mesin listrik ini.
Keselamatan Diri
1. Jaga kewaspadaan, perhatikan pekerjaan Anda
dan gunakan akal sehat bila menggunakan
mesin listrik. Jangan menggunakan mesin
listrik saat Anda lelah atau di bawah pengaruh
obat bius, alkohol, atau obat.Sekejapsaja
lalai saat menggunakan mesin listrik dapat
menyebabkancederabadanserius.
2. Gunakan alat pelindung diri. Selalu gunakan
pelindung mata.Peralatanpelindungseperti
maskerdebu,sepatupengamananti-selip,helm
pengaman,ataupelindungtelingayangdigunakan
untukkondisiyangsesuaiakanmengurangirisiko
cederabadan.
3. Cegah penyalaan yang tidak disengaja.
Pastikan bahwa sakelar berada dalam posisi
mati (off) sebelum menghubungkan mesin
ke sumber daya dan/atau paket baterai, atau
mengangkat atau membawanya.Membawa
mesinlistrikdenganjariAndapadasakelarnya
atau mengalirkan listrik pada mesin listrik
yangsakelarnyahidup(on)akanmengundang
kecelakaan.
4. Lepaskan kunci-kunci penyetel sebelum
menghidupkan mesin listrik.Kunci-kunciyang
masihterpasangpadabagianmesinlistrikyang
berputardapatmenyebabkancedera.
5. Jangan meraih terlalu jauh. Jagalah pijakan
dan keseimbangan sepanjang waktu. Hal ini
memungkinkankendaliyanglebihbaikatasmesin
listrikdalamsituasiyangtidakdiharapkan.
6. Kenakan pakaian yang memadai. Jangan
memakai pakaian yang longgar atau
perhiasan. Jaga jarak antara rambut dan
pakaian Anda dengan komponen mesin yang
bergerak.Pakaianyanglonggar,perhiasan,
ataurambutyangpanjangdapattersangkutpada
komponenyangbergerak.
7. Jika tersedia fasilitas untuk menghisap dan
mengumpulkan debu, pastikan fasilitas
tersebut terhubung listrik dan digunakan
dengan baik.Penggunaanpembersihdebudapat
mengurangibahayayangterkaitdengandebu.
8. Jangan sampai Anda lengah dan mengabaikan
prinsip keselamatan mesin ini hanya karena
sudah sering mengoperasikannya dan sudah
merasa terbiasa.Tindakanyanglalaidapat
menyebabkancederaberatdalamsepersekian
detiksaja.

17 BAHASA INDONESIA
9. Selalu kenakan kacamata pelindung
untuk melindungi mata dari cedera saat
menggunakan mesin listrik. Kacamata
harus sesuai dengan ANSI Z87.1 di Amerika
Serikat, EN 166 di Eropa, atau AS/NZS 1336 di
Australia/Selandia Baru. Di Australia/Selandia
Baru, secara hukum Anda juga diwajibkan
mengenakan pelindung wajah untuk
melindungi wajah Anda.
Menjadi tanggung jawab atasan untuk
menerapkan penggunaan alat pelindung
keselamatan yang tepat bagi operator mesin
dan orang lain yang berada di area kerja saat
itu.
Penggunaan dan pemeliharaan mesin listrik
1. Jangan memaksa mesin listrik. Gunakan
mesin listrik yang tepat untuk keperluan
Anda.Mesinlistrikyangtepatakanmenuntaskan
pekerjaandenganlebihbaikdanamanpada
kecepatansesuairancangannya.
2. Jangan gunakan mesin listrik jika sakelar
tidak dapat menyalakan dan mematikannya.
Mesinlistrikyangtidakdapatdikendalikan
dengansakelarnyaadalahberbahayadanharus
diperbaiki.
3. Cabut steker dari sumber listrik dan/atau lepas
paket baterai, jika dapat dilepas, dari mesin
listrik sebelum melakukan penyetelan apa pun,
mengganti aksesori, atau menyimpan mesin
listrik.Langkahkeselamatanpreventiftersebut
mengurangirisikohidupnyamesinsecaratak
sengaja.
4. Simpan mesin listrik jauh dari jangkauan anak-
anak dan jangan biarkan orang yang tidak
paham mengenai mesin listrik tersebut atau
petunjuk ini menggunakan mesin listrik. Mesin
listriksangatberbahayaditanganpenggunayang
tak terlatih.
5. Rawatlah mesin listrik dan aksesori. Periksa
apakah ada komponen bergerak yang tidak
lurus atau macet, komponen yang pecah, dan
kondisi-kondisi lain yang dapat memengaruhi
pengoperasian mesin listrik. Jika rusak,
perbaiki mesin listrik terlebih dahulu sebelum
digunakan.Banyakkecelakaandisebabkanoleh
kurangnyapemeliharaanmesinlistrik.
6. Jaga agar mesin pemotong tetap tajam dan
bersih.Mesinpemotongyangterawatbaik
denganmatapemotongyangtajamtidakmudah
macetdanlebihmudahdikendalikan.
7. Gunakan mesin listrik, aksesori, dan mata
mesin, dll. sesuai dengan petunjuk ini, dengan
memperhitungkan kondisi kerja dan jenis
pekerjaan yang dilakukan.Penggunaanmesin
listrikuntukpenggunaanyanglaindariperuntukan
dapatmenimbulkansituasiberbahaya.
8. Jagalah agar gagang dan permukaan
pegangan tetap kering, bersih, dan bebas dari
minyak dan pelumas. Gagang dan permukaan
peganganyanglicintidakmendukungkeamanan
penanganan dan pengendalian mesin dalam
situasi-situasi tak terduga.
9. Ketika menggunakan mesin, jangan
menggunakan sarung tangan kain yang dapat
tersangkut.Sarungtangankainyangtersangkut
padakomponenbergerakdapatmengakibatkan
cedera pada pengguna.
Penggunaan dan pemeliharaan mesin bertenaga
baterai
1. Isi ulang baterai hanya dengan pengisi daya
yang ditentukan oleh pabrikan.Pengisidaya
yangcocokuntuksatujenispaketbateraidapat
menimbulkanrisikokebakaranketikadigunakan
untukpaketbateraiyanglain.
2. Gunakan mesin listrik hanya dengan
paket baterai yang telah ditentukan secara
khusus.Penggunaanpaketbaterailaindapat
menimbulkanrisikocederadankebakaran.
3. Ketika paket baterai tidak digunakan, jauhkan
dari benda logam lain, seperti penjepit
kertas, uang logam, kunci, paku, sekrup
atau benda logam kecil lainnya, yang dapat
menghubungkan satu terminal ke terminal
lain.Hubungansingkatterminalbateraidapat
menyebabkanlukabakarataukebakaran.
4. Pemakaian yang salah, dapat menyebabkan
keluarnya cairan dari baterai; hindari kontak.
Jika terjadi kontak secara tidak sengaja, bilas
dengan air. Jika cairan mengenai mata, cari
bantuan medis.Cairanyangkeluardaribaterai
bisamenyebabkaniritasiataulukabakar.
5. Jangan menggunakan paket baterai atau
mesin yang sudah rusak atau telah diubah.
Bateraiyangrusakatautelahdiubahdapat
menyebabkanhal-halyangtidakdapatdiprediksi
yangdapatmenyebabkankebakaran,ledakan
atau risiko cidera.
6. Jangan membiarkan paket baterai atau mesin
dekat dengan api atau suhu yang berlebihan.
Pajananapiatausuhudiatas130°Cdapat
menyebabkanledakan.
7. Ikuti semua petunjuk pengisian daya dan
jangan mengisi daya paket baterai atau
mesin di luar rentang suhu yang ditentukan
di panduan.Mengisidayasecaratidaktepat
ataupadasuhudiluarrentangyangditentukan
dapatmerusakbateraidanmeningkatkanrisiko
kebakaran.

18 BAHASA INDONESIA
Servis
1. Berikan mesin listrik untuk diperbaiki hanya
kepada oleh teknisi yang berkualikasi dengan
menggunakan hanya suku cadang pengganti
yang serupa.Haliniakanmenjaminterjaganya
keamanan mesin listrik.
2. Jangan pernah memperbaiki paket baterai
yang sudah rusak.Perbaikanpaketbateraiharus
dilakukanhanyaolehprodusenataupenyedia
servis resmi.
3. Patuhi petunjuk pelumasan dan penggantian
aksesori.
Peringatan keselamatan mesin
pemotong batang berulir tanpa
kabel
1. Pegang mesin kuat-kuat.
2. Tahan benda kerja dengan kuat.
3. Jaga jarak antara wajah dan tangan Anda
dengan komponen mesin yang bergerak.
Selamapemotongan,pecahanbatangberulirbisa
terlempar.
4. Selalu kenakan sarung tangan saat menangani
batang berulir.Tepiandangeram-gerambenda
kerjamerupakanbendatajam.
5. Jangan meletakkan mesin di atas geram-
geram benda kerja. Jika tidak, hal tersebut
dapat menyebabkan kerusakan dan masalah
pada mesin.
6. Selalu pastikan Anda memiliki pijakan yang
kuat. Pastikan tidak ada orang di bawah Anda
ketika menggunakan mesin di lokasi tinggi.
7. Jangan menyentuh tepi potong atau benda
kerja segera setelah pengoperasian; suhunya
mungkin masih sangat panas dan dapat
membakar kulit Anda.
8. Hindari memotong kabel listrik. Hal tersebut
dapat menyebabkan kecelakaan serius akibat
sengatan listrik.
9. Selalu pegang batang berulir selama dan
setelah pemotongan untuk mencegah
potongan batang berulir terjatuh.Potongan
batangberulirdapatmenyebabkancederabadan
jikaterjatuhdarilokasiyangtinggi.
10. Jaga jarak aman antara badan Anda dan
komponen mesin yang bergerak. Jangan
mengoperasikan mesin jika area kerja terlalu
sempit untuk menjaga jarak aman.
11. Jangan sekali-kali meninggalkan mesin di
lokasi yang tinggi atau permukaan yang
berpotensi tidak stabil.
SIMPAN PETUNJUK INI.
PERINGATAN: JANGAN biarkan kenyamanan
atau terbiasanya Anda dengan produk (karena
penggunaan berulang) mengurangi kepatuhan
yang ketat terhadap aturan keselamatan untuk
produk yang terkait.
PENYALAHGUNAAN atau kelalaian mematuhi
kaidah keselamatan yang tertera dalam petunjuk
ini dapat menyebabkan cedera badan serius.
Petunjuk keselamatan penting untuk
kartrid baterai
1. Sebelum menggunakan kartrid baterai,
bacalah semua petunjuk dan penandaan pada
(1) pengisi daya baterai, (2) baterai, dan (3)
produk yang menggunakan baterai.
2. Jangan membongkar kartrid baterai.
3. Jika waktu beroperasinya menjadi sangat
singkat, segera hentikan penggunaan. Hal
tersebut dapat menimbulkan risiko panas
berlebih, kemungkinan mengalami luka bakar
atau bahkan terjadi ledakan.
4. Jika elektrolit mengenai mata Anda, basuh
dengan air bersih dan segera cari pertolongan
medis. Hal tersebut dapat mengakibatkan
hilangnya kemampuan penglihatan Anda.
5. Jangan menghubungkan terminal kartrid
baterai:
(1) Jangan menyentuhkan terminal dengan
bahan penghantar listrik apa pun.
(2) Hindari menyimpan kartrid baterai pada
wadah yang berisi benda logam lain
seperti paku, uang logam, dsb.
(3) Jangan membiarkan baterai terkena air
atau kehujanan.
Hubungan singkat baterai dapat menyebabkan
aliran arus listrik yang besar, panas berlebih,
kemungkinan mengalami luka bakar dan
bahkan kerusakan pada baterai.
6. Jangan menyimpan mesin dan kartrid baterai
pada lokasi dengan suhu yang bisa mencapai
atau melebihi 50 °C.
7. Jangan membuang kartrid baterai di tempat
pembakaran sampah walaupun benar-benar
rusak atau tidak bisa digunakan sama sekali.
Kartrid baterai bisa meledak jika terbakar.
8. Berhati-hatilah jangan sampai baterai jatuh
atau terbentur.
9. Jangan menggunakan baterai yang rusak.
10. Baterai litium-ion yang disertakan sesuai
dengan persyaratan Perundangan Makanan
Berbahaya.
Harus ada pengawasan untuk pengangkutan
komersialmisalnyaolehpihakketiga,ekspeditor,
persyaratankhususterhadappengemasandan
pelabelan.
Diperlukanadanyakonsultasidenganahli
mengenaimaterialberbahayauntukpersiapan
barangyangakandikirimkan.Perhatikanpula
peraturannasionalyanglebihterperinciyang
mungkin ada.
Beriperekatataututupibagianyangterbuka
dankemasibateraidengancarayangtidakakan
menimbulkanpergeserandalampengemasan.
11. Patuhi peraturan setempat yang berkaitan
dengan pembuangan baterai.
12. Gunakan baterai hanya dengan produk yang
ditentukan oleh Makita.Memasangbateraipada
produkyangtidaksesuaidapatmenyebabkan
kebakaran,kelebihanpanas,ledakan,atau
kebocoranelektrolit.
SIMPAN PETUNJUK INI.

19 BAHASA INDONESIA
PERHATIAN: Gunakan baterai asli Makita.
PenggunaanbateraiMakitayangtidakasli,atau
bateraiyangsudahdiubah,akanmengakibatkan
bateraimudahterbakar,cederadankerusakan.Akan
menghilangkangaransiMakitapadapengisidaya
dan alat Makita.
Tip untuk menjaga agar umur
pemakaian baterai maksimum
1. Isi ulang kartrid baterai sebelum habis sama
sekali. Selalu hentikan penggunaan mesin dan
ganti kartrid baterai jika Anda melihat bahwa
mesin kurang tenaga.
2. Jangan pernah mengisi ulang kartrid baterai
yang sudah diisi penuh. Pengisian ulang yang
berlebih memperpendek umur pemakaian
baterai.
3. Isi ulang kartrid baterai pada suhu ruangan
10 °C - 40 °C. Biarkan kartrid baterai yang
panas menjadi dingin terlebih dahulu sebelum
diisi ulang.
4. Isi ulang daya kartrid baterai jika Anda tidak
menggunakannya untuk jangka waktu yang
lama (lebih dari enam bulan).
DESKRIPSI BAGIAN-BAGIAN MESIN
►Gbr.1
1Penahanstasioner 2Penahanbergerak 3Dadu potong 4Baut
5Kait 6Dudukantalibahu
(untukaksesoripilihan)
7Kunci L 8Lampu(bagiandalam)
9Bagian depan 10 Pelatuksakelar 11 Tuas sakelar pengganti
arah
12 Pemandubatang
13 Skala pemandu 14 Sekruppenjepit 15 Tutup - -
DESKRIPSI FUNGSI
PERHATIAN: Selalu pastikan bahwa mesin
dimatikan dan kartrid baterai dilepas sebelum
menyetel atau memeriksa kerja mesin.
Memasang atau melepas baterai
PERHATIAN: Selalu matikan mesin sebelum
memasang atau melepas kartrid baterai.
PERHATIAN: Pegang mesin dan kartrid
baterai kuat-kuat saat memasang atau melepas
kartrid baterai. Kelalaian untuk memegang mesin
dankartridbateraikuat-kuatbisamenyebabkan
keduanyatergelincirdaritanganAndadan
mengakibatkankerusakanpadamesindankartrid
bateraidancederadiri.
►Gbr.2: 1.Indikatorberwarnamerah2.Tombol
3.Kartridbaterai
Untukmelepaskartridbaterai,geserdarimesinsambil
menggesertombolpadabagiandepankartrid.
Untukmemasangkartridbaterai,sejajarkanlidah
kartridbateraidenganalurpadarumahdanmasukkan
kedalamtempatnya.Masukkanseluruhnyasampai
terkuncipadatempatnyadanterdengarbunyiklikkecil.
JikaAndabisamelihatindikatorberwarnamerahpada
sisiatastombol,berartitidakterkuncisepenuhnya.
PERHATIAN: Selalu pasang kartrid baterai
sepenuhnya sampai indikator berwarna merah
tidak terlihat.Jikatidak,bisaterlepasdarimesin
secaratidaksengaja,menyebabkanlukapadaAnda
atauorangdisekitarAnda.
PERHATIAN: Jangan memasang kartrid
baterai secara paksa.Jikakartridtidakbergeser
denganmudah,berartitidakdimasukkandengan
benar.
Sistem perlindungan mesin / baterai
Mesin ini dilengkapi dengan sistem perlindungan mesin/
baterai.Sisteminimemutusdayakemotorsecara
otomatisuntukmemperpanjangumurpemakaianmesin
danbaterai.Mesinakanberhentisecaraotomatissaat
penggunaanjikamesinataubateraiberadadalam
salahsatukondisiberikutini.Dalamkondisiyangsama.
indikatorakanmenyala.
Perlindungan kelebihan beban
Bilamesindijalankandengancarayang
menyebabkannyamenarikarustinggiyangtidak
normal,mesinakanberhentisecaraotomatistanpa
menunjukkanapa-apa.Untuksituasiini,matikanmesin
danhentikanpekerjaanyangmenyebabkanmesin
mengalamikelebihanbeban.Kemudiannyalakanmesin
untukmemulailagipekerjaan.

20 BAHASA INDONESIA
CATATAN:Perlindungankelebihanberataktifsaat
Andamencobamemotongjenisbatangberulir
berikut.
— Batangberuliryanglebihbesardariukuran
pemotong ulir.
— Batangberuliryanglebihkerasdarikapasitas
pemotongan pemotong ulir.
Perlindungan panas berlebih
Saatmengalamikelebihanpanas,mesinberhenti
secaraotomatisdanlampuLEDakanberkedip.Biarkan
mesinmenjadidinginsebelumdinyalakankembali.
Perlindungan pengisian daya
berlebih
Ketikakapasitasbateraimelemah,mesinakanberhenti
secaraotomatis.Jikaproduktidakberoperasibahkan
ketikasakelardigunakan,lepaskanbateraidarimesin
danisidayabaterai.
Mengindikasikan kapasitas baterai
yang tersisa
Hanya untuk kartrid baterai dengan indikator
►Gbr.3: 1. Lampu indikator 2.Tombolpemeriksaan
Tekantombolpemeriksaanpadakartridbateraiuntuk
melihatkapasitasbateraiyangtersisa.Lampuindikator
menyalaselamabeberapadetik.
Lampu indikator Kapasitas
yang tersisa
Menyala Mati Berkedip
75% hingga
100%
50% hingga
75%
25% hingga
50%
0% hingga
25%
Isi ulang
baterai.
Baterai
mungkin
sudah rusak.
CATATAN: Tergantung kondisi penggunaan dan suhu
lingkungannya,penunjukkanmungkinsajasedikit
berbedadarikapasitassebenarnya.
Kerja sakelar
PERHATIAN: Sebelum memasukkan
kartrid baterai pada mesin, pastikan picu saklar
berfungsi dengan baik dan kembali ke posisi
“OFF” saat dilepas.
Untukmemulaipengoperasianpemotongan,lanjutkan
menarik pelatuk sakelar. Dadu potong pada penahan
bergerakakanberadadiatasdadupadapenahan
stasionerlalukembali.JikaAndamelepaskanpelatuk
sakelarsebelummenyelesaikanpemotongan,
pemotongulirakanberhenti.
►Gbr.4: 1.Pelatuksakelar
►Gbr.5: 1.Penahanstasioner2. Dadu potong
3.Penahanbergerak
PEMBERITAHUAN: Jangan mengoperasikan
mesin tanpa beban yang tidak diperlukan.
Fungsi berhenti otomatis
SaatAndamelanjutkanmenarikpelatuksakelar,rahang
pemotongakanmenutupdankembalikeposisiterbuka
penuhlaluberhenti.Lepaskanpelatuklalutarikkembali
untukmemulaiurutanpemotonganberikutnya.
Tuas sakelar pengganti arah
PERINGATAN: Saat mesin tidak digunakan,
selalu atur tuas sakelar pengganti arah ke posisi
terkunci.
PERHATIAN: Selalu pastikan posisi tuas
sakelar pengganti arah sebelum pengoperasian.
PEMBERITAHUAN: Jangan pindahkan tuas
sakelar pengganti arah saat pelatuk sakelar
ditarik.Haltersebutdapatmenyebabkankerusakan
pada mesin.
Untuk memulai pengoperasian pemotongan, atur tuas
sakelar pengganti arah ke posisi pemotongan.
Untukmembalikurutanpemotongan,aturtuas
sakelarpenggantiarahkeposisiberbalik.SaatAnda
melanjutkanmenarikpelatuksakelar,rahangpemotong
ulirterbukadanberhentipadaposisiterbukapenuh.
Untuk mengunci pelatuk sakelar, atur tuas sakelar
penggantiarahkeposisiterkunci.Pelatuksakelartidak
dapat ditarik di posisi ini.
►Gbr.6: 1. Tuas sakelar pengganti arah 2.Posisi
pemotongan 3.Posisiterkunci4.Posisi
berbalik
PEMBERITAHUAN: Ketika tuas sakelar
pengganti arah pada posisi berbalik, jalankan
mesin hanya ketika dibutuhkan. Untuk mencegah
kerusakan,mesinakanberhentisecaraotomatissaat
bekerjadalamposisiberbaliksecaraterus-menerus.
Other manuals for DSC102
5
Table of contents
Languages:
Other Makita Cutter manuals

Makita
Makita EK8100 Instruction Manual

Makita
Makita 4100NH3ZX User manual

Makita
Makita DCC500 User manual

Makita
Makita EK7650H User manual

Makita
Makita 4100NH User manual

Makita
Makita CC301D User manual

Makita
Makita CC301D User manual

Makita
Makita DCS550ZJ User manual

Makita
Makita 3706 User manual

Makita
Makita BCS550Z Manual

Makita
Makita 4191D User manual

Makita
Makita DSC251 User manual

Makita
Makita 4100KB User manual

Makita
Makita DCO140 User manual

Makita
Makita M4100 User manual

Makita
Makita EK7650H User guide

Makita
Makita CC301DZ User manual

Makita
Makita DPC6200 User manual

Makita
Makita 4131 User manual

Makita
Makita 4191DWF User manual