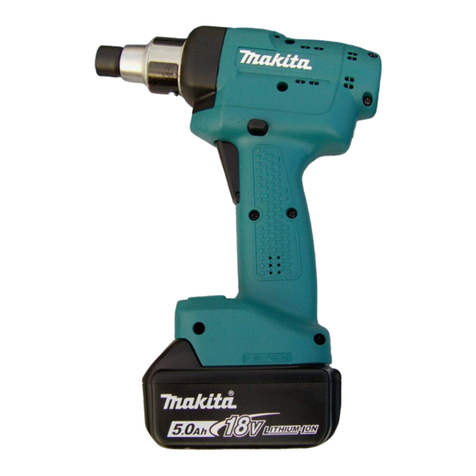
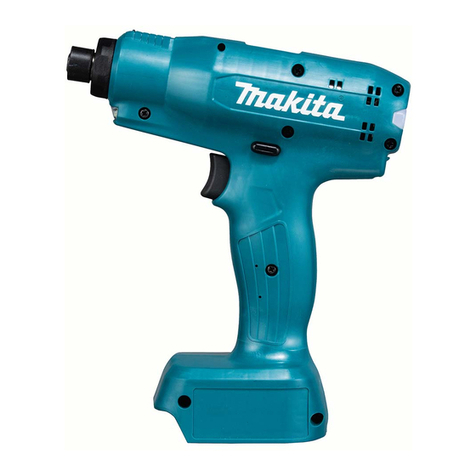
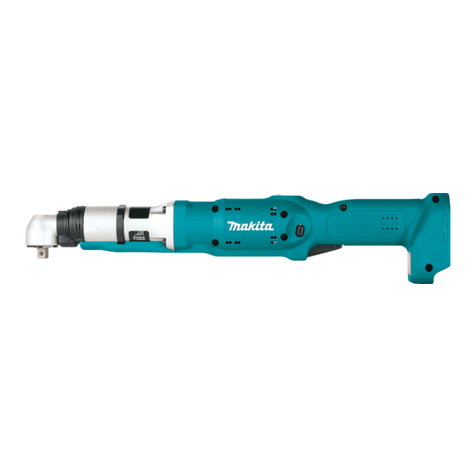
Makita BFT120F Manual

Models No.
Description
PRODUCT
CONCEPTION AND MAIN APPLICATIONS
Specification
Standard equipment
Optional accessories
< Note > The standard equipment for the tool shown may differ from country to country.
P 1 / 12
Dimensions : mm ( " )
BFT120, BFT120F
Cordless Screwdriver 9.6V
Width ( W )
Height ( H )
Length ( L )
TECHNICAL INFORMATION
The above Cordless Screwdrivers for automobile factories have
been developed as upgraded sister tools to the existing models
of Makita 6796D series.
In addition to the same advantages as tools of Model 6796D series,
the new high precision screwdrivers feature lighter tool weight
and more increased convenience.
BFT120F features built-in job light.
L
H
W
174 (6-7/8)
279 (11)
BFT120 BFT120F
256 (10-1/8)
65 (2-9/16)
w/ 3.3 Ah battery w/ 2.0 Ah battery
Model No.
No load speed : min-1 = rpm
Driving shank : mm ( " )
Fastening torque : N.m (in.lbs)
Battery
Electric brake
Torque adjustment
LED Job light
Soft starter
Reverse switch
Net Weight : Kg (lbs)
Type of cell
Voltage : V
Capacity : Ah
NiMH
9.6
5 - 12 (44.3 - 106)
6.35 (1/4) Hex
1.3 (2.8) with 2.0 Ah battery
1.4 (3.2) with 3.3 Ah battery
320
Yes
Yes
No Yes
Yes
Yes (possible to adjust with adjust grip)
2.0 / 3.3
* Adjust grip for pre-setting torque ............................... 1 pc. (only for Italy and UAS.)
* Protecor ..................................................................... 1 pc. (only for Germany)
* Battery BH9020 9.6V, 2.0Ah
* Battery BH9020A 9.6V, 2.0Ah w/ Power display
* Battery BH9033 9.6V, 3.3Ah
* Battery BH9033A 9.6V, 3.3Ah w/ Power display
* Charger DC24SA
* Charger DC14SA
* Protectors (red, blue, yellow)
* Adjust grip for pre-setting torque
* Grip base set
* Grip 37
* Automatic refreshing adapter ADP03

Repair P 2 / 12
< 1 > Lubrication
Apply MAKITA grease N. No.2 to the following portions marked with black triangle to protect
parts and product from unusual abrasion.
(28)
(31)
(38) (39) (41) (42) (44) (46)
(29)
(24)
24 16 pcs.
(40) (47)
Flat washer 18
Flat
washer 12
Item
No. Descriptions The portion to be lubricated Used
quantity Amount
of lubricant
Steel ball 3
42 38 pcs.Steel ball 3 Approx. 0.5 g
in total
Approx. 1.4 g
in total
28 1 pc.
Clutch ring
Switch lever
The surface where (29) Steel balls 4
are mounted. Approx. 0.3 g
39 1 pc.
Carrier complete A
40 4 pcs.Spur gear 17 Teeth portion
41 1 pcs.Inner gear 46 Teeth portion
44 1 pcs.Internal Inner gear Teeth portion
Teeth portion
The 4 shafts for accepting
(40) Helical gears 17.
46 1 pc.Spur gear 10
complete The 4 shafts for accepting
(47) Spur gears 31.
29 3 pcs.
3 pcs.
Steel balls 4 Approx. 0.1 g
in total
38
31
1 pc.Spindle Approx. 0.9 g
1 pc. Approx. 0.1 g
47 Spur gear 31.
< 2 > Disassembling bit holder section
Remove ring spring with No.1R291 "Retaining ring S and R pliers" from spindle as illustrated in Fig. 1.
Then, bit holder section can be disassembled as illustrated in Fig. 1A.
1R291
Retaining ring S and R pliers
Ring spring
Sleeve
Sleeve
Flat washer 11
Compression spring 13
Steel ball 3.0 x 2 pcs.
Spindle Spindle <Note>
Be careful, not to lose
compression spring 13
and steel ball 3 in this
step.
Fig. 1 Fig.1A

Repair P 3 / 12
< 3 > Assembling bit holder section
Mount the parts to spindle in the following order.
1. 2 pcs. of steel balls 3 3. Compression spring 13
2. Sleeve 4. Flat washer 11
And then, secure the above parts with ring spring. See Fig. 1A and Fig. 1
< 4 > Separating motor section from gear assembly
(1) Take off brush holder caps and carbon brushes, and then unscrew 10 pcs. of pan head screws M3x20. See Fig. 2.
(2) Take off housing L. And then, disconnect the connector of switch unit. Separate endbell complete from motor
section. See Fig. 3.
(3) Separate motor section from gear assembly by turning motor bracket anti-clockwise. See Fig. 4.
(4) Remove motor bracket with 1R269 "Bearing extractor". Then, armature can be separated from yoke unit.
See Fig. 5.
Brush holder cap
Carbon brush
Pan head screws M3x20
Fig. 2 Fig. 3
Housing L
Disconnected
connector of
switch unit
Endbell
complete
Motor bracket
1R269 Bearing extractor
Motor section
Gear assembly
Fig. 4.
Fig. 5
Motor bracket Yoke unit
Armature

Repair P 4 / 12
< 5 > Mounting motor section and gear assembly to housing
Motor bracket
Motor section
Gear assembly
Fig. 6.
Fig. 7
Motor bracket
Yoke unit
Armature
Fig. 8
(1) Pass armature through yoke unit. And mount motor bracket to armature. See Fig. 6.
(2) Insert motor bracket of motor section into gear assembly. And lock motor section by turning motor bracket
clockwise. See Fig. 7.
Check the engagement of armature with spur gear 31 of gear assembly by turning armature with your hand.
(3) Mount endbell complete to the motor section, assembled as illustrated in Fig. 7. And then, mount this motor section
to housing R with aligning the flat portion of yoke unit with the rib of housing R.
Connect the connector of switch unit with the connector of controller. See Fig. 8.
<Note>
Be careful, not to be pinched your finger
between yoke unit and armature.
Because, armature is pulled toward yoke
unit with the strong magnetic force.
Check the engagement of
armature with gear by
turning armature.
Endbell complete
Flat portion
of yoke unit Accept the flat portion
of yoke unit with this
portion.
Connect the connector of switch unit
(purple and yellow lead wire)
with the connector of controller.
(purple and yellow lead wire.)
Connectors of controller
Controller

Repair P 5 / 12
(4) Mount the following parts to housing R before mount housing L. See Fig. 9.
(5) Mount housing L and secure it with 10 pcs. of pan head screws M3x20. See Fig. 10.
* Pin 2.5
* Plate
* Lens
* Terminal
* Buzzer circuit
* F.R. Change lever
* LED circuit
Plate
Lens
LED circuit
Terminal
Terminal
F.R. Change lever
Pin 2.5
Be careful, not to pinch
the lead wire of LED circuit
with housing L.
Pass lead wire between
screw hole and the wall
of housing R.
Buzzer circuit
Fig. 9
Fig. 10
Housing L
Pan head screws M3x20

Repair P 6 / 12
< 6 > Disassembling gear assembly
( 1 ) After removing bit holder section, remove spring holder section (front cover, spring holder A, thin washer 30,
compression spring 30, thin washer 24 and torque plate).
1. Take off front cover, and remove spring holder A by turning it anti-clockwise. See Fig. 11.
2. Then, the following parts can be separated from gear case complete. See Fig. 11.
( 2 ) Remove lock washer by turning it with small screwdriver anti-clockwise. See Fig. 12.
( 3 ) Remove 3 pcs. of spur gears 31 and spur gear 10 complete. And then, remove internal gear case
by unscrewing 4 pcs. of tapping screws 3x12. See Fig. 12.
Fig. 11
Fig. 12
Spur gear 10
complete
Spur gears 31
Internal gear case
Tapping
screws 3x12
Gear case complete
* Thin washer 30
* Compression spring 30
Front cover Spring holder A
Thin washer 30
Compression
spring 30
Thin washer 24 Torque plate
Lock washer
Retaining
ring S-12
2 pcs. of flat
washers 12
16 pcs. of steel balls 3
< Note >
After removing, make sure, whether 16 pcs of
steel balls 3 are remain, or not.
Fig. 13 Fig. 14
38 pcs. of
Steel balls 3 3 pcs. of
Steel balls 4
Flat washer 18
Spur gears 17
Carrier
complete A
Clutch ring
Inner gear 46
<Note>
After removing, make sure, whether 38 pcs of steel balls 3
are remain, or not.
( 4 ) Remove flat washer 18, 38 pcs. of steel balls 3, spur gears 17 and carrier complete A.
Remove inner gear 46, clutch ring and 3 pcs.of steel balls 4. See Fig. 13.
( 5 ) Take off retaining ring S-12. Then, 2 pcs. of flat washers 12 and 16 pcs. of steel ball 3 can be removed from
spindle. See Fig. 14.
* Thin washer 24
* Torque plate

Repair P 7 / 12
< 7 > Assembling gear assembly
( 1 ) Mount flat washer 12 to spindle. And apply MAKITA grease N No.2 to the spindle. See Fig. 16.
Flat
washer 12 Spindle
Apply MAKITA grease N No.2.
Fig. 16 Fig. 17
( 2 ) Mount the spindle to gear case complete. See Fig. 17.
( 3 ) Mount flat washer 12 and 16 pcs. of steel balls 3 (MAKITA grease N No.2 is applied to them.) and the
another flat washer 12 to spindle.
And then, secure the flat washers 12 and steel balls 3 with retaining ring S-12. See Fig. 18.
( 4 ) Mount flat clutch ring, 3 pcs. of steel balls 4 and inner gear 46 to gear case complete. See Fig. 19.
( 5 ) Mount carrier complete A, 3 pcs. of spur gears 17, 38 pcs. of steel balls 3 and flat washer 18. See Fig. 20.
Flat washers 12
Spindle
Fig. 18
Retaining
ring S-12
2 pcs. of flat washers 12
16 pcs. of steel balls 3
< Note >
Be careful, not to lose steel balls 3
in this stage.
Retaining
ring S-12
Flat washer 12 Flat washer 12
Steel ball 3
Spindle
Gear case complete
Gear case complete
Clutch ring
Inner gear 46
Steel balls 4
Fig. 19 Fig. 20
38 pcs. of Steel balls 3
Flat washer 18
<Note> Before mounting, make sure, whether 38 pcs. of steel balls 3
are remain, or not.
Spur gears 17
Carrier
complete A
( 5 ) Remove spindle by pushing toward the armature side. See Fig. 15.
Fig. 15
Flat washers 12
Spindle
This flat washer 12 can remain in the gear case assembly,
when removing spindle.

Repair P 8 / 12
( 6 ) Mount internal gear case to gear case complete with aligning the boss of internal gear case with the concave
portion of gear case complete. Secure internal gear case with 4 pcs. of taping screws 3x12. See Fig. 21.
( 7 ) Mount spur gear 10 complete and 3 pcs. of spur gears 31, and mount lock washer by turning it clockwise.
And then, mount torque plate to gear case complete. See Fig. 22.
( 8 ) Put compression spring 2 into switch lever, and apply MAKITA grease N.No.2 to both upper and lower side
of switch lever. Mount this switch lever to gear case complete. See Fig. 23.
( 9 ) And then, pushing holder plate toward armature side, secure it with 1 pc. of tapping screw bind PT3x10.
See Fig. 24.
(10) Pushing switch unit toward armature side, secure it on holder plate with 1 pc. of pan head screw M2.3 x 10.
See Fig. 25. The fastening torque for pan head screw M2.3 x 10 is approx. 0.3 - 0.4 N.m.
Internal gear case
Tapping
screws 3x12
Gear case complete
Concave portion of
gear case assembly Boss portion of
internal gear case
Fig. 21
Fig. 22
Spur gear 10
complete Spur gears 31 Lock washer
Fig. 23 Fig. 24
Fig. 25
Torque plate
Compression
spring 2
Switch lever
Switch lever
Switch unit
Holder plate
Tapping screw
bind PT3x10
Tapping screw bind PT3x10
Bottom view of gear case complete
Gear case complete Holder plate
Torque plate Torque plate
Pan head
screw M2.3 x 10
Pan head
screw M2.3 x 10
Switch unit
Push toward
armature side.
Push toward
armature side.
Push toward
armature side.

Repair P 9 / 12
(11 ) Mount thin washer 24, compression spring 30, thin washer 30 and spring holder to gear case complete.
Turn spring holder and adjust as illustrated in Fig. 26.
And then, mount front cover. See Fig. 26.
Fig. 26
Thin washer 24
Compression spring 30
Thin washer 30
Spring holder
Already mounted "torque plate"
Less than 52mm
Turn spring holder
clockwise 4.5 turns, and
keep the distance mentioned
in Fig. 27.
Front cover
< 8 > Disassembling and assembling switch
(1) After separating F.R.change lever from switch, unscrew the screw fastening micro switch, and turn
the micro switch with pulling it up as illustrated in Fig. 27. Then, micro switch can be separated from switch.
(2) When assembling, secure micro switch with the fastening torque approx. 0.29 - 0.34 N.m.
(3) Aligning the F.R. change lever's concave with the boss of switch, mount F.R.change lever to switch. See Fig.28.
Screw, fastening
micro switch with
fastening torque
0.29 - 0.34 N.m
Micro switch
Turn the micro switch in
the direction of the colored
arrow with pulling it up.
Fig. 27 Fig. 28
F.R.Change lever Concave portion
of F.R. change lever Boss of switch

Circuit diagram P 10 / 12
Color index of lead wires
Black White
Red
Orange Blue
Yellow
Purple Gray
T
T
Connector
Switch
Micro switch
Reverse switch
No
COM
S1
S2
M2
M1
M2
LED
Circuit
Buzzer
Circuit
Connector
Controller
Connector
Switch unit
M
DC Motor
Terminal
< Note >
For BFT120, the LED circuit is not installed.
Indicator lamp is
built in the controller.
Wiring diagram
(1) Connecting the receptacles with the terminals of switch
Lead
holders
Endbell's
lead wire (black)
Controller's
lead wire (blue)
Controller's
lead wire (white)
Micro switch side
Housing R side
View from micro switch side
View from housing R side
Hold the following
lead wires with lead
holders.
* Endbell's lead wire (black)
* Controller's lead wire (white)
Endbell's lead
wire (red)
Controller's
lead wire (purple)
Controller's
lead wire (white)
Controller's
lead wire (orange)

Wiring diagram P 11 / 12
BFT120, 9.6V without LED job light
BFT120F, 9.6V with LED job light
Pass the endbell's lead wires (black and
red) both sides of LED cover portion
of controller.
LED cover portion
LED cover portion
Endbell's
lead wire
(black)
Endbell's
lead wire
(red)
Rib
Pass the following lead wires
between the ribs of switch.
* Controller's lead wires (white
and orange) to be connected
to micro switch.
* Controller's lead wires (blue,
purple and white) to be
connected to reverse switch.
* Controller's lead wires (red
and white) to be connected
to buzzer circuit.
Be careful, not to pinch
the lead wires between
switch and housing, when
assembling.
Rib A
Pass the following lead wires
between rib A and the wall of
housing.
* Controller's lead wires
(black and red) to be
connected to terminal
* Controller's lead wires
(white and red) to be
connected to buzzer circuit
Put the connectors of controller and buzzer circuit
between the line and terminal as illustrated above.
Connectors
Buzzer circuit has to be so mounted,
that the sponge side is faced to the
housing L side.
Connectors
Buzzer
circuit
Terminal
Put the slack lead wires and the following
connectors in this space.
* Connector of LED circuit
* Connector of switch unit
* 2 connectors of controller (also in case of mod. BFT120)

Wiring diagram P 12 / 12
BFT121F, 12V (with LED job light) Pass the endbell's lead wires (black and
red) both sides of LED cover portion
of controller.
LED cover portion
Endbell's
lead wire
(black)
Endbell's
lead wire
(red)
Connectors
Put the slack lead wires and the following
connectors in this space.
* Connector of LED circuit
* Connector of switch unit
* 2 connectors of controller (also in case of mod. BFT120)
Rib
Pass the following lead wires
between the ribs of switch.
* Controller's lead wires (white
and orange) to be connected
to micro switch.
* Controller's lead wires (blue,
purple and white) to be
connected to reverse switch.
* Controller's lead wires (red
and white) to be connected
to buzzer circuit.
Put the connectors of controller and buzzer circuit
between the line and terminal as illustrated above.
Terminal
Buzzer
circuit
Connectors
Pass the following lead wires
between rib A and the wall of
housing.
* Controller's lead wires
(black and red) to be
connected to terminal
* Controller's lead wires
(white and red) to be
connected to buzzer circuit
Rib A
Be careful, not to pinch
the lead wires between
switch and housing, when
assembling.
Buzzer circuit has to be so mounted,
that the sponge side is faced to the
housing L side.
This manual suits for next models
1
Table of contents
Other Makita Power Screwdriver manuals
Makita
Makita DFL083F User manual

Makita
Makita FS2500 User manual

Makita
Makita DF001D User manual

Makita
Makita DFT024F User manual

Makita
Makita DFT060T User manual

Makita
Makita BFL301F Manual

Makita
Makita 6826N Quick start guide

Makita
Makita BDA351 User manual

Makita
Makita DFS250 User manual

Makita
Makita DFR550Z User manual

Makita
Makita FS2700K User manual

Makita
Makita Maktec MT066 Series Manual

Makita
Makita 6835D User manual

Makita
Makita 6824TP Quick start guide

Makita
Makita FS4300 Manual

Makita
Makita DFT086F User manual

Makita
Makita 6826 User manual

Makita
Makita BFT043F User manual

Makita
Makita DFT082R User manual

Makita
Makita FS2500 User manual