7ENGLISH
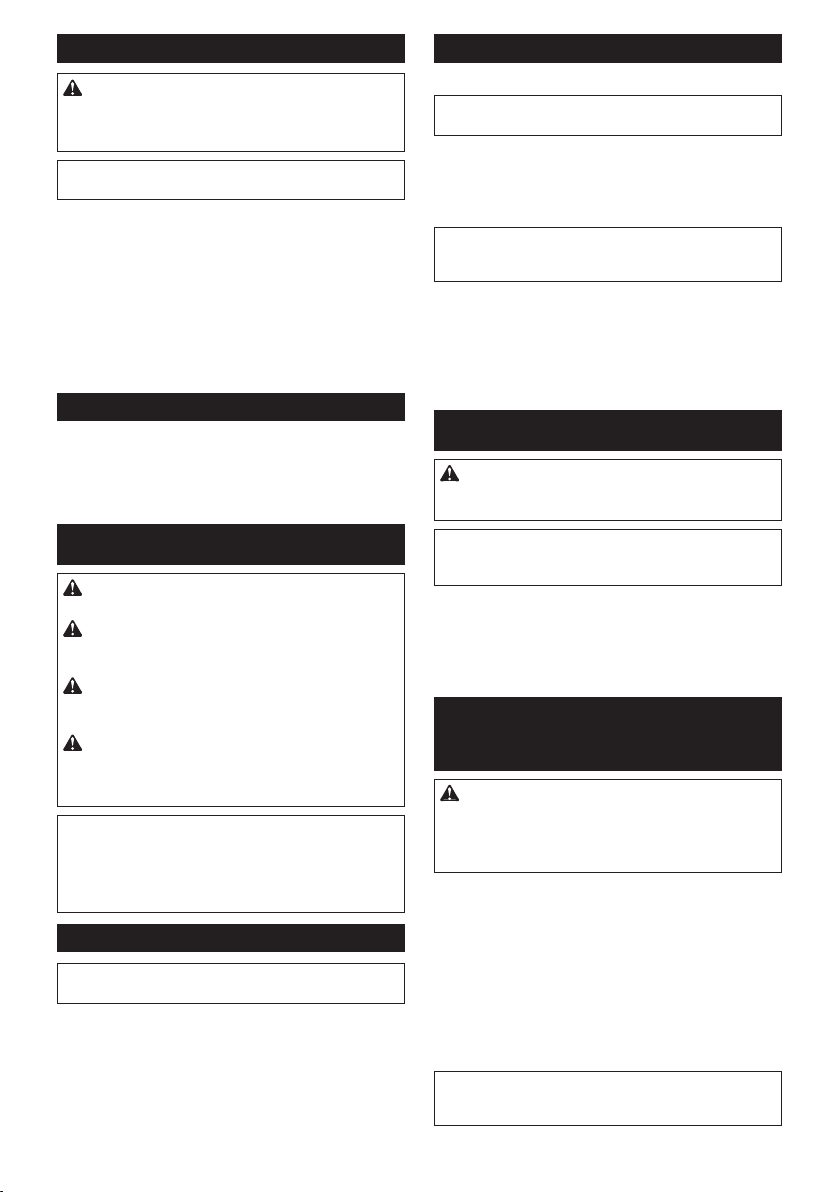
Dust nozzle
CAUTION: Make sure the bolt is securely
tightened after installing the dust nozzle.
Otherwisethedustnozzlemayfallandcauseper-
sonalinjury.
NOTICE: Do not carry the tool by the dust noz-
zle.Otherwisethetoolmaybedamaged.
Youcanremovethedustnozzleinaccordancewiththe
operation.
Toremovethedustnozzle,loosenthebolt,slightlyopen
theholderpart,andremovethedustnozzle.
Toinstallthedustnozzle,insertthemouthofthedust
nozzleintothedustoutletofthehousing,alignthe
tongueoftheholderpartwiththegrooveofthehousing,
andtightenthebolt.
►Fig.11: 1.Dustnozzle2.Dustoutlet3.Mouth
►Fig.12: 1.Holderpart2.Bolt
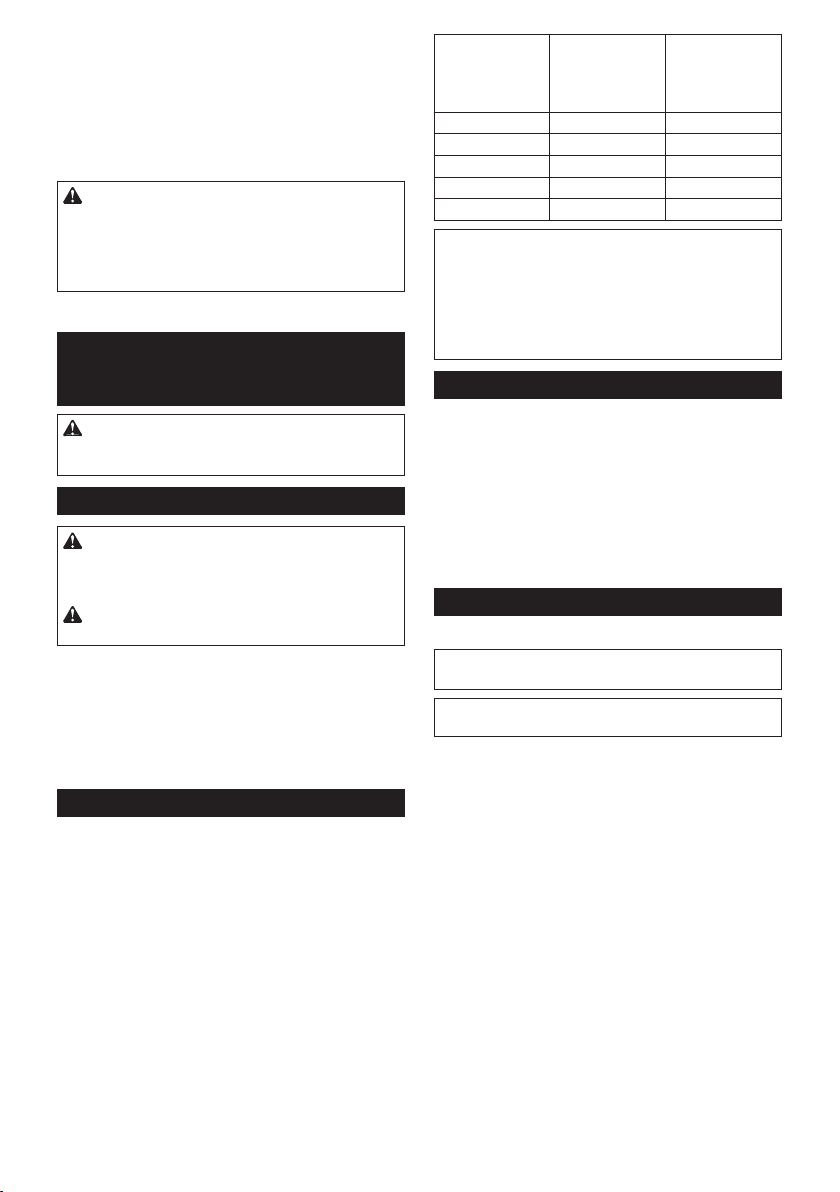
Dust collection (optional accessory)
►Fig.13: 1.Frontcuffs242.Hose3.Dustoutlet
IfaMakitahoseisused,youcanconnectthefrontcuffs
24tothedustoutletdirectly.
OPERATION
CAUTION: Only use Makita genuine abrasive
discs and pads for sander (optional accessories).
CAUTION: Never switch on the tool when it
is in contact with the workpiece, it may cause an
injury to operator.
CAUTION: Make sure the work material is
secured and stable. Falling object may cause
personal injury.
CAUTION: Hold the tool rmly with one hand
on the switch handle and the other hand on the
front grip (or side handle) when performing the
tool.
NOTICE: Be careful not to press down the shaft
lock button.Itmayshortentoollife.
NOTICE: Never force the tool. Excessivepressure
maydecreasethesanding/polishingefciency,dam-
agetheabrasivedisc/padorshortentoollife.
Sanding operation
NOTICE: Never run the tool without the abrasive
disc. You may seriously damage the pad.
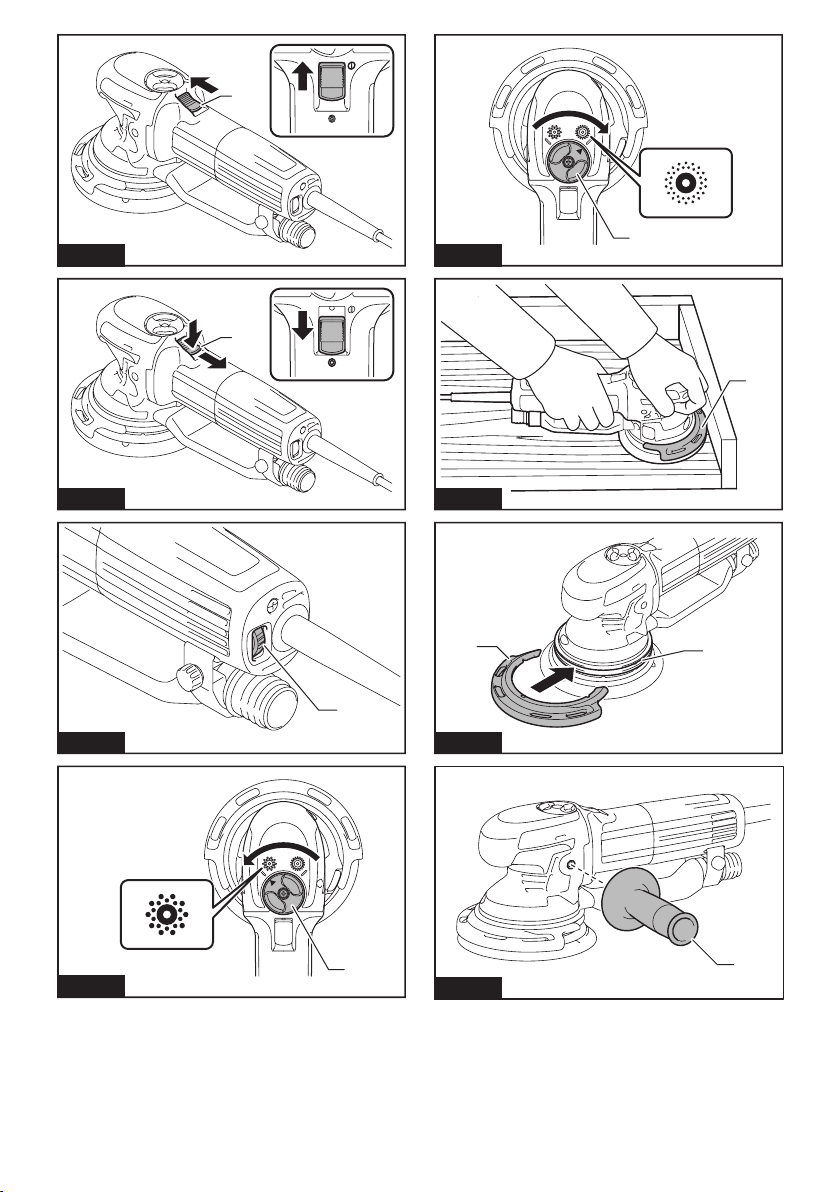
►Fig.14
Holdthetoolrmly.Turnthetoolonandwaituntilit
attainsfullspeed.Thengentlyplacethetoolonthe
workpiecesurface.Keepthepadushwiththework-
pieceandapplyslightpressureonthetool.
Polishing operation
Optional accessory
NOTICE: Continuous operation at high speed
may damage work surface.
►Fig.15
1. Applyingwax
Usethespongepad.Applywaxtothespongepadorwork
surface.Runthetoolatlowspeedtosmoothoutwax.
NOTE:First,waxanotconspicuousportionofthe
worksurfacetomakesurethatthetoolwillnot
scratchthesurfaceorresultinunevenwaxing.
2. Removingwax
Usethefeltpad.Runthetooltoremovewax.
3. Polishing
Applythewoolpadgentlytotheworksurface.
MAINTENANCE
CAUTION: Always be sure that the tool is
switched off and unplugged before attempting to
perform inspection or maintenance.
NOTICE: Never use gasoline, benzine, thinner,
alcohol or the like. Discoloration, deformation or
cracks may result.
TomaintainproductSAFETYandRELIABILITY,
repairs,anyothermaintenanceoradjustmentshould
beperformedbyMakitaAuthorizedorFactoryService
Centers,alwaysusingMakitareplacementparts.
OPTIONAL
ACCESSORIES
CAUTION:
These accessories or attachments
are recommended for use with your Makita tool spec-
ied in this manual.Theuseofanyotheraccessories
orattachmentsmightpresentariskofinjurytopersons.
Onlyuseaccessoryorattachmentforitsstatedpurpose.
Ifyouneedanyassistanceformoredetailsregarding
theseaccessories,askyourlocalMakitaServiceCenter.
• Hook-and-looptypeabrasivediscs(withpre-
punchedholes)
• Hook-and-looptypespongepad
• Hook-and-looptypefeltpad
• Hook-and-looptypewoolpad
• Pad150(Supersoft,Soft,Hard)
• Pad130(Polishing)
• Sidegrip
NOTE:Someitemsinthelistmaybeincludedinthe
toolpackageasstandardaccessories.Theymay
differfromcountrytocountry.