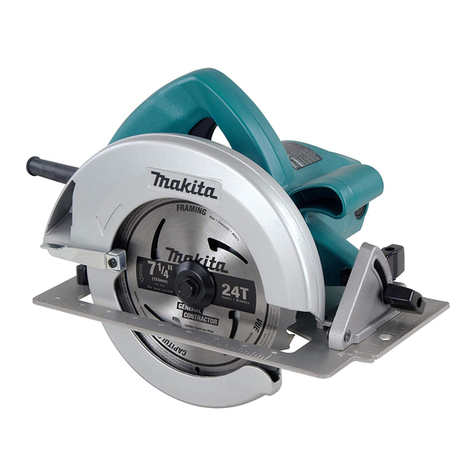
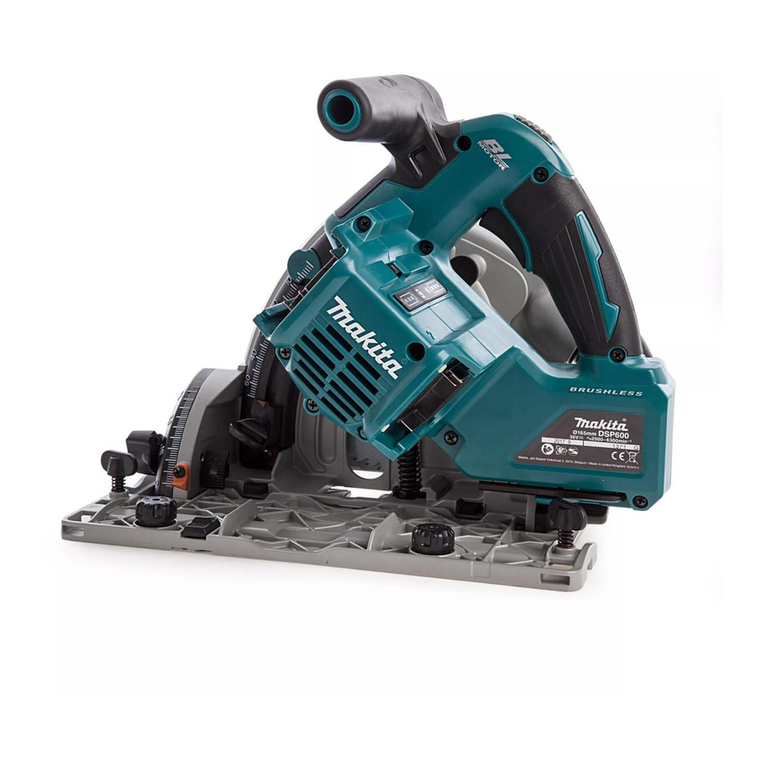
Makita 5740NB User manual

Circular
Saw
5740NB
185
mm
(7-1/4")
MODEL
5740NB
298" 3.5kg
4,700
(1
1-23/32") (7.7
Ibs)
64" 42"
:;-:z'T
(2-1/2")
(1-5/8")
INSTRUCTION MANUAL
KLAETION
SPECIFICATIONS
Max. cutting capacities
N~
loadspeed overall Net
Mode'
I
di%t?er
1-1
(RPM)
I
length
1
weight
*
Manufacturer reserves the right to change specifications without notice
*
Note: Specifications may differ from country to country.

GENERAL
SAFETY
RULES
(For
AllTools)
WARNING! Readand understandall instructions.
Failure
to follow all instructions listed below,
may
result in electric
shock,
fire and/or serious personalinjury.
SAVE THESE INSTRUCTIONS
READALL INSTRUCTIONS.
1.
Keep your work area cleanandwell
lit.
Clutteredbenches and dark areas invite
accidents.
2.
Donotoperatepowertools
in
explosiveatmospheres, suchas
in
thepresence
of flammable liquids, gases,
or
dust. Power tools create sparks which may
ignitethe dust or fumes.
3.
Keep bystanders, children, and visitors away while operating a power tool.
Distractionscan causeyouto loosecontrol.
4.
DoubleInsulatedtoolsareequippedwithapolarizedplug(onebladeiswider
than the other.) This plug
will
fit
in a polarized outlet only one way. If the
plug does not
fit
fully
in
the outlet, reversethe
plug.
If
it
still does notfit,
contact a qualified electrician to install a polarized outlet. Do not change
thepluginany way. Double insulation eliminatesthe needfor the three wire
groundedpower cordandgrounded power supply system.
5.
Avoid body contact withgroundedsurfacessuch as pipes, radiators, ranges
and refrigerators. There
is
an increased risk
of
electric shock if your body
is
grounded.
6.
Don't expose power tools torain
or
wet conditions. Water entering
a
power
toolwill increasethe risk
of
electricshock.
7.
Do notabusethe cord. Never usethe cordtocarry thetools
or
pulltheplug
from an outlet. Keep cord away from heat, oil, sharpedges
or
movingparts.
Replacedamagedcordsimmediately. Damagedcordsincreasethe riskof electric
shock.
8.
Whenoperating
a
powertooloutside, usean outdoor extension cordmarked
"W-A"
or
"W."
These cords are rated for outdoor use and reduce the risk of
electricshock.
9.
Stayalert, watchwhatyouaredoingandusecommonsensewhen operating
a power tool. Do not use tool while tired
or
under the influence of drugs,
alcohol,
or
medication.
A
moment of inattention while operating power tools
may resultinserious personalinjury.
10.
Dressproperly. Donotwear looseclothing
or
jewelry. Containlonghair. Keep
your hair, clothing, andglovesawayfrom movingparts. Looseclothes, jewelry
or longhair can becaught inmovingparts.
2

11.
Avoid accidental starting. Be sure switch isoff before
plugging
in.
Carrying
tools with your finger
on
the switch or plugging in tools that have the switch
on invitesaccidents.
12. Remove adjusting keys or switches beforeturning the tool on. A wrench or
a
keythat isleftattachedtoarotatingpartof thetool mayresult inpersonal injury.
13. Donotoverreach. Keepproper footingandbalanceatalltimes. Properfooting
andbalanceenablesbetter controlof thetool inunexpected situations.
14. Use safety equipment. Always wear eye protection. Dust mask, non-skid
safety shoes, hard hat, or hearing protection must be used for appropriate con-
ditions.
15. Use clamps
or
other practical way tosecure and support the workpiece to
a stable platform. Holding the work by hand or against your body is unstable
and may leadto lossof control.
16.
Do
notforce tool. Use the correct toolfor your application. The correct tool
will dothejob betterand safer atthe ratefor which itisdesigned.
17. Do not use tool if switch does notturn
it
on or off. Any tool that cannot be
controlledwiththe switch isdangerousand mustberepaired.
18. Disconnectthe
plug
fromthepower source beforemakingany adjustments,
changing accessories, or storing the tool. Such preventive safety measures
reducethe riskof startingthetoolaccidentally.
19. Store idle tools out of reach of children and other untrainedpersons.
Tools
are dangerous inthe hands
of
untrained users.
20.
Maintain tools
with
care. Keep cutting tools sharp and clean. Properly
maintained tools, with sharp cutting edges are less likely to bind and are easier
tocontrol.
21. Checkfor misalignmentor
binding
of movingparts, breakage of parts, and
any other condition that may affect the tools operation.
If
damaged, have
thetoolservice beforeusing. Many accidents are caused by poorly maintained
tools.
22. Use only accessories that are recommended bythe manufacturer for your
model. Accessories that may be suitable for one tool, may become hazardous
whenusedon another
tool.
23.
Tool
service must be performed only by qualified repair personnel. Service
or maintenance performed by unqualified personnel could result in a risk of
injury.
24.
When servicing
a
tool, use only identicalreplacement parts. Follow instruc-
tions
in
the Maintenance section of this manual. Use of unauthorized parts
or failure to follow Maintenance Instructions may create a risk
of
electric shock
of injury.
3

SpecificSafetyRules
1.
DANGER! Keep hands away from cuttingarea and blade. Keep your second
handon auxiliary handle,
or
motor housing. If both handsare holdingthe saw,
they cannotbecut bythe blade.
Keep your body positioned to either side of the saw blade,
but
not
in
line
with the saw blade. KICKBACK could cause the
saw
to jump backwards. (See
"Causes and Operator Prevention of Kickback")
Do notreach underneath thework while blade is rotating. The guard can not
protectyou from the blade below the work. Don't attempt to removecut material
when blade
is
moving
CAUTION: Blades coast after turn off.
2.
Check lower guardfor proper closing before each use. Donot operate saw if
lower guard does notmovefreely and closeinstantly. Never clamp
or
tiethe
lower guard intothe open position. If saw
is
accidentally dropped, lower guard
may be bent. Raise the lower guard with the RetractingHandle and make sure it
movesfreelyanddoesnottouchthe blade
or
any otherpart, in
all
anglesanddepths
of cut.
3.
Checktheoperationandconditionof thelowerguardspring.
If
theguard and
thespringarenotoperatingproperly,theymustbeservicedbeforeuse. Lower
guardmayoperatesluggishlydueto damagedpartsgummydeposits,or
a
buildupof
debris.
4.
Lower guard should be retracted manually only for special cuts such as
"Pocket Cuts." and "Compound Cuts." Raise lower guard by Retracting
Handle.As soon as bladeentersthe material, lower guard must bereleased.
For
all
other sawing, the lower guardshould operateautomatically.
5.
Alwaysobservethatthelowerguardiscoveringthebladebeforeplacingsaw
downonbench
or
floor. An unprotected,coastingbladewill causethe sawto
walk
backwards,cuttingwhatever
is
initspath.Beawareof thetimeittakesfor theblade
to stopafterswitchis released.
6.
NEVER
holdpiecebeingcut
in
your hands
or
acrossyour leg. Itis importantto
supportthe work properly to minimizebodyexposure, bladebinding,or
loss
of con-
trol.
7.
Holdtoolbyinsulatedgripping surfaceswhenperforminganoperation where
the cutting tool may contact hidden
wiring
or
its own cord. Contact with
a
"live" wirewillalsomakeexposedmetalpartsof thetool "live" andshockthe oper-
ator.
8.
When rippingalwaysusea
rip
fence
or
straight edgeguide. This improvesthe
accuracyof cutandreducesthe chancefor blade binding.
9.
Always use blades
with
correct size and shape (diamond vs. round) arbor
holes. Bladesthat do not matchthe mountinghardware of the saw will runeccen-
trically, causing
loss
of control.
10.
Neverusedamaged
or
incorrectbladewashers
or
bolts.The bladewashers and
boltwere specially designed for your saw, for optimum performanceand safety
or
operation.
4
11.
CausesandOperator Prevention
of
kickback:
Kickback is a sudden reaction
to
apinched, bound or misaligned saw blade, caus-
ing an uncontrolled saw to lift upand out of the workpiece toward the operator.
When the blade is pinched or bound tightly by the kerf closing down, the blade
stalls and the motor reaction drives the unit rapidly back toward the operator.
If the blade becomes twisted or misaligned in the cut, the teeth at the back edge
of
the blade can dig into the top surface of the wood causing the blade
to
climb
out of the kerf andjump back toward operator.
Kickbackis the result of tool misuseand/or incorrect operating procedures or con-
ditions and can be avoided by taking proper precautions as given below.
Maintainafirmgrip
with
bothhandsonthesaw andpositionyour body and
arm to allow you to resist KICKBACK forces. KICKBACK forces can be con-
trolled by the operator,
if
proper precautions are taken.
When blade is
binding,
or when interrupting a cut for any reason, release
the trigger and hold the saw motionless
in
the material
until
the blade
comestoa completestop. Never attempttoremovethesawfrom thework
or
pull
the saw backward while the blade
is
in
motion
or
KICKBACK may
occur. Investigate and take corrective actions to eliminate the cause
of
blade
binding.
When restarting a saw
in
the workpiece, center the saw blade
in
the kerf
and check that saw teeth are not engaged into the material. If saw blade is
binding, it may walk up or KICKBACKfrom the workpiece
as
the saw is restarted.
Support large panelstominimizethe risk
of
blade pinchingand KICKBACK.
Large panels tendto sag under their ownweight. Supports must be placed under
the panel on both sides, near the line
of
cut and near the edge
of
the panel as
shown in Fig.
1.
To
minimize the risk
of
blade pinching and kickback. When cutting operation
requires the resting
of
the saw on the workpiece, the saw shall be rested on the
large position andthe smaller piece cut off.
To
avoid kickback
do
support
board or panel near the cut.
Fig.
'
Don't support board or panel
away from the cut.
Fig.
:
5

Do
not use dull or damaged blade. Unsharpenedor improperly set blades produce
narrow kerf causing excessive friction, blade bindingand KICKBACK.
Blade depth and bevel adjusting locking levers must be tight and secure before
making cut. If blade adjustment shifts while cutting,
it
may cause binding and
KICKBACK.
Use extra caution when making a "Pocket Cut" into existingwalls or other
blind
areas. The protruding blade may cut objects that can cause KICKBACK.
NEVER place your hand or fingers
behindthe saw. If kickback occurs,
the saw could easily jump backwards
over your hand, possibly causing
severe injury.
Fig.
12.
Adjustments. Beforecuttingbesuredepthandbeveladjustmentsare
tight.
13.
AvoidCuttingNails. Inspectfor andremoveall nailsfromlumber beforecut-
ting.
14.
When operatingthesaw, keep the
cord away from the cutting area
andposition
it
so
that
it
will
notbe
caughtontheworkpieceduringthe
cuttingoperation.
Operate
with
proper hand support,
proper workpiece support, and sup-
plycordroutingaway from thework
area.
A
typicalillustration
of
properhand
support,workpiece support,and
supply cord routing.
Fig.
4
WARNING:
It
is important tosupport the workpiece properly andtoholdthe saw firmlyto
prevent
loss
of control which could cause personalinjury.
Fig.
4
illustratestypi-
calhandsupport or thesaw.
6

15.
Placethe wider portion
of
the saw base onthat part
of
the workpiece which is
solidly supported, not on the section that
will
fall of when the cut is made. As
examples, Fig.
5
illustratestheRIGHTwaytocut
off
theendof aboard, and
Fig.
6
theWRONGway.
If
theworkpiece isshortorsmall, clamp
it
down. DON'TTRY TO
HOLDSHORT PLACESBY HAND!
Fig.
!
Fig.
6
16.
Never attempt to saw
with
the cir-
cular saw heldupsidedown
in
a vise.
This isextremelydangerous and can
leadtoserious accidents.
Fig.
7
17.
Beforesettingthetooldownafter completingacut, besurethatthelower (tele-
scopingl guardhasclosedandthebladehascometoacomplete
stop.
7

SYMBOLS
The followings show the symbols used for tool.
.................................
volts
.................................
amperes
.................................
herts
.................................
kilograms
.................................
hours
.................................
minutes
.................................
seconds
.................................
alternating current
.................................
direct current
.................................
no loadspeed
E
A
AA
..
./min
.................................
alternating or direct current
.................................
Class
II
Construction
.................................
splash-proof construction
.................................
watertight construction
................................
revolutions or reciprocationper min
c!-
.................................
number
of
blow
8

Removing
or
installing saw blades
CAUTION:
Always be sure that the tool is switched off and unpluggedbefore removingor installing
Fig.
8
the blade.
To
remove the blade, press the shaft
lock
so
that the blade cannot revolve and use
the hex wrench to loosen the hex bolt
counterclockwise. Then remove the hex
bolt,outer flange and blade.
To installthe blade, follow the removalpro-
I
cedure in reverse.
BE SURE
TO
TIGHTEN THE
HEX
SOCKET
HEADBOLTSECURELY.
Inner
flange
yyv
'
Saw blade
Outer
flame
I
Fig.
!
9

CAUTION:
*Be sure the blade is installedwith teeth pointing up
at
the front
of
the tool.
*Use only the Makitahex wrench to installor removethe blade.
*The inner flange has
a
20
mm(13/16") diameter on one side and
a
19mm
(3/4")
diame-
ter onthe other. The sidewith 19
mm
(3/4")diameter is markedby "19". Usethe correct
side for the hole diameter of the blade you intend to use. Mounting the blade on the
wrong side can result indangerousvibration.
Inner flange
Mountingshaft
Outer flange
Hex socket head bolt
Blade
Fig.
1'
Adjusting depth
of
cut
Loosen the screw on the depth guide and
movethe baseupor down.
At the desired depth of cut, secure the
baseby tightening the screw.
I
Fig.
11
CAUTION:
*Use
a
shallow depth of cutwhen cuttingthin workpiece for cleaner,safer cuts.
*After adjustingthe depth of cut, always tighten the screw securely.
10

Bevel
cutting
Loosen the screw on the bevelscale plate
on the front of the base. Set for the desired
angle
(0
-
45") by tilting accordingly, then
tighten the screw securely.
Sighting
For straight cuts, alignthe rightnotchinthe
top guide with your cutting line on the
workpiece. For45" bevelcuts, alignthe
left
notchwith it.
Switch action
To
prevent the trigger from being acciden-
tally pulled,
a
lock-off buttonis provided.
To
start the tool, press in the lock-off but-
ton and pullthe trigger. Releasethe trigger
to stop.
--__
-___
-____
____
Fig.
1;
Fig.
1
I
Lock-of
f
but
ton
Switch
trigger
Fig.
14
CAUTION:
Before pluggingin the
tool,
always check to see that the switch trigger actuates properly
and returnsto the "OFF" positionwhen released.
11

Operation
I\
\
Hold the tool firmly. Set the base plate on
the workpiece to be cut without the blade
making any contact. Then turn the tool on
and wait until the blade attains full speed.
Nowsimply movethetoolforwardover the
workpiece surface, keeping
it
flat and
advancing smoothly until the sawing is
completed. To get clean cuts, keep your
sawing line straight and your speed
of
advance uniform.
Guide rule
The handy guide rule allows you to do
extra-accurate straight cuts. Simply slide
the guide rule up snuglyagainst the side
of
the workpieceand secure
it
inpositionwith
the screw on the front
of
the base. It also
makes repeatedcuts
of
uniform width pos-
sible.
Side grip (auxiliaryhandle)
Installthe side grip on the machine
so
that
its hook is on the rib of the blade case
(upperblade guard).
Fig.
17
12

MAINTENANCE
CAUTION:
Always be sure that the tool
is
switched off and unpluggedbefore attempting to perform
inspectionor maintenance.
Adjustingfor accuracy of
90"
cut (verticalcut)
This adjustment has been made
at
the factory. But
if
it
is off, adjust the adjustingscrew
with
a
hex wrench while squaring the blade with the base using
a
triangular rule, try-
square, etc
~
~_______
Screw
Base
Fig.
18
Fig.19
Redacingcarbonbrushes
I
I
Remove and check the carbon brushes
regularly. Replacewhen they wear downto
the limit mark. Keep the carbon brushes
clean and free to slip in the holders. Both
-
I
Fig. 20
carbon brushes should be replaced
at
the same time. Use only identical carbon
brushes.
Use
a
screwdriver to remove the brush
holder caps. Take out the worn carbon
brushes, insert the new ones and secure
the brushholder caps.
Fig.21
To
maintain product SAFETY and RELIABILITY, repairs, any other maintenanceor adjust-
ment shouldbe performed by MakitaAuthorized or Factory Service Centers,always using
Makita replacementparts.
13

ACCESSORIES
CAUTION:
These accessories or attachments are recommended
for
use with your Makita tool specified in this
manual. The use
of
any other accessories or attachments might present a risk
of
injury to persons.
The accessories
or
attachments should be used only inthe proper and intendedmanner.
Hex wrench
5
Part
No.
783203-8
VI
Sidegrip (auxiliaryhandle)
Part
No.
122453-4
Guiderule
Part
No.
164095-8
Guiderule
Faster, smoother, longer sawing
without blade sharpening.
Cuts wood, drywall, plastics,
hard wood, etc.
1
ole
1
1
Part
NO
7-1
14"
518
"
A
90009
'lameter
diameter teeth
(185mm) (15.88mm)
(185
mm)
7-114"
518''
721260-A
14

Apr-07-'98
US
185
mm
(7-1/4")
CIRCULAR SAW
Model
5740NB
Note: The switch and other part configurations
may differ from country to country.
15

=E
1
2
4
5
6
7
8
9
10
11
12
13
14
15
16
17
18
19
20
21
22
23
24
25
26
27
28
29
30
31
32
33
34
35
MAKITA
LIMITED
ONE YEAR WARRANTY
~
MACHINE
1
Hex
Socket
Head
Boll
M6x20
36
1
ARMATURE
ASSEMBLY
1
Outer Flange
lWilh
Item
34 35 37
&
39)
1
Inner
Flange
37 1
Fan
70
1
Bearing
Retainer
19-33
38
1 Shalt
Lock
1
Spindle
39
1
Ball Bearing
6000LL8
1
Ball
Bearing 6201DOW 40
1
Compression
Spring
5
1
Ring
12 41
1
Handle Cover
1
Retaining
Ring
5-38
42
1
Cord
1
Tapping Screw
Bind
CT
4x12
43
1
Cord Guard
1
Lever
44 2
Tapping
Screw
4x18
1
Tension
Spring
4
45
1
Strain
Relief
1
Safety
Cover
46
4
Tapping Scrsw
Flange
PT
4x20
1
Bearing
Box
47
1
Name
Plate
1
Helm1Gear
47 48
3
Pan Head
Screw
M5x45
1
Ball
Bearing
606
49 2 Brush
Holder
Cap
1
Spring
Washer
6
50 2
Carbon
Brush
1 WingNutM6 51
1
Motor
Housing
Complete
1
MAKITA
Label
52
1
Switch
1
Blade Care Complete
53 1
Terminal Block
1P
1
cover
Plate
54 1
Shoulder
Pm
6-7
2
Tapping
Scrsw
Bind CT
4x12 55
1
Angular
Guide
1
Rubber
Sleeve6
56
1
Wing
Ball M6x15
1
Pan
Head
Screw
M6x16 57
1
Angular
Plate
2
Countersunk Head Sciew
M5r16 58
1
Wing
Salt
M6x20
1
Roller
Pm
6 59
t Spring
Washer
6
1
Roller
20
60
1
Flat
Washer
6
1
Suppoil Complete
61
1
Spring
Pin
6
36
1
Field
62
1
Cap
Swere
Neck
Boll M6x2O
2
Tapping
Screw Flange
PF
5x60
63
1
Depth
Guide Complete
1 Baffle
Plate
64 2
Countersunk
Head
Screw
M4x8
1
Rubber
Washer
13
65 1
8.5.
1
Flat
Warher 14
66
5
Couolersunk
Head Scrsw
M5x12
1
Boll
Bearing
608L8
67
1
Set
Screw
M5x8
1
Insulation
Washer 68
1
Set
ScrewM5x8
Warranty Policy
Every Makita tool
IS
thoroughly inspected and tested before
leaving
the factory.
It
is warranted
to
be free of defects from workmanrhip and materials for
the
period of ONE YEAR from
the
date of
origind
purchase. Should any trouble develop during this one-year period
return
the COMPLETE
tool,
freight prepaid.
Io
one
of
Makita'r Factory
or
Authorized Service Ce;ters. If inspection shows
the trouble is caused by defective workmanship
or
material. Makita
wll
repan
(or
a1
our
option.
replace) without charge.
This Warranty doer
no1
apply where:
0
repairs have been made
or
attempted by others:
repairs are required because of
normal
wear and
tear
The
tool
has been abused. misused
or
improperly maintained:
alterations have been made
10
the
tool.
IN NO EVENT SHALL MAKITA BE LIABLE
FOR
ANY INDIRECT, INCIDENTAL
OR
CON-
SEQUENTIAL DAMAGES FROM THE SALE
OR
USE
OF
THE PRODUCT. THIS DISCLAIMER
APPLIES BOTH DURING AND AFTER THE TERM
OF
THIS WARRANTY.
MAKITA DISCLAIMS LIABILITY
FOR
ANY IMPLIED WARRANTIES, INCLUDING IMPLIED
WARRANTIES OF "MERCIIANTABILITY" AND "FITNESS
FOR
A SPECIFIC PURPOSE,"
AFTER THE ONE-YEAR TERM OFTHIS WARRANTY.
Tlus Warranty
eves
you specific
legal
rights, and you may
also
have other fights which vary from
slate
lo
stale.
Some
staler
do
no1
allow
the
exclusion
or
limitation of incidental
or
consequential
damages.
so
the above limitation
or
exclusion may
not
apply
10
you. Same stales do
no1
allow
limitation
on
how
long
an
implied warranty
lasts.
so
the above limitalion may
no1
apply
IO
you.
MakitaCorporation
3-1
1-8,
Sumiyoshi-cho,
Anjo,
Aichi
446-8502
Japan
PRINTED
IN
JAPAN
884155A069
Other manuals for 5740NB
3
Table of contents
Other Makita Saw manuals

Makita
Makita Makstar BSS610 User manual

Makita
Makita LH1040 User manual

Makita
Makita 5201NA User manual

Makita
Makita LF1000 User manual

Makita
Makita 5604R User manual

Makita
Makita LS1013 User manual

Makita
Makita LS1016 User manual

Makita
Makita RJ03 User manual

Makita
Makita 5201NA Operating and maintenance manual

Makita
Makita N5900B User manual

Makita
Makita LH1040 User manual

Makita
Makita 2107F User manual

Makita
Makita LW1400 Manual

Makita
Makita 5603R User manual

Makita
Makita GPS01 User manual

Makita
Makita JR3000 User manual

Makita
Makita 2704 User manual

Makita
Makita DLS211 User manual

Makita
Makita DHS900 User manual

Makita
Makita LS1016 User manual