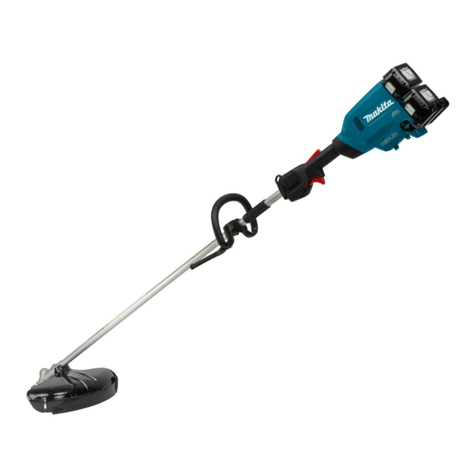
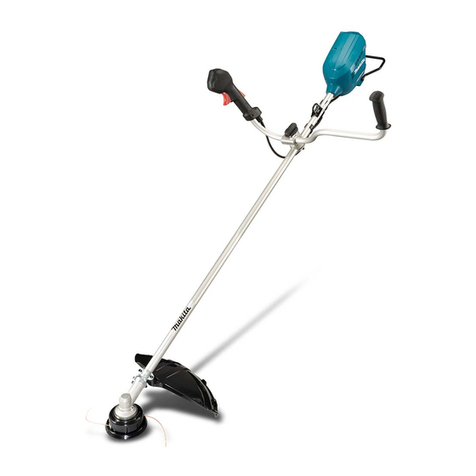
Makita DUR184L User manual

DUR184L
EN Cordless Grass Trimmer INSTRUCTION MANUAL 7
PL Akumulatorowa wykaszarka
do trawy INSTRUKCJA OBSŁUGI 16
HU Vezeték nélküli fűkasza HASZNÁLATI KÉZIKÖNYV 26
SK Akumulátorový krovinorez NÁVOD NA OBSLUHU 35
CS Akumulátorový vyžínač NÁVOD K OBSLUZE 44
UK Акумуляторна
газонокосарка
ІНСТРУКЦІЯ З
ЕКСПЛУАТАЦІЇ 53
RO Motocositoare pentru iarbă
fără cablu MANUAL DE INSTRUCŢIUNI 63
DE Akku-Rasentrimmer BETRIEBSANLEITUNG 72

Fig.1
Fig.2
Fig.3
1
2
3
4
56
9
8
7
10
11
Fig.4
2

1
2
3
Fig.5
1
Fig.6
1
2
Fig.7
1
Fig.8
1
2
Fig.9
1
Fig.10
1
Fig.11
1
Fig.12
3

1
2
Fig.13
1
3
2
Fig.14
Fig.15
Fig.16
1
2
3
Fig.17
1
2
Fig.18
1
Fig.19
Fig.20
4

1
Fig.21
Fig.22
1
2
3
4
Fig.23
Fig.24
1
2
Fig.25
1
Fig.26
Fig.27
80mm-100mm
(3″-4″)
Fig.28
5

Fig.29
Fig.30
Fig.31
Fig.32
6

7ENGLISH
ENGLISH (Original instructions)
SPECIFICATIONS
Model: DUR184L
Type of handle Loop handle
No load speed 5,000 / 6,000 min-1
Overall length 1,534 - 1,634 mm
Nylon cord diameter 2.0 - 2.4 mm
Applicable cutting tool and
cutting diameter
Nylon cutting head (P/N
197297-1)
300 mm
Rated voltage D.C. 18 V
Net weight 3.3 kg 3.6 kg
Battery cartridge BL1815N, BL1820, BL1820B BL1830, BL1830B, BL1840,
BL1840B, BL1850, BL1850B,
BL1860B
• Duetoourcontinuingprogramofresearchanddevelopment,thespecicationshereinaresubjecttochange
without notice.
• Specicationsandbatterycartridgemaydifferfromcountrytocountry.
• Weight,withbatterycartridge,accordingtoEPTA-Procedure01/2003
Noise
-Soundpressurelevel
average
Soundpowerlevelaverage Applicable standard
LPA(dB(A)) LWA(dB(A)) Uncertainty K (dB(A))
Nylon cutting head 77 89 2.0 2000/14/EC
• Evenifthesoundpressurelevellistedaboveis80dB(A)orless,thelevelunderworkingmayexceed80dB
(A).Wearearprotection.
Vibration
-Left hand Right hand Applicable standard
ah,W (m/s2)Uncertainty K (m/s2) ah,W (m/s2)Uncertainty K (m/s2)
Nylon cutting head 2.5 1.5 2.5 1.5 EN50636-2-91
NOTE: The declared vibration emission value has been measured in accordance with the standard test method
and may be used for comparing one tool with another.
NOTE:Thedeclaredvibrationemissionvaluemayalsobeusedinapreliminaryassessmentofexposure.
WARNING: The vibration emission during actual use of the power tool can differ from the declared emission
value depending on the ways in which the tool is used.
WARNING: Be sure to identify safety measures to protect the operator that are based on an estimation of
exposureintheactualconditionsofuse(takingaccountofallpartsoftheoperatingcyclesuchasthetimeswhen
the tool is switched off and when it is running idle in addition to the trigger time).
Symbols
The following show the symbols used for the equip-
ment. Be sure that you understand their meaning before
use.
Take particular care and attention.
Read instruction manual.
Danger;beawareofthrownobjects.
The distance between the tool and
bystanders must be at least 15 m.
360°
Keep bystanders away.
15m(50FT)Keep distance at least 15 m.
Wearahelmet,gogglesandearprotection.
Wearprotectivegloves.

8ENGLISH
Wearsturdybootswithnonslipsoles.
Steeltoedsafetybootsarerecommended.
Donotexposetomoisture.
Top permissible tool speed.
Never use metal blade.
Cd
Ni-MH
Li-ion
OnlyforEUcountries
Do not dispose of electric equipment or
battery pack together with household
waste material! In observance of the
EuropeanDirectives,onWasteElectric
andElectronicEquipmentandBatteries
andAccumulatorsandWasteBatteriesand
Accumulators and their implementation
in accordance with national laws, electric
equipment and batteries and battery
pack(s) that have reached the end of
their life must be collected separately and
returned to an environmentally compatible
recycling facility.
EC Declaration of Conformity
For European countries only
Designation of Machine: Cordless Grass Trimmer
Model No./ Type: DUR184L
Specications:see"SPECIFICATIONS"table.
ConformstothefollowingEuropeanDirectives:
2000/14/EC,2006/42/EC
They are manufactured in accordance with the following
standardorstandardizeddocuments:EN60335,EN/
ISO11806,EN50636
Thetechnicalleinaccordancewith2000/14/ECis
available from:
Makita, Jan-Baptist Vinkstraat 2, 3070, Belgium
With nylon cutting head
The conformity assessment procedure required by
Directive2000/14/ECwasinAccordancewithannexVI.
TÜV Rheinland LGA Products GmbH
Tillystraße 2, 90431 Nürnberg, Germany
Identicationnumber0197
MeasuredSoundPowerLevel:89dB(A)
GuaranteedSoundPowerLevel:91dB(A)
31.7.2015
YasushiFukaya
Director
Makita, Jan-Baptist Vinkstraat 2, 3070, Belgium
IMPORTANT SAFETY
INSTRUCTIONS
WARNING: Read all safety warnings and
all instructions. Failuretofollowthewarningsand
instructionsmayresultinelectricshock,reand/or
seriousinjury.
Save all warnings and instruc-
tions for future reference.
1. Be familiar with the controls and proper use of
the equipment.
2. Cutting elements continue to rotate after the
motor is switched off.
3. Never allow children or people unfamiliar with
the instructions to use the machine.
4. Stop using the machine while people, espe-
cially children, or pets are nearby.
5. Only use the machine in daylight or good arti-
cial light.
6. Before using the machine and after any
impact, check for signs of wear or damage and
repair as necessary.
7. Take care against injury from any device
tted for trimming the lament line length.
After extending new cutter line always return
the machine to its normal operating position
before switching on.
8. Never t metal cutting elements.
9. This appliance is not intended for use by
persons (including children) with reduced
physical, sensory or mental capabilities, or
lack of experience and knowledge, unless they
have been given supervision or instruction
concerning use of the appliance by a person
responsible for their safety. Children should be
supervised to ensure that they do not play with
the appliance.
10. Use the tool with the utmost care and
attention.
11. Operate the tool only if you are in good phys-
ical condition. Perform all work calmly and
carefully. Use common sense and keep in mind
that the operator or user is responsible for
accidents or hazards occurring to other people
or their property.
12. Never operate the tool when tired, feeling ill or
under the inuence of alcohol or drugs.
13. The tool should be switched off immediately if
it shows any signs of unusual operation.
Intended use of the tool
1. Use right tool. The cordless grass trimmer is
only intended for cutting grass, light weeds. It
should not be used for any other purpose such
as hedge cutting as this may cause injury.
Personal protective equipment
►Fig.1
►Fig.2
1. Dress Properly. The clothing worn should be
functional and appropriate, i.e. it should be
tight-tting but not cause hindrance. Do not
wear either jewelry or clothing which could
become entangled with high grass. Wear pro-
tective hair covering to contain long hair.
2. When using the tool, always wear sturdy shoes
with a non-slip sole. This protects against
injuries and ensures a good footing.
3. Wear protective glasses or goggles.

9ENGLISH
Electrical and battery safety
1. Avoid dangerous environment. Don't use the
tool in damp or wet locations or expose it to
rain. Water entering the tool will increase the
risk of electric shock.
2. Recharge only with the charger specied by
the manufacturer. A charger that is suitable for
one type of battery pack may create a risk of
re when used with another battery pack.
3. Use power tools only with specically desig-
nated battery packs. Use of any other battery
packs may create a risk of injury and re.
4. When battery pack is not in use, keep it away
from other metal objects, like paper clips,
coins, keys, nails, screws or other small metal
objects, that can make a connection from one
terminal to another. Shorting the battery termi-
nals together may cause burns or a re.
5. Under abusive conditions, liquid may be
ejected from the battery; avoid contact. If con-
tact accidentally occurs, ush with water. If
liquid contacts eyes, seek medical help. Liquid
ejected from the battery may cause irritation or
burns.
6. Do not dispose of the battery(ies) in a re. The
cell may explode. Check with local codes for
possible special disposal instructions.
7. Do not open or mutilate the battery(ies).
Released electrolyte is corrosive and may
cause damage to the eyes or skin. It may be
toxic if swallowed.
Starting up the tool
►Fig.3
1. Make sure that there are no children or other
people within a working range of 15 meters
(50 ft), also pay attention to any animals in the
working vicinity. Otherwise stop using the tool.
2. Before use always check that the tool is safe
for operation. Check the security of the cutting
tool and the guard and the switch trigger/lever
for easy and proper action. Check for clean
and dry handles and test the on/off function of
the switch.
3. Check damaged parts before further use of
the tool. A guard or other part that is damaged
should be carefully checked to determine
that it will operate properly and perform its
intended function. Check for alignment of
moving parts, binding of moving parts, break-
age of parts, mounting, and any other condi-
tion that may affect its operation. A guard or
other part that is damaged should be properly
repaired or replaced by our authorized ser-
vice center unless indicated elsewhere in this
manual.
4. Switch on the motor only when hands and feet
are away from the cutting tool.
5. Before starting make sure that the cutting
tool has no contact with hard objects such as
branches, stones etc. as the cutting tool will
revolve when starting.
Method of operation
1. Never operate the machine with damaged
guards or without the guards in place.
2. Only use the tool in good light and visibility.
During the winter season beware of slippery
or wet areas, ice and snow (risk of slipping).
Always ensure a safe footing.
3. Take care against injury to feet and hands from
the cutting tool.
4. Keep hands and feet away from the cutting
means at all times and especially when switch-
ing on the motor.
5. Never cut above waist height.
6. Never stand on a ladder and run the tool.
7. Never work on unstable surfaces.
8. Don't overreach. Keep proper footing and
balance at all times.
9. Remove sand, stones, nails etc. found within
the working range. Foreign particles may
damage the cutting tool and can cause to be
thrown away, resulting in a serious injury.
10. Should the cutting tool hit stones or other hard
objects, immediately switch off the motor and
inspect the cutting tool.
11. Before commencing cutting, the cutting tool
must have reached full working speed.
12. During operation always hold the tool with
both hands. Never hold the tool with one hand
during use. Always ensure a safe footing.
13. All protective equipment such as guards
supplied with the tool must be used during
operation.
14. Except in case of emergency, never drop
or cast the tool to the ground or this may
severely damage the tool.
15. Never drag the tool on the ground when mov-
ing from place to place, the tool may become
damaged if moved in this manner.
16.
Always remove the battery cartridge from the tool:
— whenever leaving the tool unattended;
— before clearing a blockage;
— before checking, cleaning or working on
the tool;
— before making any adjustments, chang-
ing accessories or storing;
— whenever the tool starts vibrating
unusually;
— whenever transporting the tool.
17. Don't force the tool. It will do the job better and
with less likelihood of a risk of injury at the
rate for which it was designed.
18. Do not operate power tools in explosive atmo-
spheres, such as in the presence of ammable
liquids, gases or dust. Power tools create sparks
which may ignite the dust or fumes.
19. Take a rest to prevent loss of control caused
by fatigue.Werecommendtotakea10to
20-minute rest every hour.
Maintenance instructions
1. The condition of the cutting tool, protective
devices and shoulder strap must be checked
before commencing work.
2. Turn off the motor and remove the battery
cartridge before carrying out maintenance,
replacing the cutting tool and cleaning the
tool.

10 ENGLISH
3. After use, disconnect the battery cartridge
from the tool and check for damage.
4. Check for loose fasteners and damaged parts
such as nearly halfway cut-off state in the
cutting tool.
5. When not in use store the equipment in a dry
location that is locked up or out of children's
reach.
6. Use only the manufacturer's recommended
replacement parts and accessories.
7. Always ensure that ventilation openings are
kept clear of debris.
8. Inspect and maintain the tool regularly, espe-
cially before/after use. Have the tool repaired
only by our authorized service center.
9. Keep handles dry, clean and free from oil and
grease.
SAVE THESE INSTRUCTIONS.
WARNING: DO NOT let comfort or familiarity
with product (gained from repeated use) replace
strict adherence to safety rules for the subject
product. MISUSE or failure to follow the safety
rules stated in this instruction manual may cause
serious personal injury.
Important safety instructions for
battery cartridge
1. Before using battery cartridge, read all instruc-
tions and cautionary markings on (1) battery
charger, (2) battery, and (3) product using
battery.
2. Do not disassemble battery cartridge.
3. If operating time has become excessively
shorter, stop operating immediately. It may
result in a risk of overheating, possible burns
and even an explosion.
4. If electrolyte gets into your eyes, rinse them
out with clear water and seek medical atten-
tion right away. It may result in loss of your
eyesight.
5. Do not short the battery cartridge:
(1) Do not touch the terminals with any con-
ductive material.
(2) Avoid storing battery cartridge in a con-
tainer with other metal objects such as
nails, coins, etc.
(3) Do not expose battery cartridge to water
or rain.
A battery short can cause a large current
ow, overheating, possible burns and even a
breakdown.
6. Do not store the tool and battery cartridge in
locations where the temperature may reach or
exceed 50 °C (122 °F).
7. Do not incinerate the battery cartridge even if
it is severely damaged or is completely worn
out. The battery cartridge can explode in a re.
8. Be careful not to drop or strike battery.
9. Do not use a damaged battery.
10. The contained lithium-ion batteries are subject
to the Dangerous Goods Legislation require-
ments.
Forcommercialtransportse.g.bythirdparties,
forwarding agents, special requirement on pack-
aging and labeling must be observed.
Forpreparationoftheitembeingshipped,consult-
inganexpertforhazardousmaterialisrequired.
Please also observe possibly more detailed
national regulations.
Tape or mask off open contacts and pack up the
battery in such a manner that it cannot move
around in the packaging.
11. Follow your local regulations relating to dis-
posal of battery.
SAVE THESE INSTRUCTIONS.
CAUTION: Only use genuine Makita batteries.
Use of non-genuine Makita batteries, or batteries that
have been altered, may result in the battery bursting
causingres,personalinjuryanddamage.Itwill
also void the Makita warranty for the Makita tool and
charger.
Tips for maintaining maximum
battery life
1. Charge the battery cartridge before completely
discharged. Always stop tool operation and
charge the battery cartridge when you notice
less tool power.
2. Never recharge a fully charged battery car-
tridge. Overcharging shortens the battery
service life.
3. Charge the battery cartridge with room tem-
perature at 10 °C - 40 °C (50 °F - 104 °F). Let
a hot battery cartridge cool down before
charging it.
4. Charge the battery cartridge if you do not use
it for a long period (more than six months).
PARTS DESCRIPTION
►Fig.4
1Battery cartridge 2Lock-off lever 3Switchtrigger 4Power lamp
5Main power button 6Reverse button 7Hook 8Lock sleeve
9Grip 10 Protector (cutting tool
guard)
11 Shoulderharness - -

11 ENGLISH
FUNCTIONAL
DESCRIPTION
WARNING:
Always be sure that the tool is
switched off and the battery cartridge is removed
before adjusting or checking function on the tool.
Failuretoswitchoffandremovethebatterycartridgemay
resultinseriouspersonalinjuryfromaccidentalstart-up.
Installing or removing battery
cartridge
CAUTION: Always switch off the tool before
installing or removing of the battery cartridge.
CAUTION: Hold the tool and the battery car-
tridge rmly when installing or removing battery
cartridge.Failuretoholdthetoolandthebattery
cartridgermlymaycausethemtoslipoffyourhands
and result in damage to the tool and battery cartridge
andapersonalinjury.
►Fig.5: 1. Red indicator 2. Button 3. Battery cartridge
To remove the battery cartridge, slide it from the tool
while sliding the button on the front of the cartridge.
To install the battery cartridge, align the tongue on the
battery cartridge with the groove in the housing and slip
it into place. Insert it all the way until it locks in place
with a little click. If you can see the red indicator on the
upper side of the button, it is not locked completely.
CAUTION: Always install the battery cartridge
fully until the red indicator cannot be seen. If not,
itmayaccidentallyfalloutofthetool,causinginjuryto
you or someone around you.
CAUTION: Do not install the battery cartridge
forcibly. If the cartridge does not slide in easily, it is
not being inserted correctly.
Tool / battery protection system
The tool is equipped with a tool/battery protection system. This
systemautomaticallycutsoffpowertothemotortoextendtool
and battery life. The tool will automatically stop during operation
if the tool or battery is placed under one of the following condi-
tions. In some conditions, the indicators light up.
Overload protection
If the tool is overloaded by entangled weeds or other
debris, , and indicators start blinking and the
tool automatically stops.
In this situation, turn the tool off and stop the application
that caused the tool to become overloaded. Then turn
the tool on to restart.
Overheat protection for tool or battery
Whenthetoolisoverheated,thetoolstopsautomati-
cally, and , , and capacity indicators blink about
60 seconds.
In this situation, let the tool cool down before turning the
tool on again.
On Off Blinking
If the tool does not start, the battery may be overheated.
In this situation, let the battery cool before starting the
tool again.
Overdischarge protection
Whenthebatterypowerisnearlyusedup,thecapacity
indicator starts blinking. And when the battery power
is used up, the capacity indicator lights up and the tool
stops automatically.
In this case, remove the battery from the tool and
charge the battery.
►Fig.6: 1. Capacity indicator
Indicating the remaining battery
capacity
Only for battery cartridges with "B" at the end of the
model number
►Fig.7: 1. Indicator lamps 2. Check button
Press the check button on the battery cartridge to indi-
cate the remaining battery capacity. The indicator lamps
light up for few seconds.
Indicator lamps Remaining
capacity
Lighted Off Blinking
75% to 100%
50% to 75%
25% to 50%
0% to 25%
Charge the
battery.
The battery
may have
malfunctioned.
NOTE: Depending on the conditions of use and the
ambient temperature, the indication may differ slightly
from the actual capacity.

12 ENGLISH
Power switch action
WARNING: Before installing the battery car-
tridge on the tool, always check to see that the
switch trigger actuates properly and returns to
the "OFF" position when released. Operating a tool
with a switch that does not actuate properly can lead
tolossofcontrolandseriouspersonalinjury.
Press and hold the main power button for some sec-
onds to turn on the tool.
To turn off the tool, press and hold the main power
button again.
►Fig.8: 1. Main power button
To prevent the switch trigger from being accidentally
pulled, a lock-off lever is provided.
To start the tool, grasp the rear handle (the lock-off lever
is released by the grasp) and then pull the switch trig-
ger. To stop the tool, release the switch trigger.
►Fig.9: 1. Lock-off lever 2.Switchtrigger
NOTE: The tool is automatically turned off after the
tool is left one minute without any operations.
Speed adjusting
Youcanadjustthetoolspeedbytappingthemain
power button.
Eachtimeyoutapthemainpowerbutton, indi-
cator or indicator lights up. is for high speed
and for low speed.
►Fig.10: 1. Main power button
Reverse button for debris removal
WARNING: Switch off the tool and remove
the battery cartridge before you remove entan-
gled weeds or debris which the reverse rotation
function can not remove.Failuretoswitchoffand
remove the battery cartridge may result in serious
personalinjuryfromaccidentalstart-up.
This tool has a reverse button to change the direction of
rotation. It is only for removing weeds and debris entan-
gled in the tool.
To reverse the rotation, tap the reverse button and pull
the trigger when the tool’s head is stopped. The power
lamp starts blinking, and the tool's head rotates in
reverse direction when you pull the switch trigger.
To return to regular rotation, release the trigger and wait
until the tool's head stops.
►Fig.11: 1. Reverse button
NOTE: During the reverse rotation, the tool operates
only for a short period of time and then automatically
stops.
NOTE: Once the tool is stopped, the rotation returns
to regular direction when you start the tool again.
NOTE: If you tap the reverse button while the tool's
head is still rotating, the tool comes to stop and to be
ready for reverse rotation.
Nylon cutting head
Optional accessory
NOTICE: The bump feed will not operate properly if
the head is not rotating.
►Fig.12: 1. Most effective cutting area
The nylon cutting head is a dual string trimmer head
provided with a bump & feed mechanism.
To feed out the nylon cord, tap the cutting head against
the ground while rotating.
NOTE: If the nylon cord does not feed out while
tapping the head, rewind/replace the nylon cord
by following the procedures described under
“Maintenance”.
Adjusting the shaft length
WARNING: Before adjusting the shaft length,
release the switch trigger and remove the battery
cartridge from the tool.Failuretoreleasethetrig-
ger and removing the battery cartridge may cause a
personalinjury.
CAUTION: Make sure to tighten the lock
sleeve before operation. Otherwise the tool may
losecontrolandresultinpersonalinjury.
Toadjustthelengthoftheshaft,turnthelocksleeve
counterclockwise until the arrow mark on the lock
sleeve indicates the unlock mark on the housing, and
pull out or push in the shaft to the desired length.
Afteradjustment,tightenthelocksleeveuntilthearrow
mark on the lock sleeve indicates the lock mark on the
housing.
►Fig.13: 1.Shaft2. Lock sleeve
ASSEMBLY
WARNING: Always be sure that the tool is
switched off and battery cartridge is removed
before carrying out any work on the tool.Failureto
switch off and remove the battery cartridge may result
inseriouspersonalinjuryfromaccidentalstart-up.
WARNING: Never start the tool unless it is
completely assembled. Operation of the tool in a
partially assembled state may result in serious per-
sonalinjuryfromaccidentalstart-up.
Installing the grip
Fitthegripontothepipeandtightenitwiththeboltand
the knob.
►Fig.14: 1. Grip 2. Bolt 3. Knob
Make sure that the grip is located in the straight area of
theshaftshowninthegure.
►Fig.15

13 ENGLISH
Installing the guard
WARNING: Never use the tool without the
guard illustrated in place.Failuretodosocan
causeseriouspersonalinjury.
CAUTION: Take care not to injure yourself on
the cutter for cutting the nylon cord.
►Fig.16
1. Aligntheprojectionsontheprotectorwiththe
grooves of the motor housing.
►Fig.17: 1. Protector 2.Projection3. Groove
2. Aligntheprojectionsontheprotectorholderwith
its counter parts of the motor housing.
►Fig.18: 1. Protector holder 2.Projection
3. Tightenthehexboltssecurelytofastentheprotec-
tor and the protector holder.
►Fig.19: 1.Hexbolt
Installing the wire guard
CAUTION: Before adjusting the wire guard,
wait for the cutting head comes to standstill. Do
not adjust the wire guard with your foot.
►Fig.20
Toreducetheriskdamagingtheobjectsinfrontofthe
cutting head, insert the wire guard so that it controls the
cutting range of the mowing line.
Slightlyexpandthewireguardoutwardandtheninsert
it into the holes of the protector.
►Fig.21: 1.Wireguard
NOTE:Donotexpandthewireguardoutwardtoo
much. Otherwise it may break.
Whenwireguardisnotinuse,liftitfortheidleposition.
►Fig.22
Installing nylon cutting head
Optional accessory
CAUTION: If the nylon cutting head acciden-
tally impacts a rock or hard object during oper-
ation, stop the tool and inspect for any damage.
If the nylon cutting head is damaged, replace it
immediately. Use of a damaged cutting tool could
resultinseriouspersonalinjury.
CAUTION: Make sure to remove the hex
wrench after installation.
NOTICE: Be sure to use genuine Makita nylon
cutting head.
1. Turn the tool upside down so that you can replace
the cutting tool easily.
2. Insertthehexwrenchthroughtheholeonthe
motor housing and rotate the receive washer until it is
lockedwiththehexwrench.
3. Place the nylon cutting head onto the threaded
spindle directly and tighten it by turning it clockwise.
4. Removethehexwrench.
To remove the nylon cutting head, turn it counterclock-
wisewhileholdingthereceivewasherwiththehex
wrench.
►Fig.23: 1. Nylon cutting head 2. Metal guard
3. Receive washer 4.Hexwrench
OPERATION
Correct handling of tool
WARNING: Always position the tool on your
right-hand side. Correct positioning of the tool allows
formaximumcontrolandwillreducetheriskofseri-
ouspersonalinjurycausedbykickback.
WARNING: Be extremely careful to maintain
control of the tool at all times. Do not allow the
tool to be deected toward you or anyone in the
work vicinity.Failuretokeepcontrolofthetool
couldresultinseriousinjurytothebystanderandthe
operator.
►Fig.24
Attachment of shoulder harness
CAUTION: Always use the shoulder harness
attached. Before operation, adjust the shoulder
harness according to the user size to prevent
fatigue.
Connect the clasp of the shoulder harness to the hook
part of the housing. Put the shoulder harness on. Be
sure that the buckles are locked completely in place.
►Fig.25: 1. Buckle 2. Hook
Detachment
The buckle is provided with a means of quick release.
Simplysqueezethesidesofthebuckletoreleasethe
tool.
►Fig.26: 1. Buckle
MAINTENANCE
WARNING: Always be sure that the tool is
switched off and battery cartridge is removed
before attempting to perform inspection or main-
tenance on the tool.Failuretoswitchoffandremove
the battery cartridge may result in serious personal
injuryfromaccidentalstart-up.
NOTICE: Never use gasoline, benzine, thinner,
alcohol or the like. Discoloration, deformation or
cracks may result.

14 ENGLISH
Replacing the nylon cord
WARNING: Use nylon cord with diameter
specied in “SPECIFICATIONS” only. Never use
heavier line, metal wire, rope or the like. Use rec-
ommended nylon cord only, otherwise it may cause
damage to the tool and result in serious personal
injury.
WARNING: Make sure that the cover of the
nylon cutting head is secured to the housing
properly as described below.Failuretoproperly
secure the cover may cause the nylon cutting head to
yapartresultinginseriouspersonalinjury.
1. Take off the cover from the housing, pressing two
latches which are slotted section oppositely on the side
of the housing.
►Fig.27
2. Cutanylonlinein3m(10ft).Foldthecuttingline
in two halves, leave one of half longer 80-100 mm (3 - 4
inches) than another.
►Fig.28
3. Hook the middle of the new nylon cord to the
notch located at the center of the spool between the 2
channels provided for the nylon cord.
Windbothendsrmlyaroundthespoolinthedirection
marked on the head for right hand direction indicated
by RH.
►Fig.29
4. Windallbutabout100mm(4”)ofthecords,leav-
ing the ends temporarily hooked through a notch on the
side of the spool.
►Fig.30
5. Mount the spool on the cover so that the grooves
and protrusions on the spool match up with those on the
cover. Now, unhook the ends of the cord from their tem-
porary position and feed the cords through the eyelets
to come out of the cover.
►Fig.31
6. Align the protrusion on the underside of the cover
withtheslotsoftheeyelets.Thenpushthecoverrmly
onto the housing to secure it. Make sure the latches
fully spread in the cover.
►Fig.32
TomaintainproductSAFETYandRELIABILITY,
repairs,anyothermaintenanceoradjustmentshould
beperformedbyMakitaAuthorizedorFactoryService
Centers, always using Makita replacement parts.
TROUBLE SHOOTING
Beforeaskingforrepairs,conductyourowninspectionrst.Ifyoundaproblemthatisnotexplainedinthemanual,
donotattempttodismantlethetool.Instead,askMakitaAuthorizedServiceCenters,alwaysusingMakitareplace-
ment parts for repairs.
State of abnormality Probable cause (malfunction) Remedy
Motor does not run. Battery cartridge is not installed. Install the battery cartridge.
Battery problem (under voltage) Recharge the battery. If recharging is not effective,
replace battery.
The drive system does not work
correctly.
Ask your local authorized service center for repair.
Motor stops running after a little use. Battery's charge level is low. Recharge the battery. If recharging is not effective,
replace battery.
Overheating. Stopusingoftooltoallowittocooldown.
ItdoesnotreachmaximumRPM. Battery is installed improperly. Install the battery cartridge as described in this
manual.
Battery power is dropping. Recharge the battery. If recharging is not effective,
replace battery.
The drive system does not work
correctly.
Ask your local authorized service center for repair.
Cutting tool does not rotate:
stop the machine immediately!
Foreignobjectsuchasabranchis
jammedbetweentheguardandthe
nylon cutting head.
Removetheforeignobject.
The drive system does not work
correctly.
Ask your local authorized service center for repair.
Abnormal vibration:
stop the machine immediately!
One end of the nylon cord has been
broken.
Tap the nylon cutting head against the ground while
it is rotating to cause the cord to feed.
The drive system does not work
correctly.
Ask your local authorized service center for repair.
Cutting tool and motor cannot stop:
Remove the battery immediately!
Electricorelectronicmalfunction. Remove the battery and ask your local authorized
service center for repair.

15 ENGLISH
OPTIONAL
ACCESSORIES
WARNING: Do not mount a metal blade on
this tool and only use the recommended accesso-
ries or attachments indicated in this manual. The
use of a metal blade or any other accessory or attach-
mentmayresultinseriouspersonalinjury.
CAUTION: These accessories or attachments
are recommended for use with your Makita tool
specied in this manual. The use of any other
accessories or attachments might present a risk of
injurytopersons.Onlyuseaccessoryorattachment
for its stated purpose.
If you need any assistance for more details regard-
ingtheseaccessories,askyourlocalMakitaService
Center.
• Nyloncuttinghead
• Nyloncord(cuttingline)
• Makitagenuinebatteryandcharger
NOTE:Someitemsinthelistmaybeincludedinthe
tool package as standard accessories. They may
differ from country to country.

16 POLSKI
POLSKI (Instrukcja oryginalna)
DANE TECHNICZNE
Model: DUR184L
Typ uchwytu Uchwytpałąkowy
Prędkośćbezobciążenia 5 000 / 6 000 min-1
Długośćcałkowita 1 534 - 1 634 mm
Średnicażyłkinylonowej 2,0 - 2,4 mm
Możliwedozastosowania
narzędzietnąceiśrednica
cięcia
Żyłkowagłowicatnąca(nr
produktu 197297-1)
300 mm
Napięcieznamionowe Prądstały18V
Ciężarnetto 3,3 kg 3,6 kg
Akumulator BL1815N, BL1820, BL1820B BL1830, BL1830B, BL1840,
BL1840B, BL1850, BL1850B,
BL1860B
• Wzwiązkuzestaleprowadzonymprzeznasząrmęprogramembadawczo-rozwojowymniniejszedanemogą
uleczmianombezwcześniejszegopowiadomienia.
• Winnychkrajachurządzeniemożemiećodmienneparametrytechniczneimożebyćwyposażonewinny
akumulator.
• MasaurządzeniawrazzakumulatoremobliczonazgodniezprocedurąEPTA01/2003
Hałas
-Średnipoziomciśnienia
akustycznego
Średnipoziommocyakustycznej Obowiązującanorma
LPA(dB(A)) LWA(dB(A)) NiepewnośćK(dB(A))
Żyłkowagłowicatnąca 77 89 2,0 2000/14/EC
• Nawetjeślipodanypowyżejpoziomciśnieniaakustycznegowynosi80dB(A)lubmniej,poziomtenpodczas
pracymożeprzekroczyć80dB(A).Nosićochronnikisłuchu.
Drgania
-Lewaręka Prawaręka Obowiązująca
norma
ah,W (m/s2)NiepewnośćK
(m/s2)
ah,W (m/s2)NiepewnośćK
(m/s2)
Żyłkowagłowica
tnąca 2,5 1,5 2,5 1,5 EN50636-2-91
WSKAZÓWKA:Deklarowanawartośćwytwarzanychdrgańzostałazmierzonazgodniezestandardowąmetodą
testowąimożnająwykorzystaćdoporównywanianarzędzi.
WSKAZÓWKA:Deklarowanąwartośćwytwarzanychdrgańmożnatakżewykorzystaćwewstępnejocenie
narażenia.
OSTRZEŻENIE:Drganiawytwarzanepodczasrzeczywistegoużytkowaniaelektronarzędziamogąsięróżnić
odwartoścideklarowanej,wzależnościodsposobujegoużytkowania.
OSTRZEŻENIE:Woparciuoszacowanenarażeniewrzeczywistychwarunkachużytkowanianależyokreślić
środkibezpieczeństwawceluochronyoperatora(uwzględniającwszystkieelementycykludziałania,tj.czas,
kiedynarzędziejestwyłączoneikiedypracujenabiegujałowym,atakżeczas,kiedyjestwłączone).
Symbole
Poniżejpokazanosymbolezastosowanenaurządze-
niu.Przedrozpoczęciemużytkowanianależyzapoznać
sięzichznaczeniem.
Zachowaćszczególnąostrożność.
Przeczytaćinstrukcjęobsługi.
Niebezpieczeństwo;uważaćnawyrzucane
przedmioty.
Minimalnaodległośćmiędzynarzędziem
aosobamipostronnymimusiwynosićco
najmniej15m.

17 POLSKI
360°
Osobypostronnepowinnyprzebywaćw
bezpiecznejodległości.
15m(50FT)Zachowaćodległośćconajmniej15m.
Nosićkask,gogleorazochronnikisłuchu.
Nosićrękawiceochronne.
Nosićwytrzymałeobuwieroboczena
podeszwieantypoślizgowej.Zalecanejest
obuwie ze stalowymi noskami.
Chronićprzedwilgocią.
Maksymalnadopuszczalnaprędkość
narzędzia.
Nigdynieużywaćnożametalowego.
Cd
Ni-MH
Li-ion
DotyczytylkopaństwUE
Niewyrzucaćurządzeńelektrycznychani
akumulatorówwrazzodpadamizgospo-
darstwa domowego! Zgodnie z dyrekty-
wamieuropejskimiwsprawiezużytego
sprzętuelektrycznegoielektronicznego
orazbateriiiakumulatoróworazzużytych
bateriiiakumulatorów,atakżedostoso-
waniemichdoprawakrajowego,zużyte
urządzeniaelektryczne,baterieiakumu-
latorynależyskładowaćosobnoiprzeka-
zywaćdozakładurecyklingudziałającego
zgodniezprzepisamidotyczącymiochrony
środowiska.
Deklaracja zgodności WE
Dotyczy tylko krajów europejskich
Oznaczenie maszyny: Akumulatorowa wykaszarka do
trawy
Model nr/typ: DUR184L
Danetechniczne:Patrztabela„DANETECHNICZNE”.
Jestzgodnezwymogamiokreślonymiwnastępujących
dyrektywacheuropejskich:2000/14/EC,2006/42/EC
Jest/sąprodukowanezgodnieznastępującyminor-
mamilubdokumentaminormalizacyjnymi:EN60335,
EN/ISO11806,EN50636
Dokumentacjatechnicznazgodnawwymaganiami
dyrektywy2000/14/ECjestdostępnaw:
Makita, Jan-Baptist Vinkstraat 2, 3070, Belgia
Z żyłkową głowicą tnącą
Proceduraocenyzgodnościwymaganaprzezdyrek-
tywę2000/14/ECzostałaprzeprowadzonazgodniez
załącznikiemVI.
TÜV Rheinland LGA Products GmbH
Tillystraße 2, 90431 Nürnberg, Niemcy
Numeridentykacyjny0197
Zmierzonypoziommocyakustycznej:89dB(A)
Gwarantowanypoziommocyakustycznej:91dB(A)
31.7.2015
YasushiFukaya
Dyrektor
Makita, Jan-Baptist Vinkstraat 2, 3070, Belgia
WAŻNE ZASADY
BEZPIECZEŃSTWA
OSTRZEŻENIE: Przeczytać wszystkie ostrze-
żenia bezpieczeństwa i wszystkie instrukcje.
Niezastosowaniesiędowspomnianychostrzeżeńi
instrukcjimożedoprowadzićdoporażeniaprądem
elektrycznym,pożarui/lubpoważnychobrażeńciała.
Wszystkie ostrzeżenia i instruk-
cje należy zachować do wykorzy-
stania w przyszłości.
1. Należy poznać elementy sterujące i zasady
właściwego użytkowania urządzenia.
2. Elementy tnące obracają się nawet po wyłącze-
niu silnika.
3. Nie dopuszczać, aby urządzenie było używane
przez dzieci lub osoby, które nie zapoznały się
z niniejszą instrukcją.
4. Wyłączyć urządzenie, gdy w pobliżu znaj-
dują się inne osoby (zwłaszcza dzieci) lub
zwierzęta.
5. Urządzenie można używać tylko przy świetle
dziennym lub dobrym sztucznym oświetleniu.
6. Przed użyciem i po każdym uderzeniu urządze-
nia należy sprawdzić, czy nie występują ślady
uszkodzenia lub zużycia, oraz wykonać ewen-
tualne naprawy.
7. Zachować ostrożność, aby uniknąć obrażeń,
jakie może spowodować urządzenie do przyci-
nania żyłki tnącej. Po wyciągnięciu nowej żyłki
tnącej, a przed włączeniem urządzenia, należy
je ustawić w normalnym położeniu roboczym.
8. Nie wolno zakładać metalowych elementów
tnących.
9. Opisywane urządzenie nie jest przeznaczone
do użycia przez osoby (w tym dzieci) niebę-
dące w pełni władz zycznych, poznawczych
lub umysłowych, bądź nieposiadające odpo-
wiedniej wiedzy i doświadczenia, o ile osoba
odpowiedzialna za ich bezpieczeństwo nie
zapewni odpowiedniego nadzoru i nie prze-
każe wskazówek dotyczących użytkowania
urządzenia. Należy pilnować, aby dzieci nie
bawiły się urządzeniem.
10. Podczas użytkowania narzędzia należy zacho-
wać maksymalną ostrożność i uwagę.
11. Narzędzie powinno być używane tylko wtedy,
gdy osoba je obsługująca jest w odpowiedniej
formie zycznej. Wszelkie czynności powinny
być wykonywane spokojnie i ostrożnie. Należy
kierować się zdrowym rozsądkiem i pamiętać,
że operator lub użytkownik odpowiada za
wypadki oraz niebezpieczeństwa zagrażające
innym osobom lub ich mieniu.
12. Narzędzia nie może użytkować osoba
zmęczona, mające złe samopoczucie lub
pod wpływem alkoholu bądź środków
farmakologicznych.
13. Jeśli narzędzie wykazuje oznaki nieprawidło-
wej pracy, należy je natychmiast wyłączyć.

18 POLSKI
Przeznaczenie narzędzia
1. Należy używać odpowiedniego narzędzia
do danej pracy. Akumulatorowa wykaszarka
do trawy jest przeznaczona wyłącznie do
koszenia trawy i małych chwastów. Nie należy
używać jej do żadnych innych celów, takich
jak przycinanie żywopłotu, ponieważ grozi to
obrażeniami.
Środki ochrony osobistej
►Rys.1
►Rys.2
1. Należy się właściwie ubrać. Odzież noszona
podczas pracy powinna być funkcjonalna i
odpowiednia, tzn. powinna przylegać do ciała,
ale nie może krępować ruchów. Nie nosić biżu-
terii ani odzieży, która mogłaby się zaplątać w
wysokiej trawie. Zaleca się noszenie nakrycia
głowy przytrzymującego długie włosy.
2. Podczas eksploatacji narzędzia zawsze należy
nosić mocne buty na podeszwie antypoślizgo-
wej. Takie obuwie chroni przed obrażeniami i
zapewnia stabilne oparcie.
3. Nosić gogle lub okulary ochronne.
Zasady bezpieczeństwa dotyczące urządzeń elek-
trycznych i akumulatora
1.
Unikać niebezpiecznych warunków pracy. Nie
wolno używać narzędzia w otoczeniu wilgotnym,
mokrym ani narażać go na działanie deszczu.
Woda, która dostanie się do wnętrza narzędzia,
zwiększa ryzyko porażenia prądem elektrycznym.
2.
Akumulator należy ładować wyłącznie przy użyciu
określonej przez producenta ładowarki. Ładowarka
przeznaczona do jednego typu akumulatora może
stwarzać zagrożenie pożarem, gdy będzie używana
do ładowania innego akumulatora.
3.
Do zasilania elektronarzędzi używać tylko specjal-
nie do tego celu przeznaczonych akumulatorów.
Używanie innych akumulatorów może stwarzać
ryzyko wystąpienia obrażeń ciała lub pożaru.
4. Gdy akumulator nie jest używany, należy
zabezpieczyć go przed kontaktem z metalo-
wymi przedmiotami, typu spinacze, monety,
klucze, gwoździe, wkręty lub innymi metalo-
wymi drobiazgami, które mogą powodować
zwarcie styków akumulatora. Zwarcie styków
akumulatora grozi poparzeniami lub pożarem.
5. W niewłaściwych warunkach eksploatacji
może dojść do wycieku elektrolitu z akumu-
latora. Nie należy go dotykać. W razie przy-
padkowego kontaktu należy przemyć skażoną
skórę wodą. W razie dostania się elektrolitu
do oczu należy zwrócić się o pomoc lekarską.
Elektrolit z akumulatora może powodować
podrażnienia lub poparzenia.
6. Nie wolno wyrzucać akumulatorów do ognia.
Ogniwo może eksplodować. Należy zapoznać
się z obowiązującymi lokalnie przepisami,
które określają specjalne wytyczne dotyczące
pozbywania się odpadów.
7. Nie wolno otwierać ani niszczyć akumula-
torów. Uwolniony elektrolit jest substancją
żrącą, która może spowodować uszkodzenie
oczu lub skóry. Może być on trujący w razie
połknięcia.
Uruchamianie narzędzia
►Rys.3
1. Upewnić się, że w promieniu 15 m (50 stóp) nie
przebywają żadne dzieci ani inne osoby, jak
również zwracać uwagę, czy w pobliżu miejsca
pracy nie ma żadnych zwierząt. W przeciwnym
razie należy wyłączyć narzędzie.
2. Przed użyciem zawsze należy sprawdzić,
czy uruchomienie narzędzia jest bezpieczne.
Sprawdzić bezpieczeństwo elementu tnącego
i osłony oraz łatwy dostęp i prawidłowe dzia-
łanie spustu/dźwigni przełącznika. Sprawdzić,
czy uchwyty są czyste i suche oraz przetesto-
wać działanie funkcji włączania i wyłączania.
3. Przed dalszym użytkowaniem narzędzia należy
sprawdzić, czy żadna część nie jest uszko-
dzona. Uszkodzoną osłonę lub inną część
należy dokładnie sprawdzić, aby mieć pew-
ność, że będzie ona poprawnie działać i speł-
niać swoją funkcję. Należy sprawdzić narzę-
dzie pod kątem nieprawidłowego ustawienia
lub zablokowania elementów ruchomych,
pęknięć części, zamocowania oraz innych
usterek, które mogą mieć wpływ na jego
działanie. Osłona lub inne uszkodzone części
powinny zostać naprawione lub wymienione
przez autoryzowany punkt serwisowy, o ile w
instrukcji nie podano inaczej.
4. Silnik należy uruchamiać tylko wtedy, gdy
dłonie i stopy znajdują się z dala od elementu
tnącego.
5. Przed uruchomieniem upewnić się, że narzę-
dzie tnące nie dotyka twardych przedmiotów,
takich jak gałęzie, kamienie itp., gdyż przy
rozruchu narzędzie tnące zaczyna się obracać.
Metoda pracy
1. Nie wolno uruchamiać urządzenia z uszkodzo-
nymi lub zdjętymi osłonami.
2. Narzędzia należy używać tylko przy dobrym
oświetleniu i widoczności. Zimą należy uważać
na śliskim lub mokrym terenie, jak również na
lodzie i śniegu (ryzyko poślizgnięcia). Zawsze
należy pamiętać o zachowaniu prawidłowej
postawy i równowagi.
3. Należy chronić stopy i dłonie przed obraże-
niami ze strony elementu tnącego.
4. Dłonie i stopy należy cały czas trzymać z dala
od elementu tnącego, szczególnie podczas
włączania silnika.
5. Nie wolno kosić powyżej pasa.
6. Nie wolno używać narzędzia, stojąc na
drabinie.
7. Nigdy nie pracować na niestabilnych
powierzchniach.
8. Nie należy sięgać narzędziem zbyt daleko.
Zawsze stać na pewnym podłożu i trzymać
równowagę.
9. Usunąć z obszaru pracy piasek, kamienie,
gwoździe itp. Obce przedmioty mogą uszko-
dzić narzędzie tnące i zostać wyrzucone na
zewnątrz, powodując poważne obrażenia ciała.
10. Jeśli narzędzie tnące uderzy o kamień lub inny
twardy przedmiot, należy natychmiast wyłą-
czyć silnik i sprawdzić narzędzie tnące.

19 POLSKI
11. Przed przystąpieniem do pracy narzędzie
tnące musi osiągnąć pełną prędkość roboczą.
12. Podczas pracy zawsze należy trzymać narzę-
dzie oburącz. Nie wolno trzymać włączonego
narzędzia jedną ręką. Zawsze należy pamiętać o
zachowaniu prawidłowej postawy i równowagi.
13. Wszystkie zabezpieczenia, takie jak osłony
dostarczone z narzędziem, muszą być uży-
wane podczas pracy.
14. Poza sytuacjami zagrożenia nie wolno upusz-
czać ani rzucać narzędzia na podłoże, ponie-
waż grozi to jego poważnym uszkodzeniem.
15. Nie wolno ciągnąć narzędzia po podłożu;
przenoszenie narzędzia w taki sposób może to
spowodować jego uszkodzenie.
16. Zawsze wyjmować akumulator z narzędzia:
— gdy narzędzie pozostaje bez nadzoru;
— przed usunięciem blokady;
— przed sprawdzaniem, czyszczeniem lub
konserwacją narzędzia;
— przed przystąpieniem do przeprowadze-
nia regulacji, wymianą akcesoriów lub
przed odłożeniem urządzenia;
— gdy urządzenie zaczyna drgać w niety-
powy sposób;
— podczas transportowania narzędzia.
17. Nie przeciążać narzędzia. Będzie ono praco-
wało lepiej, a ryzyko spowodowania obrażeń
będzie mniejsze podczas pracy z prędkością,
dla której zostało zaprojektowane.
18. Nie wolno użytkować elektronarzędzi w atmos-
ferach wybuchowych, na przykład w obec-
ności łatwopalnych cieczy, gazów lub pyłów.
Elektronarzędziawytwarzająiskry,któremogą
spowodowaćzapłonpyłówluboparów.
19. Stosować przerwy podczas pracy, aby zapo-
biec utracie kontroli w wyniku zmęczenia.
Zalecasię10–20minutowąprzerwępokażdej
przepracowanejgodzinie.
Instrukcja konserwacji
1. Przed rozpoczęciem pracy należy sprawdzić
stan narzędzia tnącego, urządzeń zabezpiecza-
jących, a także paska na ramię.
2.
Przed przystąpieniem do konserwacji, wymiany
narzędzia tnącego lub czyszczenia narzędzia
należy wyłączyć silnik i wyjąć akumulator.
3. Po zakończeniu pracy z narzędziem należy
wyjąć akumulator i sprawdzić, czy nie ma
śladów uszkodzenia.
4. Sprawdzić, czy nie ma luźnych elementów
mocujących ani uszkodzonych, np. prawie
przeciętych, części w narzędziu tnącym.
5. Gdy narzędzie nie jest użytkowane, należy je
przechowywać w suchym oraz zamkniętym lub
niedostępnym dla dzieci miejscu.
6. Stosować tylko części zamienne i akcesoria
zalecane przez producenta.
7. Zawsze należy dbać, aby otwory wentylacyjne
nie były zatkane przez zanieczyszczenia.
8. Narzędzie należy regularnie sprawdzać i
konserwować, zwłaszcza przed/po użyciu.
Naprawy narzędzia należy zlecać tylko autory-
zowanym punktom serwisowym.
9. Utrzymywać rękojeści suche, czyste i nieza-
brudzone olejem ani smarem.
ZACHOWAĆ NINIEJSZĄ
INSTRUKCJĘ.
OSTRZEŻENIE: NIE WOLNO pozwolić,
aby wygoda lub rutyna (nabyta w wyniku wielo-
krotnego używania urządzenia) zastąpiły ścisłe
przestrzeganie zasad bezpieczeństwa obsługi.
NIEWŁAŚCIWE UŻYTKOWANIE narzędzia lub
niestosowanie się do zasad bezpieczeństwa
podanych w niniejszej instrukcji obsługi może
prowadzić do poważnych obrażeń ciała.
Ważne zasady bezpieczeństwa
dotyczące akumulatora
1. Przed użyciem akumulatora zapoznać się ze
wszystkimi instrukcjami i znakami ostrze-
gawczymi na (1) ładowarce, (2) akumulatorze
i (3) produkcie, w którym będzie używany
akumulator.
2. Akumulatora nie wolno rozbierać.
3. Jeśli czas działania uległ znacznemu skróce-
niu, należy natychmiast przerwać pracę. Może
bowiem dojść do przegrzania, ewentualnych
poparzeń, a nawet eksplozji.
4. W przypadku przedostania się elektrolitu do
oczu, przemyć je czystą wodą i niezwłocznie
uzyskać pomoc lekarską. Może on bowiem
spowodować utratę wzroku.
5. Nie doprowadzać do zwarcia akumulatora:
(1) Nie dotykać styków materiałami przewo-
dzącymi prąd.
(2) Unikać przechowywania akumulatora w
pojemniku z metalowymi przedmiotami,
takimi jak gwoździe, monety itp.
(3) Chronić akumulator przed deszczem lub
wodą.
Zwarcie prowadzi do przepływu prądu elek-
trycznego o dużym natężeniu i przegrzania
akumulatora, co w konsekwencji może grozić
poparzeniami a nawet awarią urządzenia.
6. Narzędzia i akumulatora nie wolno przecho-
wywać w miejscach, w których temperatura
osiąga bądź przekracza 50°C (122°F).
7. Akumulatorów nie wolno spalać, również tych
poważnie uszkodzonych lub całkowicie zuży-
tych. Akumulator może eksplodować w ogniu.
8.
Chronić akumulator przed upadkiem i uderzeniami.
9. Nie wolno używać uszkodzonego akumulatora.
10. Stanowiące wyposażenie akumulatory lito-
wo-jonowe podlegają przepisom dotyczącym
produktów niebezpiecznych.
Napotrzebytransportukomercyjnego,np.świad-
czonegoprzezrmytrzecieczyspedycyjne,
należyprzestrzegaćspecjalnychwymagańw
zakresie pakowania i oznaczania etykietami.
Przygotowanieproduktudowysyłkiwymaga
skonsultowaniasięzespecjalistąds.materiałów
niebezpiecznych.Należytakżeprzestrzegać
przepisówkrajowych,któremogąbyćbardziej
szczegółowe.

20 POLSKI
Zakleićtaśmąlubzaślepićotwartestykiakumula-
toraorazzabezpieczyćgo,abyniemógłsięprze-
suwaćwopakowaniu.
11. Postępować zgodnie z przepisami lokalnymi
dotyczącymi usuwania akumulatorów.
ZACHOWAĆ NINIEJSZE
INSTRUKCJE.
PRZESTROGA: Używać wyłącznie oryginal-
nych akumulatorów rmy Makita.Używanienie-
oryginalnychakumulatorówrminnychniżMakitalub
akumulatorów,którezostałyzmodykowane,może
spowodowaćwybuchakumulatoraipożar,obrażenia
ciałaorazzniszczeniemienia.Stanowitorównież
naruszeniewarunkówgwarancjirmyMakitadoty-
czącychnarzędziaiładowarki.
Wskazówki dotyczące zacho-
wania maksymalnej trwałości
akumulatora
1. Akumulator należy naładować zanim zostanie
do końca rozładowany. Po zauważeniu spadek
mocy narzędzia należy przerwać pracę i nała-
dować akumulator.
2. Nie wolno ładować powtórnie w pełni nałado-
wanego akumulatora. Przeładowanie akumula-
tora skraca jego trwałość.
3. Akumulator należy ładować w temperaturze
pokojowej w przedziale 10–40°C (50–104°F). W
przypadku gorącego akumulatora przed przy-
stąpieniem do ładowania należy poczekać, aż
ostygnie.
4. Akumulatory niklowo-wodorkowe należy nała-
dować po okresie długiego nieużytkowania
(dłuższego niż sześć miesięcy).
OPIS CZĘŚCI
►Rys.4
1Akumulator 2Dźwigniablokady
włączenia
3Spustprzełącznika 4Kontrolka zasilania
5Głównyprzycisk
zasilania
6Przyciskobrotów
wstecznych
7Zaczep 8Tulejablokująca
9Uchwyt 10 Osłonazabezpiecza-
jąca(osłonanarzędzia
tnącego)
11 Szelkinośne - -
OPIS DZIAŁANIA
OSTRZEŻENIE: Przed przystąpieniem do
regulacji lub przeglądu narzędzia upewnić się, że
jest ono wyłączone, a akumulator został wyjęty.
Jeślinarzędzieniezostaniewyłączoneoraznie
zostaniewyjętyakumulator,możetospowodować
poważneobrażeniaciaławwynikuprzypadkowego
uruchomienia.
Wkładanie i wyjmowanie
akumulatora
PRZESTROGA: Przed włożeniem lub wyjęciem
akumulatora należy zawsze wyłączyć narzędzie.
PRZESTROGA: Podczas wkładania lub wyjmo-
wania akumulatora należy mocno trzymać narzę-
dzie i akumulator.Wprzeciwnymraziemogąsięone
wyślizgnąćzrąk,powodującuszkodzenienarzędzia
lubakumulatoraiobrażeniaciała.
►Rys.5: 1.Czerwonywskaźnik2. Przycisk
3. Akumulator
Abywyjąćakumulator,przesuńprzyciskznajdującysię
wprzedniejjegoczęściiwysuńakumulator.
Abywłożyćakumulator,wyrównajwystępnaakumu-
latorzezrowkiemwobudowieiwsuńgonaswoje
miejsce.Akumulatornależywsunąćdooporu,ażsię
zatrzaśnienamiejscu,cojestsygnalizowanedelikat-
nymkliknięciem.Jeśliwgórnejczęściprzyciskujest
widocznyczerwonywskaźnik,akumulatorniezostał
całkowiciezatrzaśnięty.
PRZESTROGA: Akumulator należy włożyć
do końca, tak aby czerwony wskaźnik nie był
widoczny.Wprzeciwnymraziemożeprzypadkowo
wypaśćznarzędzia,powodującobrażeniaoperatora
lubosóbpostronnych.
PRZESTROGA: Nie wkładać akumulatora na
siłę.Jeśliakumulatorniedajesięswobodniewsunąć,
oznaczato,żezostałwłożonynieprawidłowo.
Układ zabezpieczenia narzędzia/
akumulatora
Narzędziejestwyposażonewukładzabezpieczenia
narzędzia/akumulatora.Układautomatycznieodcina
zasilaniesilnikawceluwydłużeniatrwałościnarzędzia
iakumulatora.Narzędziezostanieautomatycznie
zatrzymanepodczaspracywnastępującychsytuacjach
związanychznarzędziemlubakumulatorem.Niektóre
sytuacjezostanąwskazanepoprzezwłączeniesię
odpowiednichwskaźników.
Other manuals for DUR184L
2
Table of contents
Languages:
Other Makita Trimmer manuals

Makita
Makita RBC2510 Quick start guide

Makita
Makita MUH355 User manual

Makita
Makita RBC2510 User manual

Makita
Makita DUR194 User manual

Makita
Makita HTB7600 User manual

Makita
Makita DRT50Z User manual

Makita
Makita RST210 User manual

Makita
Makita EH5000W User manual

Makita
Makita UN460WD User manual

Makita
Makita DUR190U User manual

Makita
Makita UR100D User manual

Makita
Makita 3712 User manual

Makita
Makita DUR369A User manual

Makita
Makita UR013G User manual

Makita
Makita DUR189 User manual

Makita
Makita LXRU01 User manual

Makita
Makita HHU01 User manual

Makita
Makita DUR190U User manual

Makita
Makita ER2550LH User guide

Makita
Makita 3707 User manual