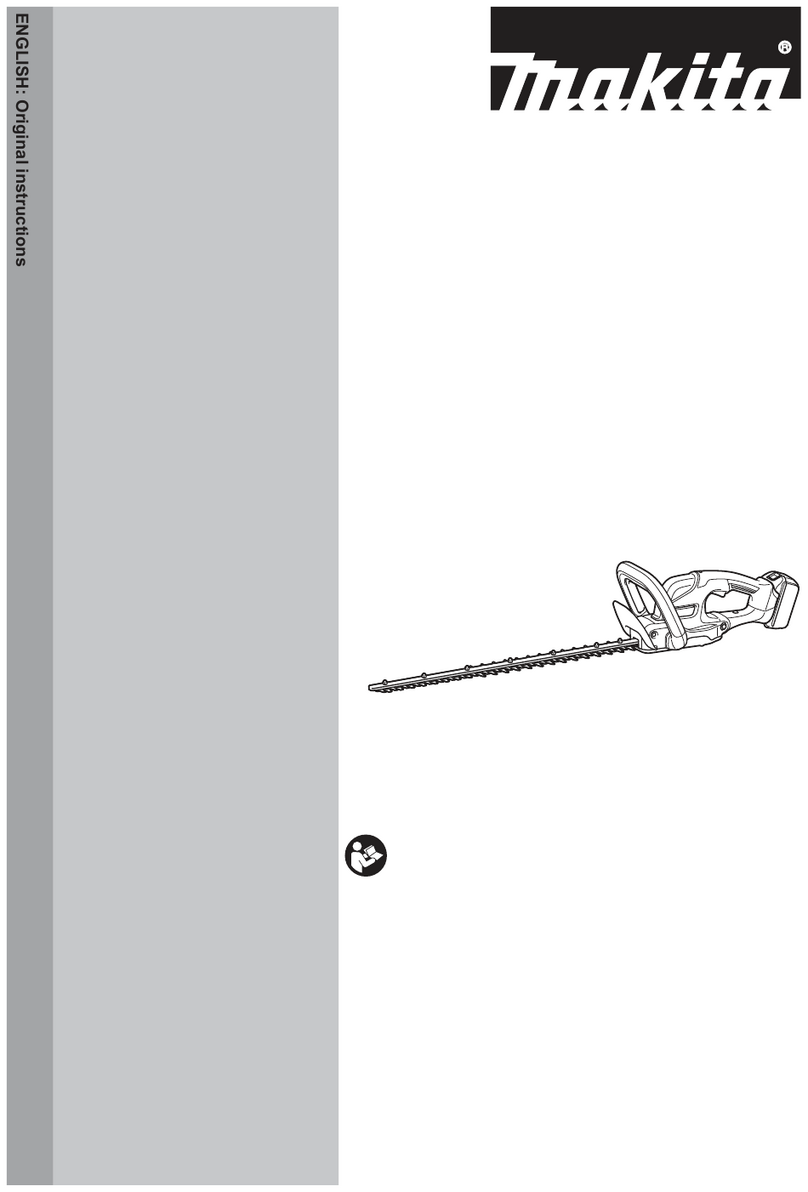
Makita UH5580 User manual

UH5580
UH6580
UH7580
EN Hedge Trimmer INSTRUCTION MANUAL 6
ZHCN 篱笆修剪机 使用说明书 12
ID Alat Pemotong Tanaman PETUNJUK PENGGUNAAN 18
MS Pemangkas Tanaman Pagar MANUAL ARAHAN 25
VI
Máy Tỉa Hàng Rào Cầm Tay
Hoạt Động Bằng Động Cơ
Điện
TÀI LIỆU HƯỚNG DẪN 32
TH 38

12
3
1
2
3
1
2
3
4
5
6
7
Fig.6
1
2
Fig.1
Fig.2
Fig.3
Fig.4
Fig.5
Fig.7
2

1
2
(1)
(2)
12
3
Fig.8
Fig.9
Fig.10
Fig.11
Fig.12
Fig.13
Fig.14
Fig.15
3

1
2
3
4
1
2
1
2
3
1
2
1
2
12
1
1
Fig.16
Fig.17
Fig.18
Fig.19
Fig.20
Fig.21
Fig.22
Fig.23
4

1
2
1
1
Fig.27
1
2
1
Fig.24
Fig.25
Fig.26
Fig.28
Fig.29
Fig.30
5

6ENGLISH
ENGLISH (Original instructions)
SPECIFICATIONS
Model UH5580 UH6580 UH7580
Blade length 550 mm 650 mm 750 mm
Strokes per minute (min-1)1,500 1,500 1,500
Overall length 970 mm 1,049 mm 1,157 mm
Net weight 4.3 - 4.5 kg 4.3 - 4.5 kg 4.3 - 4.5 kg
Safety class /II
• Duetoourcontinuingprogramofresearchanddevelopment,thespecicationshereinaresubjecttochange
without notice.
• Specicationsmaydierfromcountrytocountry.
• Weight according to EPTA-Procedure 01/2014
Symbol
Thefollowingshowthesymbolsusedfortheequip-
ment.Besurethatyouunderstandtheirmeaningbefore
use.
Read instruction manual.
DOUBLE INSULATION
Do not expose to rain.
Remove plug from the mains immediately if
thecableisdamagedorcut.
Only for EU countries
Donotdisposeofelectricequipment
together with household waste material! In
observanceoftheEuropeanDirective,on
WasteElectricandElectronicEquipment
and its implementation in accordance with
nationallaw,electricequipmentthathave
reachedtheendoftheirlifemustbecol-
lected separately and returned to an envi-
ronmentallycompatiblerecyclingfacility.
Intended use
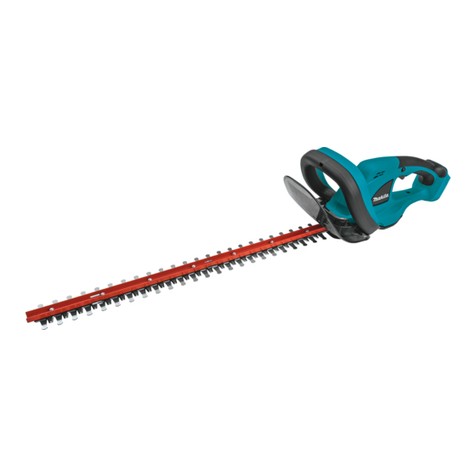
The tool is intended for trimming hedges.
Power supply
Thetoolshouldbeconnectedonlytoapowersupplyof
the same voltage as indicated on the nameplate, and
canonlybeoperatedonsingle-phaseACsupply.They
aredouble-insulatedandcan,therefore,alsobeused
from sockets without earth wire.
General Power Tool Safety Warnings
WARNING Read all safety warnings and all
instructions. Failure to follow the warnings and instruc-
tionsmayresultinelectricshock,reand/orserious
injury.
Save all warnings and instruc-
tions for future reference.
The term “power tool” in the warnings refers to your
mains-operated(corded)powertoolorbattery-operated
(cordless) power tool.
Work area safety
1. Keep work area clean and well lit.Clutteredor
dark areas invite accidents.
2. Do not operate power tools in explosive atmo-
spheres, such as in the presence of ammable
liquids, gases or dust. Power tools create sparks
which may ignite the dust or fumes.
3. Keep children and bystanders away while
operating a power tool. Distractions can cause
you to lose control.
Electrical safety
4. Power tool plugs must match the outlet. Never
modify the plug in any way. Do not use any
adapter plugs with earthed (grounded) power
tools.Unmodiedplugsandmatchingoutletswill
reduce risk of electric shock.
5. Avoid body contact with earthed or grounded
surfaces such as pipes, radiators, ranges and
refrigerators. There is an increased risk of elec-
tricshockifyourbodyisearthedorgrounded.
6. Do not expose power tools to rain or wet con-
ditions. Water entering a power tool will increase
the risk of electric shock.
7. Do not abuse the cord. Never use the cord for
carrying, pulling or unplugging the power tool.
Keep cord away from heat, oil, sharp edges
or moving parts. Damaged or entangled cords
increase the risk of electric shock.
8. When operating a power tool outdoors, use an
extension cord suitable for outdoor use. Use of
acordsuitableforoutdoorusereducestheriskof
electric shock.
9. If operating a power tool in a damp location
is unavoidable, use a residual current device
(RCD) protected supply.UseofanRCDreduces
the risk of electric shock.
10. Use of power supply via a RCD with a rated
residual current of 30 mA or less is always
recommended.

7ENGLISH
Personal safety
11. Stay alert, watch what you are doing and use
common sense when operating a power tool.
Do not use a power tool while you are tired or
under the inuence of drugs, alcohol or med-
ication. A moment of inattention while operating
powertoolsmayresultinseriouspersonalinjury.
12. Use personal protective equipment. Always
wear eye protection.Protectiveequipmentsuch
as dust mask, non-skid safety shoes, hard hat, or
hearing protection used for appropriate conditions
willreducepersonalinjuries.
13. Prevent unintentional starting. Ensure the
switch is in the o-position before connecting
to power source and/or battery pack, picking
up or carrying the tool.Carryingpowertoolswith
yourngerontheswitchorenergisingpowertools
that have the switch on invites accidents.
14. Remove any adjusting key or wrench before
turning the power tool on. A wrench or a key left
attached to a rotating part of the power tool may
resultinpersonalinjury.
15. Do not overreach. Keep proper footing and
balance at all times.Thisenablesbettercontrol
of the power tool in unexpected situations.
16. Dress properly. Do not wear loose clothing or
jewellery. Keep your hair, clothing, and gloves
away from moving parts.Looseclothes,jewel-
leryorlonghaircanbecaughtinmovingparts.
17. If devices are provided for the connection of
dust extraction and collection facilities, ensure
these are connected and properly used. Use of
dust collection can reduce dust-related hazards.
Power tool use and care
18. Do not force the power tool. Use the correct
power tool for your application. The correct
powertoolwilldothejobbetterandsaferatthe
rate for which it was designed.
19. Do not use the power tool if the switch does
not turn it on and o. Any power tool that cannot
becontrolledwiththeswitchisdangerousand
mustberepaired.
20. Disconnect the plug from the power source
and/or the battery pack from the power tool
before making any adjustments, changing
accessories, or storing power tools. Such pre-
ventive safety measures reduce the risk of starting
the power tool accidentally.
21. Store idle power tools out of the reach of chil-
dren and do not allow persons unfamiliar with
the power tool or these instructions to operate
the power tool. Power tools are dangerous in the
hands of untrained users.
22. Maintain power tools. Check for misalignment
or binding of moving parts, breakage of parts
and any other condition that may aect the
power tool’s operation. If damaged, have the
power tool repaired before use. Many accidents
arecausedbypoorlymaintainedpowertools.
23. Keep cutting tools sharp and clean. Properly
maintained cutting tools with sharp cutting edges
arelesslikelytobindandareeasiertocontrol.
24. Use the power tool, accessories and tool bits
etc. in accordance with these instructions, tak-
ing into account the working conditions and
the work to be performed. Use of the power tool
foroperationsdierentfromthoseintendedcould
result in a hazardous situation.
Service
25. Have your power tool serviced by a qualied
repair person using only identical replacement
parts. This will ensure that the safety of the power
tool is maintained.
26. Follow instruction for lubricating and chang-
ing accessories.
27. Keep handles dry, clean and free from oil and
grease.
HEDGE TRIMMER SAFETY
WARNINGS
1. Keep all parts of the body away from the cut-
ter blade. Do not remove cut material or hold
material to be cut when blades are moving.
Make sure the switch is o when clearing
jammed material. A moment of inattention while
operating the hedge trimmer may result in serious
personalinjury.
2. Carry the hedge trimmer by the handle with
the cutter blade stopped. When transporting or
storing the hedge trimmer always t the cut-
ting device cover. Proper handling of the hedge
trimmerwillreducepossiblepersonalinjuryfrom
thecutterblades.
3. Hold the power tool by insulated gripping
surfaces only, because the cutter blade may
contact hidden wiring or its own cord.Cutter
bladescontactinga“live”wiremaymakeexposed
metal parts of the power tool “live” and could give
the operator an electric shock.
4. Keep cable away from cutting area. During
operationthecablemaybehiddeninshrubsand
canbeaccidentallycutbytheblade.
5. Do not use the hedge trimmer in the rain or in wet
or very damp conditions. The electric motor is not
waterproof.
6. First-time users should have an experienced
hedge trimmer user show them how to use the
trimmer.
7. Thehedgetrimmermustnotbeusedbychildren
or young persons under 18 years of age. Young
personsover16yearsofagemaybeexempted
from this restriction if they are undergoing training
under the supervision of an expert.
8. Use the hedge trimmer only if you are in good
physical condition. If you are tired, your attention
willbereduced.Beespeciallycarefulattheendof
a working day. Perform all work calmly and care-
fully.Theuserisresponsibleforalldamagesto
third parties.
9. Neverusethetrimmerwhenundertheinuence
of alcohol, drugs or medication.


8ENGLISH
10. Checktomakesurethatthevoltageandfre-
quencyofthepowersupplycorrespondtothe
specicationsgivenontheidenticationplate.We
recommend the use of a residual-current-operated
circuitbreaker(ground-faultcircuitinterrupter)
with a tripping current of 30 mA or less, or an earth
leakage current protector.
11. Workglovesofstoutleatherarepartofthebasic
equipmentofthehedgetrimmerandmustalways
bewornwhenworkingwithit.Alsowearsturdy
shoes with anti-skid soles.
12. Before starting work check to make sure that the
trimmer is in good and safe working order. Ensure
guardsarettedproperly.Checkcablefordam-
agebeforestartingworkandreplaceifnecessary.
Thehedgetrimmermustnotbeusedunlessfully
assembled.
13. Keepcableawayfromthecuttingarea.Always
work in such a way that the extension power cord
isbehindyou.
14. Removeplugfromthemainsimmediatelyifcable
is damaged or cut.
15. Makesureyouhaveasecurefootingbeforestart-
ing operation.
16. Holdthetoolrmlywhenusingthetool.
17. Do not operate the tool at no-load unnecessarily.
18. Immediatelyswitchothemotorandunplugthe
mains plug if the cutter should come into contact
withafenceorotherhardobject.Checkthecutter
for damage, and if damaged repair immediately.
19. Before checking the cutter, taking care of faults,
or removing material caught in the cutter, always
switchothetrimmerandunplugthemainsplug.
20. Switchothetrimmeranddisconnectandsecure
themainsplugbeforedoinganymaintenance
work.
21. When moving the hedge trimmer to another loca-
tion, including during work, always unplug the
mainsplugandputthebladecoveronthecutter
blades.Nevercarryortransportthetrimmerwith
the cutter running. Never grasp the cutter with
your hands.
22. Cleanthehedgetrimmerandespeciallythecut-
terafteruse,andbeforeputtingthetrimmerinto
storage for extended periods. Lightly oil the cutter
and put on the cover. The cover supplied with the
unitcanbehungonthewall,providingasafeand
practical way to store the hedge trimmer.
23. Store the hedge trimmer with the cover on, in a dry
room. Keep it out of reach of children. Never store
the trimmer outdoors.
24. Do not operate the tool at no-load
unnecessarily.
25. Never point the shear blades to yourself or
others.
26. If the blades stop moving due to the stuck of
foreign objects between the blades during
operation, switch o the tool and unplug
the mains plug, and then remove the foreign
objects using tools such as pliers. Removing
theforeignobjectsbyhandmaycauseaninjury
forthereasonthatthebladesmaymoveinreac-
tiontoremovingtheforeignobjects.
27. Avoid dangerous environment. Don't use the
tool in damp or wet locations or expose it to
rain. Water entering the tool will increase the
risk of electric shock.
28. Check the hedges and bushes for foreign
objects, such as wire fences or hidden wiring
before operating the tool.
SAVE THESE INSTRUCTIONS.
WARNING: DO NOT let comfort or famil-
iarity with product (gained from repeated
use) replace strict adherence to safety
rules for the subject product. MISUSE or
failure to follow the safety rules stated in
this instruction manual may cause serious
personal injury.
FUNCTIONAL
DESCRIPTION
CAUTION:
• Alwaysbesurethatthetoolisswitchedoand
unpluggedbeforeadjustingorcheckingfunction
on the tool.
Switch action
►Fig.1: 1. Switch trigger B 2. Switch trigger A
3.SwitchtriggerC
Foryoursafety,thistoolisequippedwithatriple
switching system. To turn on the tool, press two out of
threetriggersA,BandC.Releaseeitheroneofthetwo
pressedtriggerstoturno.Thesequenceofswitch-
ingisunimportantasthetoolonlystartswhenboth
switches are activated.
Straight cut
►Fig.2
To trim the hedge straight, pull triggers A and B.
Vertical cut
►Fig.3
CutupwardswithbothhandspulltheswitchtriggersB
andCandmoveitinfrontofyourbody.
Far area cut
►Fig.4
Totrimthehedgeinfarareawithbothhandspullthe
switchtriggersAandC.

9ENGLISH
ASSEMBLY
CAUTION:
• Alwaysbesurethatthetoolisswitchedoand
unpluggedbeforecarryingoutanyworkonthe
tool.
Engage the extension cord
CAUTION:
• Make sure that the extension cord is unplugged
to the mains outlet.
►Fig.5: 1. Hook complete 2. Extension cord 3. Tool's
cord
When engaging the extension cord, secure it to the
tool's cord with the hook complete. Attach the hook
about100-200mmfromtheextensioncordconnector.
This will help prevent unintentional disconnection.
Waist cord hook
CAUTION:
• Do not attach the holder of waist cord hook to
other than the extension cord. Do not attach it
inapositionclosertothetoolbeyondthehook
complete. Failure to do so may cause an acci-
dentorpersonalinjury.
• Attachrmlyonehookofthehookcompleteto
the tool's cord and the other hook of hook com-
plete to the extension cord. Working with the
tool with a sole hook only attached may cause
anaccidentandinjury.
Using the waist cord hook helps to minimizing a risk of
cuttingotheextensioncordunexpectedlycausedby
the loose extension cord.
►Fig.6: 1. Hook 2. Tool 3. Tool's cord 4. Hook com-
plete 5. Extension cord 6. Holder 7. Waist
cord hook
Press in or pull out the cord through the opening of the
holder.
►Fig.7: 1. Holder 2.Cord
CAUTION:
• Do not force the opening of the holder. Failure to
dosomaycausedeectionanddamagetoit.
Arm cord hook (Accessory)
CAUTION:
• Do not attach the holder of arm cord hook to
other than the extension cord. Do not attach it
inapositionclosertothetoolbeyondthehook
complete hooks. Failure to do so may cause an
accidentorpersonalinjury.
• Attachrmlyonehookofthehookcompleteto
the tool's cord and the other hook of hook com-
plete to the extension cord. Working with the
tool with a sole hook only attached may cause
anaccidentandinjury.
Using the arm cord hook helps to minimize a risk of
cuttingotheextensioncordunexpectedlycausedby
the loose extension cord.
►Fig.8: 1. Holder 2. Arm cord hook
Attachrmlythearmcordhookplacingaroundyour
arm and pass the extension cord through the holder.
Thelengthofthearmcordhookbandisadjustable.
NOTE:
• Do not pass the extension cord through the
band.
• Do not force the opening of the holder. Failure to
dosomaycausedeectionanddamagetoit.
• Using the arm cord hook together with the waist
cord hook is more helpful.
OPERATION
CAUTION:
• Be careful not to accidentally contact a metal
fenceorotherhardobjectswhiletrimming.The
bladewillbreakandmaycauseseriousinjury.
• Overreaching with a hedge trimmer, particularly
from a ladder, is extremely dangerous. Do not
workfromanythingwobblyorinrm.
NOTICE: Do not attempt to cut branches thicker
than 10 mm in diameter with the tool.Cutbranches
to10cmlowerthanthecuttingheightusingbranch
cuttersbeforeusingthetool.
►Fig.9: (1)Cuttingheight(2) 10 cm
CAUTION:
• Donotcutodeadtreesorsimilarhardobjects.
Failure to do so may damage the tool.
Holdthetrimmerwithbothhandspulltheswitchtrigger
AorBandmoveitinfrontofyourbody.
►Fig.10
Asabasicoperation,tiltthebladestowardsthetrim-
ming direction and move it calmly and slowly at the
speed rate of 3 - 4 seconds per meter.
►Fig.11: 1. Trimming direction 2.Tilttheblades
3.Hedgesurfacetobetrimmed
To cut a hedge top evenly, it helps to tie a string at the
desired hedge height and to trim along it, using it as a
reference line.
►Fig.12
Attaching the chip receiver (accessory) on the tool when
trimmingthehedgestraightcanavoidcutoleaves’
beingthrownaway.
►Fig.13
To cut a hedge side evenly, it helps to cut from the
bottomupwards.
►Fig.14
Trimboxwoodorrhododendronfromthebasetoward
thetopforaniceappearanceandgoodjob.
►Fig.15

10 ENGLISH
Installing or removing chip receiver
(accessory)
CAUTION:
• Alwaysbesurethatthetoolisswitchedoand
unpluggedbeforeinstallingorremovingchip
receiver.
NOTE:
• When replacing the chip receiver, always wear
gloves so that hands and face does not directly
contacttheblade.Failuretodosomaycause
personalinjury.
• Alwaysbesuretoremovethebladecover
beforeinstallingthechipreceiver.
• Thechipreceiverreceivescut-oleavesand
alleviates collecting thrown-away leaves. This
canbeinstalledoneithersideofthetool.
►Fig.16: 1. Press 2.Chipreceiver3. Nut 4. Shear
blade
Pressthechipreceiverontheshearbladessothatits
slitsoverlapwiththenutsontheshearblades.Atthis
time, make sure that the chip receiver does not contact
branchcatcheratthetopoftheshearblades.
►Fig.17: 1. Nut 2. Branch catcher
Atthistime,thechipreceiverneedstobeinstalledso
thatitshookstintogroovesintheshearbladeunit.
►Fig.18: 1. Hooks 2. Fit the hooks into groove
3. Grooves
Toremovethechipreceiver,pressitsleveronboth
sides so that the hooks are unlocked.
►Fig.19: 1.Presstheleversonbothsides2. Unlock
the hooks
CAUTION:
• Thebladecover(standardequipment)cannot
beinstalledonthetoolwiththechipreceiver
beinginstalled.Beforecarryingorstoring,unin-
stallthechipreceiverandtheninstalltheblade
covertoavoidbladeexposure.
NOTE:
• Checkthechipreceiverforsecureinstallment
beforeuse.
• Nevertrytouninstallthechipreceiverbyan
excessive force with its hooks locked in the
bladeunitgrooves.Usingtheexcessiveforce
may damage it.
MAINTENANCE
CAUTION:
• Alwaysbesurethatthetoolisswitchedoand
unpluggedbeforeattemptingtoperforminspec-
tion or maintenance.
Cleaning the tool
Cleanoutthetoolbywipingodustwithadryorsoap-
dipped rag.
CAUTION:
• Neverusegasoline,benzine,thinner,alcohol
or the like. Discoloration, deformation or cracks
may result.
Blade maintenance
Smearthebladebeforeandonceperhourduringoper-
ation using machine oil or similars.
Afteroperation,removedustfrombothsidesofthe
bladewithwiredbrush,wipeoitwitharagandthen
apply enough low-viscosity oil, such as machine oil etc.
andspray-typelubricatingoil.
CAUTION:
• Donotwashthebladesinwater.Failuretodo
so may cause rust or damage on the tool.
NOTICE: If the parts other than the shear blades
such as the crank are worn out, ask Makita
Authorized Service Centers for parts replacement
or repairs.
Removing or installing shear blade
CAUTION:
• Beforeremovingorinstallingshearblade,
alwaysbesurethatthetoolisswitchedoand
unplugged.
• Whenreplacingtheshearblade,alwayswear
gloveswithoutremovingbladecoversothat
hands and face does not directly contact the
blade.Failuretodosomaycausepersonal
injury.
NOTE:
• Donotwipeogreasefromthegearandcrank.
Failure to do so may cause damage to the tool.
• Forspecicwayofremovingandinstalling
shearbladesrefertothereverseofapackage
foraccessoryshearblades.

11 ENGLISH
Removing the shear blades
Reverse the tool and loosen four screws.
►Fig.20: 1. Screws 2. Blade cover
NOTE:
• Be careful not to get your hands dirty as grease
isappliedintheshearbladedrivingarea.
Remove the under cover.
►Fig.21: 1. Under cover 2. Blade cover
Remove the gear housing cover.
►Fig.22: 1. Gear housing cover
Setthecrankattheangleasshowninthegurewitha
slottedbitscrewdriver.
►Fig.23: 1.Crank
Removetwoscrewsfromtheshearbladesandthe
shearbladeunitwillbetakenout.
►Fig.24: 1. Screws 2.Shearblade
CAUTION:
• Return the gear to the original position in such
amannerasitwasinstalledifitshouldbetaken
awaybymistake.
Installing the shear blade
Prepare 4 removed screws (For under cover), 2 screws
(Forshearblade),gearhousingcover,undercover,and
newshearblades.
Adjustthecrankpositionasshowninthegure.At
this time, apply some grease provided with new shear
bladestotheperipheryofthecrank.
►Fig.25: 1.Crank
Overlaptheovalholeintheupperbladewiththatinthe
lower one.
►Fig.26: 1.Ellipseofshearblade
Takeoutthebladecoverfromtheoldshearbladesand
titontothenewonesforeasyhandlingduringthe
replacementofblades.
►Fig.27
Placethenewshearbladesonthetoolsothattheoval
holesintheshearbladestontothecrank.Overlapthe
holesintheshearbladeswiththescrewholesinthe
tool and then secure them with two screws.
►Fig.28: 1.Ellipseofshearblade2.Crank
Checkthecrankforsmoothturnwithaslottedbit
screwdriver.
►Fig.29: 1.Crank
Install the gear housing, under cover on the tool.
Tightenthescrewrmly.
Removethebladecoverandthenturnonthetoolto
check it for proper movement.
NOTE:
• Whentheshearbladesdoesnotoperateprop-
erly,thereisapoortbetweenthebladesand
crank.Redofromthebeginning.
Storage
Thehookholeinthebottomofthebladecoveriscon-
venient for hanging the tool from a nail or screw on the
wall.
►Fig.30
Putthebladecoverontheshearbladessothatthe
bladesarenotexposed.Storethetooloutofthereach
of children carefully.
Store the tool in the place not exposed to water and
rain.
To maintain product SAFETY and RELIABILITY,
repairs,carbonbrushinspectionandreplacement,any
othermaintenanceoradjustmentshouldbeperformed
byMakitaAuthorizedServiceCenters,alwaysusing
Makita replacement parts.
OPTIONAL
ACCESSORIES
CAUTION:
• These accessories or attachments are recom-
mendedforusewithyourMakitatoolspecied
in this manual. The use of any other accessories
orattachmentsmightpresentariskofinjuryto
persons. Only use accessory or attachment for
its stated purpose.
If you need any assistance for more details regard-
ing these accessories, ask your local Makita Service
Center.
• Blade cover
• Hook complete
• Shearbladeassembly
• Waist cord hook
• Arm cord hook
NOTE:
• Someitemsinthelistmaybeincludedinthe
tool package as standard accessories. They
maydierfromcountrytocountry.

12
中文简体
中文简体 (原本)
规格
型号 UH5580 UH6580 UH7580
刀片长度 550 mm 650 mm 750 mm
冲程速度(/min)1,500 1,500 1,500
总长度 970 mm 1,049 mm 1,157 mm
净重 4.3 - 4.5 kg 4.3 - 4.5 kg 4.3 - 4.5 kg
安全等级 /II
• 生产者保留变更规格不另行通知之权利。
• 规格可能因销往国家之不同而异。
• 重量符合EPTA-Procedure 01/2014
符号
以下显示本设备使用的符号。在使用工具之
前请务必理解其含义。
阅读使用说明书。
双重绝缘
勿使本工具淋雨。
若电线损坏或被割断,请立即
拔出主电源插头。
仅限于欧盟国家
请勿将电气设备与家庭普通废
弃物一同丢弃!请务必遵守欧
洲关于废弃电子电气设备的指
令,根据各国法律法规执行。
达到使用寿命的电气设备必须
分类回收至符合环境保护规定
的再循环机构。
用途
本工具用于修剪绿篱。
电源
本工具只可连接电压与铭牌所示电压相同的
电源,且仅可使用单相交流电源。本工具双
重绝缘,因此也可用于不带接地线的插座。
电动工具通用安全警告
警告!阅读所有警告和所有说明。不遵
照以下警告和说明会导致电击、着火和/或
严重伤害。
保存所有警告和说明书以备
查阅。
在所有下列的警告中术语“电动工具”指市
电驱动(有线)电动工具或电池驱动(无
线)电动工具。
工作场地的安全
1. 保持工作场地清洁和明亮。混乱和黑暗
的场地会引发事故。
2. 不要在易爆环境,如有易燃液体、气体
或粉尘的环境下操作电动工具。电动工
具产生的火花会点燃粉尘或气体。
3. 让儿童和旁观者离开后操作电动工具。
注意力不集中会使操作者失去对工具的
控制。
电气安全
4. 电动工具插头必须与插座相配。绝不能
以任何方式改装插头。需接地的电动工
具不能使用任何转换插头。未经改装的
插头和相配的插座将减少电击危险。
5. 避免人体接触接地表面,如管道、散热
片和冰箱。如果你身体接地会增加电击
危险。
6. 不得将电动工具暴露在雨中或潮湿环境
中。水进入电动工具将增加电击危险。
7. 不得滥用电线。绝不能用电线搬运、拉
动电动工具或拔出其插头。使电线远离
热源、油、锐边或运动部件。受损或缠
绕的软线会增加电击危险。
8. 当在户外使用电动工具时,使用适合户
外使用的外接软线。适合户外使用的软
线将减少电击危险。

13
中文简体
9. 如果在潮湿环境下操作电动工具是不可
避免的,应使用剩余电流动作保护器
(RCD)。使用RCD可减小电击危险。
10. 始终建议通过额定剩余电流为30mA或
以下的RCD来使用电源。
人身安全
11. 保持警觉,当操作电动工具时关注所从
事的操作并保持清醒。当你感到疲倦,
或在有药物、酒精或治疗反应时,不要
操作电动工具。在操作电动工具时瞬间
的疏忽会导致严重人身伤害。
12. 使用个人防护装置。始终佩戴护目镜。
安全装置,诸如适当条件下使用防尘面
具、防滑安全鞋、安全帽、听力防护等
装置能减少人身伤害。
13. 防止意外起动。确保开关在连接电源和/
或电池盒、拿起或搬运工具时处于关断位
置。手指放在已接通电源的开关上或开关
处于接通时插入插头可能会导致危险。
14. 在电动工具接通之前,拿掉所有调节钥
匙或扳手。遗留在电动工具旋转零件上
的扳手或钥匙会导致人身伤害。
15. 手不要伸展得太长。时刻注意立足点和
身体平衡。这样在意外情况下能很好地
控制电动工具。
16. 着装适当。不要穿宽松衣服或佩戴饰品。
让衣服、手套和头发远离运动部件。宽
松衣服、佩饰或长发可能会卷入运动部
件中。
17. 如果提供了与排屑、集尘设备连接用的装
置,要确保他们连接完好且使用得当。使
用这些装置可减少尘屑引起的危险。
电动工具使用和注意事项
18. 不要滥用电动工具,根据用途使用适当
的电动工具。选用适当设计的电动工具
会使你工作更有效、更安全。
19. 如果开关不能接通或关断工具电源,则
不能使用该电动工具。不能用开关来控
制的电动工具是危险的且必须进行修理。
20. 在进行任何调节、更换附件或贮存电动
工具之前,必须从电源上拔掉插头和/
或使电池盒与工具脱开。这种防护性措
施将减少工具意外起动的危险。
21. 将闲置不用的电动工具贮存在儿童所及范
围之外,并且不要让不熟悉电动工具或对
这些说明不了解的人操作电动工具。电动
工具在未经培训的用户手中是危险的。
22. 保养电动工具。检查运动件是否调整到
位或卡住,检查零件破损情况和影响电
动工具运行的其他状况。如有损坏,电
动工具应在使用前修理好。许多事故由
维护不良的电动工具引发。
23. 保持切削刀具锋利和清洁。保养良好的
有锋利切削刃的刀具不易卡住而且容易
控制。
24. 按照使用说明书,考虑作业条件和进行
的作业来使用电动工具、附件和工具的
刀头等。将电动工具用于那些与其用途
不符的操作可能会导致危险。
维修
25. 将你的电动工具送交专业维修人员,使
用同样的备件进行修理。这样将确保所
维修的电动工具的安全性。
26. 上润滑油及更换附件时请遵循本说明书
指示。
27. 手柄务必保持干燥、清洁、无油(脂)。
绿篱修剪机使用安全警告
1. 使身体各部位与刀片保持一定距离。当刀
片正在移动时,请勿移开切割材料或按住
要切割的材料。清除卡住的材料时,请确
保开关已关闭。在操作绿篱机期间,分心
可能会导致严重的人身伤害。
2. 在刀片停止运行的情况下,请通过工具
把手来搬运绿篱机。运输或存储绿篱机
时,请务必盖上切割装置护盖。准确操
作绿篱机会降低由刀片造成人身伤害的
可能性。
3. 因为刀片可能会接触到隐藏的电线或自
身电线,操作电动工具时仅可抓握绝缘
把手表面。刀片接触到带电的电线时,
电动工具上曝露的金属部分可能也会带
电,操作者可能会因此触电。
4. 请使电线远离切割区域。操作期间,电
线可能会隐藏在灌木丛中,因而意外被
刀片割断。
5. 请勿在雨中、水中或十分潮湿的环境下
使用绿篱机。电机不防水。
6. 用户首次使用时,应让有经验的绿篱机
用户向其展示如何使用该设备。
7. 儿童或不满18岁的少年不得使用绿篱
机。超过16岁的少年如果在专业人士的
监督下接受过培训,则不受该限制。

14
中文简体
8. 请仅在身体状态良好的情况下使用绿篱
机。疲惫会导致使用者注意力降低。在
一天的工作快结束时应特别注意这一点。
应镇定、谨慎地完成所有工作。给第三方
造成的所有损失由用户负责。
9. 在酒精、药物或接受医疗的情况下,切
勿使用绿篱机。
10. 请检查确认电压和电源频率与铭牌上的规
格相符。我们建议使用分闸电流为30 mA
或以下的剩余电流动作断路器(漏电断路
器)或接地漏电保护器。
11. 结实的皮革工作手套是操作绿篱机时的基
本装备之一,在操作绿篱机时必须始终佩
戴。同时应穿戴具有防滑底的结实靴。
12. 开始工作之前,请检查确认绿篱机处于
良好和安全的工作状态。确保保护罩安
装到位。开始作业之前,请检查电线有
无损坏,必要时应进行更换。在完全安
装到位前不得使用绿篱机。
13. 确保电线远离切割区域。操作过程中请
始终保证延长线位于您的后侧。
14. 若电线损坏或被割断,请立即拔出主电
源插头。
15. 开始操作前请确保立足稳固。
16. 使用工具时,请将其握牢。
17. 如无必要,请勿在空载状态下操作工具。
18. 如果刀片接触到围栏或其他硬物,请立
即关闭电机并拔出主电源插头。检查刀
片是否受损,如果受损请立即维修。
19. 检查刀片、处理故障或取出卡在刀片上
的材料之前,请务必关闭绿篱机并拔下
主电源插头。
20. 进行保养工作之前,请关闭绿篱机,然
后断开连接并固定主电源插头。
21. 将绿篱机移至另一个位置时(包括工作期
间),请务必拔下主电源插头并为刀片盖
上刀片罩。切勿在刀片运转的情况下移动
或搬运绿篱机。切勿用手去抓刀片。
22. 使用之后以及要长期储存绿篱机之前,
请清洁绿篱机(特别是刀片)。在刀片
上抹少量的油,然后盖上刀片罩。随机
器附带的护盖可挂在墙上,为绿篱机的
存放提供了安全和实用的方法。
23. 存放绿篱机时,将其护盖盖上,然后存
放在干燥的房间内。将其存放在儿童无
法触及的地方。切勿在室外存放绿篱机。
24. 如无必要,请勿在空载状态下操作工具。
25. 切勿将刀片对准自身或其他人员。
26. 倘若在操作时因刀片之间卡入异物导致
刀片停止运转,应关闭工具并拔下电源
插头,然后使用钳子等工具清除异物。
用手清除异物可能会受伤,因为在清除
异物时刀片可能会移动。
27. 避免危险的环境。请勿在潮湿或淋雨环
境下使用工具。工具受潮将增加触电的
危险。
28. 操作工具前,检查绿篱和灌木是否有铁
丝网或隐藏电线等异物。
请保留此说明书。
警告: 请勿为图方便或因对产品足
够熟悉(由于重复使用而获得的经验)
而不严格遵循相关产品安全规则。使用
不当或不遵循使用说明书中的安全规则
会导致严重的人身伤害。
功能描述
小心:
• 在调节或检查工具功能之前,请务必关
闭工具电源开关并拔下电源插头。
开关操作
►图片1: 1. 开关扳机B 2. 开关扳机A 3. 开
关扳机C
为了您的安全考虑,该工具配备了三重开关
系统。开启工具时,请按下扳机A、B和C中
任意两个。释放被按下的两个扳机之一时,
即可关闭工具。由于工具仅在两个开关都被
启动时才会开启,因此开关序列并不重要。
直线切割
►图片2
要沿直线修剪绿篱时,请扣动扳机A和B。
垂直切割
►图片3
用双手向上切割,然后扣动开关扳机B和C,
再将绿篱机移至您身体的前方。
远距离切割
►图片4
要用双手修剪远距离绿篱时,请扣动开关板
机A和C。

15
中文简体
装配
小心:
• 对工具进行任何装配操作前,请务必确
认工具已关闭且已拔下电源插头。
安装延长线
小心:
• 务必将延长线插头从主电源插座上
拔下。
►图片5: 1. 钩套 2. 延长线 3. 工具导线
安装延长线时,请使用钩套将其固定在工
具的导线上。在距离延长线接头约100 -
200 mm处安装卡钩。这样有助于防止延长
线意外断开。
腰带钩
小心:
• 请勿用腰带钩的固定夹固定延长线之外
的物体。请勿在越过钩套、靠近工具的
位置安装腰带钩。否则可能会导致意外
或人身伤害。
• 将钩套的一个卡钩牢固地安装在工具的
导线上,然后将钩套的另一个卡钩安装
在延长线上。操作工具时只安装一个卡
钩可能引发事故或造成人员伤害。
使用腰带钩可最大限度地减少延长线由于过
松而被意外切断的风险。
►图片6: 1. 卡钩 2. 工具 3. 工具导线 4. 钩
套5. 延长线 6. 固定夹 7. 腰带钩
将导线从固定夹开口处压入或拔出。
►图片7: 1. 固定夹 2. 导线
小心:
• 请勿强行打开固定夹。否则可能会导致
固定夹偏移和受损。
臂带钩(附件)
小心:
• 请勿用臂带钩的固定夹固定延长线之外
的物体。请勿在越过钩套卡钩、靠近工
具的位置安装臂带钩。否则可能会导致
意外或人身伤害。
• 将钩套的一个卡钩牢固地安装在工具的
导线上,然后将钩套的另一个卡钩安装
在延长线上。操作工具时只安装一个卡
钩可能引发事故或造成人员伤害。
使用臂带钩可最大限度地减少延长线由于过
松而被意外切断的风险。
►图片8: 1. 固定夹 2. 臂带钩
将臂带钩牢固地缠在您的手臂上,然后将延长
线 穿 过 固 定 夹 。臂 带 钩 绑 带 的 长 度 可 调 节 。
注:
• 请勿使延长线穿过绑带。
• 请勿强行打开固定夹。否则可能会导致
固定夹偏移和受损。
• 同时使用臂带钩和腰带钩会更有帮助。
操作
小心:
• 修剪时请小心不要意外接触金属导板或
其他硬物。否则刀片会断裂并可能造成
严重的人身伤害。
• 拿着绿篱机够着去修剪难以触及的物体
(特别是在梯子上的时候)会相当危
险。请勿在摇晃或不稳的物体上工作。
注意: 请勿用工具剪切直径超过10 mm的
树枝。使用树枝剪将枝干修剪至低于切割高
度10 cm后,再使用本工具。
►图片9: (1) 切割高度 (2) 10 cm
小心:
• 请勿切割死树或类似的硬物。否则可能
会导致工具受损。
用双手握住绿篱机,然后扣动开关扳机A或
B,再将其移至您身体的前方。
►图片10
基 本 操 作 是 :将 刀 片 倾 斜 至 修 剪 方 向 ,然 后 稳
定 、缓 慢 地 以 3至4秒每米的速度移动工具。
►图片11: 1. 修剪方向 2. 倾斜刀片 3. 要修
剪的绿篱表面

16
中文简体
要均匀修剪绿篱顶部时,可在所需的绿篱高
度上拉一根线绳,并将其作为参考线,沿着
它进行修剪。
►图片12
笔直修剪绿篱时,在工具上安装碎屑接收器
(附件)可避免剪下的叶子四散。
►图片13
要均匀修剪绿篱侧面时,可从底部朝上修剪。
►图片14
从底部朝顶部修剪黄杨或杜鹃花可获得较美
观的外形和效果。
►图片15
安装或拆卸碎屑接收器(附件)
小心:
• 在安装或拆下碎屑接收器之前,请务必
关闭工具电源开关并拔下电源插头。
注:
• 更换碎屑接收器时,请务必佩戴手套,
以免手部和面部直接接触刀片。否则
可能会导致人身伤害。
• 安装碎屑接收器之前,请务必拆下刀
片罩。
• 碎屑接收器会接收剪下的树叶,便于
收集散落的树叶。可安装在工具的任
一侧。
►图片16: 1. 按2. 碎屑接收器 3. 螺母
4. 刀片
将碎屑接收器压在刀片上,使其切口和刀片
上的螺母重合。此时,请确保碎屑接收器没
有和刀片顶部的树枝夹持器接触。
►图片17: 1. 螺母 2. 树枝夹持器
此时,需要安装碎屑接收器,使其挂钩和刀
片单元上的凹槽啮合。
►图片18: 1. 挂钩 2. 挂钩和凹槽啮合
3. 凹槽
要拆卸碎屑接收器时,请按下其两侧的杆,
解开挂钩的锁定。
►图片19: 1. 按下两侧的杆 2. 解开挂钩
的锁定
小心:
• 安装了碎屑接收器时,无法在工具上安
装刀片罩(标配)。搬运或存放之前,
请拆卸碎屑接收器,然后安装刀片罩,
以免刀片曝露在外面。
注:
• 使用前请检查碎屑接收器是否已稳固
安装。
• 在碎屑接收器的挂钩锁定在刀片单元凹
槽中时,切勿强行拆卸碎屑接收器。强
行拆卸可能会使其受损。
保养
小心:
• 检查或保养工具之前,请务必关闭工具
电源开关并拔下插头。
清洁工具
用干布或浸有肥皂的布擦掉工具上的灰尘。
小心:
• 切勿使用汽油、苯、稀释剂、酒精或类
似物品清洁工具。否则可能会导致工具
变色、变形或出现裂缝。
刀片保养
操作之前和操作期间(一小时一次)在刀片
上涂抹机油或类似产品。
操作后,请用钢丝刷清除刀片两侧的灰尘,
用抹布进行擦拭,然后涂抹足够的低粘度油
(例如机油等)和喷淋式润滑油。
小心:
• 请勿在水中清洗刀片。否则可能会导致
工具生锈或受损。
注意: 如果曲柄等非刀片部件磨损,请联
络牧田授权维修服务中心更换部件或维修。
拆卸或安装刀片
小心:
• 拆卸或者安装刀片之前,请务必关闭
工具电源并拔下插头。
• 更换刀片时,请勿拆下刀片罩并务必
佩戴手套,以免手部和面部直接接触
刀片。否则可能会导致人身伤害。

17
中文简体
注:
• 请勿擦掉齿轮和曲柄上的油脂。否则可
能会导致工具受损。
• 有关拆卸和安装刀片的具体方法,请参
阅附件刀片包装的背面。
拆卸刀片
翻转工具,然后拧松四颗螺丝。
►图片20: 1. 螺丝 2. 刀片罩
注:
• 在刀片驱动区域涂抹润滑油时,请小心
不要弄脏您的手。
拆下下盖板。
►图片21: 1. 下盖板 2. 刀片罩
拆下齿轮箱盖。
►图片22: 1. 齿轮箱盖
用一字头螺丝起子将曲柄设定在如图所示的
角度。
►图片23: 1. 曲柄
从刀片上拆下两颗螺丝,然后取出刀片单元。
►图片24: 1. 螺丝 2. 刀片
小心:
• 如果齿轮被意外取出,请按照安装齿轮
的方法将其装回原来的位置。
安装刀片
准备好4颗已拆下的螺丝(用于下盖板)、2
颗螺丝(用于刀片)、齿轮箱盖、下盖板和
新刀片。
如图所示调节曲柄位置。此时,将随新刀片
附带的润滑油涂抹在曲柄周围。
►图片25: 1. 曲柄
使上下刀片上的椭圆孔重合。
►图片26: 1. 刀片的椭圆体
从旧的刀片上取出刀片罩,然后将其安装到新
的刀片上,以便在更换刀片过程中轻松 操作。
►图片27
将新刀片放在工具上,使刀片上的椭圆孔和
曲柄吻合。将刀片上的孔和工具上的螺丝孔
重叠,然后用两颗螺丝固定。
►图片28: 1. 刀片的椭圆体 2. 曲柄
用一字头螺丝起子检查曲柄是否运转顺利。
►图片29: 1. 曲柄
将齿轮箱、下盖板安装到工具上。紧固螺丝。
拆下刀片罩,然后开启工具以检查其是否运
转正常。
注:
• 刀片无法正常操作时,则表示刀片和
曲柄之间安装不良。从头开始再操作
一次。
存放
使用刀片罩底部的钩孔可便于将工具挂在墙
壁的钉子或螺丝上。
►图片30
将刀片罩装在刀片上,以免刀片曝露在外。
注意将工具存放在儿童无法触及的地方。
将工 具 存 放 于不 会 曝 露 在 水 或 雨水中 的地 方。
为 了 保 证 产 品 的 安 全 性 与 可 靠 性 ,任 何 维 修 、
碳刷检查和更换、或其它维修保养工作需由
Makita( 牧 田 )授 权 服 务 中 心 完 成 。务 必 使 用
Makita( 牧 田 )的 替 换 部 件 。
选购附件
小心:
• 这些附件或装置专用于本说明书所列的
Makita(牧田)电动工具。其他附件或
装置的使用可能会有人身伤害风险。仅
可将附件或装置用于规定目的。
如您需要了解更多关于这些选购附件的信
息,请咨询当地的Makita(牧田)维修服务
中心。
• 刀片罩
• 钩套
• 刀片组件
• 腰带钩
• 臂带钩
注:
• 本列表中的一些部件可能作为标准附件
包含于工具包装内。它们可能因销往国
家之不同而异。

18 BAHASA INDONESIA
BAHASA INDONESIA (Petunjuk Asli)
SPESIFIKASI
Model UH5580 UH6580 UH7580
Panjangmatapisau 550 mm 650 mm 750 mm
Langkah per menit (min-1)1.500 1.500 1.500
Panjangkeseluruhan 970 mm 1.049 mm 1.157 mm
Beratbersih 4,3 - 4,5 kg 4,3 - 4,5 kg 4,3 - 4,5 kg
Kelas keamanan /II
• Karenakesinambunganprogrampenelitiandanpengembangankami,spesikasiyangdisebutkandisinidapat
berubahtanpapemberitahuan.
• Spesikasidapatberbedadarisatunegarakenegaralainnya.
• Berat menurut Prosedur EPTA 01/2014
Simbol
Berikutiniadalahsimbol-simbolyangdigunakanpada
peralatan ini. Pastikan Anda memahami arti masing-
masingsimbolsebelummenggunakanalat.
Bacapetunjukpenggunaan.
ISOLASI GANDA
Janganmembiarkanalatkehujanan.
Cabutstekerdarisumberlistriksegera
apabilakabelrusakatauterpotong.
Hanya untuk negara-negara Uni Eropa
Janganmembuangperalatanlistrik
ataubateraibersama-samadengan
bahanlimbahrumahtangga!Dengan
memerhatikanPetunjukEropa,tentang
LimbahPeralatanListrikdanElektronik
serta pelaksanaannya sesuai dengan
ketentuan hukum nasional, peralatan
listrikyangtelahhabisumurpakainya
harus dikumpulkan secara terpisah dan
dikembalikankefasilitasdaurulangyang
kompatibelsecaralingkungan.
Penggunaan
Mesin ini digunakan untuk memotong tanaman pagar.
Pasokan daya
Mesinharusterhubungdenganpasokandayalistrik
yangbervoltasesamadenganyangterterapadapelat
nama,danhanyadapatdijalankandenganlistrikAC
fase tunggal. Mesin diisolasi ganda sehingga dapat
jugadihubungkandengansokettanpakabelarde.
Peringatan Keselamatan Umum
Mesin Listrik
PERINGATAN Bacalah semua peringatan
keselamatan dan semua petunjuk. Kelalaian
mematuhiperingatandanpetunjukdapatmenyebabkan
sengatanlistrik,kebakarandan/ataucederaserius.
Simpanlah semua peringatan
dan petunjuk untuk acuan di
masa depan.
Istilah “mesin listrik” dalam semua peringatan mengacu
padamesinlistrikyangdijalankandengansumberlistrik
jala-jala(berkabel)ataubaterai(tanpakabel).
Keselamatan tempat kerja
1. Jaga tempat kerja selalu bersih dan
berpenerangan cukup.Tempatkerjayang
berantakandangelapmengundangkecelakaan.
2. Jangan gunakan mesin listrik dalam
lingkungan yang mudah meledak, misalnya
terdapat cairan, gas, atau debu yang mudah
terbakar.Mesinlistrikmenimbulkanbungaapi
yangdapatmembakardebuatauuaptersebut.
3. Jauhkan anak-anak dan orang lain saat
menggunakan mesin listrik. Jika perhatian
terpecah,Andamungkinsajakehilangankendali.
Keamanan Kelistrikan
4. Steker mesin listrik harus cocok dengan
stopkontak. Jangan sekali-kali mengubah
steker dengan cara apa pun. Jangan
menggunakan steker adaptor dengan mesin
listrik yang terbumi (dibumikan). Steker yang
tidakdiubahdanstopkontakyangcocokakan
mengurangi risiko sengatan listrik.
5. Hindari sentuhan tubuh dengan permukaan
yang terbumi atau dibumikan seperti pipa,
radiator, kompor, dan kulkas. Risiko sengatan
listrikbertambahjikaadabagiantubuhAndayang
menyentuhbumiatautanah.
6. Jangan membiarkan mesin listrik kehujanan
atau basah. Air yang masuk ke dalam mesin listrik
akan meningkatkan risiko sengatan listrik.
7. Jangan menyalahgunakan kabel. Jangan
sekali-kali menggunakan kabel untuk
membawa, menarik, atau mencabut mesin
listrik dari stopkontak. Jauhkan kabel dari
panas, minyak, tepian tajam, atau bagian
yang bergerak.Kabelyangrusakataukusut
memperbesarrisikosengatanlistrik.

19 BAHASA INDONESIA
8. Jika menggunakan mesin listrik di luar
ruangan, gunakan kabel ekstensi yang
sesuai dengan penggunaan di luar ruangan.
Menggunakankabelyangsesuaidengan
penggunaan luar ruangan akan mengurangi risiko
sengatan listrik.
9. Jika mengoperasikan mesin listrik di lokasi
lembap tidak terhindarkan, gunakan pasokan
daya yang dilindungi peranti imbasan arus
(residual current device - RCD). Penggunaan
RCDmengurangirisikosengatanlistrik.
10. Disarankan untuk menggunakan pasokan daya
melalui RCD dengan kapasitas arus sisa 30mA
atau kurang.
Keselamatan Diri
11. Jaga kewaspadaan, perhatikan pekerjaan Anda
dan gunakan akal sehat saat menggunakan
mesin listrik. Jangan menggunakan mesin
listrik saat Anda lelah atau di bawah pengaruh
obat-obatan, alkohol, atau dalam masa
pengobatan.SesaatsajaAndalalaisaat
menggunakanmesinlistrikdapatmenyebabkan
cederabadanserius.
12. Gunakan alat pelindung diri. Selalu gunakan
pelindung mata. Penggunaan peralatan
pelindungsepertimaskerdebu,sepatupengaman
anti-selip, helm pengaman, atau pelindung telinga
untuk kondisi yang sesuai akan mengurangi risiko
cederabadan.
13. Cegah penyalaan yang tidak disengaja.
Pastikan bahwa sakelar berada dalam posisi
mati (o) sebelum menghubungkan mesin
ke sumber daya dan/atau paket baterai,
mengangkat, atau membawanya.Membawa
mesinlistrikdenganjariberadadisakelaratau
mengalirkan listrik pada mesin listrik dengan
sakelar hidup (on) akan mengundang kecelakaan.
14. Lepaskan kunci-kunci penyetel sebelum
menghidupkan mesin listrik. Kunci-kunci yang
masihterpasangpadabagianmesinlistrikyang
berputardapatmenyebabkancedera.
15. Jangan meraih terlalu jauh. Selalu
jagalah pijakan dan keseimbangan. Hal ini
memungkinkan pengendalian mesin listrik yang
lebihbaikdalamsituasiyangtidakdiharapkan.
16. Kenakan pakaian dengan baik. Jangan
memakai pakaian yang kedodoran atau
perhiasan. Jaga jarak antara rambut, pakaian,
dan sarung tangan Anda dengan bagian mesin
yang bergerak. Pakaian kedodoran, perhiasan,
ataurambutpanjangdapattersangkutpada
bagianyangbergerak.
17. Jika pada peranti tersedia fasilitas untuk
menghisap dan mengumpulkan debu, pastikan
fasilitas tersebut terhubung listrik dan
digunakan dengan baik.Penggunaanpembersih
debudapatmengurangibahayayangterkait
dengandebu.
Penggunaan dan pemeliharaan mesin listrik
18. Jangan memaksa mesin listrik. Gunakan
mesin listrik yang tepat untuk keperluan
Anda. Mesin listrik yang tepat akan menuntaskan
pekerjaandenganlebihbaikdanamanjikapada
kecepatan sesuai rancangannya.
19. Jangan menggunakan mesin listrik jika sakelar
tidak dapat menyalakan dan mematikannya.
Mesin listrik yang tidak dapat dikendalikan dengan
sakelarnyaakanberbahayadanharusdiperbaiki.
20. Cabut steker dari sumber listrik dan/atau paket
baterai dari mesin listrik sebelum melakukan
penyetelan, penggantian aksesori, atau
menyimpan mesin listrik. Langkah keselamatan
preventiftersebutmengurangirisikohidupnya
mesinsecarataksengaja.
21. Simpan mesin listrik jauh dari jangkauan
anak-anak dan jangan biarkan orang yang
tidak paham mengenai mesin listrik tersebut
atau petunjuk ini untuk menggunakan mesin
listrik.Mesinlistriksangatberbahayaditangan
pengguna yang tidak terlatih.
22. Rawatlah mesin listrik. Periksa apakah ada
bagian bergerak yang tidak sejajar atau macet,
bagian yang pecah, dan kondisi lain yang
dapat memengaruhi penggunaan mesin listrik.
Jika rusak, perbaiki mesin listrik terlebih
dahulu sebelum digunakan. Banyak kecelakaan
disebabkanolehkurangnyapemeliharaanmesin
listrik.
23. Jaga agar mesin pemotong tetap tajam dan
bersih.Mesinpemotongyangterawatbaik
denganmatapemotongyangtajamtidakmudah
macetdanlebihmudahdikendalikan.
24. Gunakan mesin listrik, aksesori, dan mata
mesin, dll. berdasarkan petunjuk ini, dengan
memperhitungkan kondisi kerja dan jenis
pekerjaan yang dilakukan. Pemakaian
mesin listrik untuk penggunaan selain yang
diperuntukkandapatmenimbulkansituasi
berbahaya.
Servis
25. Bawa mesin listrik untuk diperbaiki hanya
kepada oleh teknisi yang berkualikasi
menggunakan hanya suku cadang pengganti
yang serupa.Haliniakanmenjaminterjaganya
keamanan mesin listrik.
26. Patuhi petunjuk pelumasan dan penggantian
aksesori.
27. Jagalah agar gagang kering, bersih, serta
bebas dari minyak dan gemuk.
PERINGATAN KESELAMATAN
PEMOTONG TANAMAN
1. Jauhkan bagian tubuh Anda dari mata pisau
pemotong. Jangan ambil material pemotongan
atau penahan saat mata pisau bergerak. Selalu
matikan mesin ketika membersihkan material
yang tersangkut pada mesin.SesaatsajaAnda
lalai saat menggunakan pemotong tanaman dapat
menyebabkancederabadanserius.
2. Bawalah pemotong tanaman menggunakan
gagangnya dengan mata pisau yang tidak
beroperasi. Ketika membawa atau menyimpan
pemotong tanaman, selalu masukkan dalam
penutup alat pemotong. Penanganan pemotong
tanaman yang tepat akan mengurangi risiko
cedera diri terhadap mata pisau pemotong.

20 BAHASA INDONESIA
3. Pegang mesin listrik hanya pada permukaan
genggam yang terisolasi, karena mata pisau
pemotong mungkin bersentuhan dengan
kawat tersembunyi atau kabelnya. Mata pisau
pemotong yang menyentuh kawat “hidup” dapat
menyebabkanbagianlogampadamesinteraliri
arus listrik dan menyengat pengguna.
4. Jauhkan kabel dari area pemotongan. Selama
pengoperasian,kabeldapattersembunyidalam
semak-semak sehingga dapat terpotong secara
tidaksengaja.
5. Jangangunakanpemotongtanamansaathujan
ataukondisibasahdanlembap.Motorlistriktidak
tahan air.
6. Penggunaawamharusmemintabantuan
orangyangberpengalamandalampenggunaan
pemotongtanamanuntukmenunjukkancara
menggunakan alat.
7. Pemotongtanamantidakbolehdigunakanoleh
anak-anakatauusiadibawah18tahun.Orang
denganusiadiatas16tahundiperbolehkan
menggunakanalatiniapabilamerekatelah
menjalanipelatihandenganpengawasanahli.
8. Hanya gunakan pemotong tanaman ketika kondisi
sikAndamemadai.ApabilaAndalelah,perhatian
Anda mungkin dapat menurun. Berhati-hatilah
ketikapekerjaanhampirselesai.Lakukansemua
pekerjaandengantenangdanhati-hati.Pengguna
bertanggungjawabatassemuakerusakanyang
terjadipadapihakketiga.
9. Jangan pernah gunakan pemotong ketika Anda
beradadalampengaruhalkohol,obat-obatan,
ataudalammasapengobatan.
10. Periksadanpastikanbahwategangandan
frekuensisuplaidayasesuaidenganspesikasi
yangterterapadapelatidentikasi.Kami
menyarankan menggunakan pemutus rangkaian
denganimbasanarus(pemutusrangkaiansalah
arde) dengan arus pemutusan 30 mA atau kurang,
ataudenganpelindungaruskebocoranarde.
11. Sarungtangankerjadenganbahankulit
merupakan alat standar untuk pemotong tanaman
dan harus selalu dikenakan ketika menggunakan
pemotong.Kenakanjugasepatuyangkuat
dengan sol anti-selip.
12. Sebelummemulaikerja,periksadanpastikan
pemotongberadapadakondisiyangbaikdan
aman. Pastikan seluruh pelindung terpasang
denganbenar.Periksakerusakanpadakabel
sebelummulaibekerjadangantibilaperlu.
Pemotongtanamantidakbolehdigunakankecuali
telah terpasang dengan lengkap.
13. Jauhkankabeldariareapemotongan.Selalu
bekerjadengankabeldayaberadadibelakang
Anda.
14. Segeracabutstekerdarisumberlistrikapabila
kabelrusakatauterpotong.
15. PastikanAndamemilikipijakanyangaman
sebelummulaimengoperasikanmesin.
16. Pegang mesin dengan kuat saat
menggunakannya.
17. Janganmengoperasikanmesintanpabebanyang
tidak diperlukan.
18. Segeramatikanmotordancabutstekerdari
sumberdayaapabilapemotongmenyentuhpagar
ataubendakeraslainnya.Periksakerusakan
padapemotongdansegeraperbaikibilaperlu.
19. Sebelummemeriksapemotong,memperbaiki
kerusakan,ataumembersihkanmaterialyang
tersangkut pada pemotong, selalu matikan
pemotongdancabutsteker.
20. Matikanpemotongdancabutstekersebelum
melakukanpekerjaanperawatanapapun.
21. Ketika memindahkan pemotong tanaman ke lokasi
lain,termasukselamamelakukanpekerjaan,
selalucabutstekerdanpasangpenutupmata
pisau pada mata pisau pemotong. Jangan pernah
membawaataumemindahkanpemotongyang
masihberoperasi.Janganpernahgenggampisau
pemotong menggunakan tangan.
22. Bersihkan pemotong tanaman setelah digunakan
dansebelummenyimpanpemotongdalam
waktu yang lama. Sedikit lumasi pemotong dan
masukkan ke dalam penutupnya. Penutup yang
disertakan dengan mesin dapat digantung di
dinding, sehingga pemotong tanaman dapat
disimpan dengan aman dan praktis.
23. Simpan pemotong tanaman dengan penutupnya
diruanganyangkering.Jauhkandarijangkauan
anak-anak. Jangan pernah simpan pemotong di
luar ruangan.
24. Jangan mengoperasikan mesin tanpa beban
yang tidak diperlukan.
25. Jangan arahkan bilah pisau pemangkas ke diri
sendiri atau orang lain.
26. Jika bilah pisau berhenti bergerak karena
benda asing tersangkut di antara bilah pisau
selama pengoperasian, matikan mesin dan
cabut steker, lalu keluarkan benda asing
menggunakan alat seperti tang. Mengeluarkan
bendaasingdengantangandapatmenyebabkan
cederakarenabilahpisaudapatbergeraksebagai
akibatdaridikeluarkannyabendaasingtersebut.
27. Hindari lingkungan berbahaya. Jangan
gunakan mesin di lokasi yang lembap dan
basah, atau membiarkannya terkena hujan.
Air yang masuk ke dalam mesin akan
meningkatkan risiko sengatan listrik.
28. Periksa tanaman pagar dan belukar apakah
ada benda asing di dalamnya, seperti pagar
kawat atau kawat yang tersembunyi sebelum
mengoperasikan alat.
SIMPAN PETUNJUK INI.
PERINGATAN: JANGAN biarkan
kenyamanan atau terbiasanya Anda dengan
produk (karena penggunaan berulang)
mengurangi kepatuhan yang ketat terhadap
aturan keselamatan untuk produk yang
terkait. PENYALAHGUNAAN atau kelalaian
dalam mematuhi kaidah keselamatan
yang tertera padapetunjuk ini dapat
menyebabkan cedera badan serius.
Other manuals for UH5580
7
This manual suits for next models
2
Table of contents
Languages:
Other Makita Trimmer manuals

Makita
Makita UH004G User manual

Makita
Makita 3708 User manual

Makita
Makita BUR360 User manual

Makita
Makita UH3000DW User manual

Makita
Makita DUR193RF User manual

Makita
Makita 3712 User manual

Makita
Makita DUR141 User manual

Makita
Makita DUN500W User manual

Makita
Makita DRT50ZX06 User manual

Makita
Makita 3708F User manual

Makita
Makita UH3502 User manual

Makita
Makita BCM3310 User manual

Makita
Makita EH6000S User manual

Makita
Makita DUR365U User manual

Makita
Makita UR008GD201 User manual

Makita
Makita DUN500W User manual

Makita
Makita UR012G User manual

Makita
Makita UH013G User manual

Makita
Makita 3710 User manual

Makita
Makita EH760 User manual