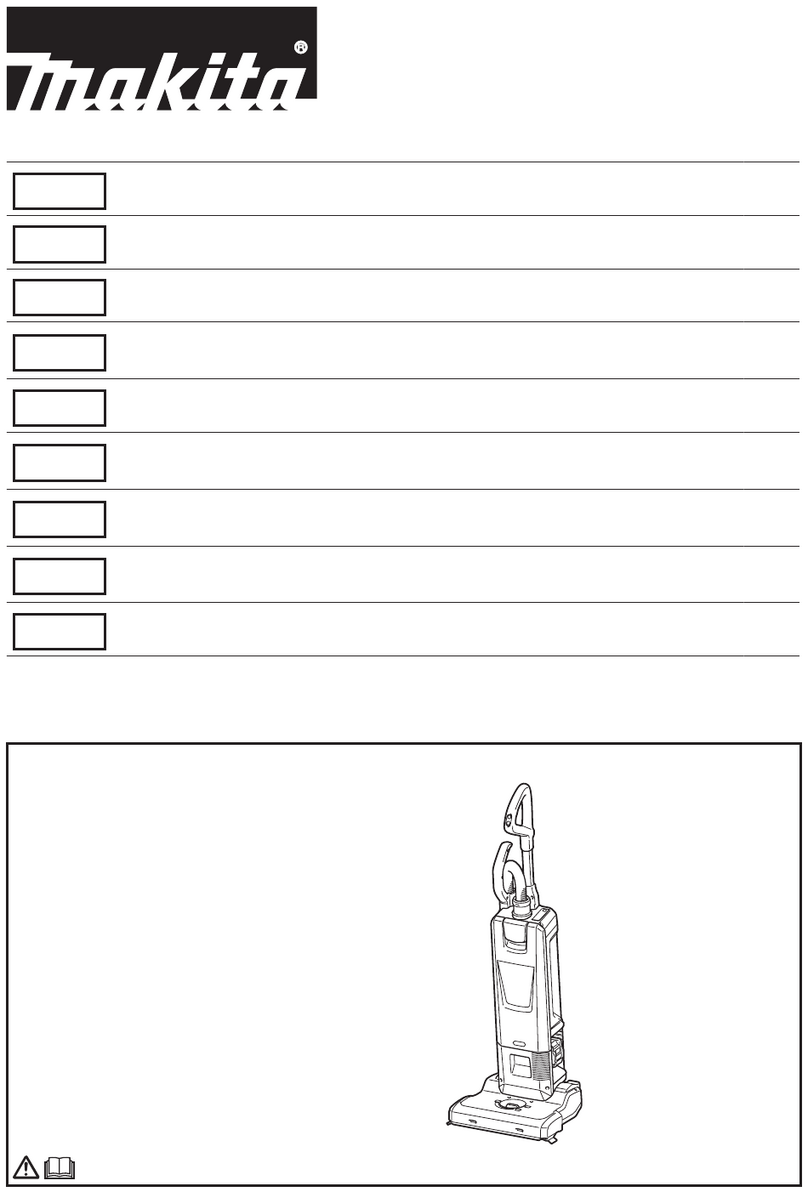
Makita DVC560 User manual

DVC560
EN Cordless Upright Cleaner INSTRUCTION MANUAL 8
ZHCN 充电直立式吸尘器 使用说明书 18
ID Pembersih Debu Model
Berdiri Tanpa Kabel PETUNJUK PENGGUNAAN 29
MS Pembersih Vakum Tegak
Tanpa Kord MANUAL ARAHAN 41
VI Máy Hút Bụi Thẳng Đứng
Dùng Pin TÀI LIỆU HƯỚNG DẪN 53
TH 63

14
13
7
6
10
11
22 23
21
1
2
3
4
24
25
15 16
5
12
8
9
17
18
19
20
26
27
28
29
30
Fig.1
1
2
3
Fig.2
Fig.3
2

1
2
Fig.4
Fig.5
1
2
Fig.6
1
2
Fig.7
1
2
Fig.8
Fig.9
3
1
4
2
Fig.10
3

12
Fig.11
Fig.12
2
1
Fig.13
1
2
Fig.14
1
4
5
2
3
Fig.15
Fig.16
1
2
Fig.17
1
Fig.18
4

1
Fig.19
Fig.20
1
AB
Fig.21
Fig.22
Fig.23
Fig.24
5

1
Fig.25
1
Fig.26
1
Fig.27
1
Fig.28
Fig.29
Fig.30
Fig.31
1
Fig.32
6

1
2
3
Fig.33
1
2
Fig.34
1
Fig.35
Fig.36
1
2
Fig.37
1
2
Fig.38
7

8ENGLISH
ENGLISH (Original instructions)
WARNING
• This machine is not intended for use by persons including children with reduced physical, sensory or mental
capabilities, or lack of experience and knowledge.
• Children should be supervised to ensure that they do not play with the cleaner.
• See the chapter “SPECIFICATIONS” for the type reference of the battery.
• See the section “Installing or removing battery cartridge” for how to remove or install the battery.
• When disposing the battery cartridge, remove it from the tool and dispose of it in a safe place. Follow your local
regulations relating to disposal of battery.
• If the tool is not used for a long period of time, the battery must be removed from the tool.
• Do not short the battery cartridge.
• See the chapter “MAINTENANCE” for the appropriate details of precautions during user maintenance.
SPECIFICATIONS
Model: DVC560
Maximum air volume * 1.9 m3/min
Vacuum * 12 kPa
Capacity 5 L
Dimensions (L x W x H) 326 mm x 318 mm x 1,146 mm
Rated voltage D.C. 36 V
Net weight 8.3 - 9.0 kg
* The value is measured by our original method.
• Duetoourcontinuingprogramofresearchanddevelopment,thespecicationshereinaresubjecttochange
without notice.
• Specicationsandbatterycartridgemaydierfromcountrytocountry.
• The weight includes accessories (round brush, corner nozzle) and battery cartridge(s). The lightest and heavi-
est combination weight of the appliance and battery cartridge(s) are shown in the table.
Applicable battery cartridge and charger
Battery cartridge BL1815N / BL1820B / BL1830B / BL1840B / BL1850B / BL1860B
Charger DC18RC / DC18RD / DC18RE / DC18SD / DC18SE / DC18SF /
DC18SH
• Some of the battery cartridges and chargers listed above may not be available depending on your region of
residence.
WARNING: Only use the battery cartridges and chargers listed above. Use of any other battery cartridges
andchargersmaycauseinjuryand/orre.

9ENGLISH
Symbols
The followings show the symbols which may be used
for the equipment. Be sure that you understand their
meaning before use.
Read instruction manual.
Take particular care and attention.
Ni-MH
Li-ion
Only for EU countries
Due to the presence of hazardous com-
ponents in the equipment, waste electrical
and electronic equipment, accumulators
and batteries may have a negative impact
on the environment and human health.
Do not dispose of electrical and electronic
appliances or batteries with household
waste!
In accordance with the European Directive
on waste electrical and electronic equip-
ment and on accumulators and batteries
and waste accumulators and batteries,
as well as their adaptation to national law,
waste electrical equipment, batteries and
accumulators should be stored separately
and delivered to a separate collection point
for municipal waste, operating in accor-
dance with the regulations on environmen-
tal protection.
This is indicated by the symbol of the
crossed-out wheeled bin placed on the
equipment.
Intended use
The appliance is intended for collecting dry dust. The
appliance is suitable for commercial use, for example in
hotels,schools,hospitals,factories,shops,ocesand
rental businesses.
SAFETY WARNINGS
Cordless vacuum cleaner safety
warnings
WARNING: IMPORTANT! READ CAREFULLY
all safety warnings and all instructions BEFORE
USE. Failure to follow the warnings and instructions
mayresultinelectricshock,reand/orseriousinjury.
1. Before use, make sure that this cleaner must
be used by people who have been adequately
instructed on the use of this cleaner.
2. Do not use without lter bag and/or lters in
place. Replace a damaged lter immediately.
3. AVOID UNINTENTIONAL STARTING. Be sure
switch is OFF when installing battery(ies).
4. Do not attempt to pick up ammable materials,
re works, lighted cigarettes, hot ashes, hot
metal chips, sharp materials such as razors,
needles, broken glass or the like.
5. NEVER USE THE CLEANER IN THE VICINITY
OF GASOLINE, GAS, PAINT, ADHESIVES OR
OTHER HIGHLY EXPLOSIVE SUBSTANCES.
The switch emits sparks when turned ON
and OFF. And so does the motor commutator
during operation. A dangerous explosion may
result.
6. This cleaner is not suitable for picking up
hazardous dust.
7. Never vacuum up toxic, carcinogenic, com-
bustible or other hazardous materials such
as asbestos, arsenic, barium, beryllium,
lead, pesticides, or other health endangering
materials.
8. Do not use outdoors or on wet surfaces.
9. For Finland, this machine is not to be used
outdoors at low temperature.
10. Do not use the appliance close to heat sources
(stoves, etc.).
11. Do not block suction inlet/outlet/cooling vents.
These vents permit cooling of the motor.
Blockage should be carefully avoided other-
wise the motor will burn out due to a lack of
ventilation.
12. Do not fold, tug or step on the hose.
13. Stop the cleaner immediately if you notice
poor performance or anything abnormal
during operation.
14. REMOVE THE BATTERY(IES). When not in
use, before servicing, and when changing
accessories.
15. Clean and service the cleaner immediately
after each use to keep it in optimum operating
condition.
16. MAINTAIN THE CLEANER WITH CARE. Keep
the cleaner clean for better and safer per-
formance. Follow instructions for changing
accessories. Keep handles dry, clean, and free
from oil and grease.
17. CHECK DAMAGED PARTS. Before further use
of the cleaner, a guard or other part that is
damaged should be carefully checked to deter-
mine that it will operate properly and perform
its intended function. Check for alignment of
moving parts, binding of moving parts, break-
age of parts, mounting, and any other condi-
tions that may aect its operation. A guard or
other part that is damaged should be properly
repaired or replaced by an authorized service
center unless otherwise indicated elsewhere
in this instruction manual. Have defective
switches replaced by authorized service cen-
ter. Don’t use the cleaner if switch does not
turn it on and o.
18. REPLACEMENT PARTS. When servicing, use
only identical replacement parts.
19. When not in use, always store the cleaner
indoors.
20. Be kind to your cleaner. Rough handling can
cause breakage of even the most sturdily built
cleaner.
21. Do not attempt to clean the exterior or interior
with benzine, thinner or cleaning chemicals.
Cracks and discoloration may be caused.

10 ENGLISH
22. Do not use cleaner in an enclosed space where
ammable, explosive or toxic vapors are given
o by oil-base paint, paint-thinner, gasoline,
some mothproong substances, etc., or in
areas where ammable dust is present.
23. Do not operate the cleaner or any tool while
under the inuence of drugs or alcohol.
24. Wear appropriate protective equipment
such as a mask depending on the usage
environment.
25. This machine is not intended for use by per-
sons including children with reduced physical,
sensory or mental capabilities, or lack of expe-
rience and knowledge.
26. Children should be supervised to ensure that
they do not play with the cleaner.
27. Never handle battery(ies) and cleaner with wet
hands.
28. Use extreme caution when cleaning on stairs.
29. Keep proper footing and balance at all times.
30. Do not use the cleaner as a stool or work
bench. The machine may fall down and may
result in personal injury.
31. Keep all parts of your body and clothing away
from the openings and moving part like the
rotating brushroll. Otherwise they may be caught
intheapplianceandcauseinjury.
Battery tool use and care
1. Recharge only with the charger specied by
the manufacturer. A charger that is suitable for
onetypeofbatterypackmaycreateariskofre
when used with another battery pack.
2. Use power tools only with specically desig-
nated battery packs. Use of any other battery
packsmaycreateariskofinjuryandre.
3. When battery pack is not in use, keep it away
from other metal objects, like paper clips,
coins, keys, nails, screws or other small metal
objects, that can make a connection from one
terminal to another. Shorting the battery termi-
nalstogethermaycauseburnsorare.
4. Under abusive conditions, liquid may be
ejected from the battery; avoid contact. If con-
tact accidentally occurs, ush with water. If
liquid contacts eyes, additionally seek medical
help.Liquidejectedfromthebatterymaycause
irritation or burns.
5. Do not use a battery pack or tool that is dam-
aged or modied.Damagedormodiedbatteries
may exhibit unpredictable behaviour resulting in
re,explosionorriskofinjury.
6. Do not expose a battery pack or tool to re or
excessive temperature.Exposuretoreortem-
perature above 130 °C may cause explosion.
7. Follow all charging instructions and do not
charge the battery pack or tool outside the
temperature range specied in the instruc-
tions. Charging improperly or at temperatures
outsidethespeciedrangemaydamagethe
batteryandincreasetheriskofre.
SAVE THESE INSTRUCTIONS.
WARNING: DO NOT let comfort or familiarity
with product (gained from repeated use) replace
strict adherence to safety rules for the subject
product. MISUSE or failure to follow the safety
rules stated in this instruction manual may cause
serious personal injury.
Important safety instructions for
battery cartridge
1. Before using battery cartridge, read all instruc-
tions and cautionary markings on (1) battery
charger, (2) battery, and (3) product using
battery.
2. Do not disassemble or tamper with the battery
cartridge.Itmayresultinare,excessiveheat,
or explosion.
3. If operating time has become excessively
shorter, stop operating immediately. It may
result in a risk of overheating, possible burns
and even an explosion.
4. If electrolyte gets into your eyes, rinse them
out with clear water and seek medical atten-
tion right away. It may result in loss of your
eyesight.
5. Do not short the battery cartridge:
(1) Do not touch the terminals with any con-
ductive material.
(2) Avoid storing battery cartridge in a con-
tainer with other metal objects such as
nails, coins, etc.
(3) Do not expose battery cartridge to water
or rain.
A battery short can cause a large current
ow, overheating, possible burns and even a
breakdown.
6. Do not store and use the tool and battery car-
tridge in locations where the temperature may
reach or exceed 50 °C (122 °F).
7. Do not incinerate the battery cartridge even if
it is severely damaged or is completely worn
out. The battery cartridge can explode in a re.
8. Do not nail, cut, crush, throw, drop the battery
cartridge, or hit against a hard object to the
battery cartridge. Such conduct may result in a
re,excessiveheat,orexplosion.
9. Do not use a damaged battery.
10. The contained lithium-ion batteries are subject
to the Dangerous Goods Legislation require-
ments.
For commercial transports e.g. by third parties,
forwarding agents, special requirement on pack-
aging and labeling must be observed.
For preparation of the item being shipped, consult-
ing an expert for hazardous material is required.
Please also observe possibly more detailed
national regulations.
Tapeormaskoopencontactsandpackupthe
battery in such a manner that it cannot move
around in the packaging.
11. When disposing the battery cartridge, remove
it from the tool and dispose of it in a safe
place. Follow your local regulations relating to
disposal of battery.
11 ENGLISH
12. Use the batteries only with the products
specied by Makita. Installing the batteries to
non-compliantproductsmayresultinare,exces-
sive heat, explosion, or leak of electrolyte.
13. If the tool is not used for a long period of time,
the battery must be removed from the tool.
14. During and after use, the battery cartridge may
take on heat which can cause burns or low
temperature burns. Pay attention to the han-
dling of hot battery cartridges.
15. Do not touch the terminal of the tool imme-
diately after use as it may get hot enough to
cause burns.
16. Do not allow chips, dust, or soil stuck into the
terminals, holes, and grooves of the battery
cartridge. It may result in poor performance or
breakdown of the tool or battery cartridge.
17. Unless the tool supports the use near
high-voltage electrical power lines, do not use
the battery cartridge near high-voltage electri-
cal power lines. It may result in a malfunction or
breakdown of the tool or battery cartridge.
18. Keep the battery away from children.
SAVE THESE INSTRUCTIONS.
CAUTION: Only use genuine Makita batteries.
Use of non-genuine Makita batteries, or batteries that
have been altered, may result in the battery bursting
causingres,personalinjuryanddamage.Itwill
also void the Makita warranty for the Makita tool and
charger.
Tips for maintaining maximum
battery life
1. Charge the battery cartridge before completely
discharged. Always stop tool operation and
charge the battery cartridge when you notice
less tool power.
2. Never recharge a fully charged battery car-
tridge. Overcharging shortens the battery
service life.
3. Charge the battery cartridge with room tem-
perature at 10 °C - 40 °C (50 °F - 104 °F). Let
a hot battery cartridge cool down before
charging it.
4. When not using the battery cartridge, remove
it from the tool or the charger.
5. Charge the battery cartridge if you do not use
it for a long period (more than six months).
PARTS DESCRIPTION
►Fig.1
1Handle 2Switch plate 3Pipe grip 4Hose
5Indication panel 6Lever (for the dust box
cover)
7Dust box cover 8Carrying handle
9Lock (for battery cover) 10 Adjustinglever 11 Battery cover 12 Corner nozzle
13 Round brush 14 Foot lever 15 Caster wheel 16 Side brush
17 Suction hose 18 Joint 19 Aluminum pipe 20 Pipe holder
21 LED lamp 22 Brushroll 23 Bottom plate 24 ON / mode change
button
25 OFF button 26 Indicator of oparating
mode
27 Indicator of excess level
of dust
28 Indicator of brushroll
error
29 Indicator for remaining
battery capacity
30 Battery check / LED
lamp button
- - - -
ASSEMBLY
CAUTION: Always be sure that the appli-
ance is switched o and the battery cartridge
is removed before carrying out any work on the
appliance.
CAUTION: Always wear dust mask during
assembly or maintenance.
Handle connecting
1. Insert the handle pole fully to the cleaner body as
showninthegure.
2. Close the lock latch.
►Fig.2: 1. Handle pole 2. Red marking 3. Lock latch
NOTICE: Insert the handle fully until the red
marking cannot be seen.
Hose connecting
Insert the hose into the mounting port of the appliance
and turn the horse until it locks.
►Fig.3

12 ENGLISH
Pipe connecting
Insertthetipofthealuminumpipetothejoint,andthen
attach the aluminum pipe to the pipe holder.
►Fig.4: 1. Joint 2. Pipe holder
NOTICE: Insert the aluminum pipe in correct
direction as shown in gure. Otherwise the pipe
holder will not be locked and the aluminum pipe may
comeo.
►Fig.5
Installing or removing battery
cartridge
CAUTION: Always switch o the appliance
before installing or removing of the battery
cartridge.
CAUTION: Hold the cleaner and the battery
cartridge rmly when installing or removing bat-
tery cartridge. Failure to hold the cleaner and the
batterycartridgermlymaycausethemtoslipo
your hands and result in damage to the cleaner and
batterycartridgeandapersonalinjury.
CAUTION: Be careful not to pinch your n-
gers when opening or closing the battery cover.
Failuretodosomaycausepersonalinjury.
Toinstallthebatterycartridge,releasethelockrst,and
then open the battery cover. After that, insert the battery
cartridge.
►Fig.6: 1. Lock 2. Battery cover
Align the tongue on the battery cartridge with the groove
in the housing and slip it into place. Insert it all the way
until it locks in place with a little click. Then lock the
battery cover.
►Fig.7: 1. Battery cartridge 2. Button
To remove the battery cartridge, slide it from the appli-
ance while sliding the button in front of the cartridge.
CAUTION: Always install the battery cartridge
fully. If not, it may accidentally fall out of the appli-
ance,causinginjurytoyouorsomeonearoundyou.
CAUTION: Do not install the battery cartridge
forcibly. If the cartridge does not slide in easily, it is
not being inserted correctly.
NOTE: The cleaner does not work with only one
battery cartridge.
Installing the lter bag
CAUTION: Do not use a damaged lter bag.
Always use the vacuum cleaner with the lter bag
properly installed. Otherwise the vacuumed dust
or particles may be exhausted from the cleaner
and they may cause respiratory disease to the
operator.
Installthelterbagbeforeusingcleaner.
Filter bag is a throw-away type. Throw away the entire
lterbagwithoutemptyingwhenithasbecomefull.
NOTICE: When the lter bag is already full or
clogged, replace with new one. Continuous use
withthelterbagfullorcloggedresultsinreduced
suction power.
NOTICE: To prevent dust from getting into the
motor:
— Make sure that the lter bag is installed
before use.
— Do not use a broken or ripped bag.
Otherwise the motor may be broken.
NOTICE: Do not fold the cardboard at its open-
ing when installing the lter bag.
NOTICE: The lter bag for the cleaner is an
important component for maintaining the appli-
ance performance. Using non-genuine lter bag
may cause smoke or ignition.
NOTE:Whenthelterbagisnotinstalledintheappli-
ance, the dust box cover does not close completely.
1. Unlock the lever and open the dust box cover.
►Fig.8: 1. Lever 2. Dust box cover
2. Unfoldthelterbagfully.
►Fig.9
3. Insertthelterbagintotheslotontheholderso
that the side with mark entersrst.
4. Hook the latch of the holder.
►Fig.10: 1. Slot 2. Filter bag 3. Holder 4. Latch
5. Make sure that only the marking on the cardboard
can be seen through the slit of the holder.
►Fig.11: 1. Marking 2. Slit
6. Unfoldthelterbagifitisfolded.
►Fig.12
7. Lock the dust box cover certainly.
CAUTION: Be careful not to pinch your n-
gers when hooking the latch, and when closing
the dust box cover.
Removing the lter bag
CAUTION: Handle the lter bag softly.
Otherwiseforeignobjectsareblownintoeyes,itmay
resultinpersonalinjury.
Replacethelterbagwhenitbecomesfullorclogged.
Open the dust box cover and open the latch, then take
outthelterbag.
Pullthestriponthesideoftheopeningtoshutthelter
baganddisposeofthelterbaginwhole.
►Fig.13: 1. Latch 2. Strip
NOTICE: Do not use a used lter bag.Thelter
bagisdesignedforsingleuse.Usinglterbagrepeat-
edlymaycausecloggingofthelterandresultsin
damage to the appliance.

13 ENGLISH
FUNCTIONAL
DESCRIPTION
CAUTION: Always be sure that the appli-
ance is switched o and the battery cartridge is
removed before adjusting or checking function on
the appliance.
Tool / battery protection system
The tool is equipped with a tool/battery protection sys-
tem.Thissystemautomaticallycutsopowertothe
motor to extend tool and battery life. The tool will auto-
matically stop during operation if the tool or battery is
placed under one of the following conditions:
Overload protection
When the tool is operated in a manner that causes it to
draw an abnormally high current, the tool automatically
stops without any indication. In this situation, turn the
tooloandstoptheapplicationthatcausedthetoolto
become overloaded. Then turn the tool on to restart.
Overheat protection
On Blinking
When the tool is overheated, the tool stops automati-
cally, and the battery indicator blinks about 60 seconds.
In this situation, let the tool cool down before turning the
tool on again.
Overdischarge protection
When the battery capacity becomes low, the tool stops
automatically. If the product does not operate even
when the switches are operated, remove the batteries
from the tool and charge the batteries.
Indicating the remaining battery
capacity
Only for battery cartridges with the indicator
►Fig.14: 1. Indicator lamps 2. Check button
Press the check button on the battery cartridge to indi-
cate the remaining battery capacity. The indicator lamps
light up for a few seconds.
Indicator lamps Remaining
capacity
Lighted O Blinking
75% to 100%
50% to 75%
25% to 50%
0% to 25%
Charge the
battery.
The battery
may have
malfunctioned.
NOTE: Depending on the conditions of use and the
ambienttemperature,theindicationmaydierslightly
from the actual capacity.
NOTE:Therst(farleft)indicatorlampwillblinkwhen
the battery protection system works.
Indication panel
►Fig.15: 1. Operating mode 2. Excess level of dust
3. Brushroll error 4. Remaining battery
capacity 5. Battery check / LED lamp button
Operating mode
To change the operating mode, refer to the section for
switch action.
Excess level of dust
Ifthisindicatorlightsup,replacethelterbag.(Refer
thesectionofremovingthelterbag.)
NOTE: This indicator does not work when the appli-
ance operates in “lower noise level (1)” mode.
NOTE: This indicator may not work depending on the
usage environment.
NOTE: The indicator automatically goes out approxi-
matelyoneminuteaftertheapplianceisswitchedo.
Ifyouclearthecloggingofthelterbagandrestart
the appliance, the indicator goes out even within one
minute.
Brushroll error
Blinking The brushroll is under high
load for some reasons.
On The brushroll is stopped by
abnormal reason.
WARNING: Immediately switch o the appli-
ance when this lamp lights up during operation.
Otherwise the motor malfunction may occur and
causere.

14 ENGLISH
Remaining battery capacity
During operation, press the battery check / LED lamp
button to indicate the remaining battery capacities. The
battery indicators correspond to each battery.
►Fig.16
Battery indicator status Remaining
battery
capacity
On O Blinking
50% to 100%
20% to 50%
0% to 20%
Charge the
battery
Battery check / LED lamp button
During operation, the following operations can be
performed.
• Simply press the button to check the remaining
battery capacity.
• Pressandholdthebuttontoturnon/otheLED
lamp.
Switch action
►Fig.17: 1. ON / mode change button 2. OFF button
Turning on / o the appliance
To start the appliance, simply push the ON / mode
changebutton.Toswitcho,pushtheOFFbutton.
CAUTION: Always put the head of the appli-
ance on the oor when turning on the appliance.
Otherwise an accident due to entanglement may
occurandcauseapersonalinjury.
Changing operating mode
You can change the operating mode in three steps:
“lower noise level (1)”, “normal (2)”, and “high (3)”.
If you want to change operating mode, press the ON
/ mode change button when the appliance is running.
The operating mode switches in order “lower noise level
(1)” , “normal (2)” , and “high (3)”.
The appliance will start in the same mode as the previ-
ous setting.
Lighting up the LED lamp
CAUTION: Do not look in the light or see the
source of light directly.
The appliance is equipped with the LED lamps.
See the paragraph of the battery check / LED lamp
button for operation.
►Fig.18: 1. LED lamp
Foot lever
CAUTION: Always lock the appliance in
upright position when you let go of the handle.
Otherwise the appliance may accidentally fall and
causeinjury.
CAUTION: Be careful not to pinch your n-
gers between the main body and the head of the
appliance.
To unlock the upright position of the appliance, step on
the foot lever and pull the handle backward.
The range of motion is 90 degrees from the upright
position.
►Fig.19: 1. Foot lever
To lock the appliance in upright position, raise up the
handle forward until the foot lever locks the position
with click.
►Fig.20
NOTE: While the appliance is in the upright position,
the brushroll stops rotating.
Adjusting the height of brushroll
CAUTION: Always make sure that the adjust-
ing lever comes into the position properly before
operation.
Theheightofbrushrollcanbeadjustedin4steps.
Turntheadjustinglevertoyourdesiredheight.
WhentheadjustingleverpointstheAmark,the
brushrollislocatedatthelowestpointabovetheoor
andissuitableforcleaninghardoorsandshort-haired
carpets.WhentheadjustingleverpointstheBmark,the
brushrollislocatedatthehighestpointabovetheoor
and is suitable for cleaning long-haired carpets.
►Fig.21: 1.Adjustinglever
NOTE: The brushroll may not rotate if the height of
brushroll is too low against the surface of the carpet.
Carrying handle
When carrying the appliance, push the appliance with
the caster wheels only, or carry it by holding the carry-
ing handle(s).
►Fig.22

15 ENGLISH
CAUTION: When carrying the appliance, lock
the appliance in upright position. Otherwise falling
accident may occur.
CAUTION: Do not carry the appliance
with anything other than the carrying handle.
Otherwise falling accident may occur or unintentional
startingmaycauseaninjury.
►Fig.23
OPERATION
CAUTION: Do not pull out the handle pole
from the appliance during operation. Doing so lose
controloftheapplianceandmayresultseriousinjury.
CAUTION: Do not put your hand or leg under
the appliance during operation. Otherwise pinching
accident may occur.
Normal cleaning operation
1. Hold the handle, and then unlock the upright
position.
2. Turnontheappliance.Cleanaoor.
►Fig.24
Using the side brush
The side brush is convenient for cleaning the corner of
a wall.
If the side brush gets short, take the appliance to the
Makita service center for replacement
►Fig.25: 1. Side brush
Operation with accessories
CAUTION: Keep holding the handle when
using accessories. Otherwise the appliance may
accidentallyfallandcauseinjury.
NOTICE: When using accessories, lock the
appliance in upright position. Otherwise the rota-
tionofthebrushrollmaydamagetheoor.
Using the aluminum pipe
The aluminum pipe is suitable for cleaning tight quar-
ters, or high places.
►Fig.26: 1. Aluminum pipe
Using the hose
The hose is suitable for cleaning near your hands.
►Fig.27: 1. Hose
To use the hose, pull out the aluminum pipe from the
hose while pushing the lever.
To install the hose, insert the hose into the aluminum
pipe until it clicks.
►Fig.28: 1. Lever
Using the attachments
►Fig.29
To install the attachment, twist and insert it securely to
the aluminum pipe or the hose. To disconnect, twist and
remove it.
MAINTENANCE
CAUTION: Always be sure that the appli-
ance is switched o and the battery cartridge is
removed before attempting to perform inspection
or maintenance.
NOTICE: Never use gasoline, benzine, thinner,
alcohol or the like. Discoloration, deformation or
cracks may result.
To maintain product SAFETY and RELIABILITY,
repairs,anyothermaintenanceoradjustmentshould
be performed by Makita Authorized or Factory Service
Centers, always using Makita replacement parts.
Storage
When storing, remove the battery cartridges and store
the appliance on level place in upright position.
►Fig.30
Cleaning the appliance body
Fromtimetotimewipeotheoutside(cleanerbody)of
the cleaner using a cloth dampened in soapy water.
►Fig.31
Cleaning the HEPA lter
CAUTION: Do not use the cleaner without a
lter or continue to use dirty or damaged lter.
Vacuumed dust or particles may be exhausted
from the cleaner and they may cause respiratory
disease to the operator.
NOTICE: To keep optimum suction power and
clean exhaust, clean the lter periodically. If
enough suction power is not obtained even after
the cleaning, replace the lter with new one.
NOTICE: To prevent the lter from being dam-
aged, do not use following tools and similar items
for cleaning :
— Air duster
— High pressure washer
— Tools made of hard materials such as a
metallic brush
1. Openthedustboxcoverandtakeoutthelter
bag.
Releasethehooksonthelterandremoveitfromthe
appliance body.
►Fig.32: 1. Hook

16 ENGLISH
2. Beatthedustofromthelter.Theltercanbe
washed with water. Rinse away the dust and particles
onthelterevery1or2month.Afterthat,drythelter
completely in a shaded and well-ventilated place to
prevent unpleasant odor or malfunctions.
3. Toinstallthelter,insertthesidewithoutthe
hooksintothegroovethenpushinthelteruntilthe
hooks are secured with a click.
►Fig.33: 1. Groove 2.HEPAlter3. Hook
Cleaning the brushroll
1. Remove the bottom plate, and then remove the
brushroll.
If the hair of the brushroll gets short, ask the Makita
service center for new one.
Operating the appliance with the short hair brushroll
results in poor dust collecting.
►Fig.34: 1. Bottom plate 2. Brushroll
2. Remove threads and hairs from the brushroll
using scissors.
Remove the cap and clean debris.
►Fig.35: 1. Cap
3. Install the cap, brushroll, and bottom plate in
reverse order.
►Fig.36
CAUTION: Attach the bottom plate com-
pletely. If the appliance is operated without the
bottomplate,thebrushrollmaycomeoandcause
injury.
NOTICE: Always attach the brushroll. Operating
the appliance without the brushroll results in poor
dust collecting.
How to clear the clog
NOTICE: Do not operate the appliance with the
intake ow path clogged. Continuous use with the
intakeowpathcloggedresultsinreducedsuction
power.
1. Remove the bottom plate, and then remove the
brushroll.
2. Remove the aluminum pipe from the appliance
and from the hose.
3. Turn the hose counterclockwise, and then remove
the hose from the appliance.
4. Remove the suction hose by pulling the tab.
►Fig.37: 1. Suction hose 2. Tab
5. Inspecttheintakeowpathofairfortheinsideof
the aluminum pipe and the hose, and the suction hose.
Clean debris inside of them.
6. Align the tongue of the suction hose with the
groove in the housing and slip it into place.
►Fig.38: 1. Tongue 2. Groove
7. Install the hose, aluminum pipe, brushroll, and
bottom plate.
CAUTION: Install the hose, pipe rmly.
Otherwisedustleakagemayoccurandcauseinjury.

17 ENGLISH
TROUBLESHOOTING
Beforeaskingforrepairs,conductyourowninspectionrst.Ifyoundaproblemthatisnotexplainedinthemanual,
do not attempt to disassemble the machine. Instead, ask Makita Authorized Service Centers, always using Makita
replacement parts for repairs.
Symptom Probable cause Remedy
Not working Battery cartridges are installed improperly. Install the battery cartridges as described
in this manual.
The battery cartridges are exhausted. Charge the battery cartridges.
The handle is installed improperly. Installthehandlermlyasdescribedin
this manual.
The brushroll does not rotate The appliance is locked in upright position. Unlock the upright position of the
appliance.
The indicator of brushroll error is lighting. Inspect that there is no entanglement
aroundthebrushroll(body,capandjoint).
Weak suction power The indicator of excess level of dust is
lighting.
Replacethelterbag.
Ifthelterbagisnotfull,unfoldthelter
bag and shake it to clear the clogging.
Ifreplacingthelterbagdoesnotsolve
the problem...
CleanorreplacetheHEPAlter.
Inspect that there is no debris clogged in
the hose and pipe.
Debris is entangled in the brushroll and the
rotating speed is declined.
Inspect that there is no entanglement
aroundthebrushroll(body,cap,joint).
The height of brushroll is too high from
theoor.
Lower the height of the brushroll.
The hair of brushroll has become short. Replace the brushroll.
Lower the height of the brushroll.
The appliance is operating in low mode. Change to the higher operating mode.
The brushroll is not installed. Install the brushroll.
The pipe or the hose is installed
improperly.
Installthepipeorthehosermly.
Loud driving noise The appliance is operating in high mode. Change to the lower operating mode.
Debris is entangled in the brushroll. Inspect that there is no entanglement
aroundthebrushroll(body,capandjoint).
Thelterbagislledwithdust. Replacethelterbag.
Ifreplacingthelterbagdoesnotsolve
the problem...
CleanorreplacetheHEPAlter.
Inspect that there is no debris clogged in
the hose and pipe.
The indicator of excess level of dust blinks
after a little use
Thelterbagisfolded. Unfoldtheentranceofthelterbagbefore
setting it.
LED lamp does not light TheLEDlampsettingiso. During operation, press and hold the
battery check / LED lamp button to turn on
the LED lamp.
The caster wheel is hard to move Debris is entangled in the caster wheel. Clean the debris on the caster wheel.
OPTIONAL
ACCESSORIES
CAUTION: These accessories or attachments
are recommended for use with your Makita tool
specied in this manual. The use of any other
accessories or attachments might present a risk of
injurytopersons.Onlyuseaccessoryorattachment
for its stated purpose.
If you need any assistance for more details regard-
ing these accessories, ask your local Makita Service
Center.
• Corner nozzle
• Round brush
• HEPAlter
• Filter bag
• Makita genuine battery and charger
NOTE: Some items in the list may be included in the
tool package as standard accessories. They may
dierfromcountrytocountry.

18
中文简体
中文简体 (原本)
警告
• 本设备不得由不熟悉操作说明的人员(包括小孩)和体力、感觉及心智不健全或缺乏经
验和知识的人员使用。
• 应看管好儿童,勿让其玩耍本吸尘机。
• 有关电池的类型信息,请参阅“规格”章节。
• 有关如何拆卸或安装电池的信息,请参阅“安装或拆卸电池组”部分。
• 丢弃电池组时,需将其从工具上卸下并在安全地带进行处理。关于如何处理废弃的电池,
请遵循当地法规。
• 如长时间不使用工具,必须将电池从工具内取出。
• 请勿使电池组短路。
• 有关用户维护期间的注意事项的详情,请参阅“维护”章节。
规格
型号: DVC560
最大风量*1.9 m3/min
真空吸力*12 kPa
容量 5 L
尺寸(长 ×宽×高) 326 mm ×318 mm ×1,146 mm
额定电压 D.C. 36 V
净重 8.3 - 9.0 kg
* 数据来源于Makita的原始测量方法。
• 生产者保留变更规格不另行通知之权利。
• 规格和电池组可能因销往国家之不同而异。
• 净重包括附件(圆刷、角落集尘口)和电池组的重量。设备和电池组的最轻及最重组合
重量见表格。
适用电池组和充电器
电池组 BL1815N / BL1820B / BL1830B /
BL1840B / BL1850B / BL1860B
充电器 DC18RC / DC18RD / DC18RE / DC18SD /
DC18SE / DC18SF / DC18SH
• 部分以上所列电池组和充电器是否适用视用户所在地区而异。
警告: 请仅使用以上所列电池组和充电器。使用其他类型的电池组或充电器可能会导
致人身伤害和/或失火。

19
中文简体
符号
以下显示本设备可能会使用的符号。在使用
工具之前,请务必理解其含义。
阅读使用说明书。
特别小心和注意。
Ni-MH
Li-ion 仅限于欧盟国家
由于本设备中包含有害成分,
因此废弃的电气和电子设备、
蓄电池和普通电池可能会对环
境和人体健康产生负面影响。
请勿将电气和电子工具或电池
与家庭普通废弃物放在一起处
置!
根据欧洲关于废弃电气电子设
备、蓄电池和普通电池、废弃
的蓄电池和普通电池的指令及
其国家层面的修订法案,废弃
的电气设备、普通电池和蓄电
池应当单独存放并递送至城市
垃圾收集点,根据环保法规进
行处置。
此规定由标有叉形标志的带轮
垃圾桶符号表示。
用途
本工具用于收集干尘。本工具适合商业用
途,例如,用于酒店、学校、医院、工厂、
商店、办公室和租借的办公场所。
安全警告
充电式吸尘器安全警告
警告: 重要事项 使用前请仔细通读所
有的安全警告和所有的说明事项。若不遵循
警告和说明事项,可能导致触电、起火和/
或严重的人身伤害。
1. 使用前,请确保本集尘器必须由经过培
训的合格人员使用。
2. 过滤袋和/或过滤器未放置到位时请勿
使用。如果过滤器受损,请立即更换。
3. 避免意外启动。安装电池时请确保开关
已关闭。
4. 请勿试图吸取可燃物、鞭炮、点燃的香
烟、热灰、热金属片、以及剃刀、针、
碎玻璃等尖锐物体。
5. 切勿在附近有汽油、煤气、油漆、粘合
剂或其他易爆物质的环境下使用集尘器。
开启和关闭时开关会发出火花。操作期
间电机整流器也会发出火花。可能会导
致爆炸。
6. 该集尘器不适合吸取有毒灰尘。
7. 切勿吸取有毒物质、致癌物质、易燃物
质或石棉、砷、钡、铍、铅、杀虫剂等
有害物质或其他危及健康的物质。
8. 请勿在户外或潮湿的表面上使用。
9. 芬兰地区用户不得在低温户外使用本机。
10. 请勿在热源(火炉等)附近使用本工具。
11. 切勿堵塞吸气口/吹气口/冷却通风口。
这些通风口可冷却电机。应小心避免堵
塞,否则电机会因为通风不足而被烧坏。
12. 请勿折叠、拉拽或踩踏软管。
13. 如果您在操作期间发现性能下降或任何
异常,请立即停止工具。
14. 取出电池。不使用时,维修前或更换附
件时,请断开集尘器电源。
15. 每次使用后请立即清洁和维护吸尘器,
使其处于最佳的工作状态。
16. 小心保养集尘器。保持集尘器的清洁,
以提高产品的性能和安全性。根据说明
更换附件。保持把手干燥、清洁,无油
污和润滑脂。
17. 检查有无部件损坏。在进一步使用集尘
器之前,应仔细检查保护罩或其他部件
有无损坏,以确定工具是否可以正常运
转。检查运动部件是否有偏差或粘连、
部件是否破损、安装是否妥当以及其他
可能会影响工具运行的情况。除非本手
册另有声明,否则应由授权维修中心对
受损保护罩或其他部件进行修复或更换。
失灵的开关由授权的维修中心进行更换。
如果开关不能开启和关闭集尘器,请勿
使用。
18. 更换部件。进行维修时,请仅使用与原
来相同的更换部件。
19. 存放闲置的集尘器。不使用时,应将集
尘器存放在室内。
20. 善待集尘器。即便集尘器再结实,野蛮
操作也会将其损坏。
21. 请勿试图用苯、稀释剂或清洁用化学品
清洁工具的外部或内部。否则可能会导
致工具破裂和褪色。
22. 请勿在存放有油基涂料、涂料稀释剂、
汽油或防蛀物品,会释放出易燃、易爆
或有毒气体的密闭空间里或存在易燃灰
尘的地方使用集尘器。

20
中文简体
23. 请勿在服药或饮酒的情况下操作本工具
或其他工具。
24. 根据使用环境来穿戴合适的保护装备,
例如面罩。
25. 本设备不得由不熟悉操作说明的人员
(包括小孩)和体力、感觉及心智不健
全或缺乏经验和知识的人员使用。
26. 应看管好儿童,勿让其玩耍本吸尘机。
27. 切勿用湿手操作电池和集尘器。
28. 清洁楼梯时要特别注意安全。
29. 操作时请双脚站稳,始终保持平衡。
30. 切勿将集尘器当做凳子或工作台使用。
机器可能会跌倒导致人身伤害。
31. 确保身体和衣物远离通风口和移动部件,
如处于旋转状态的刷辊。否则,它们可
能会被卷入工具内并造成人身伤害。
用电池驱动的电动工具的使用和保养
1. 请仅使用制造商指定的充电器进行充电。
将适用于某一种类型电池组的充电器用
于其他类型的电池组时,可能会导致起
火。
2. 电动工具仅可使用专门指定的电池组。
使用其他类型的电池组可能会导致人身
伤害或起火。
3. 不使用电池组时请将其远离纸夹、硬币、
钥匙、钉子、螺丝或其他小型金属物体
放置。这些物体可能会使电池端子短路。
这些物体可能会使电池端子短路,引起
燃烧或起火。
4. 使用过度时,电池中可能溢出液体。请
避免接触。如果意外接触到电池漏液,
请用水冲洗。如果液体接触到眼睛,请
就医。电池漏液可能会导致过敏发炎或
灼伤。
5. 不要使用损坏或改装过的电池包或工具。
损坏或改装过的电池组可能呈现无法预
测的结果,导致着火、爆炸或伤害。
6. 不要将电池包暴露于火或高温中。电池
包暴露于火或高于130 ℃的高温中可能
导致爆炸。
7. 遵循所有充电说明。不要在说明书中指
定的温度范围之外给电池包或电动工具
充电。 不正确或在指定的温度范围外充
电可能会损坏电池和增加着火的风险。
请保留此说明书。
警告: 请勿为图方便或因对产品足够熟
悉(由于重复使用而获得的经验)而不严格
遵循相关产品安全规则。使用不当或不遵循
使用说明书中的安全规则会导致严重的人身
伤害。
电池组的重要安全注意事项
1. 在使用电池组之前,请仔细通读所有的
说明以及(1)电池充电器,(2)电
池,以及(3)使用电池的产品上的警告
标记。
2. 切勿拆卸或改装电池组。否则可能引起
火灾、过热或爆炸。
3. 如果机器运行时间变得过短,请立即停
止使用。否则可能会导致过热、起火甚
至爆炸。
4. 如果电解液进入您的眼睛,请用清水将
其冲洗干净并立即就医。否则可能会导
致视力受损。
5. 请勿使电池组短路:
(1) 请勿使任何导电材料碰触到端子。
(2) 避免将电池组与其他金属物品如钉
子、硬币等放置在同一容器内。
(3) 请勿将电池组置于水中或使其淋雨。
电池短路将产生大的电流,导致过热,
并可能导致起火甚至击穿。
6. 请勿在温度可能达到或超过50°C
(122°F)的场所存放以及使用工具和电
池组。
7. 即使电池组已经严重损坏或完全磨损,
也请勿焚烧电池组。电池组会在火中爆
炸。
8. 请勿对电池组射钉,或者切削、挤压、
抛掷、掉落电池组,又或者用硬物撞击
电池组。否则可能引起火灾、过热或爆
炸。
9. 请勿使用损坏的电池。
10. 本工具附带的锂离子电池需符合危险品
法规要求。
第三方或转运代理等进行商业运输时,
应遵循包装和标识方面的特殊要求。
有关运输项目的准备作业,咨询危险品
方面的专业人士。同时,请遵守可能更
为详尽的国家法规。
请使用胶带保护且勿遮掩表面的联络信
息,并牢固封装电池,使电池在包装内
不可动。
Other manuals for DVC560
7
Table of contents
Languages:
Other Makita Ultrasonic Jewelry Cleaner manuals

Makita
Makita CL107FD User manual

Makita
Makita 4076D Manual

Makita
Makita DCL285F User manual

Makita
Makita DCL181F User manual

Makita
Makita CL115FD User manual

Makita
Makita DCL184ZO User manual

Makita
Makita CL104DWYX User manual

Makita
Makita DCL142 User manual

Makita
Makita CL003G User manual

Makita
Makita LC08 User manual

Makita
Makita CL114FD User manual

Makita
Makita DCL283F User manual

Makita
Makita DCL282F User manual

Makita
Makita CL106FD User manual

Makita
Makita CL001G User manual

Makita
Makita DCL281FZ User manual

Makita
Makita DCL182 User manual

Makita
Makita CL100D User manual

Makita
Makita DCL282FZ User manual

Makita
Makita VC010G User manual