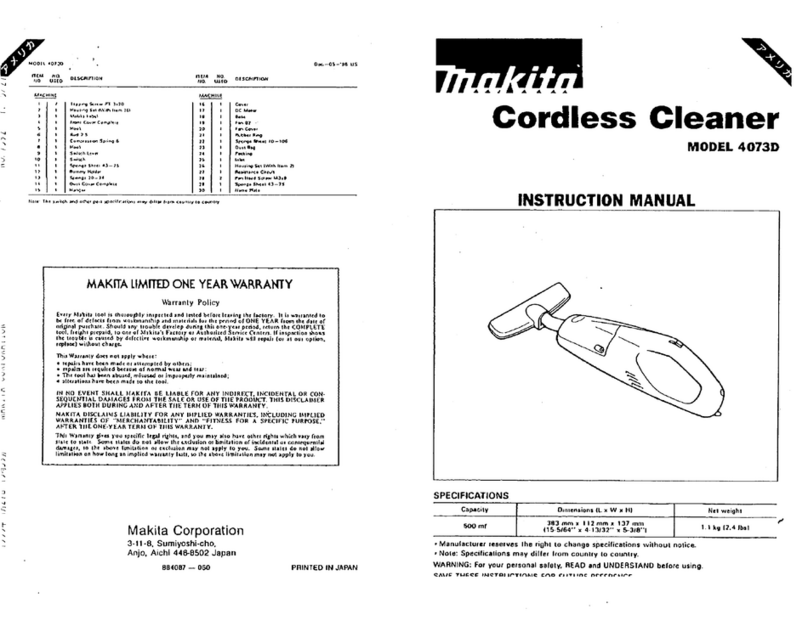
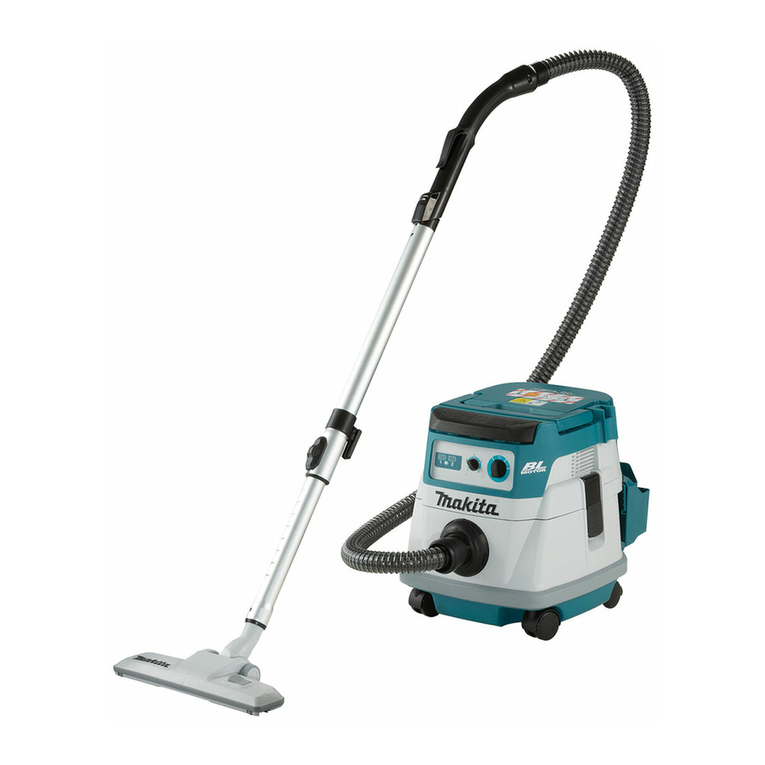
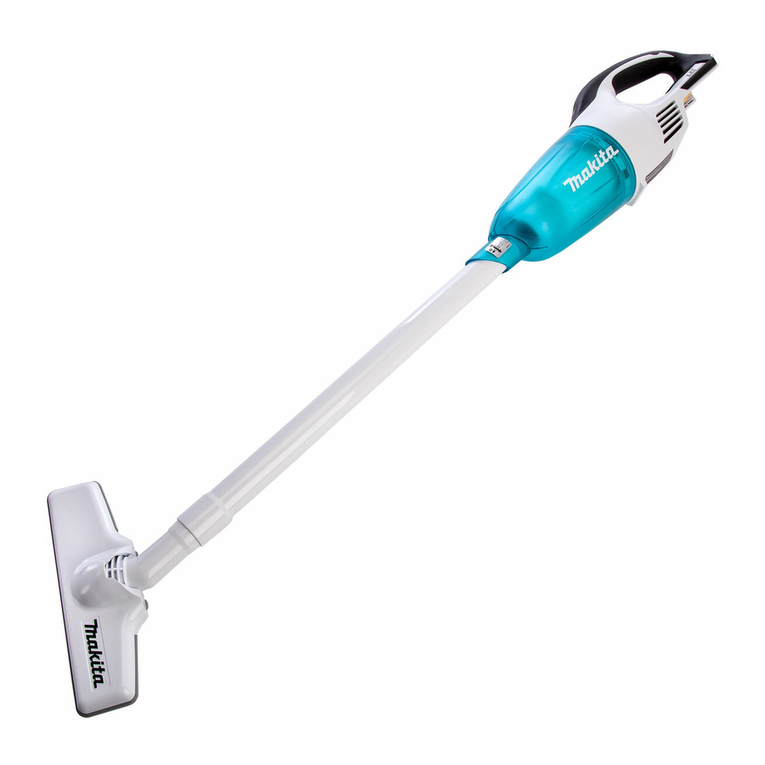
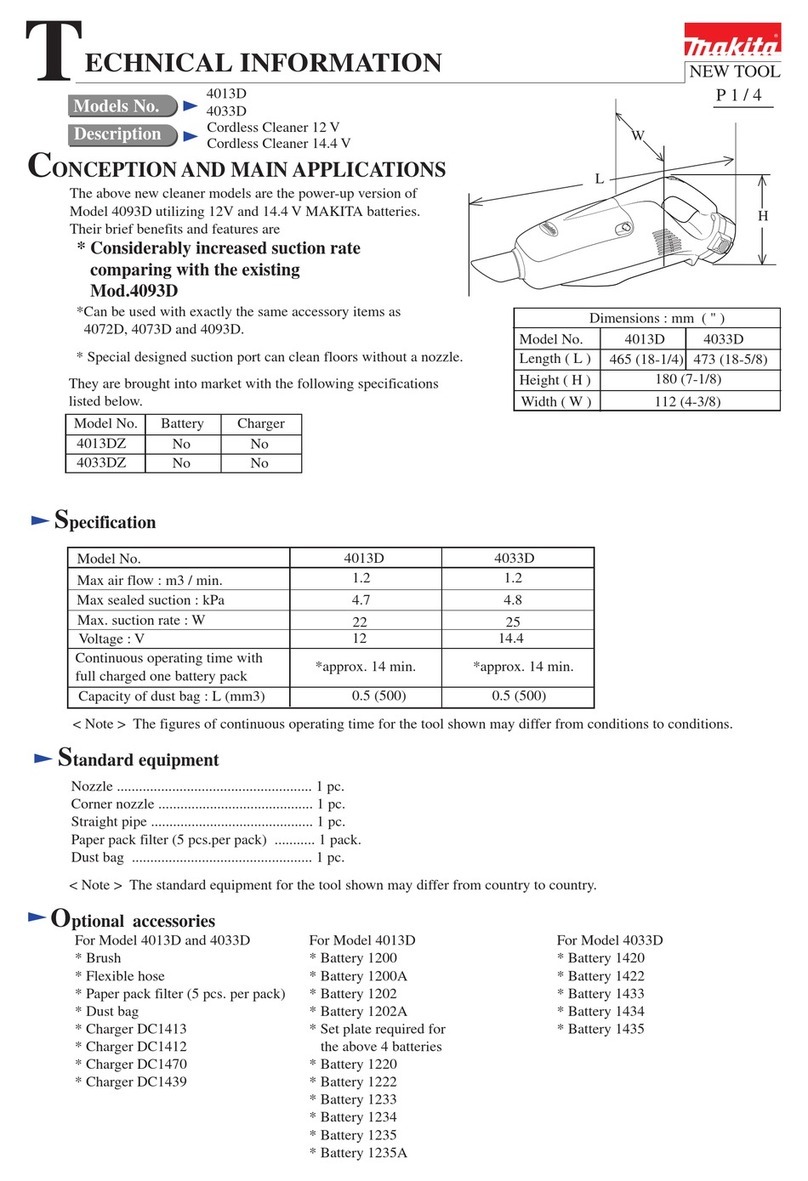
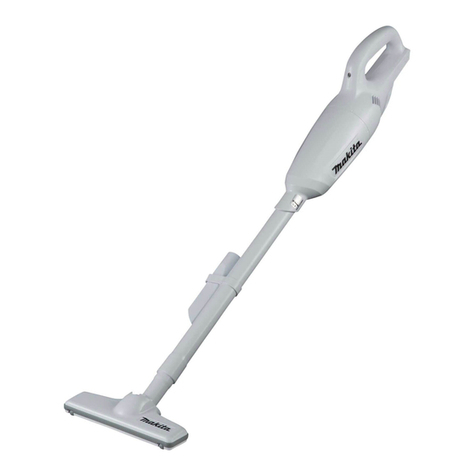
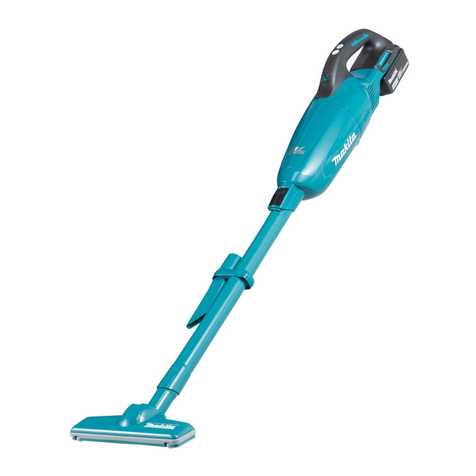
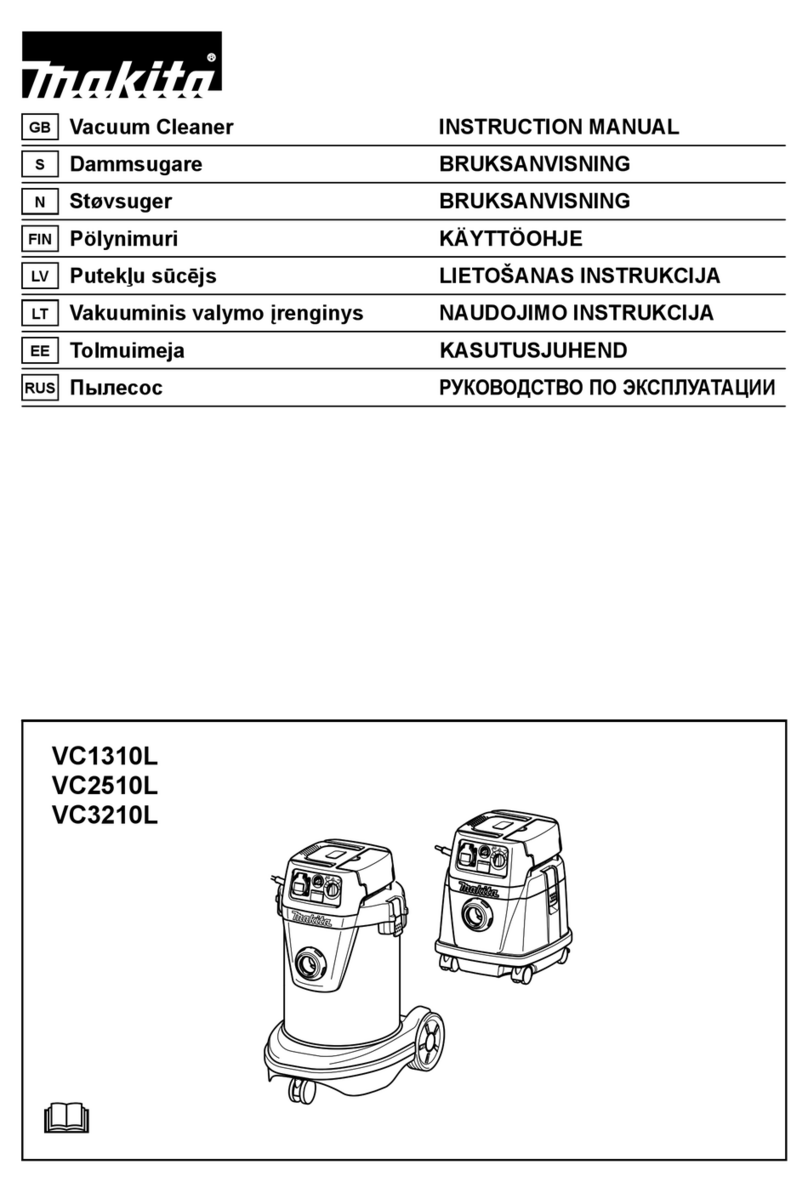
Makita DCL283F User manual

DCL283F
EN Cordless Cleaner INSTRUCTION MANUAL 8
SL Brezžični čistilnik NAVODILA ZA UPORABO 17
SQ Pastruesi me bateri MANUALI I PËRDORIMIT 26
BG Акумулаторна
прахосмукачка РЪКОВОДСТВО ЗА
ЕКСПЛОАТАЦИЯ 35
HR Bežični usisavač PRIRUČNIK S UPUTAMA 45
МК Безжична правосмукалка УПАТСТВО ЗА УПОТРЕБА 54
SR Бежични чистач УПУТСТВО ЗА УПОТРЕБУ 64
RO Aspirator cu acumulator MANUAL DE INSTRUCŢIUNI 74
UK Бездротовий пилосос ІНСТРУКЦІЯ З
ЕКСПЛУАТАЦІЇ 83
RU Аккумуляторный пылесос РУКОВОДСТВО ПО
ЭКСПЛУАТАЦИИ 93

2
Fig.1
1
2
3
Fig.2
1
2
Fig.3
12
Fig.4
12
Fig.5
12
3
Fig.6
134
2
Fig.7
1 2
34
Fig.8

3
2
1
Fig.9
1
Fig.10
12
Fig.11
12
Fig.12
1
Fig.13
1
Fig.14
1
Fig.15
1
2
3
Fig.16

4
1
2
Fig.17
12
Fig.18
1
2
Fig.19
1
2
Fig.20
1
2
3
4
Fig.21
1
2
Fig.22
Fig.23

5
1
Fig.24
1
2
3
Fig.25
1
2
Fig.26
1
2
Fig.27
1
2
3
Fig.28
Fig.29
1
Fig.30
Fig.31

6
Fig.32
Fig.33
Fig.34
1
2
Fig.35
1
Fig.36

7
3
4
1
2
5
Fig.37
23
1
4
Fig.38
2
1
Fig.39
2
1
Fig.40
1
2
Fig.41
1
2
3
Fig.42

8ENGLISH
ENGLISH (Original instructions)
WARNING
• This appliance can be used by children aged from 8 years and above and persons with reduced physical, sen-
sory or mental capabilities or lack of experience and knowledge if they have been given supervision or instruc-
tion concerning use of the appliance in a safe way and understand the hazards involved.
• Children shall not play with the appliance. Cleaning and user maintenance shall not be made by children with-
out supervision.
• See the chapter “SPECIFICATIONS” for the type reference of the battery.
• See the section “Installing or removing battery cartridge” for how to remove or install the battery.
• When disposing the battery cartridge, remove it from the tool and dispose of it in a safe place. Follow your local
regulations relating to disposal of battery.
• If the tool is not used for a long period of time, the battery must be removed from the tool.
• Do not short the battery cartridge.
• See the chapter “MAINTENANCE” for the appropriate details of precautions during user maintenance.
SPECIFICATIONS
Model: DCL283F
Capacity 730 mL
Continuous use (with battery BL1830B) Approx. 10 min
Overall length (with pipe, nozzle, and battery BL1830B) 1,066 mm
Rated voltage D.C. 18 V
Net weight 1.3 - 1.7 kg
• Duetoourcontinuingprogramofresearchanddevelopment,thespecicationshereinaresubjecttochange
without notice.
• Specicationsmaydierfromcountrytocountry.
• The weight does not include accessories but battery cartridge(s). The lightest and heaviest combination weight
of the appliance and battery cartridge(s) are shown in the table.
Applicable battery cartridge and charger
Battery cartridge BL1815N / BL1820B / BL1830B / BL1840B / BL1850B / BL1860B
Charger DC18RC / DC18RD / DC18RE / DC18SD / DC18SE / DC18SF /
DC18SH / DC18WC
• Some of the battery cartridges and chargers listed above may not be available depending on your region of
residence.
WARNING: Only use the battery cartridges and chargers listed above. Use of any other battery cartridges
andchargersmaycauseinjuryand/orre.

9ENGLISH
Symbols
The followings show the symbols which may be used
for the equipment. Be sure that you understand their
meaning before use.
Read the instruction manual.
Arepresentative battery applicable to this
product.
Ni-MH
Li-ion Only for EU countries
Due to the presence of hazardous com-
ponents in the equipment, waste electrical
and electronic equipment, accumulators
and batteries may have a negative impact
on the environment and human health.
Do not dispose of electrical and electronic
appliances or batteries with household
waste!
In accordance with the European Directive
on waste electrical and electronic equip-
ment and on accumulators and batteries
and waste accumulators and batteries,
as well as their adaptation to national law,
waste electrical equipment, batteries and
accumulators should be stored separately
and delivered to a separate collection point
for municipal waste, operating in accor-
dance with the regulations on environmen-
tal protection.
This is indicated by the symbol of the
crossed-out wheeled bin placed on the
equipment.
Intended use
The tool is intended for collecting dry dust.
SAFETY WARNINGS
Cordless cleaner safety warnings
WARNING: IMPORTANT! READ CAREFULLY
all safety warnings and all instructions BEFORE
USE. Failure to follow the warnings and instructions
mayresultinelectricshock,reand/orseriousinjury.
1. Do not expose to rain. Store indoors.
2. Do not allow to be used as a toy. Close
attention is necessary when used by or near
children.
3. Use only as described in this manual. Use only
manufacturer's recommended attachments.
4. Do not use with damaged battery. If appliance
is not working as it should, has been dropped,
damaged, left outdoors, or dropped into water,
return it to a service center.
5. Do not handle appliance with wet hands.
6. Do not put any object into openings. Do not
use with any opening blocked; keep free of
dust, lint, hair, and anything that may reduce
air ow.
7. Keep hair, loose clothing, ngers, and all parts
of body away from openings and moving parts.
8.
Turn o all controls before removing the battery.
9. Use extra care when cleaning on stairs.
10. Do not use to pick up ammable or combusti-
ble liquids, such as gasoline, or use in areas
where they may be present.
11. Use only the charger supplied by the manufac-
turer to recharge.
12. Do not pick up anything that is burning or
smoking, such as cigarettes, matches, or hot
ashes.
13.
Do not use without dust bag and/or lters in place.
14. Do not charge the battery outdoors.
15. Recharge only with the charger specied by
the manufacturer. Acharger that is suitable for
onetypeofbatterypackmaycreateariskofre
when used with another battery pack.
16. Use appliances only with specically desig-
nated battery packs. Use of any other battery
packsmaycreateariskofinjuryandre.
17. When (the) battery pack is not in use, keep
it away from other metal objects, like paper
clips, coins, keys, nails, screws or other small
metal objects, that can make a connection
from one terminal to another.
18. Under abusive conditions, liquid may be
ejected from the battery; avoid contact. If con-
tact accidentally occurs, ush with water.
19. Do not use a battery pack or appliance that
is damaged or modied.Damagedormodied
batteries may exhibit unpredictable behaviour
resultinginre,explosionorriskofinjury.
20. Do not expose a battery pack or appliance
to re or excessive temperature. Exposure
toreortemperatureabove130°Cmaycause
explosion.
21. Follow all charging instructions and do not
charge the battery pack or appliance outside
the temperature range specied in the instruc-
tions. Charging improperly or at temperatures
outsidethespeciedrangemaydamagethe
batteryandincreasetheriskofre.
SAVE THESE INSTRUCTIONS.
ADDITIONAL SAFETY RULES
This appliance is intended for household use.
1. Read this instruction manual and the charger
instruction manual carefully before use.
2. Do not pick up the following materials:
— Hot substances that are burning or smok-
ing (cigarettes, matches, incense sticks,
candles, hot ashes), sparks and metal
dust generated by cutting or grinding
metal, etc.
— Flammable liquid (kerosene, gasoline,
solvents such as benzine, thinner, etc.)
— Flammable material (toner, paint, spray,
etc.)
— Explosive or pyrophoric substances
(nitroglycerin, aluminum, magnesium,
titanium, zinc, red phosphorus, yellow
phosphorus, celluloid, etc. and their dust,
gas or steam)

10 ENGLISH
— Liquid, oil, wet dirt or damp garbage,
including vomit and excreta
— Hard pieces with sharp edges (wood
chips, metals, stones, glasses, nails,
pins, razors or cutlery)
— Solidifying and conductive ne powder
(metal or carbon powder)
— Foam like carpet cleaning agent, etc.
(they may cause explosion or re)
— Large amount of powder (our, re extin-
guisher powder, etc.)
— Substances that cause toxic symptoms
— Aggressive chemicals (acid, alkali, etc.)
— Fine binding powder such as cement
— Fine particle like concrete dust
— Desiccants
— Asbestos
— Pesticides
Suchactionmaycausere,injuryand/orproperty
damage.
To reduce your exposure to these chemicals,
always wear approved respiratory protection such
asdustmasksthatarespeciallydesignedtolter
out microscopic particles. Direct the exhaust air
away from your face and body.
3. Stop operation immediately if you notice any-
thing abnormal.
4. If you drop or strike the cleaner, check it care-
fully for cracks or damage before operation.
5. Do not bring close to stoves or other heat
sources.
6. Do not block the intake hole or vent holes.
SAVE THESE INSTRUCTIONS.
Important safety instructions for
battery cartridge
1. Before using battery cartridge, read all instruc-
tions and cautionary markings on (1) battery
charger, (2) battery, and (3) product using
battery.
2. Do not disassemble or tamper with the battery
cartridge.Itmayresultinare,excessiveheat,
or explosion.
3. If operating time has become excessively
shorter, stop operating immediately. It may
result in a risk of overheating, possible burns
and even an explosion.
4. If electrolyte gets into your eyes, rinse them
out with clear water and seek medical atten-
tion right away. It may result in loss of your
eyesight.
5. Do not short the battery cartridge:
(1) Do not touch the terminals with any con-
ductive material.
(2) Avoid storing battery cartridge in a con-
tainer with other metal objects such as
nails, coins, etc.
(3) Do not expose battery cartridge to water
or rain.
A battery short can cause a large current
ow, overheating, possible burns and even a
breakdown.
6. Do not store and use the tool and battery car-
tridge in locations where the temperature may
reach or exceed 50 °C (122 °F).
7. Do not incinerate the battery cartridge even if
it is severely damaged or is completely worn
out. The battery cartridge can explode in a re.
8. Do not nail, cut, crush, throw, drop the battery
cartridge, or hit against a hard object to the
battery cartridge. Such conduct may result in a
re,excessiveheat,orexplosion.
9. Do not use a damaged battery.
10. The contained lithium-ion batteries are subject
to the Dangerous Goods Legislation require-
ments.
For commercial transports e.g. by third parties,
forwarding agents, special requirement on pack-
aging and labeling must be observed.
For preparation of the item being shipped, consult-
ing an expert for hazardous material is required.
Please also observe possibly more detailed
national regulations.
Tapeormaskoopencontactsandpackupthe
battery in such a manner that it cannot move
around in the packaging.
11. When disposing the battery cartridge, remove
it from the tool and dispose of it in a safe
place. Follow your local regulations relating to
disposal of battery.
12. Use the batteries only with the products
specied by Makita. Installing the batteries to
non-compliantproductsmayresultinare,exces-
sive heat, explosion, or leak of electrolyte.
13. If the tool is not used for a long period of time,
the battery must be removed from the tool.
14. During and after use, the battery cartridge may
take on heat which can cause burns or low
temperature burns. Pay attention to the han-
dling of hot battery cartridges.
15. Do not touch the terminal of the tool imme-
diately after use as it may get hot enough to
cause burns.
16. Do not allow chips, dust, or soil stuck into the
terminals, holes, and grooves of the battery
cartridge.Itmaycauseheating,catchingre,
burst and malfunction of the tool or battery car-
tridge,resultinginburnsorpersonalinjury.
17. Unless the tool supports the use near
high-voltage electrical power lines, do not use
the battery cartridge near high-voltage electri-
cal power lines. It may result in a malfunction or
breakdown of the tool or battery cartridge.
18. Keep the battery away from children.
SAVE THESE INSTRUCTIONS.
CAUTION: Only use genuine Makita batteries.
Use of non-genuine Makita batteries, or batteries that
have been altered, may result in the battery bursting
causingres,personalinjuryanddamage.Itwill
also void the Makita warranty for the Makita tool and
charger.

11 ENGLISH
Tips for maintaining maximum
battery life
1. Charge the battery cartridge before completely
discharged. Always stop tool operation and
charge the battery cartridge when you notice
less tool power.
2. Never recharge a fully charged battery car-
tridge. Overcharging shortens the battery
service life.
3. Charge the battery cartridge with room tem-
perature at 10 °C - 40 °C (50 °F - 104 °F). Let
a hot battery cartridge cool down before
charging it.
4. When not using the battery cartridge, remove
it from the tool or the charger.
5. Charge the battery cartridge if you do not use
it for a long period (more than six months).
FUNCTIONAL
DESCRIPTION
CAUTION: Always be sure that the tool is
switched o and the battery cartridge is removed
before adjusting or checking function on the tool.
CAUTION: Take care not to trap nger(s)
between cleaner and battery as shown in diagram
when loading battery. Trappingnger(s)maycause
injury.
►Fig.1
Installing or removing battery
cartridge
CAUTION: Always switch o the tool before
installing or removing of the battery cartridge.
CAUTION: Hold the tool and the battery car-
tridge rmly when installing or removing battery
cartridge. Failure to hold the tool and the battery
cartridgermlymaycausethemtoslipoyourhands
and result in damage to the tool and battery cartridge
andapersonalinjury.
To remove the battery cartridge, slide it from the tool
while sliding the button on the front of the cartridge.
►Fig.2: 1. Red indicator 2. Button 3. Battery cartridge
To install the battery cartridge, align the tongue on the
battery cartridge with the groove in the housing and slip
it into place. Insert it all the way until it locks in place
with a little click. If you can see the red indicator as
showninthegure,itisnotlockedcompletely.
CAUTION: Always install the battery cartridge
fully until the red indicator cannot be seen. If not,
itmayaccidentallyfalloutofthetool,causinginjuryto
you or someone around you.
CAUTION: Do not install the battery cartridge
forcibly. If the cartridge does not slide in easily, it is
not being inserted correctly.
Tool / battery protection system
The tool is equipped with tool/battery protection system.
Thissystemautomaticallycutsopowertothemotorto
extend tool and battery life. The tool will automatically
stop during operation if the tool or battery is placed
under one of the following conditions.
Overloaded:
The tool/battery is operated in a manner that causes it
to draw an abnormally high current.
Inthissituation,turnthetooloandstoptheapplication
that caused the tool to become overloaded. Then turn
the tool on to restart.
Overheated:
The tool/battery is overheated. In this situation, let the
tool/battery cool before turning the tool on again.
Low battery voltage:
The remaining battery capacity is too low and the tool
will not operate. In this situation, remove and recharge
the battery.
Protections against other causes:
Protection system is also designed for other causes
that could damage the tool and allows the tool to stop
automatically. Take all the following steps to clear the
causes, when the tool has been brought to a temporary
halt or stop in operation.
1. Turnthetoolo,andthenturnitonagainto
restart.
2. Charge the battery(ies) or replace it/them with
recharged battery(ies).
3. Let the tool and battery(ies) cool down.
If no improvement can be found by restoring protection
system, then contact your local Makita Service Center.
Indicating the remaining battery
capacity
Only for battery cartridges with the indicator
►Fig.3: 1. Indicator lamps 2. Check button
Press the check button on the battery cartridge to indi-
cate the remaining battery capacity. The indicator lamps
light up for a few seconds.
Indicator lamps Remaining
capacity
Lighted O Blinking
75% to 100%
50% to 75%
25% to 50%
0% to 25%
Charge the
battery.
The battery
may have
malfunctioned.

12 ENGLISH
NOTE: Depending on the conditions of use and the
ambienttemperature,theindicationmaydierslightly
from the actual capacity.
NOTE:Therst(farleft)indicatorlampwillblinkwhen
the battery protection system works.
Switch action
CAUTION: Before installing the battery car-
tridge into the tool, set the slide switch to "O"
side and check that the switch trigger actuates
properly and returns to the "OFF" position when
released.
When the slide switch is set to "O" side:
To start the tool, simply pull the switch trigger. Release
the switch trigger to stop.
►Fig.4: 1. Slide switch 2. Switch trigger
When the slide switch is set to "I" side:
While the slide switch is set to "I" side, the switch trig-
ger is pulled automatically and the cleaner continues
actuating. To stop the cleaner, set the slide switch to "O"
side and release the switch trigger.
►Fig.5: 1. Slide switch 2. Switch trigger
Lighting up the lamp
CAUTION: Do not look in the light or see the
source of light directly.
To turn on the lamp, either squeeze the switch trigger or
set the slide switch in the "I" position.
While the cleaner is running, the lamp turns on.
The lamp goes out immediately after you stop operation.
NOTE: When the remaining battery capacity gets low,
the lamp starts blinking. The timing, at which the lamp
starts blinking depends on the temperature at work
place and the battery cartridge conditions.
►Fig.6: 1. Lamp 2. Slide switch 3. Switch trigger
ASSEMBLY
CAUTION: Always be sure that the tool is
switched o and the battery cartridge is removed
before carrying out any work on the tool.
Parts description
Optional accessory
High performance lter and stay and
sponge lter
►Fig.7: 1. Capsule 2.Highperformancelter3. Stay
4.Spongelter
Prelter or high performance lter
and HEPA lter
►Fig.8: 1. Capsule 2.Prelter3. High performance
lter4.HEPAlter
NOTICE: Do not underlay the high performance
lter with an optional lter (non-woven cloth). The
lterscouldnotberemovedfromthecleaner.
NOTE:Donotinstallanoptionallter(non-woven
cloth)betweentheHEPAlterandprelter.Thesuc-
tion power may be reduced.
NOTE:Alwaysusethehighperformancelterthatis
framed with an originally-designed stay when overlay-
ingitontheHEPAlter.
►Fig.9: 1.Highperformancelter2. Stay (designed
forhighperformancelter)
Disposing of dust
CAUTION: Empty the cleaner before it
becomes too full, or the suction force weakens.
CAUTION: Be sure to empty the inside of the
cleaner itself of dust. Failure to do so may cause the
ltertobecloggedorthemotortobedamaged.
Inordertodropduststickingonthelterinthecapsule,
tap the capsule 4 or 5 times with your hand.
►Fig.10: 1. Capsule
Point suction inlet downwards, turn capsule in direction of
arrow in diagram, and disconnect capsule slowly and straight.
►Fig.11: 1. Capsule 2. Suction inlet
NOTE: Dust may spill out when capsule is opened, so
be sure to set a garbage bag beneath capsule.
Remove accumulated dust from the inside of capsule
andhighperformancelter.
►Fig.12: 1. Capsule 2.Highperformancelter
Twisthighperformancelterindirectionofarrowto
unfastensecuringlipfromcleanerunitandthenpullo
thelter.
►Fig.13: 1. Securing lip
NOTE:Whenusingtheprelter,alsofollowthepro-
cedure above.
Cleanoutthenedustandlightlytaptodislodgedust
fromhighperformancelter.
Reassembly
Connecthighperformancelter.Atthistime,makesure
totwisthighperformanceltersothatsecuringlipis
rmlylockedintothecleanerunit.
►Fig.14: 1.Highperformancelter
►Fig.15: 1. Securing lip
NOTICE: Always be sure to check that high per-
formance lter is loaded correctly prior to using
cleaner. If it is not loaded correctly, dust will get into
the motor housing, and cause motor failure.
If the problem as described later occurs, high perfor-
mancelterisnotloadedcorrectly.Reloaditcorrectly
to rectify problem.
Attach the capsule.Align the mark on capsule with the
markonthehandleandthenrmlytwistcapsuleinthe
direction of arrow until it is secured.
►Fig.16: 1. Mark 2. Handle 3. Capsule

13 ENGLISH
NOTE: Always remove dust ahead of time, as suction
power will be reduced if there is too much dust in
cleaner.
Problem Example
Thesecuringlipofhighperformancelterisnotrmly
locked into groove of cleaner housing.
►Fig.17: 1. Securing lip 2. Groove of cleaner housing
Installing or removing stay / HEPA lter
Optional accessory
For the stay and sponge lter
To remove the stay, push up the bottom part of pillars
ofthestaywithyourngersandreleaseitsgroovefrom
the protrusion on the cleaner.After that, remove the
spongelter.
►Fig.18: 1. Stay 2.Spongelter
To install, align the grooves on the stay with the protru-
sion on the cleaner and push until it clicks.
Insertthespongelterbetweenthepillarsandsetitin
the original position.
For the HEPA lter
WheninstallingtheHEPAlter,tthegrooveofthe
HEPAlterwiththeprotrusiononthecleaner.Then,put
theprelterorthehighperformancelterontheHEPA
lterandtwistittosecure.Toremove,followtheinstal-
lation procedure in reverse.
►Fig.19: 1.HEPAlter2.Prelter
►Fig.20: 1.HEPAlter2.Highperformancelter
OPERATION
CAUTION: Do not move your face close to
the air vent when operating the cleaner. If foreign
objectsareblownintoeyes,itmayresultinpersonal
injury.
Installing and removing cleaner
attachments
CAUTION: After installing attachments, check
if they are securely installed. If the attachments are
installedimperfectly,theymaycomeoandcause
personalinjury.
CAUTION: Be careful not to hit your hand on
the wall etc. when removing the attachments.
When using attachment with lock
function
To install attachment, insert it to the suction inlet of the
cleaner until it clicks. Make sure that the attachment is
locked.
►Fig.21: 1. Suction inlet 2. Attachment with lock
function 3. Hook 4. Release button
NOTICE: When installing the attachment with
lock function, be sure to align the release button
on the cleaner with the hook on the attachment. If
they are not aligned, the attachment will not be locked
andmaycomeofromthecleaner.
To remove, pull the attachment while pushing the release button.
►Fig.22:
1. Release button 2. Attachment with lock function
When using attachment without lock
function
CAUTION:
To connect attachment without
lock function, twist and insert it in direction of the
arrow to secure the connection during use. To dis-
connect the attachment, twist and extract it also in
direction of the arrow. If the attachment is twisted in
the opposite direction, the capsule may become loose.
►Fig.23
Cleaning (Suction)
Nozzle
Attachthenozzletocleanotables,desks,furniture,
etc. The nozzle slips on easily.
►Fig.24: 1. Nozzle
Nozzle + Extension wand (Straight pipe)
Theextensionwandtsinbetweenthenozzleandthe
cleaner itself. This arrangement is convenient for clean-
ingaoorinastandingposition.
►Fig.25: 1. Cleaner body 2. Extension wand (Straight
pipe) 3. Nozzle
Sash nozzle
Fit on the sash nozzle for cleaning corners and crevices
of a car or furniture.
►Fig.26: 1. Sash nozzle 2. Cleaner body
You can store the sash nozzle in the nozzle holder.
►Fig.27: 1. Nozzle holder 2. Sash nozzle
CAUTION: Be careful not to trap nger(s)
between the sash nozzle and the nozzle holder.
Trappingnger(s)maycauseinjury.
Sash nozzle + Extension wand
(Straight pipe)
In tight quarters where the cleaner itself cannot squeeze
in, or in high places hard to reach, use this arrangement.
►Fig.28: 1. Sash nozzle 2. Extension wand (Straight
pipe) 3. Cleaner body
Cleaning without nozzle
You can pick up powder and dust without nozzle.
►Fig.29
Forpickingupdustonaoorinastandingposition,itis
convenient to attach the extension wand to the cleaner.
►Fig.30: 1. Extension wand (Straight pipe)

14 ENGLISH
MAINTENANCE
CAUTION: Always be sure that the tool is
switched o and the battery cartridge is removed
before attempting to perform inspection or
maintenance.
To maintain product SAFETY and RELIABILITY,
repairs,anyothermaintenanceoradjustmentshould
be performed by MakitaAuthorized or Factory Service
Centers, always using Makita replacement parts.
After use
CAUTION: Putting the cleaner against the
wall without any other support may cause the
cleaner to fall down, resulting in personal injury
or damage to the cleaner.
►Fig.31
Cleaning
CAUTION: Clean lters when they become
clogged. Continuing use in the clogged condition
mayresultinheatingorre.
NOTICE: Never use gasoline, benzine, thinner,
alcohol or the like. Discoloration, deformation or
cracks may result.
NOTICE: Do not blow dust sticking on the
cleaner and lters by air duster. It brings dust into
the housing and causes failure.
NOTICE: After washing lters, dry them thor-
oughly before use.Insucientlydriedltersmay
cause poor suction and shorten the service life of the
motor.
NOTICE: After cleaning lters and sponge lter,
be sure to re-install them before use. If you use the
cleanerwithoutltersandspongelter,dustcomes
into the motor housing and cause malfunction.
Cleaner body
Fromtimetotimewipeotheoutside(cleanerbody)of
the cleaner using a cloth dampened in soapy water.
Cleanoutalsothesuctionopeningandltermounting
area.
►Fig.32
High performance lter
Washthelterinsoapywaterwhenitiscloggedwith
dust and the cleaner power becomes weak. Dry it out
thoroughly before use.
►Fig.33
HEPA lter
Optional accessory
NOTICE: Do not rub or scratch the HEPA lter
with hard objects such as a brush and a paddle.
CloggedHEPAltercausespoorsuctionperformance.
Cleanoutthelterfromtimetotime.
OccasionallywashtheHEPAlterinwater,rinseand
dry thoroughly in the shade before use. Never wash the
lterinawashingmachine.
►Fig.34
Sponge lter
Whenthespongelterbecomesdirty,cleanitas
follows.
1. Removeltersthatcoverthestay.
2. Pulloutthespongelterfrombetweenthepillars.
3. Cleanthespongelterbytappingorwashing.If
you wash it, dry it out thoroughly before use.
4. Insertthespongelterbetweenthepillarsandset
it in the original position. Make sure that each bottom
edgeofthepillarholdsdownthespongelter,and
thereisnogapbetweenthespongelterandsuction
opening.
►Fig.35: 1.Spongelter2. Bottom edge of pillar
Wall mount for cordless cleaner
Optional accessory
NOTE: The screw to mount the holder is not included.
Prepareascrewwhichtswiththematerialtoscrew
into.
Attach the wall mount for cordless cleaner to a hard
wooden wall, beam or column, where the wall mount
forcordlesscleanercanbermlysecured.Alwaysbe
sure that the wall mount for cordless cleaner is securely
attached before hanging the cleaner.
►Fig.36: 1. Wall mount for cordless cleaner
CAUTION: Do not hang the cleaner to the wall
mount violently or hang other appliances than the
cleaner.

15 ENGLISH
Troubleshooting
Before asking for repairs, check the following points.
Symptom Area to be investigated Fixing method
Weak suction power Is the capsule full of dust? Empty the capsule of dust.
Isthelterclogged? Cleanorwashthelter.
Is the battery cartridge discharged? Charge the battery cartridge.
Not working Is the battery cartridge discharged? Charge the battery cartridge.
Noise and vibration Isthelterclogged? Cleanorwashthelter.
Is the nozzle, pipe or suction inlet of the
appliance is clogged? Removethecloggedobjectsinthenozzle,
pipe or suction inlet of the appliance.
Is the nozzle/pipe inlet blocked? Do not block the nozzle/pipe inlet.
CAUTION: Do not attempt to repair the cleaner by yourself.
OPTIONAL
ACCESSORIES
CAUTION: These accessories or attachments
are recommended for use with your Makita tool
specied in this manual. The use of any other
accessories or attachments might present a risk of
injurytopersons.Onlyuseaccessoryorattachment
for its stated purpose.
If you need any assistance for more details regard-
ing these accessories, ask your local Makita Service
Center.
• Extension wand (Straight pipe)
• Nozzle
• Nozzle for carpet
• Shelf brush
• Sash nozzle
• Round brush
• Flexible hose
• Filter (non-woven cloth)
• Prelter
• Highperformancelter
• HEPAlter
• Seat nozzle
• Crevice nozzle
• Wall mount for cordless cleaner
• Cyclone unit
• Cyclone attachment
• Tool bag
• Makita genuine battery and charger
NOTE: Some items in the list may be included in the
tool package as standard accessories. They may
dierfromcountrytocountry.
Cyclone attachment
Optional accessory
►Fig.37: 1. Release button 2. Hook 3. Extension
wand (Straight pipe) 4. Cyclone attachment
5. Suction inlet
About the cyclone attachment
Using the cleaner with the cyclone attachment installed
reduces the amount of dust that enters the capsule,
which helps to prevent the suction force from weaken-
ing. In addition, cleaning after use is also simple.
CAUTION: Always be sure that the tool is
switched o and the battery cartridge is removed
before carrying out any work on the tool. If the
battery cartridge is left inserted, the cleaner may start
unexpectedlyandresultininjury.
CAUTION: Clean the mesh lter of the
cyclone attachment and the lters of the cleaner
unit when they become clogged. Continuing use in
the clogged condition may result in heating or smoke.
NOTICE: When the cyclone attachment is
attached, do not use the cleaner in a horizontal
or upward facing position. Doing so may cause the
meshltertobecomeclogged.
NOTICE: Always use the cleaner with the lters
installed, even when using the cyclone attach-
ment.Usingthecleanerwithouttheltersinstalled
may result in a motor malfunction.
NOTE: Check that the cyclone attachment, cleaner,
and extension wand (straight pipe) are locked prop-
erly before use.
NOTE:
Empty the dust case of the cyclone attachment
and the capsule of the cleaner when dust has accumu-
lated. Continuing use will result in weakened suction force.
NOTE: You can also use the cyclone attachment with-
out lock function.
NOTE: To install or remove the cyclone attachment,
refer to the section "Installing and removing cleaner
attachments".

16 ENGLISH
Disposing of dust
When dust has accumulated up to the full line of the
dust case, follow the procedure below and dispose of
the dust.
1. Holdthedustcasermly,pressandholdthetwo
buttons, and remove the dust case.
►Fig.38: 1. Full line 2. Dust case 3. Button (two
locations) 4.Meshlter
2. Dispose of the dust inside the dust case and
remove any dust and powder adhered to the surface of
themeshlter.
3. Insert the dust case all the way until the two but-
tons lock with a click.
►Fig.39: 1. Dust case 2. Button (two locations)
CAUTION: When reassembling the dust case,
be careful not to pinch your ngers.
NOTE: Check that the cyclone attachment, cleaner,
and extension wand (straight pipe) are locked prop-
erly before restarting operation.
NOTE: If the suction force does not recover even
after disposing of the dust and cleaning the mesh
lter,checkwhetherdusthasaccumulatedinthe
capsule of the cleaner or clogging has occurred.
NOTE:Thedustmayyupwhendisposingfromthe
cyclone attachment. Be careful not to let dust get into
your eyes.
Cleaning
CAUTION: After washing the cyclone attach-
ment, dry it thoroughly before use.Insuciently
dried components may cause an electrical shock or
damage to the appliance.
Whenthedustcasebecomesdirtyorthemeshlteris
clogged, remove and wash them with water. (Refer to
“Disposing of dust” for the removal procedure.)
Dry the parts thoroughly before reinstallation and use.
►Fig.40: 1. Dust case 2.Meshlter
Whenthemeshltergetsdirtybadly,cleanitinthe
following procedures.
1. Turnthemeshlterinthedirectionofthearrow
and remove it while the hooks are unlocked.
►Fig.41: 1.Meshlter2. Hook
2. Removethedustonthemeshlterandthenwash
it with water.After that, dry it thoroughly.
3. Insertthemeshlterintothebasewhilethehooks
arealignedwiththeport.Turnthemeshlterinthe
direction of the arrow until the hooks are locked with a
click.Makesurethatthemeshlterisinstalledsecurely.
►Fig.42: 1.Meshlter2. Hook 3. Port

17 SLOVENŠČINA
SLOVENŠČINA (Originalna navodila)
OPOZORILO
• Tonapravolahkonavarennačin,čerazumejovključenatveganja,uporabljajootroci,stari8letinvečterosebe
zzmanjšanimizičnimi,čutilnimialipsihičnimisposobnostmiterspomanjkanjemizkušenjinznanja,česopod
ustreznimnadzoromalisoprejelinavodilavzvezizuporabonaprave.
• Otrociseznapravonesmejoigrati.Otrocibreznadzoranesmejoizvajatičiščenjainuporabniškega
vzdrževanja.
• Glejtepoglavje„TEHNIČNIPODATKI“zavrstobaterije.
• Zanavodilaonameščanjualiodstranjevanjubaterijeglejterazdelek„Nameščanjealiodstranjevanjeakumula-
torskebaterije“.
• Koželiteakumulatorskobaterijozavreči,jovzemiteizorodjainodložitemedodpadkenavarnomesto.
Upoštevajtelokalneuredbegledeodlaganjabaterije.
• Čeorodjanebosteuporabljalidaljčasa,morateodstranitibaterijo.
• Nepovzročitekratkegastikaakumulatorskebaterije.
• Zaprimernepodrobnostioprevidnostnihukrepihmedvzdrževanjemglejtepoglavje„VZDRŽEVANJE“.
TEHNIČNI PODATKI
Model: DCL283F
Zmogljivost 730 mL
Neprekinjenauporaba(zakumulatorjemBL1830B) Pribl. 10 min
Celotnadolžina(scevjo,šoboinbaterijoBL1830B) 1.066 mm
Nazivna napetost D.C. 18 V
Netoteža 1,3 – 1,7 kg
• Kernenehnoopravljamoraziskaveinrazvijamosvojeizdelke,selahkotehničnipodatkivtemdokumentu
spremenijobrezobvestila.
• Tehničnipodatkiselahkorazlikujejooddržavedodržave.
• Težanevključujepripomočkov,vključujepaakumulatorskebaterije.Najlažjainnajtežjakombinacijateže
napraveinakumulatorskihbaterijstaprikazanivtabeli.
Uporabna akumulatorska baterija in polnilnik
Baterijskivložek BL1815N / BL1820B / BL1830B / BL1840B / BL1850B / BL1860B
Polnilnik DC18RC / DC18RD / DC18RE / DC18SD / DC18SE / DC18SF /
DC18SH / DC18WC
• Nekaterezgorajnavedeneakumulatorskebaterijeinpolnilnikimordavvašidržaviprebivališčanisonavoljo.
OPOZORILO: Uporabljajte le zgoraj navedene akumulatorske baterije in polnilnike. Uporaba drugih
akumulatorskihbaterijinpolnilnikovlahkopovzročitelesnepoškodbein/alipožar.

18 SLOVENŠČINA
Simboli
Naslednjisimboliselahkouporabljajovpovezavis
strojem.Preduporaboizdelkaseobveznoseznanitez
njihovimpomenom.
Preberite navodila za uporabo.
Vzorecbaterije,kiseuporabljazata
izdelek.
Ni-MH
Li-ion SamozadržaveEU
Zaradi prisotnosti nevarnih komponent v
opremiimajolahkouporabljenaelektrična
inelektronskaoprema,akumulatorjiin
baterijenegativenvplivnaokoljeinzdravje
ljudi.
Električnihinelektronskihnapravalibaterij
neodlagajtemedgospodinjskeodpadke!
Skladno z evropsko Direktivo o odpadni
električniinelektronskiopremi,oakumula-
torjihinbaterijahterodpadnihakumulator-
jihinbaterijahternjenouporabovdržavnih
zakonihmoraterabljenoelektričnoin
elektronskoopremo,baterijeinakumula-
torjezbiratiločenoterdostavitinaposebno
zbiralno mesto za komunalne odpadke, ki
delujeskladnospredpisizazaščitookolja.
Tonakazujesimbolprečrtanegasmetnjaka
skolesi,kijenatisnjennaopremi.
Predvidena uporaba
Orodjejenamenjenozazbiranjesuhegaprahu.
VARNOSTNA
OPOZORILA
Varnostna opozorila za brezžični
čistilnik
OPOZORILO: POMEMBNO! POZORNO
PREBERITE vsa varnostna opozorila in navodila
pred uporabo.Zaradineupoštevanjaopozorilin
navodillahkopridedoelektričnegašoka,požarain/ali
hudihtelesnihpoškodb.
1. Ne izpostavljajte dežju. Hranite v notranjih
prostorih.
2. Ne dovolite igranja z napravo. Potrebna je
posebna pozornost, kadar napravo uporabljajo
otroci ali se uporablja v njihovi bližini.
3. Uporabljajte le v skladu z opisi v tem priroč-
niku. Uporabljajte le priključke, ki jih priporoča
proizvajalec.
4.
Ne uporabljajte naprave s poškodovanim akumu-
latorjem. Če naprava ne deluje, kot bi morala, je
padla, je poškodovana, pozabljena na prostem ali
je padla v vodo, jo odnesite v servis.
5. Ne rokujte z napravo z mokrimi rokami.
6. Ne vstavljajte predmetov v odprtine. Ne upo-
rabljajte z zamašenimi odprtinami; odstranite
prah, vlakna, lase in vse, kar bi lahko zmanj-
šalo pretok zraka.
7. Las, ohlapnih oblačil, prstov in nobenih delov
telesa ne približujte odprtinam in premikajočim
se delom.
8. Preden odstranite akumulator, izklopite vse
upravljalne elemente.
9. Med čiščenjem na stopnicah bodite izjemno
previdni.
10. Ne uporabljajte za pobiranje vnetljivih ali gor-
ljivih tekočin, kot je bencin, in ne uporabljajte v
območjih, kjer so lahko prisotne.
11. Za polnjenje uporabljajte samo polnilnik, ki ga
dobavlja proizvajalec.
12. Ne pobirajte ničesar, kar gori ali iz česar se vije
dim, kot so cigarete, vžigalice ali vroč pepel.
13. Ne uporabljajte brez vrečke za prah in/ali
nameščenih ltrov.
14. Akumulatorja ne polnite na prostem.
15. Orodje polnite samo s polnilnikom, ki ga je
določil proizvajalec.Polnilnik,kijeprimerenza
eno vrsto akumulatorskega sklopa, lahko pomeni
nevarnostpožara,čegauporabljatezdrugim
akumulatorskim sklopom.
16. Naprave uporabljajte samo s predpisano vrsto
akumulatorskih sklopov. Pri uporabi drugih
akumulatorskih sklopov lahko pride do telesnih
poškodbinpožara.
17. Ko akumulatorskega sklopa ne uporabljate,
ga ne hranite ob kovinskih predmetih, kot so
sponke za papir, kovanci, ključi, žeblji, vijaki ali
drugi manjši kovinski predmeti, ki lahko pove-
žejo oba terminala.
18. V neprimernih pogojih lahko iz akumulatorja
uhaja tekočina; izogibajte se stiku. Če pride do
nenamernega stika, sperite z vodo.
19. Ne uporabljajte akumulatorskega sklopa ali
naprave, ki je poškodovana ali spremenjena.
Delovanjepoškodovanihalispremenjenihbaterij
jenepredvidljivoinlahkopovzročipožar,eksplo-
zijoalitelesnepoškodbe.
20. Akumulatorskega sklopa oziroma naprave
ne izpostavljajte ognju ali previsoki tempera-
turi.Izpostavljenostognjualitemperaturamnad
130°Clahkopovzročieksplozijo.
21.
Upoštevajte vsa navodila glede polnjenja in
akumulatorskega sklopa oziroma naprave ne
polnite zunaj določenega temperaturnega raz-
pona.Nepravilnopolnjenjealipolnjenjepritempe-
raturahzunajdoločenegarazponalahkopovzroči
poškodbebaterijeinpovečanevarnostpožara.
SHRANITE TA NAVODILA.
DODATNA VARNOSTNA
PRAVILA
Ta naprava je namenjena le za domačo uporabo.
1. Pred uporabo pozorno preberite ta navodila za
uporabo in navodila za uporabo polnilnika.
2. Ne pobirajte naslednjih materialov:
— Vroče snovi, ki gorijo ali se iz njih kadi
(cigarete, vžigalice, dišeče palčke, sveče,
vroč pepel), iskre in kovinski prah, ki nas-
tane med rezanjem ali brušenjem kovine,
itd.

19 SLOVENŠČINA
— Vnetljive tekočine (kerozin, bencin, topila,
kot so benzen, razredčila itd.)
— Vnetljivi materiali (toner, barva, pršilo itd.)
— Eksplozivne ali piroforne snovi (nitro-
glicerin, aluminij, magnezij, titan, cink,
rdeči fosfor, rumeni fosfor, celuloid itd. ali
njihov prah, plin ali para)
— Tekočine, olje, mokra zemlja ali vlažne
smeti, vključno z izbljuvki in iztrebki
— Trdi predmeti z ostrimi robovi (lesni
ostružki, kovine, kamni, steklo, žeblji,
bucike, britvice ali jedilni pribor)
— Fini prah, ki se strjuje in je prevoden
(kovinski ali ogljikov prah)
— Snovi za čiščenje preprog v obliki pene
itd. (lahko povzročijo eksplozijo ali požar)
— Velike količine prahu (moka, prah gasil-
nega aparata itd.)
— Snovi, ki povzročajo toksične znake
— Agresivne kemikalije (kisline, alkalne
snovi)
— Fini vezivni prah, kot je cement
— Fini delci, kot je betonski prah
— Sušilna sredstva
— Azbest
— Pesticidi
Takšnadejanjalahkopovzročijopožar,telesne
poškodbein/alimaterialnoškodo.
Zazmanjšanjeizpostavljenostitemkemikalijam
vednonositeodobrenozaščitodihal,kotsoprotip-
rašnemaske,kisoposebejzasnovanezaltrira-
njemikroskopskihdelcev.Izpušnizrakusmerite
stran od obraza in telesa.
3. Če opazite karkoli neobičajnega, takoj prene-
hajte uporabljati orodje.
4. Če vam čistilnik pade iz rok ali če z njim kam
udarite, ga pred uporabo skrbno preglejte, da
preverite, ali je razpokan ali poškodovan.
5. Ne približujte ga pečicam ali drugim virom
vročine.
6. Ne zamašite vhodne odprtine ali odprtin za
prezračevanje.
SHRANITE TA NAVODILA.
Pomembna varnostna navodila za
akumulatorsko baterijo
1. Pred uporabo baterijskega vložka preberite
vsa navodila in opozorilne oznake na (1) pol-
nilniku akumulatorja, (2) akumulatorju in (3)
izdelku, ki uporablja akumulator.
2. Ne razstavljajte ali spreminjajte akumulatorske
baterije.Stemlahkopovzročitepožar,preko-
mernovročinoalieksplozijo.
3. Če se je čas delovanja občutno skrajšal, takoj
prenehajte uporabljati orodje. V nasprotnem
primeru lahko pride do pregretja, morebitnih
opeklin in celo eksplozije.
4. Če pride elektrolit v stik z očmi, jih sperite s
čisto vodo in takoj poiščite zdravniško pomoč.
Posledica je lahko izguba vida.
5.
Ne povzročite kratkega stika baterijskega vložka:
(1) Ne dotikajte se priključkov s kakršnim
koli prevodnim materialom.
(2) Izogibajte se shranjevanju baterijskega
vložka v vsebniku z drugimi kovinskimi
predmeti kot so žeblji, kovanci itn.
(3) Ne izpostavljajte baterijskega vložka vodi
ali dežju.
Kratek stik akumulatorja lahko povzroči velik
električni tok, pregrevanje, morebitne opekline
in celo okvaro.
6. Ne shranjujte in uporabljajte orodja in akumu-
latorske baterije na mestih, kjer lahko tempera-
tura doseže ali preseže 50 °C (122 °F).
7. Ne sežigajte baterijskega vložka, tudi če je
hudo poškodovan ali v celoti izpraznjen.
Baterijski vložek lahko v ognju eksplodira.
8. Ne pribijajte, režite, drobite, mečite, spuščajte
akumulatorske baterije oziroma ne udarjajte
z akumulatorsko baterijo po trdem predmetu.
Takšnoravnanjelahkopovzročipožar,preko-
mernovročinoalieksplozijo.
9. Ne uporabljajte poškodovanih akumulatorjev.
10. Priložene litij-ionske baterije ustrezajo zahte-
vam zakonodaje v zvezi z nevarnim blagom.
Zakomercialneprevoze,npr.tiste,kijihopravljajo
tretjestrankeincarinskiposredniki,jetrebaupoštevati
posebnezahtevevzvezizembalažoinoznačevanjem.
Med postopkom priprave na odpremo izdelka se
jetrebaposvetovatisstrokovnjakomzanevarne
snovi.Pritemupoštevajtetudipodrobnejšenacio-
nalne predpise.
Odprtestikeoblepitezlepilnimtrakomalijihdru-
gačezaščitite,baterijopazapakirajtetako,dasev
embalažinemorepremikati.
11. Ko odstranjujete akumulatorsko baterijo, jo
vzemite iz orodja in varno zavrzite. Upoštevajte
lokalne uredbe glede odlaganja baterije.
12. Baterije uporabljajte le z izdelki, ki jih določi
Makita.Čenamestitebaterijevneskladneizdelke,
lahkopridedopožara,pregrevanja,eksplozijeali
puščanjaelektrolita.
13. Če orodja dlje časa ne uporabljate, morate iz
njega odstraniti baterijo.
14. Med uporabo in po uporabi lahko akumu-
latorska baterija postane vroča in povzroči
opekline. Z vročimi akumulatorskimi baterijami
ravnajte pazljivo.
15.
Ne dotikajte se priključka orodja takoj po uporabi,
ker se lahko dovolj segreje, da povzroči opekline.
16. Ne dovolite, da bi se v priključke, odprtine in
utore akumulatorske baterije zlepili ostružki,
prah ali zemlja.Tolahkopovzročipregrevanje,
požar,razpočenjeinokvaroorodjaaliakumula-
torskebaterijeterprivededoopeklinalidrugih
telesnihpoškodb.
17. Razen če orodje podpira uporabo v bližini
visokonapetostnih električnih vodov, akumula-
torske baterije ne uporabljajte v bližini visoko-
napetostnih električnih vodov.Takšnauporaba
lahkopovzročimotnjevdelovanjualiokvaro
orodjaoziromaakumulatorskebaterije.
18. Baterijo hranite izven dosega otrok.
SHRANITE TA NAVODILA.

20 SLOVENŠČINA
POZOR: Uporabljajte le originalne baterije
Makita.ČeuporabljateneoriginalnebaterijeMakita
alibaterije,kisobilespremenjene,lahkopridedo
eksplozijebaterijeinposledičnodopožara,telesnih
poškodbalimaterialneškode.Stakšnouporabo
bostetudirazveljaviligarancijoMakitazaorodjein
polnilnik Makita.
Nasveti za ohranjanje največje
zmogljivosti akumulatorja
1. Napolnite baterijski vložek, preden se v celoti
izprazni. Ko opazite, da ima orodje manjšo
moč, vedno ustavite delovanje orodja in napol-
nite baterijski vložek.
2. Nikoli znova ne polnite popolnoma napol-
njenega baterijskega vložka. Prenapolnjenje
skrajša življenjsko dobo akumulatorja.
3. Baterijski vložek s sobno temperaturo pol-
nite pri temperaturi okolja od 10 °C do 40 °C.
Počakajte, da se vroč baterijski vložek pred
polnjenjem ohladi.
4. Ko akumulatorske baterije ne uporabljate, jo
odstranite iz orodja ali polnilnika.
5. Če baterijskega vložka ne uporabljate dalj časa
(več kot 6 mesecev), ga napolnite.
OPIS DELOVANJA
POZOR: Pred nastavljanjem ali preizkusom
delovanja orodja se prepričajte, ali je orodje
izključeno in ali je akumulatorska baterija
odstranjena.
POZOR: Pazite, da si med nameščanjem
akumulatorja ne priprete prstov med čistilnik in
akumulator, kot je prikazano na diagramu. Tako se
lahkopoškodujete.
►Sl.1
Nameščanje ali odstranjevanje
akumulatorske baterije
POZOR: Vedno izklopite orodje, preden name-
stite ali odstranite akumulatorsko baterijo.
POZOR: Kadar nameščate ali odstranjujete
akumulatorsko baterijo, trdno držite orodje in
akumulatorsko baterijo.Čeorodjainakumulatorske
baterijenedržitetrdno,selahkozgodi,davamzdr-
snetaizrok,posledicapajelahkopoškodbaorodjain
akumulatorskebaterijetertelesnapoškodba.
Čeželiteodstranitiakumulatorskobaterijo,jopotisnite
izorodja,pritempapomikajtegumbnasprednjistrani
vložka.
►Sl.2: 1.Rdečiindikator2. Gumb 3.Baterijskivložek
Akumulatorskobaterijovstavitetako,daporavnate
jezičeknabaterijizutoromnaohišjuinjopotisnetev
ležišče.Potisnitejodokonca,dasezaskoči.Čevidite
rdečiindikator,kotjeprikazanonasliki,seakumulator-
skabaterijaniustreznozaskočila.
POZOR: Vedno namestite akumulatorsko
baterijo tako, da rdeči indikator ni več viden.Če
teganeupoštevate,lahkobaterijanepričakovano
padeizorodjainpoškodujevasaliosebevneposre-
dnibližini.
POZOR: Ne nameščajte akumulatorske bate-
rije s silo.Česeakumulatorskabaterijanezaskoči
zlahka,nipravilnovstavljena.
Zaščitni sistem orodja/akumulatorja
Orodjejeopremljenozzaščitnimsistemomzaorodje/
akumulator.Sistemsamodejnoprekinenapajanje
orodja,dapodaljšaživljenjskodoboorodjainakumu-
latorja.Orodjesebosamodejnozaustavilomeddelo-
vanjem,čestaorodjealiakumulatorzamenjanapod
naslednjimipogoji.
Preobremenjeno:
Orodje/baterijadelujenanačin,zaradikateregaprihaja
doneobičajnovisokegatoka.
Vtemprimeruizklopiteorodjeinprenehajteizvajati
delo,kijepovzročilopreobremenitevorodja.Natovklo-
piteorodjeingaznovazaženite.
Pregrevanje:
Orodje/baterijajepregreta.Vtemprimerupustite,dase
orodje/baterijaohladi,predenorodjeznovavklopite.
Nizka napetost akumulatorja:
Napolnjenostakumulatorjajeprenizka,zatoorodje
nedeluje.Vtemprimeruodstraniteinnapolnite
akumulator.
Zaščita pred drugimi vzroki:
Sistemzaščitejezasnovantudizadrugevzroke,kibi
lahkopovzročilipoškodbeorodja,inomogočasamo-
dejnoustavitevorodja.Kadarseorodjezačasnoustavi
aliprenehadelovati,izveditevsenaslednjekorake,da
odpravite vzroke.
1. Izklopiteorodjeinganatovklopite,dagaznova
zaženete.
2. Napolnitebaterijoalijozamenjajteznapolnjeno
baterijo(popotrebiponovitepostopekšezadrugo
baterijo).
3. Počakajte,daseorodjeinbaterijaohladita.
Čezobnovitvijosistemazaščiteneodpravitetežave,se
obrnite na lokalni servisni center Makita.
Prikazuje preostalo raven
napolnjenosti akumulatorja
Samo za akumulatorske baterije z indikatorjem
►Sl.3: 1.Indikatorskelučke2.Gumbzapreverjanje
Pritisnitegumbzapreverjanjenabaterijskemvložku,
dapreveriteravennapolnjenostiakumulatorja.
Indikatorskelučkenakratkozasvetijo.
Other manuals for DCL283F
5
Table of contents
Languages:
Other Makita Vacuum Cleaner manuals

Makita
Makita VC007GL User manual

Makita
Makita VC002GL User manual

Makita
Makita DVC867L User manual

Makita
Makita VC009G User manual

Makita
Makita CL117FD User manual

Makita
Makita DVC261ZX4 User manual

Makita
Makita DUB187 User manual

Makita
Makita 4013D User manual

Makita
Makita VC001GL User manual

Makita
Makita CL108FDSAP User manual

Makita
Makita VC001GL User manual

Makita
Makita VC005GL User manual

Makita
Makita VC005GLZ User manual

Makita
Makita VC005GL User manual

Makita
Makita DVC261TX25 User manual

Makita
Makita DVC560 User manual

Makita
Makita VC011G User manual

Makita
Makita DVC660 User manual

Makita
Makita DRC200 User manual

Makita
Makita VC3211M User manual