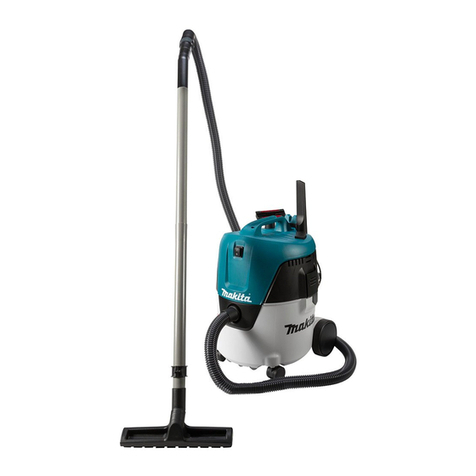
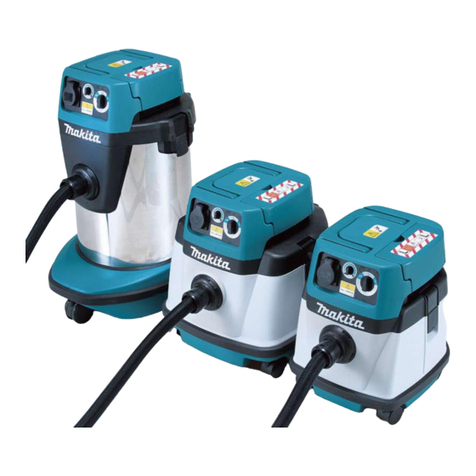
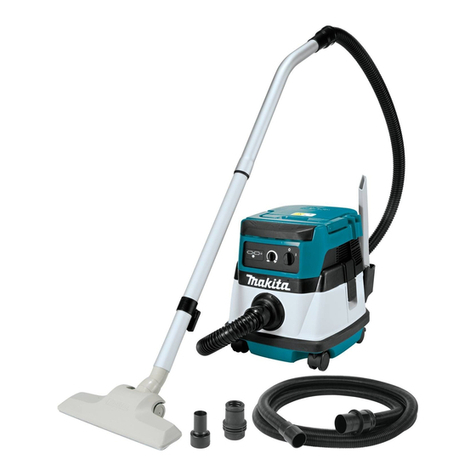
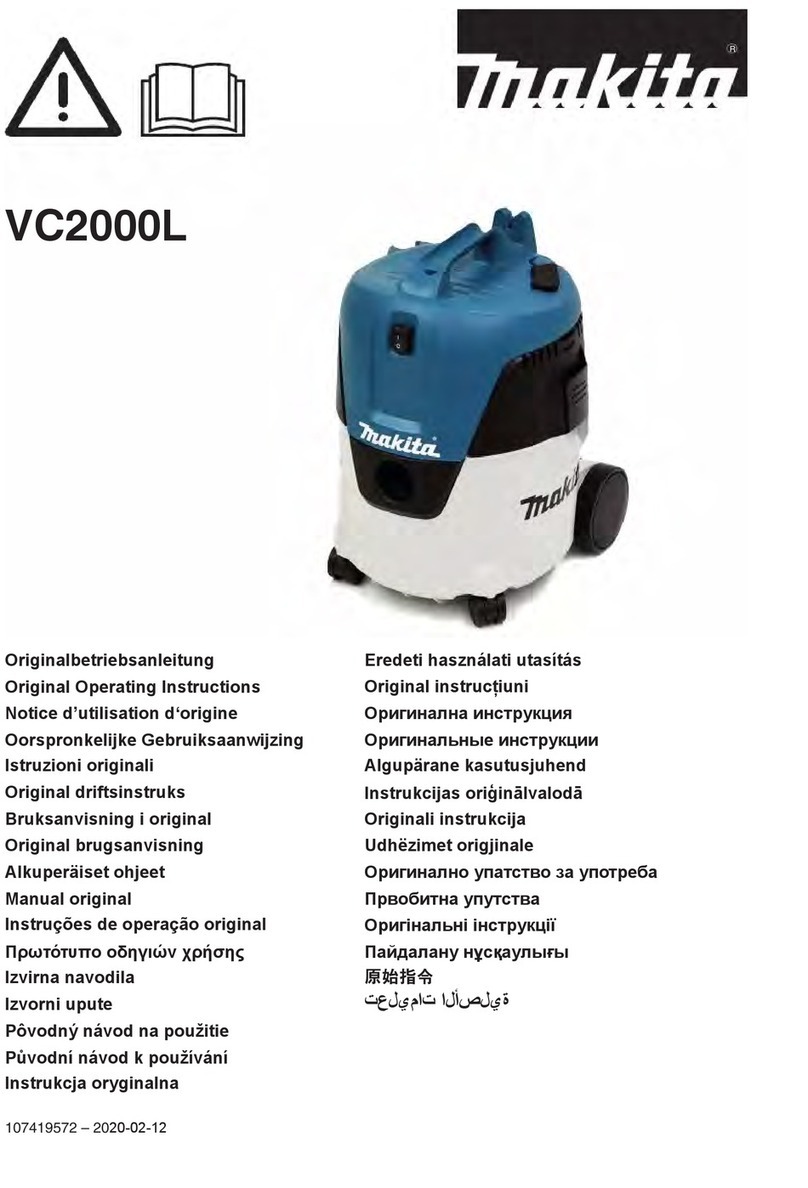
Makita VC005GL User manual

VC005GL
EN Cordless Vacuum Cleaner INSTRUCTION MANUAL 7
PL Odkurzacz akumulatorowy INSTRUKCJA OBSŁUGI 16
HU Vezeték nélküli porszívó HASZNÁLATI KÉZIKÖNYV 26
SK Akumulátorový vysávač NÁVOD NA OBSLUHU 36
CS Bezdrátový akumulátorový
vysavač NÁVOD K OBSLUZE 45
UK Акумуляторний пилосос ІНСТРУКЦІЯ З
ЕКСПЛУАТАЦІЇ 54
RO Aspirator fără cablu MANUAL DE INSTRUCŢIUNI 64
DE Akku-Staubsauger BETRIEBSANLEITUNG 74

1
2
3
4
Fig.1
2
1
Fig.2
1
2
Fig.3
1
2
Fig.4
1
2
Fig.5
11
2
Fig.6
Fig.7
2

1
3
2
Fig.8
12
3
4
Fig.9
Fig.10
1
2
3
Fig.11
1
2
3
4
5
6
6
6
Fig.12
1
4
2
3
Fig.13
1
2
3
Fig.14
3

1
Fig.15
1
2
Fig.16
Fig.17
1
2
Fig.18
1
2
3
Fig.19
2
3
1
Fig.20
1
2
Fig.21
4

1
2
Fig.22
1
3
2
Fig.23
1
2
3
Fig.24
Fig.25
2
1
Fig.26
1
2
2
Fig.27
2
1
Fig.28
Fig.29
5

1
Fig.30
Fig.31
6

7ENGLISH
ENGLISH (Original instructions)
WARNING
• This machine is not intended for use by persons including children with reduced physical, sensory or mental
capabilities, or lack of experience and knowledge.
• Children should be supervised to ensure that they do not play with the cleaner.
• See the chapter “SPECIFICATIONS” for the type reference of the battery.
• See the section “Installing or removing battery cartridge” for how to remove or install the battery.
• When disposing the battery cartridge, remove it from the tool and dispose of it in a safe place. Follow your local
regulations relating to disposal of battery.
• If the tool is not used for a long period of time, the battery must be removed from the tool.
• Do not short the battery cartridge.
• See the chapter “MAINTENANCE” for the appropriate details of precautions during user maintenance.
SPECIFICATIONS
Model: VC005GL
Standard lter type Cloth lter (for dry dust)
Maximum air volume at the end of hose
(with BL4040, ø32 mm x 1.7 m hose) 2.7 m3/min
Maximum air volume at turbine
(with BL4040) 4.2 m3/min
Vacuum
(with BL4040) 23 kPa
Recoverable capacity 8 L
Dimensions (L x W x H) 366 mm x 334 mm x 397 mm
Rated voltage D.C. 36 V - 40 V max
Net weight 7.9 - 11.0 kg
Protection degree IPX4
•
Due to our continuing program of research and development, the specications herein are subject to change without notice.
• Specications and battery cartridge may dier from country to country.
• The weight does not include accessories but battery cartridge(s). The lightest and heaviest combination weight
of the appliance and battery cartridge(s) are shown in the table.
• For wet dust, the oat and the water lter or cloth lter are required.
Applicable battery cartridge and charger
Battery cartridge BL4020 / BL4025 / BL4040* / BL4050F* / BL4080F*
* : Recommended battery
Charger DC40RA / DC40RB / DC40RC
•
Some of the battery cartridges and chargers listed above may not be available depending on your region of residence.
WARNING: Only use the battery cartridges and chargers listed above. Use of any other battery cartridges
and chargers may cause injury and/or re.
Symbols
The followings show the symbols which may be used
for the equipment. Be sure that you understand their
meaning before use.
Read instruction manual.
Take particular care and attention.
Warning! The cleaner may contain haz-
ardous dust.
Never stand on the cleaner.
Dust class L (light). The cleaners are capa-
ble of picking up dust class L. Follow your
country's regulations relating to dusts and
to occupational health and safety.

8ENGLISH
Ni-MH
Li-ion
Only for EU countries
Due to the presence of hazardous com-
ponents in the equipment, waste electrical
and electronic equipment, accumulators
and batteries may have a negative impact
on the environment and human health.
Do not dispose of electrical and electronic
appliances or batteries with household
waste!
In accordance with the European Directive
on waste electrical and electronic equip-
ment and on accumulators and batteries
and waste accumulators and batteries,
as well as their adaptation to national law,
waste electrical equipment, batteries and
accumulators should be stored separately
and delivered to a separate collection point
for municipal waste, operating in accor-
dance with the regulations on environmen-
tal protection.
This is indicated by the symbol of the
crossed-out wheeled bin placed on the
equipment.
Intended use
The appliance is intended for collecting dry dust. The
appliance is suitable for commercial use, for example in
hotels, schools, hospitals, factories, shops, oces and
rental businesses.
Noise
The typical A-weighted noise level determined accord-
ing to EN60335-2-69:
Sound pressure level (LpA) : 70 dB(A) or less
Uncertainty (K) : 2.5 dB(A)
The noise level under working may exceed 80 dB (A).
NOTE: The declared noise emission value(s) has
been measured in accordance with a standard test
method and may be used for comparing one tool with
another.
NOTE: The declared noise emission value(s)
may also be used in a preliminary assessment of
exposure.
WARNING: Wear ear protection.
WARNING: The noise emission during actual
use of the power tool can dier from the declared
value(s) depending on the ways in which the
tool is used especially what kind of workpiece is
processed.
WARNING: Be sure to identify safety mea-
sures to protect the operator that are based on an
estimation of exposure in the actual conditions of
use (taking account of all parts of the operating
cycle such as the times when the tool is switched
o and when it is running idle in addition to the
trigger time).
Vibration
The vibration total value (tri-axial vector sum) deter-
mined according to EN60335-2-69:
Vibration emission (ah,M) : 2.5 m/s2or less
Uncertainty (K) : 1.5 m/s2
NOTE: The declared vibration total value(s) has been
measured in accordance with a standard test method
and may be used for comparing one tool with another.
NOTE: The declared vibration total value(s) may also
be used in a preliminary assessment of exposure.
WARNING: The vibration emission during
actual use of the power tool can dier from the
declared value(s) depending on the ways in which
the tool is used especially what kind of workpiece
is processed.
WARNING: Be sure to identify safety mea-
sures to protect the operator that are based on an
estimation of exposure in the actual conditions of
use (taking account of all parts of the operating
cycle such as the times when the tool is switched
o and when it is running idle in addition to the
trigger time).
EC Declaration of Conformity
For European countries only
The EC declaration of conformity is included as Annex A
to this instruction manual.
SAFETY WARNINGS
Cordless vacuum cleaner safety
warnings
WARNING: IMPORTANT! READ CAREFULLY
all safety warnings and all instructions BEFORE
USE. Failure to follow the warnings and instructions
may result in electric shock, re and/or serious injury.
1. Before use, make sure that this cleaner must
be used by people who have been adequately
instructed on the use of this cleaner.
2. Before use, operators shall be provided with
information, instruction and training for the
use of the machine and the substances for
which it is to be used, including the safe
method of removal and disposal of the mate-
rial collected.
3. Always make sure that lters are correctly
installed before use. Do not use the cleaner
without lters in place. Replace a damaged
lter immediately. It is recommended to have
some spares as lters are consumable items.
4. AVOID UNINTENTIONAL STARTING. Be sure
switch is OFF when installing battery(ies).
5. Do not attempt to pick up ammable materials,
re works, lighted cigarettes, hot ashes, hot
metal chips, sharp materials such as razors,
needles, broken glass or the like.
6.
NEVER USE THE CLEANER IN THE VICINITY
OF GASOLINE, GAS, PAINT, ADHESIVES OR
OTHER HIGHLY EXPLOSIVE SUBSTANCES.
The switch emits sparks when turned ON and
OFF. And so does the motor commutator during
operation. A dangerous explosion may result.

9ENGLISH
7. Never vacuum up toxic, carcinogenic, com-
bustible or other hazardous materials such
as asbestos, arsenic, barium, beryllium,
lead, pesticides, or other health endangering
materials.
8. Always place the cleaner on a horizontal at
surface to prevent it from falling or moving
unintentionally.
9. Never use the cleaner outdoors in the rain.
10. For Finland, this machine is not to be used
outdoors at low temperature.
11. Do not use close to heat sources (stoves, etc.).
12. If the exhaust air is returned to the room, it
is necessary to provide for an adequate air
change rate in the room. Reference to National
regulations is necessary.
13. Do not block suction inlet/outlet/cooling vents.
These vents permit cooling of the motor.
Blockage should be carefully avoided other-
wise the motor will burn out due to a lack of
ventilation.
14. Keep proper footing and balance at all times.
15. Do not fold, tug or step on the hose.
16. Stop the cleaner immediately if you notice
poor performance or anything abnormal
during operation.
17. REMOVE THE BATTERY(IES). When not in
use, before servicing, and when changing
accessories.
18. Clean and service the cleaner immediately
after each use to keep it in tiptop operating
condition.
19. MAINTAIN THE CLEANER WITH CARE. Keep
the cleaner clean for better and safer per-
formance. Follow instructions for changing
accessories. Keep handles dry, clean, and free
from oil and grease.
20. CHECK DAMAGED PARTS. Before further use
of the cleaner, a guard or other part that is
damaged should be carefully checked to deter-
mine that it will operate properly and perform
its intended function. Check for alignment of
moving parts, binding of moving parts, break-
age of parts, mounting, and any other condi-
tions that may aect its operation. A guard or
other part that is damaged should be properly
repaired or replaced by an authorized service
center unless otherwise indicated elsewhere
in this instruction manual. Have defective
switches replaced by authorized service cen-
ter. Don’t use the cleaner if switch does not
turn it on and o.
21. For user servicing, the machine shall be dis-
mantled, cleaned and serviced, as far as is
reasonably practicable, without causing risk to
the maintenance sta and others.
22. The machine should be technically inspected
by the manufacturer, or an instructed person,
at least annually, consisting of, for example,
inspection of lters for damage, air tightness
of the machine and proper function of the
control mechanism.
23. When carrying out service or repair opera-
tions, all contaminated items which cannot be
satisfactorily cleaned are to be disposed of;
such items shall be disposed of in impervious
bags in accordance with any current regula-
tion for the disposal of such waste.
24. REPLACEMENT PARTS. When servicing, use
only identical replacement parts.
25. When not in use, always store the cleaner
indoors.
26. Be kind to your cleaner. Rough handling can
cause breakage of even the most sturdily built
cleaner.
27. Do not attempt to clean the exterior or interior
with benzine, thinner or cleaning chemicals.
Cracks and discoloration may be caused.
28. Do not use cleaner in an enclosed space where
ammable, explosive or toxic vapors are given
o by oil-base paint, paint-thinner, gasoline,
some mothproong substances, etc., or in
areas where ammable dust is present.
29. Do not operate the cleaner or any tool while
under the inuence of drugs or alcohol.
30. As a basic rule of safety, use safety goggles or
safety glasses with side shields.
31. Use a dust mask in dusty work conditions.
32. This machine is not intended for use by per-
sons including children with reduced physical,
sensory or mental capabilities, or lack of expe-
rience and knowledge.
33. Children should be supervised to ensure that
they do not play with the cleaner.
34.
Never handle battery(ies) and cleaner with wet hands.
35. Use extreme caution when cleaning on stairs.
36. Do not use the cleaner as a stool or work
bench. The machine may fall down and may
result in personal injury.
37. Do not pick up foam or soapy liquid. It can
cause foam to come out of air exit, resulting in
electric shock and damage to the cleaner.
Battery tool use and care
1. Recharge only with the charger specied by
the manufacturer. A charger that is suitable for
one type of battery pack may create a risk of re
when used with another battery pack.
2. Use power tools only with specically desig-
nated battery packs. Use of any other battery
packs may create a risk of injury and re.
3. When battery pack is not in use, keep it away
from other metal objects, like paper clips,
coins, keys, nails, screws or other small metal
objects, that can make a connection from one
terminal to another. Shorting the battery termi-
nals together may cause burns or a re.
4. Under abusive conditions, liquid may be
ejected from the battery; avoid contact. If con-
tact accidentally occurs, ush with water. If
liquid contacts eyes, additionally seek medical
help. Liquid ejected from the battery may cause
irritation or burns.
5. Do not use a battery pack or tool that is dam-
aged or modied. Damaged or modied batteries
may exhibit unpredictable behaviour resulting in
re, explosion or risk of injury.

10 ENGLISH
6. Do not expose a battery pack or tool to re or
excessive temperature. Exposure to re or tem-
perature above 130 °C may cause explosion.
7. Follow all charging instructions and do not
charge the battery pack or tool outside the
temperature range specied in the instruc-
tions. Charging improperly or at temperatures
outside the specied range may damage the
battery and increase the risk of re.
SAVE THESE INSTRUCTIONS.
WARNING: DO NOT let comfort or familiarity
with product (gained from repeated use) replace
strict adherence to safety rules for the subject
product. MISUSE or failure to follow the safety
rules stated in this instruction manual may cause
serious personal injury.
Important safety instructions for
battery cartridge
1. Before using battery cartridge, read all instruc-
tions and cautionary markings on (1) battery
charger, (2) battery, and (3) product using
battery.
2. Do not disassemble or tamper the battery
cartridge. It may result in a re, excessive heat,
or explosion.
3. If operating time has become excessively
shorter, stop operating immediately. It may
result in a risk of overheating, possible burns
and even an explosion.
4. If electrolyte gets into your eyes, rinse them
out with clear water and seek medical atten-
tion right away. It may result in loss of your
eyesight.
5. Do not short the battery cartridge:
(1) Do not touch the terminals with any con-
ductive material.
(2) Avoid storing battery cartridge in a con-
tainer with other metal objects such as
nails, coins, etc.
(3) Do not expose battery cartridge to water
or rain.
A battery short can cause a large current
ow, overheating, possible burns and even a
breakdown.
6. Do not store and use the tool and battery car-
tridge in locations where the temperature may
reach or exceed 50 °C (122 °F).
7. Do not incinerate the battery cartridge even if
it is severely damaged or is completely worn
out. The battery cartridge can explode in a re.
8. Do not nail, cut, crush, throw, drop the battery
cartridge, or hit against a hard object to the
battery cartridge. Such conduct may result in a
re, excessive heat, or explosion.
9. Do not use a damaged battery.
10. The contained lithium-ion batteries are subject
to the Dangerous Goods Legislation require-
ments.
For commercial transports e.g. by third parties,
forwarding agents, special requirement on pack-
aging and labeling must be observed.
For preparation of the item being shipped, consult-
ing an expert for hazardous material is required.
Please also observe possibly more detailed
national regulations.
Tape or mask o open contacts and pack up the
battery in such a manner that it cannot move
around in the packaging.
11. When disposing the battery cartridge, remove
it from the tool and dispose of it in a safe
place. Follow your local regulations relating to
disposal of battery.
12. Use the batteries only with the products
specied by Makita. Installing the batteries to
non-compliant products may result in a re, exces-
sive heat, explosion, or leak of electrolyte.
13. If the tool is not used for a long period of time,
the battery must be removed from the tool.
14. During and after use, the battery cartridge may
take on heat which can cause burns or low
temperature burns. Pay attention to the han-
dling of hot battery cartridges.
15. Do not touch the terminal of the tool imme-
diately after use as it may get hot enough to
cause burns.
16. Do not allow chips, dust, or soil stuck into the
terminals, holes, and grooves of the battery
cartridge. It may cause heating, catching re,
burst and malfunction of the tool or battery car-
tridge, resulting in burns or personal injury.
17. Unless the tool supports the use near
high-voltage electrical power lines, do not use
the battery cartridge near a high-voltage elec-
trical power lines. It may result in a malfunction
or breakdown of the tool or battery cartridge.
18. Keep the battery away from children.
SAVE THESE INSTRUCTIONS.
CAUTION: Only use genuine Makita batteries.
Use of non-genuine Makita batteries, or batteries that
have been altered, may result in the battery bursting
causing res, personal injury and damage. It will
also void the Makita warranty for the Makita tool and
charger.
Tips for maintaining maximum
battery life
1. Charge the battery cartridge before completely
discharged. Always stop tool operation and
charge the battery cartridge when you notice
less tool power.
2. Never recharge a fully charged battery car-
tridge. Overcharging shortens the battery
service life.
3. Charge the battery cartridge with room tem-
perature at 10 °C - 40 °C (50 °F - 104 °F). Let
a hot battery cartridge cool down before
charging it.
4. When not using the battery cartridge, remove
it from the tool or the charger.
5. Charge the battery cartridge if you do not use
it for a long period (more than six months).

11 ENGLISH
PARTS DESCRIPTION
► Fig.1: 1. Head unit 2. Filter cage 3. Cloth lter
4. Tank
FUNCTIONAL
DESCRIPTION
CAUTION: Always be sure that the appliance
is switched o and the battery cartridges are
removed before adjusting or checking function on
the appliance.
Installing or removing battery
cartridge
CAUTION: Always switch o the appliance
before installing or removing battery cartridges.
CAUTION: Hold the cleaner and battery car-
tridges rmly when installing or removing battery
cartridges. Failure to do so may cause them to slip
o your hands, resulting in damage to the cleaner and
battery cartridges or personal injury.
CAUTION: Be careful not to pinch your n-
gers when opening or closing the battery cover.
Failure to do so may cause personal injury.
The cleaner has double battery slots. With two identical
batteries in parallel, you can extend your running time
in one or more uses without having to stop to recharge
batteries. The cleaner also works with a single battery,
so you can choose with either double batteries or single
battery according to your needs.
► Fig.2: 1. Left battery slot 2. Right battery slot
With double batteries
Continuous drive with two batteries allows longer run-
time and more ecient cleaning. When the rst battery
is becoming empty, the cleaner automatically switches
a power source, so it continues working with the second
battery.
NOTE: The left battery slot (when facing the front of
the cleaner) has priority over the right battery slot.
The right battery slot will only be identied as a power
source, either when no battery is installed in the
left battery slot or the battery in the left battery slot
becomes empty.
NOTE: You can remove the battery from the left
battery slot and recharge it after the cleaner has
switched its power source from the left battery slot to
the right without ceasing operation. To give priority
back to the left battery slot after installing a recharged
battery, restart the cleaner.
With a single battery
Only one battery is required as a power source in either
the left or right battery slot. The cleaner automatically
determines which battery slot is available according to
operating conditions.
Installation and uninstallation
To install battery cartridges, release the lock rst,
and open the battery cover. Then insert the battery
cartridges.
► Fig.3: 1. Lock 2. Battery cover
Align the tongues on the battery cartridges with the
grooves in the battery housing and slip them into place.
Insert them all the way until they lock in place with a
little click.
Then lock the battery cover.
► Fig.4: 1. Battery cartridge 2. Button
To remove the battery cartridges, slide them out of the
battery housing while pressing and holding the buttons
in front of the cartridges.
CAUTION: Always install the battery cartridge
fully. If not, it may accidentally fall out of the appli-
ance, causing injury to you or someone around you.
CAUTION: Do not install the battery cartridge
forcibly. If the cartridge does not slide in easily, it is
not being inserted correctly.
NOTE: When the cleaner switches the power source
from the rst battery to the second, it may require a
temporary halt in operations, causing a slight loss of
suction. Please note that it is not malfunction so the
cleaner recovers and resumes operations immedi-
ately after the pause.
Indicating the remaining battery
capacity
Press the check button on the battery cartridge to indi-
cate the remaining battery capacity. The indicator lamps
light up for a few seconds.
► Fig.5: 1. Indicator lamps 2. Check button
Indicator lamps Remaining
capacity
Lighted O Blinking
75% to 100%
50% to 75%
25% to 50%
0% to 25%
Charge the
battery.
The battery
may have
malfunctioned.
NOTE: Depending on the conditions of use and the
ambient temperature, the indication may dier slightly
from the actual capacity.
NOTE: The rst (far left) indicator lamp will blink when
the battery protection system works.

12 ENGLISH
Battery indicators on control panel
The remaining battery capacity can be read on the
control panel at any time. Press the check button, and
the left and right indicators will show the battery charge
levels correspondingly.
► Fig.6: 1. Battery indicators 2. Check button
► Fig.7
Battery indicator status Remaining
battery
capacity
On O Blinking
50% to 100%
20% to 50%
0% to 20%
Charge the
battery
Battery not
inserted
NOTE: The battery indicators will also be activated
when the cleaner starts functioning or switches its
power source from one to another.
Appliance / battery protection
system
The appliance is equipped with an appliance/battery
protection system. This system automatically cuts o
power to the motor to extend appliance and battery life.
The appliance will automatically stop during operation
if the appliance or battery is placed under one of the
following conditions:
Overload protection
When the appliance/battery is operated in a manner
that causes it to draw an abnormally high current, the
appliance automatically stops. In this situation, turn the
appliance o and stop the application that caused the
appliance to become overloaded. Then turn the appli-
ance on to restart.
Overheat protection
On Blinking
When the appliance is overheated, the appliance stops
automatically, and both left and right battery indicators
blink. In this situation, let the appliance cool down
before turning the appliance on again.
On Blinking
When the battery is overheated, the appliance stops
automatically, and one of the indicators for overheated
battery blinks. In this situation, let the battery cool down
before turning the appliance on again.
Overdischarge protection
When the battery capacity becomes low, the appliance stops auto-
matically. If the appliance does not run along with the switch opera-
tion, remove the batteries from the appliance and recharge them.
Protections against other causes
Protection system is also designed for other causes that could dam-
age the appliance and allows the appliance to stop automatically.
Take all the following steps to clear the causes, when the appliance
has been brought to a temporary halt or stop in operation.
1.
Turn the appliance o, and then turn it on again to restart.
2. Charge the battery(ies) or replace it/them with
recharged battery(ies).
3. Let the appliance and battery(ies) cool down.
If no improvement can be found by restoring protection
system, then contact your local Makita Service Center.
Switch action
Turning cleaner on
1. Turn the stand-by switch in the "I" (ON) position to
have the cleaner ready in stand-by mode.
2. Press the power button.
To switch back to stand-by mode, press the power
button again.
Turning cleaner o
Perform one of the following steps.
• Press the power button to set the cleaner back in
stand-by mode, and then turn the stand-by switch
in the "O" (OFF) position.
• Turn the stand-by switch in the "O" (OFF) position.
Adjusting suction power
The suction power can be adjusted according to your work needs.
• Turn the suction force adjusting knob to the left to
reduce the suction power.
• Turn the suction force adjusting knob to the right
to increase the suction power.
► Fig.8: 1. Stand-by switch 2. Power button 3. Suction
force adjusting knob
Locking and unlocking casters
Front casters can be locked with stoppers to help the
cleaner stand still.
Lower the stopper lever by hand to lock the caster, and
raise it up to release.
► Fig.9: 1. Caster 2. Stopper lever 3. Unlocked posi-
tion 4. Locked position
NOTE: When moving the cleaner, make sure that the
caster is unlocked. Moving the cleaner with the caster
in a locked position may cause damage to the caster.

13 ENGLISH
Carriage handle
CAUTION: Lift and carry the appliance with
due care. Failing to do so may result in personal
injury or damage to the appliance.
When carrying the cleaner, carry it by holding the han-
dle on the head unit. The handle is retractable on the
head unit when not in use.
► Fig.10
ASSEMBLY
CAUTION: Always be sure that the appliance
is switched o and the battery cartridges are
removed before carrying out any work on the
appliance.
CAUTION: Always wear dust mask during
assembly or maintenance.
Installing powder lter (HEPA) and
prelter (for dry dust)
Optional accessory
CAUTION: Never pick up water or other liq-
uids or wet dusts when using the powder lter.
Picking up such things may cause the powder lter
breakage.
To use powder lter:
1. Remove the lter cage and cloth lter out of the
tank.
► Fig.11: 1. Filter cage 2. Cloth lter 3. Tank
2. Place the prelter into the tank aligning the mount-
ing position markings on the prelter and tank.
3. Set the damper into the prelter, and then place
the powder lter over the damper aligning the mounting
position markings on the powder lter and prelter.
4. Mount the head unit over the tank and secure
them with the locking latches.
► Fig.12: 1. Head unit 2. Powder lter (HEPA)
3. Damper 4. Prelter 5. Tank 6. Mounting
position marking
NOTICE: Before using the powder lter, make
sure that prelter and damper are used together. It
is not allowed to install powder lter alone.
Installing paper pack
Optional accessory
WARNING: Before using a paper pack,
make sure that the cloth lter or prelter is used
together. Failure to use the cloth lter / prelter
together may cause unusual noise and heat, resulting
in a re.
NOTICE: Never pick up water or other liquids
or wet dusts when using a paper pack. Picking up
such things may cause the paper pack breakage.
NOTICE: When using the cloth lter, make sure
that the lter cage is used together.
NOTICE: When using the prelter, make sure
that the powder lter and the damper are used
together.
1. Unfold a paper pack.
2. Align the paper pack opening with the dust intake
of the tank.
3. Install the paper pack into the tank with its card-
board opening hooked on the paper pack holder.
► Fig.13: 1. Paper pack 2. Cardboard opening
3. Paper pack holder 4. Dust intake
Installing polyethylene bag
With a polyethylene bag installed in the tank, you can
easily empty the tank without letting your hands dirty.
Lay a polyethylene bag over the tank, and slip one side
of the top edge of the bag at its open end in between
the holder plate and the front wall of the tank.
► Fig.14: 1. Holder plate 2. Front wall of tank
3. Polyethylene bag
Spread the other top edges of the bag outwards over
the top rims of the tank. Place the cloth lter or prelter
over the polyethylene bag to fasten the opening of the
bag securely.
► Fig.15: 1. Cloth lter / prelter
NOTE:
A polyethylene bag available on the market
can be used. 0.04 mm or thicker one is recommended.
NOTE:
Too much dust will tear the bag easily, so do not
collect the dust more than the half of the bag capacity.
Emptying tank with polyethylene bag
WARNING: Always make sure that the cleaner
is switched o and the battery cartridges are
removed before emptying the tank. Failure to do
so may cause an electric shock and serious personal
injury.
NOTICE: Do not apply a great impact on the
tank. Applying a great impact may cause deformation
and damage to the parts.
NOTICE: Empty the tank at least once a day
although this depends on picked-up dust volume
in the tank. Or, the suction force will weaken and the
motor may be broken.
NOTICE: Do not grab the hooks or latches when
emptying the tank. Grabbing the hooks or latches
may cause them to break.
Release the locking latches and lift the head unit up o
the tank.
Shake o dust from the cloth lter or prelter before
lifting the lter away from the tank.
Then remove the polyethylene bag out of the tank,
closing the opening of the bag by hand.
► Fig.16: 1. Polyethylene bag 2. Tank

14 ENGLISH
NOTE: Take the polyethylene bag out of the tank
carefully to avoid it from being scratched and torn by
the edges inside the tank.
NOTE: Empty the polyethylene bag before it
becomes full. Too much dust in the tank may cause
the polyethylene bag to be torn.
Installing multi hook
Use the multi hook to hold a hose, accessories and
attachments not in use in place, and you can quickly
take them out according to your preferences.
► Fig.17
Place the multi hook over the mounting base at the rear
of the cleaner, setting the rails on the multi hook along
the grooves on the mounting base.
► Fig.18: 1. Multi hook 2. Mounting base
Installing MAKPAC adapter
Optional accessory
Connectable and stackable MAKPAC storage cases
can be installed on top of the cleaner with an optional
adapter. The cases are available in many sizes and
styles to suit your preferences.
Place the mounting base hook over the handle of the
cleaner with its mounting surface facing upwards when
the handle is folded into the closed position.
► Fig.19: 1. Mounting base hook 2. Mounting surface
3. Handle
Mount the MAKPAC adapter onto the mounting base
hook, and secure them together with four screws
provided.
► Fig.20: 1. MAKPAC adapter 2. Mounting base hook
3. Screw
Lift the push bar up and tighten the knob to prepare
installing the MAKPAC cases onto the cleaner.
► Fig.21: 1. Push bar 2. Knob
NOTE: For details on installing the MAKPAC cases,
refer to the instructions provided with the MAKPAC
adapter and cases.
Connecting the hose
NOTICE: Never force the hose for bending or
stamp it. Never move the cleaner by a hose.
Forcing, stamping and pulling the hose may cause a
breakage or deformation of the hose.
NOTICE: When picking up large wastes such as
planer carvings, concrete dusts or similar other
than small wastes, use the 38 mm inner diameter
hose (optional accessory). Using the 28 mm inner
diameter hose (optional accessory) may cause a
hose stung and damage.
Insert the hose end to the dust intake (hose inlet) of the
cleaner, then turn it clockwise until it locks in place.
► Fig.22: 1. Hose 2. Dust intake (hose inlet)
Installing or removing cleaner attachments
CAUTION: After installing an attachment,
check if it is securely installed. If the attachment
is installed imperfectly, it may come o and cause
personal injury.
Attachments with lock function
NOTICE: When installing the attachment with
lock function, be sure to align the release button
with the hook on the attachment. If they are not
aligned, the attachment will not be locked and may
come o from the cleaner.
Insert an attachment into the suction inlet of the cleaner
by pushing them together with a click.
To remove the attachment, pull it o while pushing the release button.
► Fig.23: 1. Suction inlet with lock function 2. Release
button 3. Attachment with lock function
NOTE: An attachment with lock function can only be
installed in the suction inlet with lock function.
► Fig.24: 1. Attachment with lock function 2. Suction
inlet with lock function 3. Suction inlet with-
out lock function
Attachments without lock function
Optional accessory
Insert an attachment into the suction inlet of the cleaner
by pushing and hand screwing it in place.
Hand twist and pull the attachment apart from the suc-
tion inlet after use.
► Fig.25
Adjusting lengths of slide-type
extension wand
A slide-type extension wand can be combined for
shorter and longer lengths. It allows to clean hard-to-
reach areas and comfortable positioning options.
Pull in and out the slide pipe to change wand lengths
while pressing and holding the slide button.
Release the slide button to lock the slide pipe in your desired position.
► Fig.26: 1. Slide pipe 2. Slide button
MAINTENANCE
CAUTION: Always be sure that the appliance
is switched o and the battery cartridges are
removed before attempting to perform inspection
or maintenance.
NOTICE: Never use gasoline, benzine, thinner,
alcohol or the like. Discoloration, deformation or
cracks may result.
To maintain product SAFETY and RELIABILITY,
repairs, any other maintenance or adjustment should
be performed by Makita Authorized or Factory Service
Centers, always using Makita replacement parts.

15 ENGLISH
Storage of accessories
Accessories and attachments not in use, such as noz-
zles and brushes, can be hooked and stored in the multi
hook at the rear of the cleaner.
► Fig.27: 1. Multi hook 2. Accessories and attach-
ments not in use
Pipes (with an optional stopper installed) can be placed
into the pipe holder when not using the cleaner for a
short time.
► Fig.28: 1. Stopper (optional accessory) 2. Pipe
holder
A hose can be wrapped and stored around the housing
of the cleaner in large loops. Keep its root end installed
in the hose inlet and hang the loops on the multi hook
with the loose end tied up.
► Fig.29
Cleaning of cloth lter
Clean out the cloth lter at regular intervals since
clogged cloth lter may result in poor suction
performance.
Wipe and shake dust o the cloth lter by hand on
occasions.
► Fig.30: 1. Cloth lter
Cleaning of powder lter (HEPA) and
prelter
Optional accessory
Clean out the powder lter, prelter and damper at
regular intervals since clogged lters and damper may
result in poor suction performance.
Routinely wipe and shake dust o lters and damper
by hand.
Occasionally wash the powder lter in water, rinse and
dry thoroughly in the shade before use. Never wash
lters in a washing machine.
► Fig.31
NOTE: Do not rub or scratch the powder lter, the
prelter and the damper with hard objects such as a
brush and a paddle.
NOTE: The lters wear out in course of time. It is
recommended to have some spares for them.
OPTIONAL
ACCESSORIES
CAUTION: These accessories or attachments
are recommended for use with your Makita tool
specied in this manual. The use of any other
accessories or attachments might present a risk of
injury to persons. Only use accessory or attachment
for its stated purpose.
If you need any assistance for more details regard-
ing these accessories, ask your local Makita Service
Center.
• Hose
• Front cus (22, 24, 38)
• Straight pipe
• Extension wand
• Corner nozzle
• Round brush
• Powder lter, HEPA (for dry dust)
• Damper
• Prelter
• Cloth lter
• Nozzle assembly
• Bent pipe
• Polyethylene bag
• Paper pack
• MAKPAC adapter
• Makita genuine battery and charger
NOTE: Some items in the list may be included in the
tool package as standard accessories. They may
dier from country to country.

16 POLSKI
POLSKI (Instrukcja oryginalna)
OSTRZEŻENIE
• To urządzenie nie jest przeznaczone do użytkowania przez osoby, w tym dzieci, o ograniczonej sprawności
ruchowej, sensorycznej lub umysłowej oraz osoby nieposiadające odpowiedniej wiedzy i doświadczenia.
• Należy zwracać uwagę, aby dzieci nie bawiły się odkurzaczem.
• Informacje na temat zalecanych akumulatorów zawiera rozdział „DANE TECHNICZNE”.
• Sposób montażu i demontażu opisano w punkcie „Wkładanie i wyjmowanie akumulatora”.
• Jeśli zajdzie konieczność utylizacji akumulatora, należy wyjąć go z narzędzia i przekazać w bezpieczne miej-
sce. Postępować zgodnie z przepisami lokalnymi dotyczącymi usuwania akumulatorów.
• Jeśli narzędzie nie będzie używane przez dłuższy czas, należy wyjąć z niego akumulator.
• Nie doprowadzać do zwarcia akumulatora.
• Szczegółowe informacje na temat środków ostrożności podczas konserwacji wykonywanej przez użytkownika
zawiera rozdział „KONSERWACJA”.
DANE TECHNICZNE
Model: VC005GL
Filtr standardowy Filtr z tkaniny (do pyłu suchego)
Maksymalny przepływ powietrza na końcu węża
(z BL4040, wąż ø32 mm x 1,7 m) 2,7 m3/min
Maksymalny przepływ powietrza w turbinie
(z BL4040) 4,2 m3/min
Podciśnienie
(z BL4040) 23 kPa
Pojemność 8 l
Wymiary (dług. x szer. x wys.) 366 mm x 334 mm x 397 mm
Napięcie znamionowe Prąd stały 36 V–40 V maks.
Ciężar netto 7,9–11,0 kg
Stopień ochrony IPX4
• W związku ze stale prowadzonym przez naszą rmę programem badawczo-rozwojowym niniejsze dane mogą
ulec zmianom bez wcześniejszego powiadomienia.
•
W innych krajach urządzenie może mieć odmienne parametry techniczne i może być wyposażone w inny akumulator.
• Waga nie uwzględnia akcesoriów (oprócz akumulatorów). Wagę najlżejszych i najcięższych kombinacji urzą-
dzenia z akumulatorami przedstawiono w tabeli.
• W przypadku mokrego pyłu wymagane jest stosowanie pływaka oraz ltra wody lub ltra z tkaniny.
Kompatybilne akumulatory i ładowarki
Akumulator BL4020 / BL4025 / BL4040* / BL4050F* / BL4080F*
*: Zalecany akumulator
Ładowarka DC40RA / DC40RB / DC40RC
•
Pewne z wymienionych powyżej akumulatorów i ładowarek mogą być niedostępne w regionie zamieszkania użytkownika.
OSTRZEŻENIE: Należy używać wyłącznie akumulatorów i ładowarek wymienionych powyżej.
Używanie innych akumulatorów i ładowarek może stwarzać ryzyko wystąpienia obrażeń ciała lub pożaru.
Symbole
Poniżej pokazano symbole, jakie mogą być zastoso-
wane na urządzeniu. Przed rozpoczęciem użytkowania
należy zapoznać się z ich znaczeniem.
Przeczytać instrukcję obsługi.
Zachować szczególną ostrożność.
Ostrzeżenie! W odkurzaczu może się
znajdować niebezpieczny pył.
Nigdy nie stawać na odkurzaczu.

17 POLSKI
Klasa pyłu L (lekki). Odkurzacze przeznaczone
są do zbierania pyłu klasy L. Należy postępować
zgodnie z przepisami lokalnymi odnoszącymi się
do pyłów oraz do bezpieczeństwa i higieny pracy.
Ni-MH
Li-ion
Dotyczy tylko państw UE
Z uwagi na obecność w sprzęcie nie-
bezpiecznych składników, zużyty sprzęt
elektryczny, elektroniczny, akumulatory
oraz baterie mogą powodować negatywny
wpływ na środowisko i zdrowie ludzi.
Nie wyrzucaj urządzeń elektrycznych,
elektronicznych lub akumulatorów wraz z
odpadami z gospodarstwa domowego!
Zgodnie z Europejską Dyrektywą w sprawie
zużytego sprzętu elektrycznego i elektronicz-
nego oraz dotyczącą akumulatorów i baterii
oraz zużytych akumulatorów i baterii, a także
dostosowaniem ich do prawa krajowego, zużyte
urządzenia elektryczne, elektroniczne, baterie
i akumulatory, należy składować osobno i
przekazywać do punktu selektywnej zbiórki
odpadów komunalnych, działającego zgodnie z
przepisami dotyczącymi ochrony środowiska.
Informuje o tym symbol przekreślonego kołowego
kontenera na odpady umieszczony na sprzęcie.
Przeznaczenie
To urządzenie jest przeznaczone do odsysania suchego pyłu.
Urządzenie jest przeznaczone do użytku komercyjnego, na
przykład w hotelach, szkołach, szpitalach, fabrykach, skle-
pach, biurach oraz przez rmy świadczące usługi wynajmu.
Hałas
Typowy równoważny poziom dźwięku A określony w
oparciu o normę EN60335-2-69:
Poziom ciśnienia akustycznego (LpA): 70 dB(A) lub mniej
Niepewność (K): 2,5 dB(A)
Poziom hałasu podczas pracy może przekraczać 80 dB (A).
WSKAZÓWKA:
Deklarowana wartość emisji hałasu
została zmierzona zgodnie ze standardową metodą testową
i można ją wykorzystać do porównywania narzędzi.
WSKAZÓWKA:
Deklarowaną wartość emisji hałasu
można także wykorzystać we wstępnej ocenie narażenia.
OSTRZEŻENIE: Nosić ochronniki słuchu.
OSTRZEŻENIE: Poziom hałasu wytwa-
rzanego podczas rzeczywistego użytkowania
elektronarzędzia może się różnić od wartości
deklarowanej w zależności od sposobu użytko-
wania narzędzia, a w szczególności od rodzaju
obrabianego elementu.
OSTRZEŻENIE: W oparciu o szacowane
narażenie w rzeczywistych warunkach użytkowa-
nia należy określić środki bezpieczeństwa w celu
zapewnienia ochrony operatora (uwzględniając
wszystkie elementy cyklu działania, tj. czas, kiedy
narzędzie jest wyłączone i kiedy pracuje na biegu
jałowym, a także czas, kiedy jest włączone).
Drgania
Całkowita wartość poziomu drgań (suma wektorów w 3
osiach) określona zgodnie z normą EN60335-2-69:
Emisja drgań (ah,M): 2,5 m/s2 lub mniej
Niepewność (K): 1,5 m/s2
WSKAZÓWKA: Deklarowana wartość poziomu
drgań została zmierzona zgodnie ze standardową
metodą testową i można ją wykorzystać do porówny-
wania narzędzi.
WSKAZÓWKA: Deklarowaną wartość poziomu
drgań można także wykorzystać we wstępnej ocenie
narażenia.
OSTRZEŻENIE: Drgania wytwarzane pod-
czas rzeczywistego użytkowania elektronarzędzia
mogą się różnić od wartości deklarowanej w
zależności od sposobu użytkowania narzędzia,
a w szczególności od rodzaju obrabianego
elementu.
OSTRZEŻENIE: W oparciu o szacowane
narażenie w rzeczywistych warunkach użytkowa-
nia należy określić środki bezpieczeństwa w celu
zapewnienia ochrony operatora (uwzględniając
wszystkie elementy cyklu działania, tj. czas, kiedy
narzędzie jest wyłączone i kiedy pracuje na biegu
jałowym, a także czas, kiedy jest włączone).
Deklaracja zgodności WE
Dotyczy tylko krajów europejskich
Deklaracja zgodności WE jest dołączona jako załącznik
A do niniejszej instrukcji obsługi.
OSTRZEŻENIA
DOTYCZĄCE
BEZPIECZEŃSTWA
Ostrzeżenia dotyczące
bezpieczeństwa dla odkurzacza
akumulatorowego
OSTRZEŻENIE: WAŻNE! UWAŻNIE
PRZECZYTAĆ wszystkie zasady bezpieczeństwa
i zalecenia PRZED UŻYCIEM. Niezastosowanie się
do wspomnianych ostrzeżeń i instrukcji może dopro-
wadzić do porażenia prądem elektrycznym, pożaru i/
lub poważnych obrażeń ciała.
1. Odkurzacza mogą używać wyłącznie osoby
odpowiednio przeszkolone.
2. Przed użyciem urządzenia operatorzy powinni
otrzymać informacje, instrukcje i przeszko-
lenie w zakresie obsługi urządzenia oraz
substancji, z którymi ma być ono używane, w
tym na temat bezpiecznej metody usuwania i
utylizacji zebranego materiału.
3. Przed użyciem zawsze należy się upewnić,
czy ltry są prawidłowo założone. Odkurzacza
nie wolno używać bez włożonych ltrów.
Uszkodzony ltr należy niezwłocznie wymie-
nić. Zalecane jest zaopatrzenie się w kilka
zapasowych ltrów, ponieważ są to części
zużywające się.

18 POLSKI
4. UNIKAĆ PRZYPADKOWEGO URUCHOMIENIA.
Podczas montażu akumulatorów należy upew-
nić się, że wyłącznik znajduje się w położeniu
wyłączonym.
5. Nie próbować wciągać odkurzaczem materia-
łów łatwopalnych, fajerwerków, zapalonych
papierosów, gorącego popiołu, gorących
wiórów metalowych ani ostrych przedmiotów,
takich jak żyletki, igły czy zbite szkło.
6. NIGDY NIE UŻYWAĆ ODKURZACZA
W POBLIŻU ZBIORNIKÓW BENZYNY,
GAZU, LAKIERU, KLEJU ANI INNYCH
WYBUCHOWYCH SUBSTANCJI. Włączanie/
wyłączanie przełącznika zasilania powoduje
iskrzenie. Iskrzenie powoduje także komutator
silnika. Może to być przyczyną wybuchu.
7. Nigdy nie wciągać odkurzaczem materiałów
toksycznych, rakotwórczych, łatwopalnych ani
innych materiałów niebezpiecznych, takich jak
azbest, arsen, bar, beryl, ołów, pestycydy lub
inne materiały niebezpieczne dla zdrowia.
8. Zawsze ustawiać odkurzacz na płaskiej pozio-
mej powierzchni, aby uniknąć jego przypadko-
wego upadku lub przesunięcia.
9. Nigdy nie używać odkurzacza na zewnątrz
podczas deszczu.
10. W przypadku Finlandii ta maszyna nie jest
przeznaczona do użycia na zewnątrz w niskich
temperaturach.
11. Nie używać w pobliżu źródeł ciepła (pieców
itp.).
12. Jeśli powietrze wylotowe jest wprowadzane z
powrotem do pomieszczenia, konieczne jest
zapewnienie odpowiedniej wymiany powietrza
w tym pomieszczeniu. Należy zapoznać się z
odpowiednimi przepisami obowiązującymi w
danym kraju.
13. Nie blokować otworu zasysania, otworu dmu-
chawy ani otworów chłodzenia. Zapewniają
one chłodzenie silnika. Otwory wentylacyjne
powinny być zawsze odsłonięte; w przeciw-
nym razie dojdzie do przepalenia się silnika w
wyniku braku wentylacji.
14. Zawsze stać na pewnym podłożu i utrzymywać
równowagę.
15. Nie zginać i nie szarpać węża ani nie stawać na
nim.
16. W przypadku zauważenia małej skuteczności
działania lub innych nietypowych objawów
natychmiast wyłączyć odkurzacz.
17. WYJĄĆ AKUMULATORY. Gdy odkurzacz
nie jest używany, podczas konserwacji oraz
wymiany akcesoriów.
18. Po każdym użyciu natychmiast wyczyścić i
wykonać konserwację w celu utrzymania urzą-
dzenia w idealnym stanie technicznym.
19. STARANNIE WYKONYWAĆ CZYNNOŚCI
KONSERWACYJNE. Utrzymywać czystość
odkurzacza, aby zapewnić lepsze i bezpiecz-
niejsze działanie. Przestrzegać instrukcji
wymiany akcesoriów. Utrzymywać rękojeści
suche, czyste i niezabrudzone olejem ani
smarem.
20. SPRAWDZIĆ USZKODZONE CZĘŚCI.
Uszkodzoną osłonę lub inną część należy
dokładnie sprawdzić przed dalszym użyt-
kowaniem odkurzacza, aby mieć pewność,
że będzie ona poprawnie działać i spełniać
swoją funkcję. Należy sprawdzić narzędzie
pod kątem nieprawidłowego ustawienia lub
zablokowania elementów ruchomych, pęknięć
części, zamocowania oraz innych usterek,
które mogą mieć wpływ na jego działanie.
Osłona lub inne uszkodzone części powinny
zostać naprawione lub wymienione przez auto-
ryzowany punkt serwisowy, o ile w instrukcji
nie podano inaczej. Uszkodzone przełączniki
powinny zostać wymienione w autoryzowanym
punkcie serwisowym. Nie używać odkurzacza,
jeśli nie działają funkcje przełącznika.
21. Podczas serwisu maszyna powinna być roz-
montowywana, czyszczona i serwisowana w
sposób uzasadniony ze względów praktycz-
nych, bez stwarzania ryzyka dla personelu
konserwacyjnego i innych osób.
22. Przynajmniej raz w roku producent lub poin-
struowana osoba powinna przeprowadzić
kontrolę techniczną urządzenia, polegającą
na przykład na sprawdzeniu ltrów pod kątem
uszkodzeń, szczelności urządzenia i prawidło-
wego działania mechanizmu kontrolnego.
23.
Podczas wykonywania czynności serwisowych
lub naprawczych wszystkie zanieczyszczone
elementy, których nie można w sposób zadowa-
lający wyczyścić, należy zutylizować; elementy
te należy umieścić w nieprzepuszczalnych
torbach zgodnie z obowiązującymi przepisami
dotyczącymi utylizacji takich odpadów.
24. CZĘŚCI ZAMIENNE. Do wymiany należy uży-
wać tylko identycznych części zamiennych.
25. PRZECHOWYWANIE ODKURZACZA. Gdy
odkurzacz nie jest używany, należy go prze-
chowywać w pomieszczeniu.
26. Z odkurzaczem należy obchodzić się delikat-
nie. Niedbałe i agresywne użytkowanie może
spowodować uszkodzenie nawet najbardziej
wytrzymałego odkurzacza.
27. Nie czyścić powierzchni zewnętrznych ani
wewnętrznych benzyną, rozpuszczalnikiem ani
chemicznymi środkami czyszczącymi. Mogą
powstać pęknięcia i odbarwienia.
28.
Nie używać odkurzacza w pomieszczeniach zamknię-
tych, w których występują łatwopalne, wybuchowe
lub toksyczne opary farb olejnych, rozpuszczalników,
benzyny, niektórych substancji przeciwmolowych itp.
ani w miejscach, w których występuje łatwopalny pył.
29. Odkurzacza ani żadnego innego urządzenia
nie wolno obsługiwać, będąc pod wpływem
narkotyków lub alkoholu.
30. W ramach podstawowej ochrony nosić gogle
lub okulary ochronne z osłonami bocznymi.
31. W miejscach silnie zapylonych używać maski.
32.
To urządzenie nie jest przeznaczone do użytkowania
przez osoby, w tym dzieci, o ograniczonej sprawności
ruchowej, sensorycznej lub umysłowej oraz osoby
nieposiadające odpowiedniej wiedzy i doświadczenia.
33. Należy zwracać uwagę, aby dzieci nie bawiły
się odkurzaczem.

19 POLSKI
34. Nie wolno obsługiwać odkurzacza ani akumu-
latorów mokrymi rękami.
35. Zachować szczególną ostrożność podczas
sprzątania na schodach.
36. Nie używać odkurzacza jako stołka ani stołu
warsztatowego. Urządzenie może się przewró-
cić i spowodować obrażenia.
37. Odkurzaczem nie wolno zbierać piany ani
płynów zawierających mydło. Może to dopro-
wadzić do wydostania się piany przez wylot
powietrza i spowodować porażenie prądem
elektrycznym i uszkodzenie odkurzacza.
Użytkowanie narzędzi akumulatorowych i dbałość o nie
1.
Akumulator należy ładować wyłącznie przy
użyciu określonej przez producenta ładowarki.
Ładowarka przeznaczona do jednego typu aku-
mulatora może stwarzać zagrożenie pożarem, gdy
będzie używana do ładowania innego akumulatora.
2.
Do zasilania elektronarzędzi używać tylko spe-
cjalnie do tego celu przeznaczonych akumulato-
rów. Używanie innych akumulatorów może stwarzać
ryzyko wystąpienia obrażeń ciała lub pożaru.
3. Gdy akumulator nie jest używany, należy
zabezpieczyć go przed kontaktem z metalo-
wymi przedmiotami, typu spinacze, monety,
klucze, gwoździe, wkręty lub innymi metalo-
wymi drobiazgami, które mogą powodować
zwarcie styków akumulatora. Zwarcie styków
akumulatora grozi poparzeniami lub pożarem.
4. W niewłaściwych warunkach eksploatacji
może dojść do wycieku elektrolitu z akumu-
latora. Nie należy go dotykać. W razie przy-
padkowego kontaktu należy przemyć skażoną
skórę wodą. W przypadku dostania się elek-
trolitu do oczu należy dodatkowo skorzystać
z porady lekarza. Elektrolit z akumulatora może
powodować podrażnienia lub poparzenia.
5.
Nie używać uszkodzonego lub przerobionego aku-
mulatora ani narzędzia. Uszkodzone lub przerobione
akumulatory mogą działać w nieprzewidywalny sposób i
spowodować pożar, wybuch lub obrażenia ciała.
6. Nie wystawiać akumulatora ani narzędzia na
działanie ognia ani nadmiernej temperatury.
Narażenie na ogień lub temperaturę wyższą niż
130°C może spowodować wybuch.
7. Przestrzegać wszystkich instrukcji ładowania
i nie ładować akumulatora ani narzędzia w
temperaturze wykraczającej poza zakres okre-
ślony w instrukcji. Nieprawidłowe ładowanie lub
temperatury wykraczająca poza określony zakres
mogą spowodować uszkodzenie akumulatora
oraz wzrost zagrożenia pożarem.
ZACHOWAĆ NINIEJSZE
INSTRUKCJE.
OSTRZEŻENIE: NIE WOLNO pozwolić,
aby wygoda lub rutyna (nabyta w wyniku wielo-
krotnego używania urządzenia) zastąpiły ścisłe
przestrzeganie zasad bezpieczeństwa obsługi.
NIEWŁAŚCIWE UŻYTKOWANIE narzędzia lub
niestosowanie się do zasad bezpieczeństwa
podanych w niniejszej instrukcji obsługi może
prowadzić do poważnych obrażeń ciała.
Ważne zasady bezpieczeństwa
dotyczące akumulatora
1. Przed użyciem akumulatora zapoznać się ze
wszystkimi instrukcjami i znakami ostrze-
gawczymi na (1) ładowarce, (2) akumulatorze
i (3) produkcie, w którym będzie używany
akumulator.
2. Nie rozmontowywać ani modykować akumu-
latora. Może to spowodować pożar, przegrzanie
lub wybuch.
3. Jeśli czas działania uległ znacznemu skróce-
niu, należy natychmiast przerwać pracę. Może
bowiem dojść do przegrzania, ewentualnych
poparzeń, a nawet eksplozji.
4. W przypadku przedostania się elektrolitu do
oczu, przemyć je czystą wodą i niezwłocznie
uzyskać pomoc lekarską. Może on bowiem
spowodować utratę wzroku.
5. Nie doprowadzać do zwarcia akumulatora:
(1) Nie dotykać styków materiałami przewo-
dzącymi prąd.
(2) Unikać przechowywania akumulatora w
pojemniku z metalowymi przedmiotami,
takimi jak gwoździe, monety itp.
(3) Chronić akumulator przed deszczem lub
wodą.
Zwarcie prowadzi do przepływu prądu elek-
trycznego o dużym natężeniu i przegrzania
akumulatora, co w konsekwencji może grozić
poparzeniami a nawet awarią urządzenia.
6. Narzędzia i akumulatora nie wolno przechowy-
wać ani używać w miejscach, w których tempe-
ratura osiąga bądź przekracza 50°C (122°F).
7. Akumulatorów nie wolno spalać, również tych
poważnie uszkodzonych lub całkowicie zuży-
tych. Akumulator może eksplodować w ogniu.
8. Nie należy przecinać ani zgniatać akumulatora,
wbijać w niego gwoździ, rzucać nim, upusz-
czać, ani uderzać akumulatorem o twarde
obiekty. Takie działanie może spowodować pożar,
przegrzanie lub wybuch.
9. Nie wolno używać uszkodzonego akumulatora.
10. Stanowiące wyposażenie akumulatory lito-
wo-jonowe podlegają przepisom dotyczącym
produktów niebezpiecznych.
Na potrzeby transportu komercyjnego, np. świad-
czonego przez rmy trzecie czy spedycyjne,
należy przestrzegać specjalnych wymagań w
zakresie pakowania i oznaczania etykietami.
Przygotowanie produktu do wysyłki wymaga
skonsultowania się ze specjalistą ds. materiałów
niebezpiecznych. Należy także przestrzegać
przepisów krajowych, które mogą być bardziej
szczegółowe.
Zakleić taśmą lub zaślepić otwarte styki akumula-
tora oraz zabezpieczyć go, aby nie mógł się prze-
suwać w opakowaniu.
11. Jeśli zajdzie konieczność utylizacji akumula-
tora, należy wyjąć go z narzędzia i przekazać
w bezpieczne miejsce. Postępować zgodnie z
przepisami lokalnymi dotyczącymi utylizacji
akumulatorów.

20 POLSKI
12. Używać akumulatorów tylko z produktami
określonymi przez rmę Makita. Zastosowanie
akumulatorów w niezgodnych produktach może
spowodować pożar, przegrzanie, wybuch lub
wyciek elektrolitu.
13. Jeśli narzędzie nie będzie używane przez dłuż-
szy czas, należy wyjąć z niego akumulator.
14. Przed użyciem akumulatora i po jego użyciu
akumulator może pozostawać nagrzany, co
może spowodować poparzenia lub poparzenia
w niskiej temperaturze. Z gorącym akumulato-
rem należy obchodzić się ostrożnie.
15. Nie należy dotykać styku narzędzia bezpośred-
nio po jego użyciu, ponieważ może on być na
tyle gorący, że spowoduje oparzenia.
16. Nie należy dopuszczać, aby wióry, kurz lub
brud gromadziły się na stykach, w otworach i
rowkach akumulatora. Może to doprowadzić do
przegrzania, pożaru, wybuchu lub uszkodzenia
narzędzia lub akumulatora, co może spowodować
oparzenia lub obrażenia ciała.
17. Jeśli narzędzie nie jest przeznaczone do
użytku w pobliżu linii wysokiego napięcia,
nie należy korzystać z akumulatora w ich
sąsiedztwie. Może to spowodować nieprawidło-
wości w działaniu lub uszkodzenie narzędzia lub
akumulatora.
18. Przechowywać akumulator w miejscu niedo-
stępnym dla dzieci.
ZACHOWAĆ NINIEJSZE
INSTRUKCJE.
PRZESTROGA: Używać wyłącznie oryginal-
nych akumulatorów rmy Makita. Używanie nie-
oryginalnych akumulatorów rm innych niż Makita lub
akumulatorów, które zostały zmodykowane, może
spowodować wybuch akumulatora i pożar, obrażenia
ciała oraz zniszczenie mienia. Stanowi to również
naruszenie warunków gwarancji rmy Makita doty-
czących narzędzia i ładowarki.
Wskazówki dotyczące zacho-
wania maksymalnej trwałości
akumulatora
1. Akumulator należy naładować zanim zostanie
do końca rozładowany. Po zauważeniu spadek
mocy narzędzia należy przerwać pracę i nała-
dować akumulator.
2. Nie wolno ładować powtórnie w pełni nałado-
wanego akumulatora. Przeładowanie akumula-
tora skraca jego trwałość.
3. Akumulator należy ładować w temperaturze
pokojowej w przedziale 10–40°C (50–104°F). W
przypadku gorącego akumulatora przed przy-
stąpieniem do ładowania należy poczekać, aż
ostygnie.
4. Jeśli akumulator nie jest używany, należy go
wyjąć z narzędzia lub ładowarki.
5. Akumulatory niklowo-wodorkowe należy nała-
dować po okresie długiego nieużytkowania
(dłuższego niż sześć miesięcy).
OPIS CZĘŚCI
► Rys.1: 1. Zespół górny 2. Kosz ltra 3. Filtr z tka-
niny 4. Zbiornik
OPIS DZIAŁANIA
PRZESTROGA: Przed przystąpieniem do regu-
lacji lub przeglądu urządzenia upewnić się, że jest
ono wyłączone, a akumulatory zostały wyjęte.
Wkładanie i wyjmowanie akumulatora
PRZESTROGA: Przed włożeniem lub wyję-
ciem akumulatorów należy zawsze wyłączyć
urządzenie.
PRZESTROGA: Podczas wkładania lub wyjmo-
wania akumulatorów należy mocno trzymać odku-
rzacz i akumulatory. W przeciwnym razie mogą się
one wyślizgnąć z rąk, powodując uszkodzenie odku-
rzacza i akumulatorów oraz obrażenia ciała.
PRZESTROGA: Zachować ostrożność, aby
podczas otwierania lub zamykania pokrywy
akumulatora nie przytrzasnąć palców.
Niezastosowanie się do tej zasady może spowodo-
wać obrażenia ciała.
Odkurzacz ma dwa gniazda akumulatora. Dzięki dwóm
identycznym akumulatorom zamontowanym równolegle
można wydłużyć czas pracy w jednym lub kilku cyklach
użycia, bez konieczności przerywania pracy na ładowanie
akumulatorów. Odkurzacz działa również z jednym akumu-
latorem, więc można wybrać, czy będzie używany z dwoma
akumulatorami czy z jednym, odpowiednio do potrzeb.
► Rys.2: 1. Gniazdo akumulatora po lewej stronie
2. Gniazdo akumulatora po prawej stronie
Z dwoma akumulatorami
Ciągła praca z dwoma akumulatorami zapewnia
dłuższy czas pracy i bardziej efektywne czyszczenie.
Kiedy pierwszy akumulator rozładowuje się, odkurzacz
automatycznie przełącza źródło zasilania, dzięki czemu
kontynuuje pracę z użyciem drugiego akumulatora.
WSKAZÓWKA: Gniazdo akumulatora po lewej stro-
nie (patrząc od przodu odkurzacza) ma pierwszeń-
stwo przed gniazdem akumulatora po prawej stronie.
Gniazdo akumulatora po prawej stronie zostanie
zidentykowane jako źródło zasilania tylko wtedy,
gdy w gnieździe akumulatora po lewej stronie nie ma
akumulatora lub jeśli akumulator w gnieździe po lewej
stronie będzie prawie rozładowany.
WSKAZÓWKA: Akumulator znajdujący się w gnieź-
dzie po lewej stronie można wyjąć i naładować po
przełączeniu źródła zasilania odkurzacza z gniazda
akumulatora po lewej stronie na gniazdo zasilania
po prawej, bez konieczności przerywania pracy. Aby
po włożeniu ponownie naładowanego akumulatora
z powrotem przypisać pierwszeństwo do gniazda
akumulatora po lewej stronie, należy zrestartować
odkurzacz.
Other manuals for VC005GL
5
Table of contents
Languages:
Other Makita Vacuum Cleaner manuals

Makita
Makita 440 User manual

Makita
Makita BVC350 Series Manual

Makita
Makita GCV08PM User manual

Makita
Makita VC001GL User manual

Makita
Makita DVC660Z User manual

Makita
Makita DVC260 User manual

Makita
Makita BVC340 User manual

Makita
Makita CL114FD User manual

Makita
Makita DVC864L User manual

Makita
Makita DVC150L User manual

Makita
Makita DVC260 User manual

Makita
Makita BVC340 User manual

Makita
Makita DCL180 User manual

Makita
Makita DRC200 User manual

Makita
Makita CL106FD User manual

Makita
Makita BCL140 User manual

Makita
Makita DCL284F User manual

Makita
Makita XCV17 User manual

Makita
Makita DVC560 User manual

Makita
Makita CL108FD User manual