WWW.MARETTI.COM
8/9
“No rights can be derived from the information provided on this Instruction Manual. Information on the Instruction Manual has been compiled with the utmost care and is updated on a continuous basis. Nevertheless Maretti cannot guarantee that all information is free of errors, complete or fully up to date.”
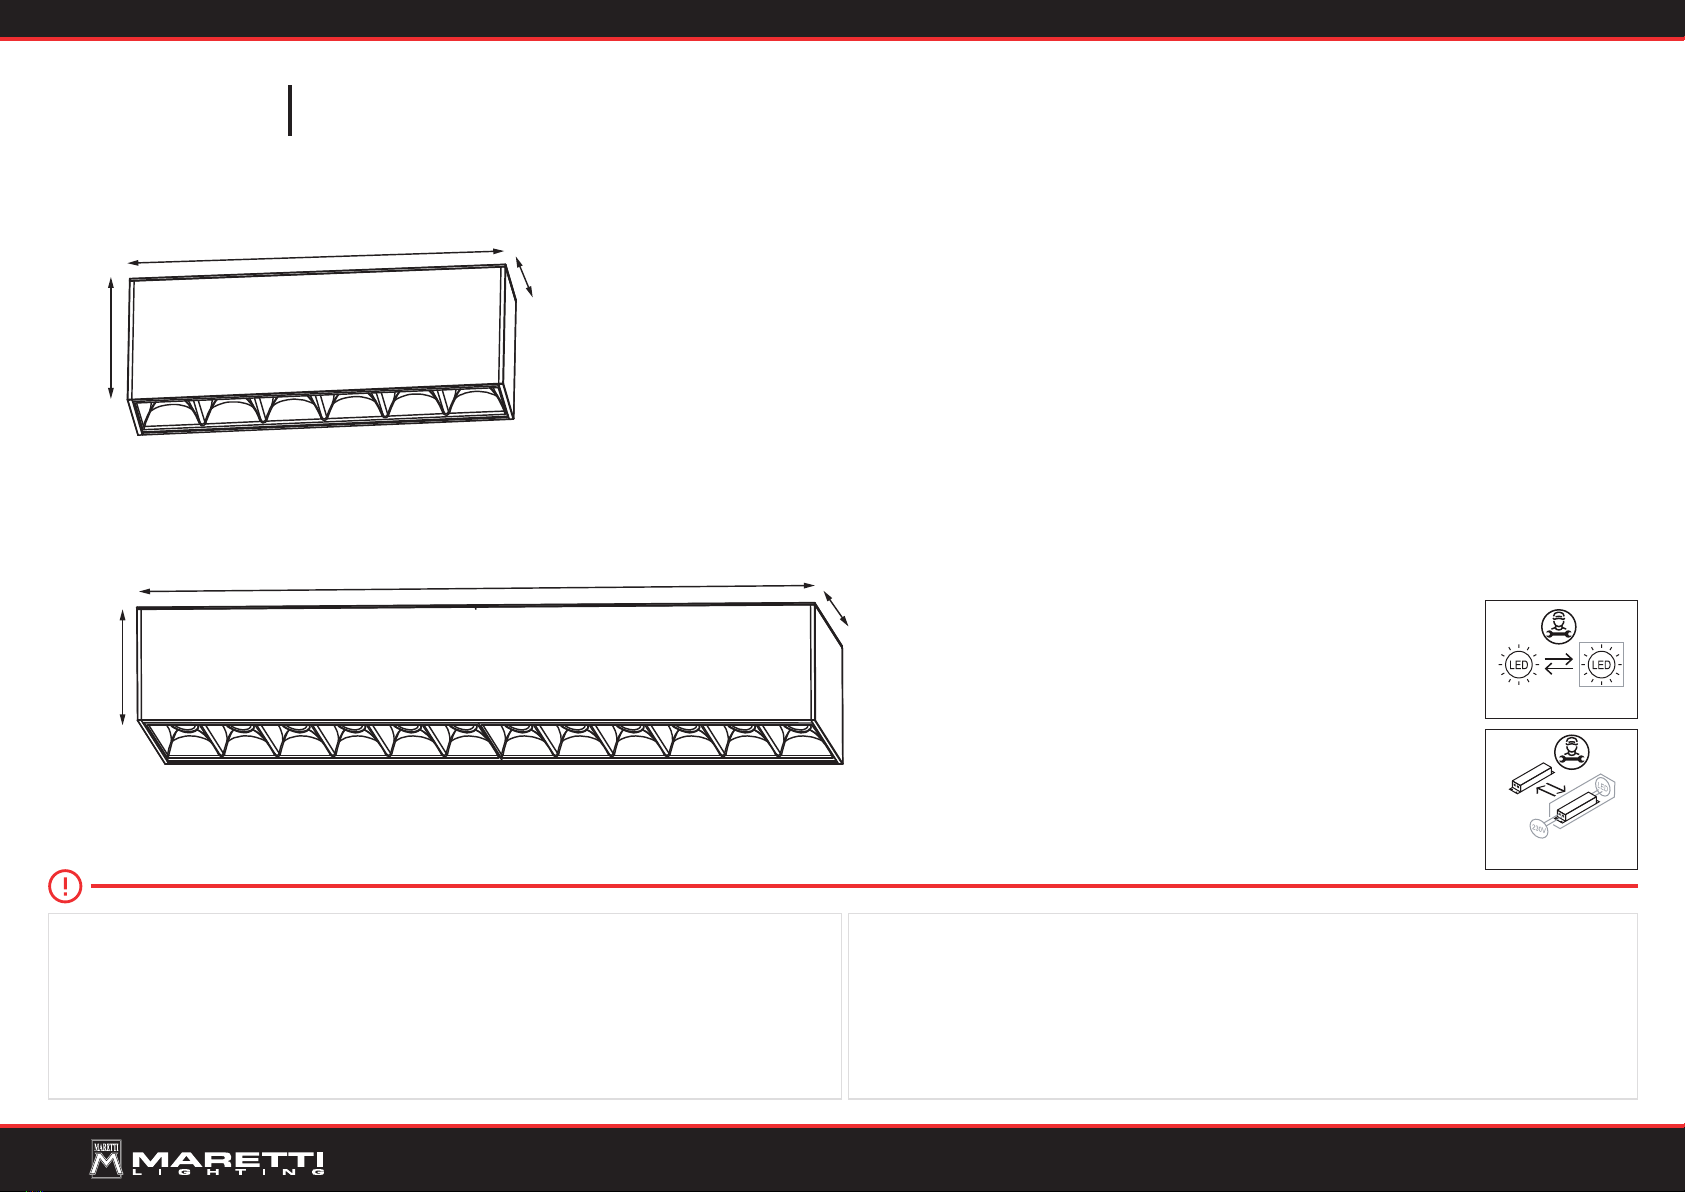
12.5534.COLOUR
12.5536.COLOUR
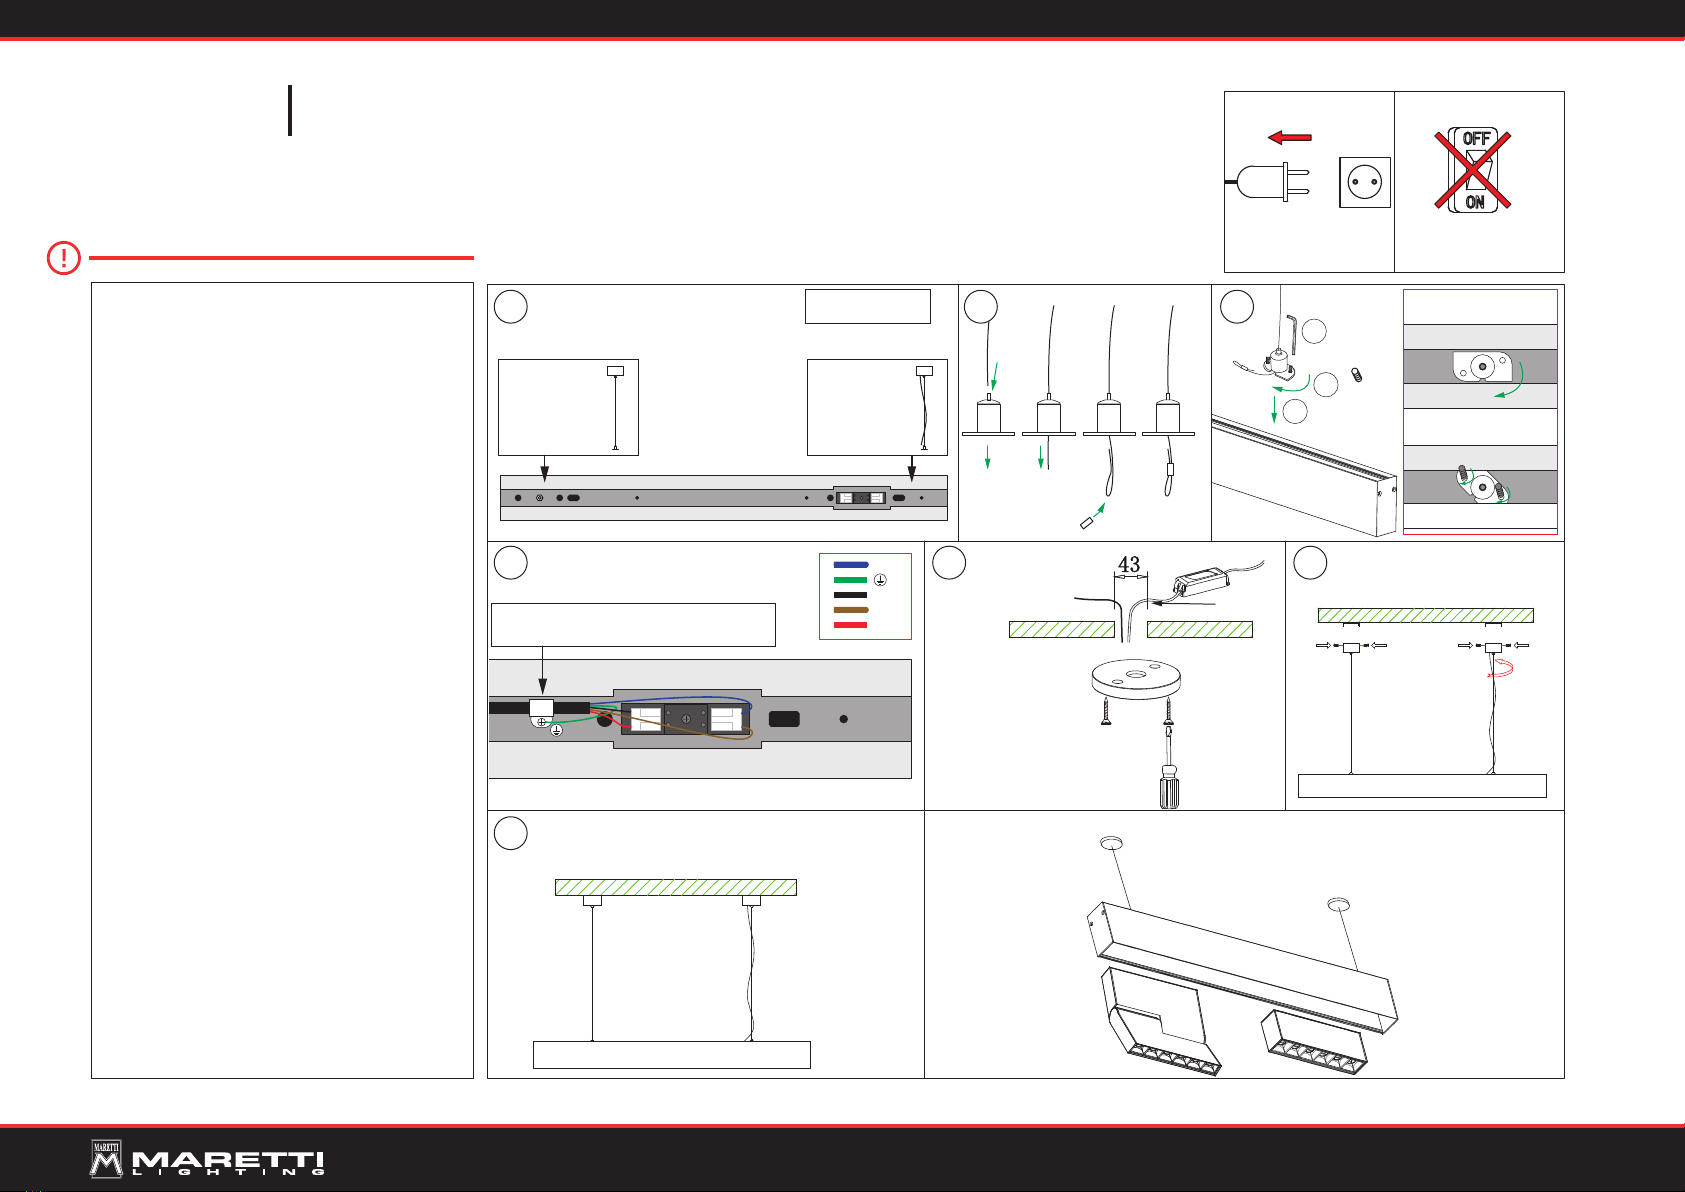
FORZATRACK DALI STELLA SERIES
INSTRUCTIONS 8/9
DC24V
DC24V
DC24V
DC24V
Driver
not incl.
Driver not incl.
Driver not incl.
DC24V
Driver not incl.
Driver not incl.
Voorbeeld. Armaturen worden apart besteld / Example. Fixtures are ordered separately.
Stella 6
Art. No.: 12.5534.04
Montagekit/Mounting kit
Art.No:12.5476.04
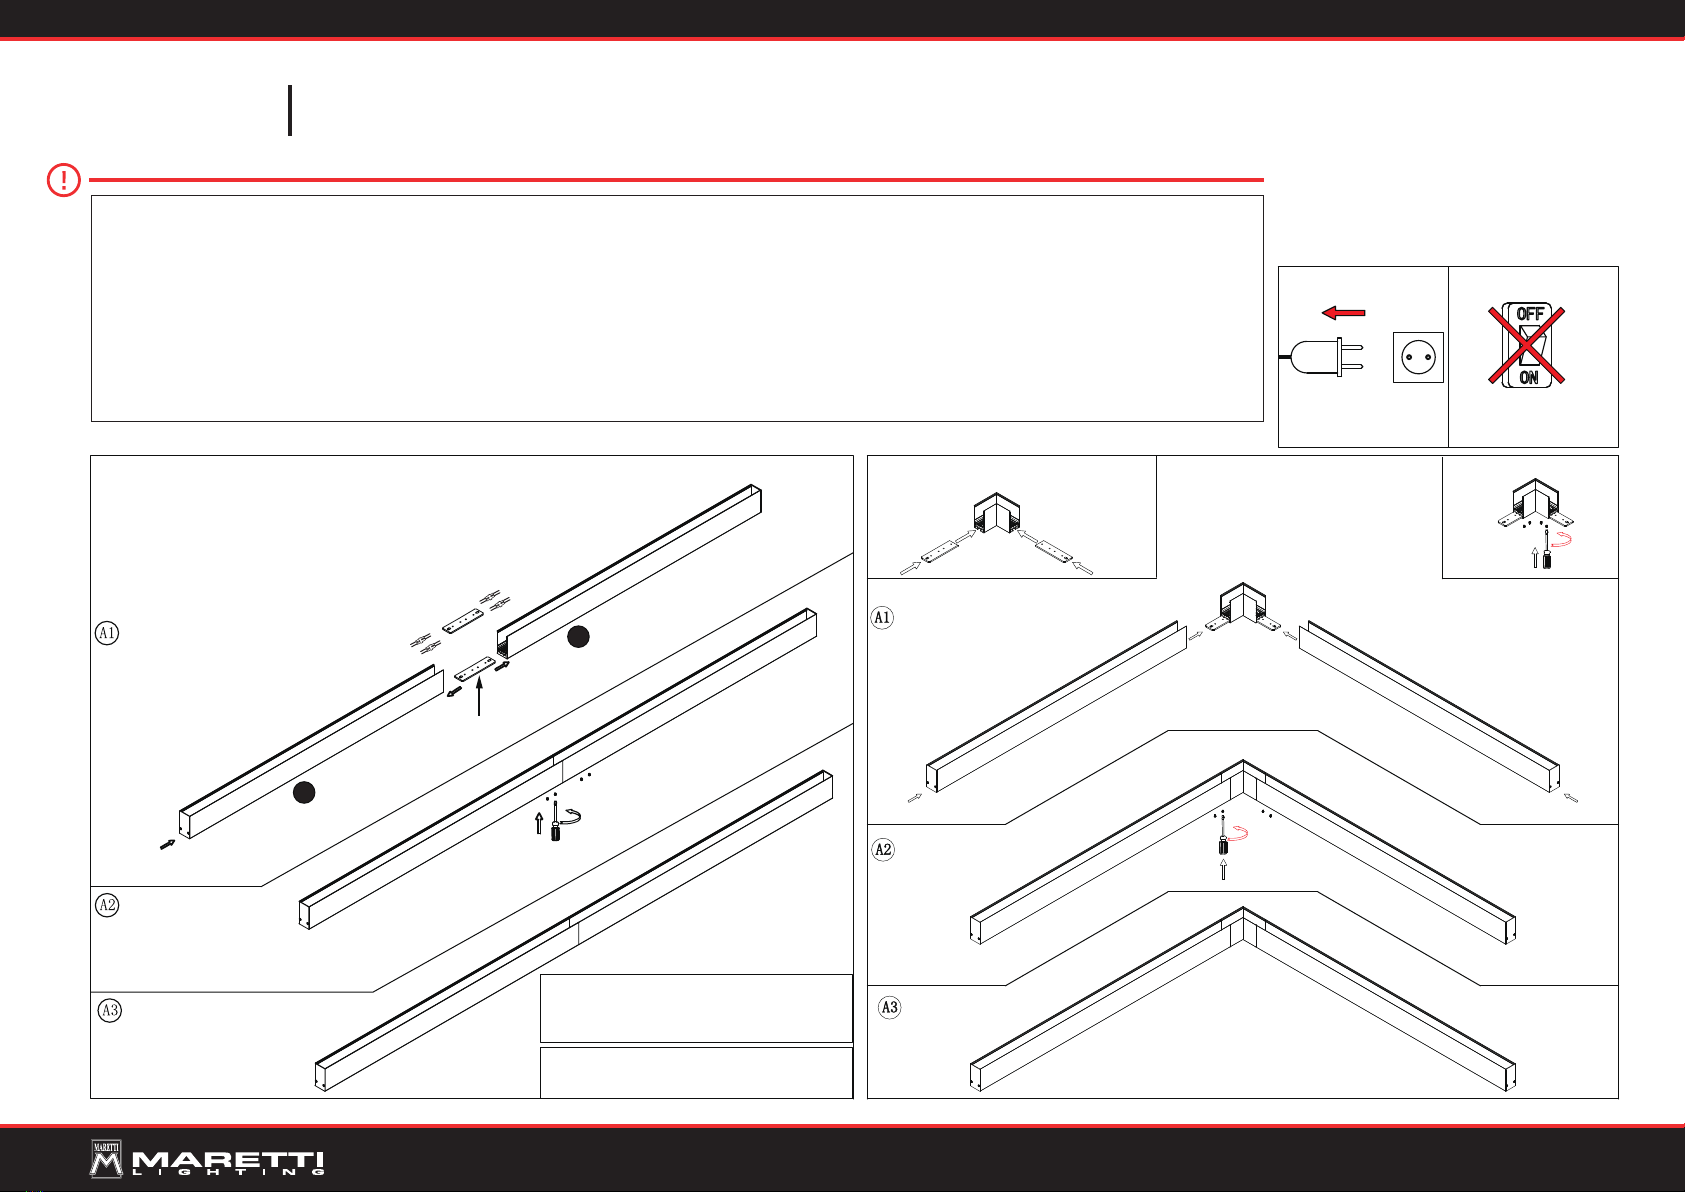
A B
Piega 6
Art. No: 12.5540.04
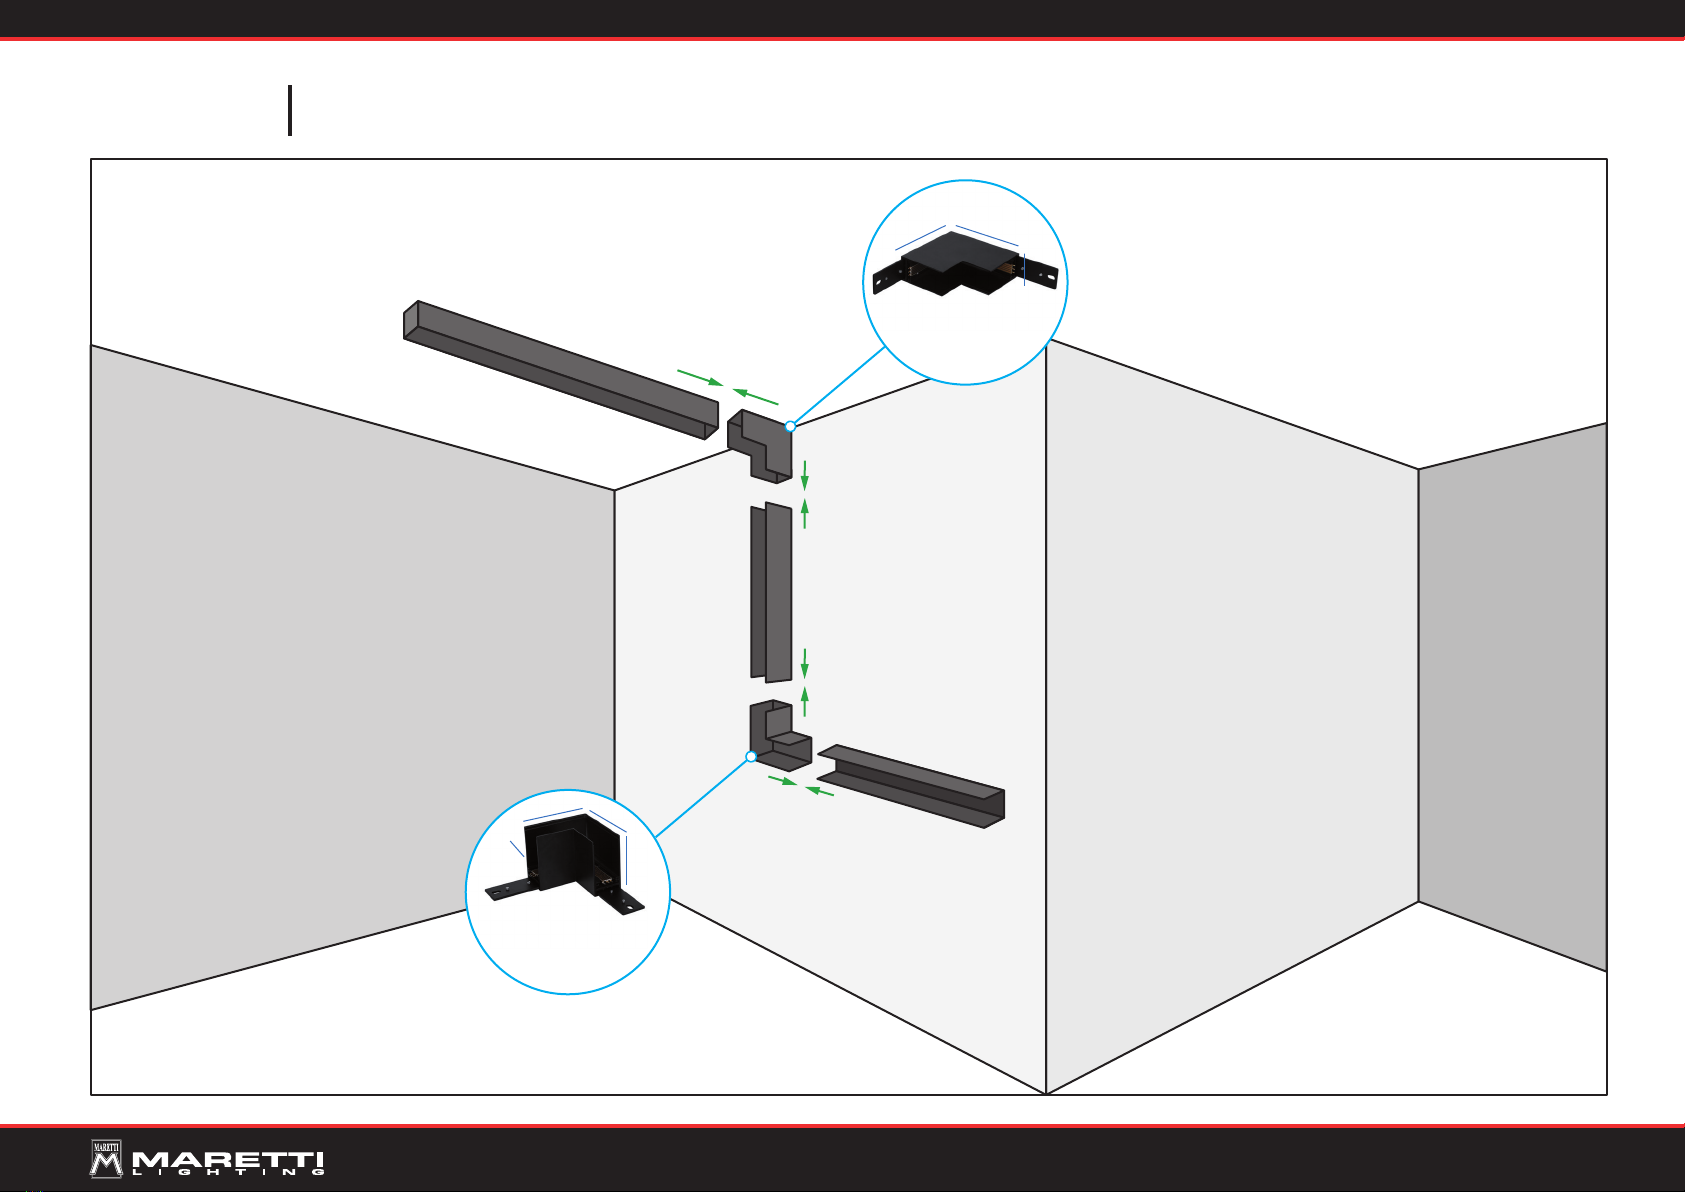
Bevestig de rail met de schroef losjes aan
de inbouwbeugel door enkele keren te draaien.
Loosely mount the track onto the bracket
by twisting the screw a few times.
Draai the beugel 90° om deze in het plafond te plaatsen.
Twist the bracket 90° to place it in the ceiling.
Draai de beugel terug middels de schroef,
om deze op het plafond te laten rusten.
Twist back de bracket by using the screw,
and let it rest on the ceiling.
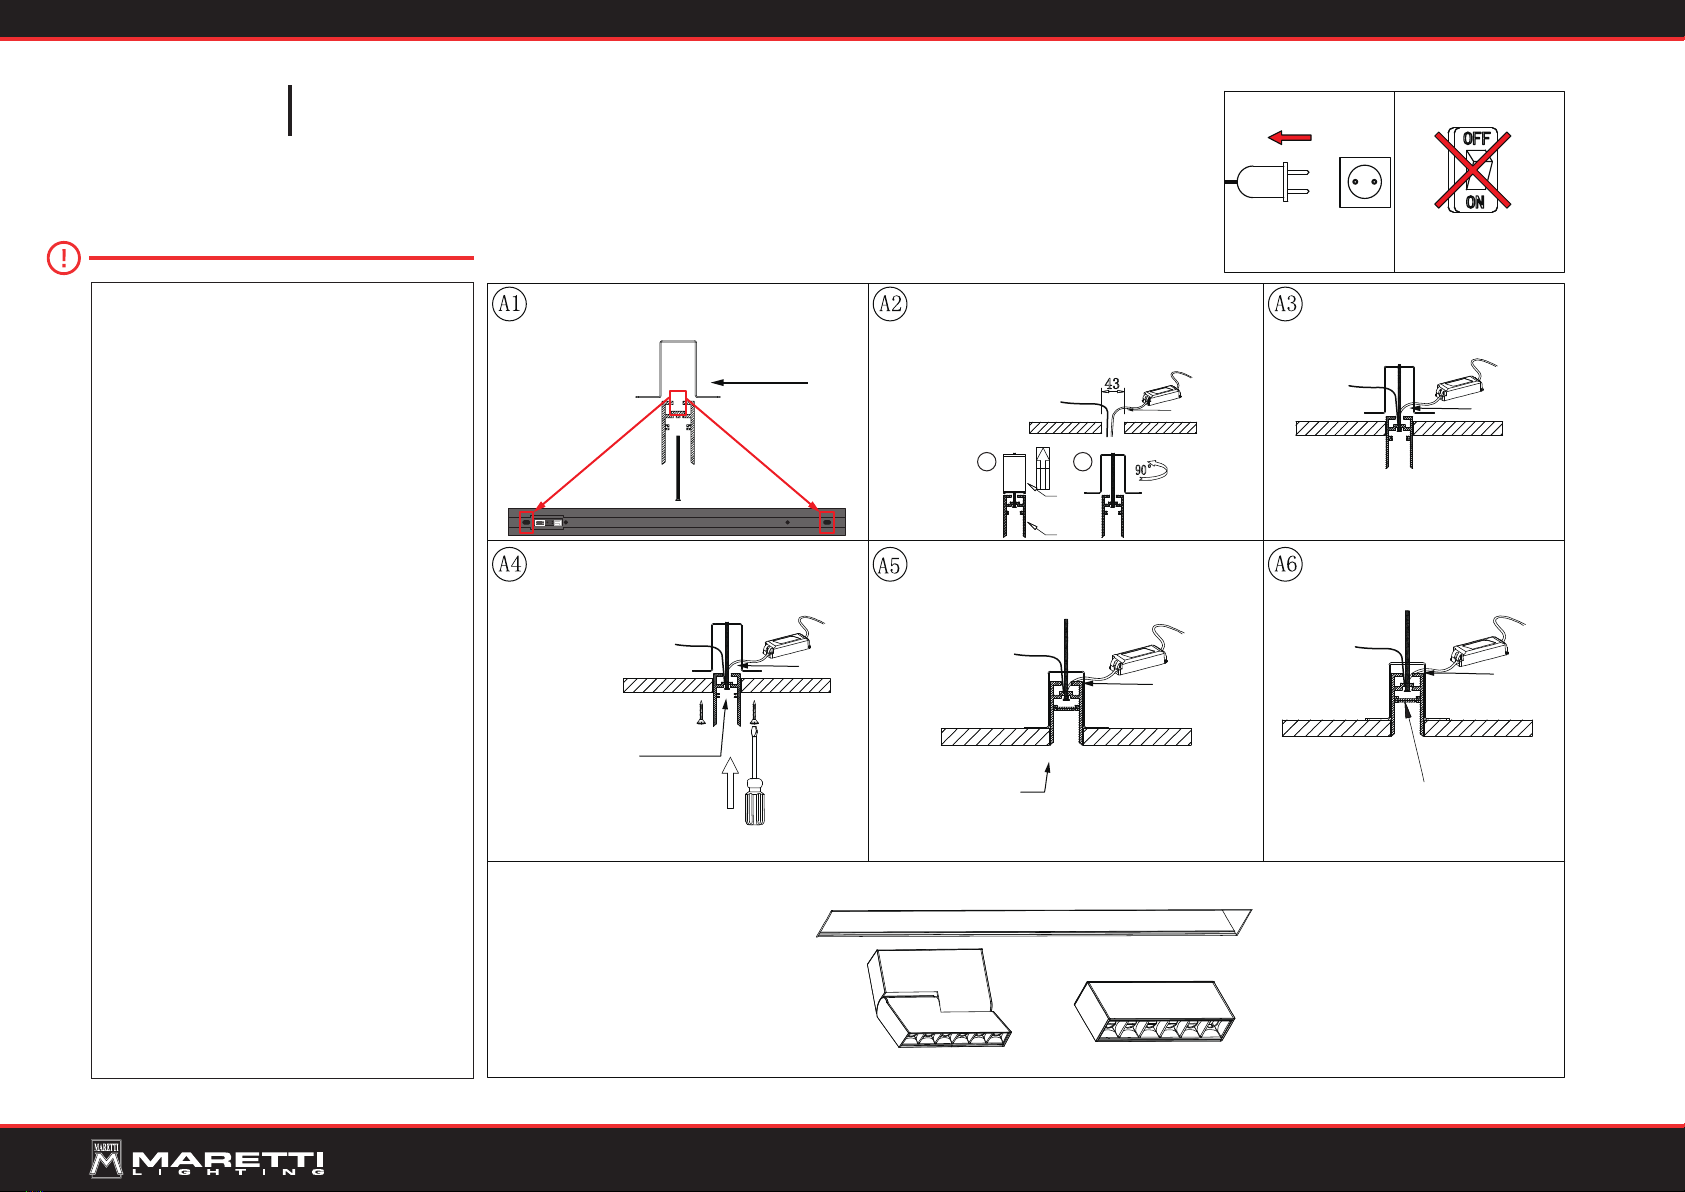
Bevestig de beugel aan
het plafond met twee zelf
tappende schroeven.
Fix the bracket onto the ceiling
by using two self-tapping screws.
Hoogte-instelling van de FORZATRACK.
Track height adjustment.
Track verhoogd tot
hetzelfde niveau
met het plafond.
Track raised to the same
level with the ceiling.
Installeren / Install
Decoratieve onderdelen die op
deze locatie zijn geïnstalleerd.
Decorative parts installed
in this location.
FORZATRACK Mounting instruction: recessed Let op: Draag voor de installatie handschoenen.
Note: Wear gloves before installation.
21
Schakel de stroomvoorziening
Shut off the power supply
Werk zonder elektriciteit
Work without electricity
DALI
DALI
DALI
DALI
DALI
+Strip –
DC24V–10A
DC24V+10A
LET OP: Volg en bewaar deze gebruiksaanwijzing.
-Zorg ervoor dat de netspanning uitgeschakeld is voor installatie,
reparatie of onderhoud. (Installatie, reparatie en onderhoud uitslui-
tend door gekwaliceerde personen).
-Voor reparatie of onderhoud uitsluitend originele delen gebruiken.
Probeer het product niet zelf te demonteren en te repareren,
onjuiste reparaties kunnen het product beschadigen en elektrische
schokken veroorzaken wat tot ernstig letsel kan leiden. Gebruik het
armatuur alleen binnenshuis.
-Het armatuur niet in vochtige of natte ruimte gebruiken.
-Uitsluitend op het etiket aangegeven lichtbronnen gebruiken.
De fabrikant aanvaardt geen enkele aansprakelijkheid voor letsel
of schade als gevolg van een verkeerde toepassing van het
armatuur. De fabrikant aanvaardt geen garantie in geval van het niet
behandelen van de lampen volgens de richtlijnen van de fabrikant.
Als er schade aan elektrische onderdelen te vinden zijn, vraag dan
een elektricien om het te vervangen.
Onderhoud is behoud:
Een goede instandhouding van het armatuur is sterk afhankelijk
van omgevings- en onderhoudsfactoren. Hierop kunnen wij geen
invloed uitoefenen.
-Schakel voor de zekerheid de elektriciteit uit!
-Gebruik geen agressieve, schurende of chemische schoonmaak-
middelen.
NOTE: Follow and keep this instructions manual.
-Make sure that the mains voltage is switched off before
installation, reparation or maintenance. (Installation, reparation
and maintenance only by qualied persons).
-Use only original parts for repairs or maintenance.
Never attempt to disassemble, repair or alter the product in any
way, improper repairs could damage the product causing electrical
shocks which may cause serious injury.
-Use the xture only indoors.
-Don’t use the xture in humid or wet areas.
-Use only suitable light sources indicated on the label.
The manufacturer accepts no liability for any injuries or damages
resulting from the incorrect use or installation of the xture.
Any operation performed on the xture that is not in accordance
with instructions will void manufacturer’s warranty. If you nd any
damage to the electrical parts, please ask a qualied electrician to
replace it.
Maintenance is preservation:
A good preservation of the xture is highly dependent on
environmental factors and maintenance. We cannot exercise any
inuence on this.
-Make sure that the mains voltage is switched off before you begin.
-Do not use aggressive, abrasive or chemical cleaners.