10 42900 Rev. 09-30-2008
TD2100 PREMIUM Keypad
The PREMIUM keypad offers all the same function as the STANDARD keypad plus it is
possible for you to dispense any length of tape from 5” to 99” in 1” increments. The exception
from the STANDARD keypad is there are 10 preset lengths versus 20. There are two versions of
the PREMIUM keypad, Short and Long. The Long version has longer pre-programmed lengths
than the Short.
To dispense a length of tape 5” to 99” press the NUM LOCK key. The NUM LOCK light is lit
and the 0-9 keys are activated. Just press any two keys to get the desired length. For example,
press 07 for 7” piece of tape or 77 for a 77” piece of tape. These “custom” lengths can be
programmed in the REPEAT SHORT or REPEAT LONG keys by turning on the NUM LOCK,
press PROGRAM, press two keys of desired length and then desired REPEAT key to store
value. You must turn off the NUM LOCK mode to verify the length is stored and displayed.
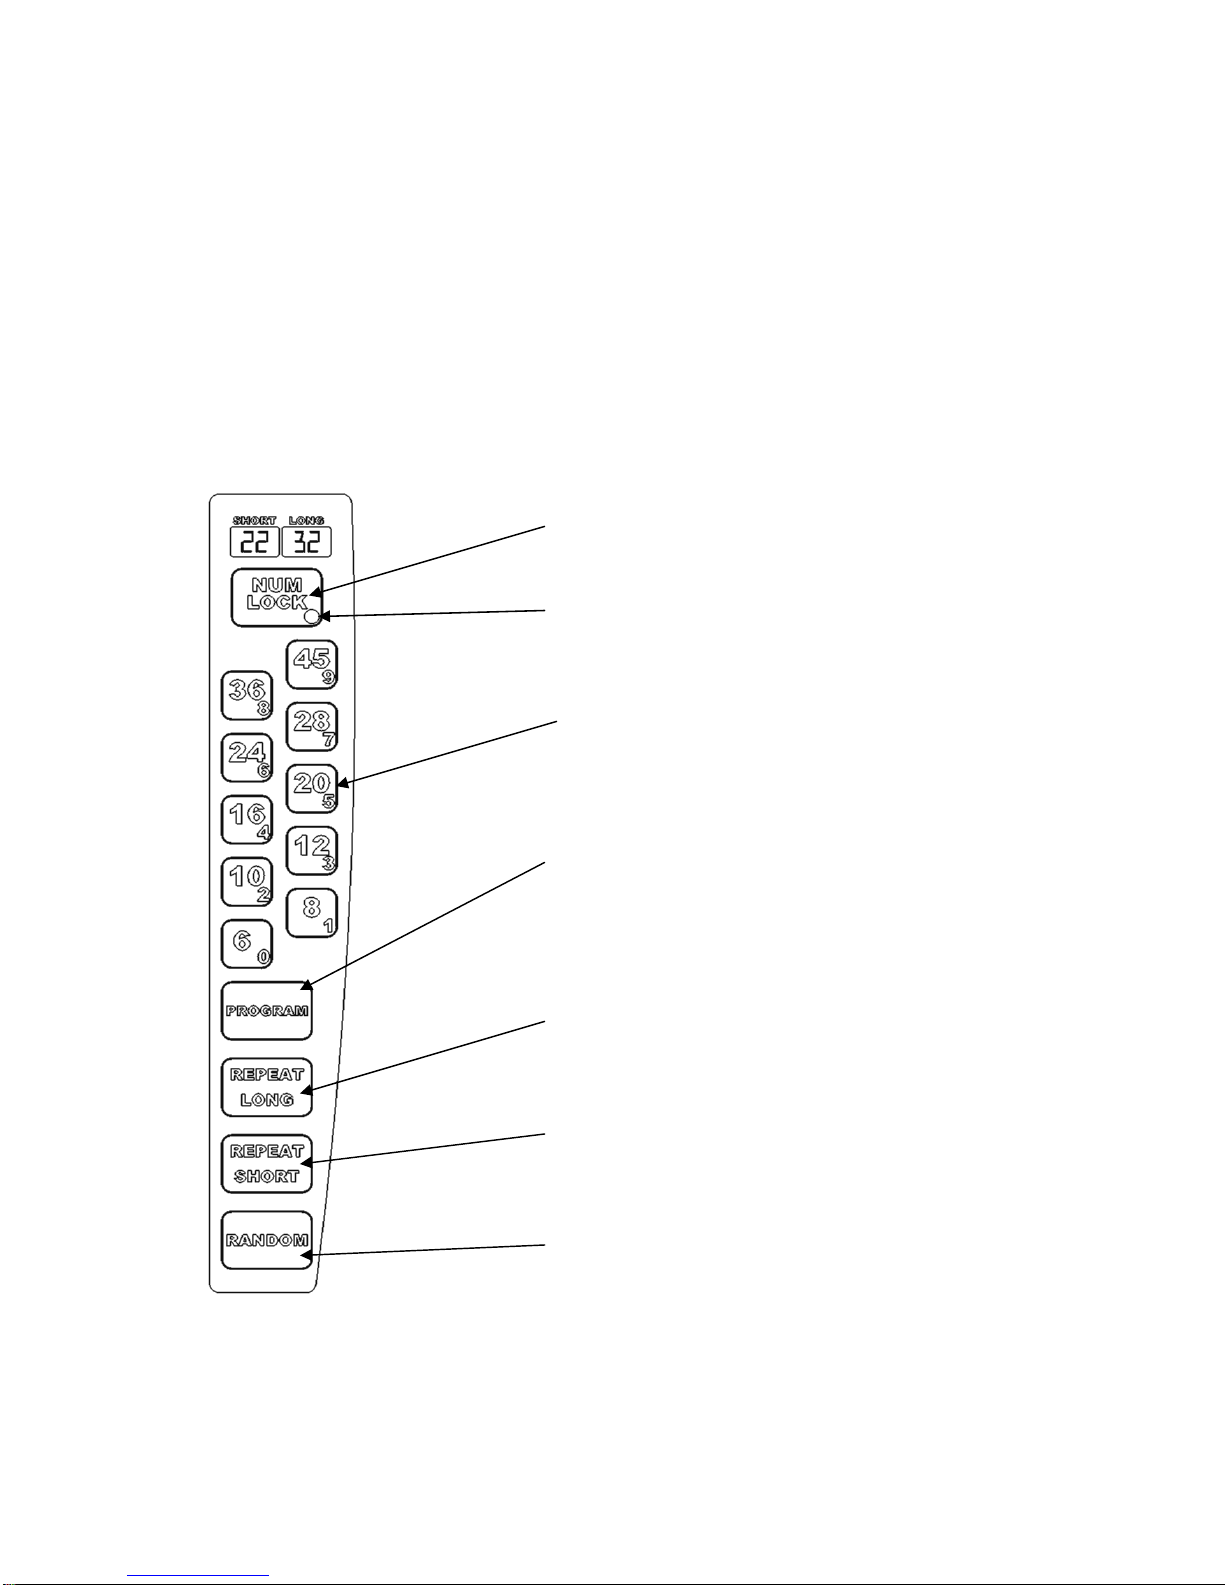
Num Lock Key: When pressed this key will activate
the red number on the keypad.
Num Lock Key Indicator: When lit, the NUM
LOCK is activated and the red numbers are used.
When not lit, the black numbers are used.
Number Keys: When pressed will dispense the
length of tape in black, when num lock is on will give
the red numbers for dispensing or programming,
requires 2 key strokes for custom lengths.
Program Key: When pressed will begin the
programming sequence, follow by pressing the
desired length and the location to store it, press the
num lock followed by the corresponding red numbers
to achieve a custom length.
Repeat Long Key: When pressed, this key will
repeat the length that is stored in the long display.
You will use this button during programming.
Repeat Short Key: When pressed, this key will
repeat the length that is stored in the short display.
You will use this button during programming.
Random Key: When pressed will dispense tape until
released.
Figure 7 – Premium Short Keypad