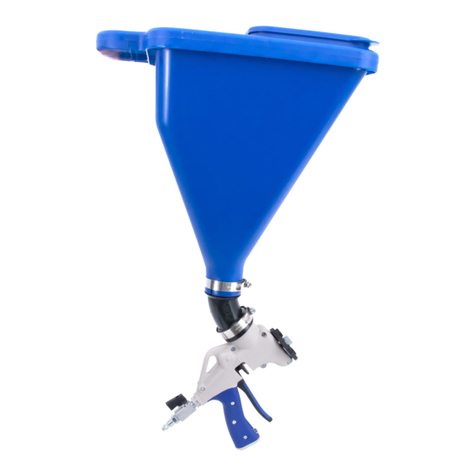
Marshalltown ENFORCER E400 User manual

ENFORCER™
Part# E400 | EDI# 10400
104 S. 8th Ave. | Marshalltown, IA
Phone 800-888-0127 / 641-753-0127 | Fax 800-477-6341 / 641-753-6341
www.MARSHALLTOWN.com
WS137

2 of 14 104 S. 8th Ave. Marshalltown, IA Phone 800-888-0127 / 641-753-0127 • Fax 800-477-6341 / 641-753-6341 www.MARSHALLTOWN.com WS137
TABLE OF CONTENTS
Safety Precautions......................................................................................................................................................................2
Safety Decals ...............................................................................................................................................................................2
Warranty........................................................................................................................................................................................3
Assembly ......................................................................................................................................................................................4
Priming the Unit ...........................................................................................................................................................................5
Spraying..................................................................................................................................................................................... 6-7
Refilling without Mud Pump.......................................................................................................................................................8
Refilling with Mud Pump.............................................................................................................................................................9
Cleaning.......................................................................................................................................................................................10
Maintenance...............................................................................................................................................................................10
Replacement Parts ................................................................................................................................................................... 11
ENFORCER™ Parts Breakdown...............................................................................................................................................12
ENFORCER™ Gun Parts Breakdown ......................................................................................................................................13
SAFETY PRECAUTIONS
DANGER!
• DANGER or
WARNING!
WARNING safety signs are located near specific hazards.
• General precautions are listed on CAUTION safety signs.
CAUTION: DO NOT USE THE ENFORCER™ UNTIL YOU HAVE FULLY READ AND UNDERSTOOD THE
INSTRUCTION MANUAL AND ALL THE WARNING LABELS.
DO NOT USE THIS PRODUCT UNLESS YOU ARE WILLING TO OBSERVE ALL THE INSTRUCTIONS AND
WARNING LABELS.
PRIOR TO EACH USE OF THE ENFORCER CHECK ALL CONNECTIONS AND CHECK FOR WORN PARTS.
REPLACE IF NECESSARY WITH SPECIFIED ENFORCER™ PARTS. DO NOT MODIFY THIS PRODUCT IN ANY
MANNER. DOING SO COULD RESULT IN SERIOUS INJURY.
U.S. and Foreign Patents Pending
CALIFORNIA PROPOSITION 65 WARNING: This product can expose you to chemicals known to the
State of California to cause cancer, birth defects, or other reproductive harm.

3 of 14
104 S. 8th Ave. Marshalltown, IA Phone 800-888-0127 / 641-753-0127 • Fax 800-477-6341 / 641-753-6341 www.MARSHALLTOWN.comWS137
If your safety decals are damaged, they can be replaced by contacting Customer Service.
&$87,21
&$87,21'212786(7+((1)25&(5
817,/<28+$9()8//<5($'$1'
81'(56722'7+(,16758&7,210$18$/
$1'$//:$51,1*/$%(/6
'212786(7+,6352'8&781/(66<28
$5(:,//,1*722%6(59(7+(6(
,16758&7,216$1':$51,1*/$%(/6
35,2572($&+86(2)7+((1)25&(5
&+(&.$//&211(&7,216$1'&+(&.
)25:2513$5765(3/$&(,)
1(&(66$5<:,7+63(&,),('(1)25&(5
3$57621/<
'212702',)<7+,6352'8&7,1$1<
0$11(5'2,1*62&28/'5(68/7,1
6(5,286,1-85<
86)RUHLJQ3DWHQWV3HQGLQJ
:$51,1*
'2 127 (;&((' $1 ,1/(7 $,5
35(6685(2)36,'2,1*62
&28/'5(68/7,1&20321(17
)$,/85($1'3266,%/(,1-85<
SAFETY DECALS
WARRANTY
This product is warranted to the original purchaser only, to be free of defects in material and
workmanship under normal use, for one year from purchase date. MARSHALLTOWN shall without
charge for parts and labor, repair or replace such parts which are found to be defective. All
transportation charges for replacement parts must be borne by the purchaser. For warranty
service, the product must be delivered, with proof of purchase date, to MARSHALLTOWN. Contact
MARSHALLTOWN Customer Service to determine the best method of delivering the product that is
under warranty. The delivery of the product must be made no later than 30 days after the expiration of
the warranty period.
All implied warranties, including those of merchantability and fitness for a particular purpose, are limited
to one year from date of purchase by the original retail customer and to the extent permitted by law any
and all implied warranties are excluded and disclaimed after the expiration of such period.
Some states do not allow limitations on how long an implied warranty lasts, or the exclusion or
limitations of incidental or consequential damages, so the above limitations or exclusions may not apply
to you. This warranty gives you specific legal rights, and you may also have other rights, which vary from
state to state.
Exclusion from this warranty:
1. All consequential damages, including pickup and delivery of the unit, communication, mileage
charges and/or rental of a replacement unit during repairs are not covered under this warranty,
or are any loss of income and/or other loss resulting from the failure of the product to function
due to a warranty defect.
2. This warranty will not apply when the product becomes inoperative due to misuse, normal
wear, neglect, improper maintenance, accident or freight damage; has not been operated and
maintained in accordance with the instructions furnished in the Operator’s Manual; or has
been altered or modified without approval from the factory Service Department.
3. No parts or products are to be returned to the factory without prior written approval from the
factory.
WS356 WS353

4 of 14 104 S. 8th Ave. Marshalltown, IA Phone 800-888-0127 / 641-753-0127 • Fax 800-477-6341 / 641-753-6341 www.MARSHALLTOWN.com WS137
ASSEMBLY
Step 1
Attach mud hose assembly to tank
outlet. Thread mud hose fitting into
bottom cap until tight.
Step 2
Insert the coiled blue air hose into
the push-lock fitting in the bottom of
the pneumatic assembly cover until it
locks in place.
Step 3
Attach mud hose assembly to the
bottom inlet of gun. Tighten by hand.
DO NOT OVER TIGHTEN.
Step 4
Connect the quick-disconnect coupler
into the back of the gun.
Step 5
Place bottom of tank over backpack
support bar and lock straps. Ensure
the pneumatic assembly faces the
right side. Tighten straps until there is
a secure fit.
Step 6
Cut one end of the fill hose ⁄" deep
lengthwise and connect this end of
the fill hose to the outlet of your mud
pump. Tighten clamp with screw
driver.

5 of 14
104 S. 8th Ave. Marshalltown, IA Phone 800-888-0127 / 641-753-0127 • Fax 800-477-6341 / 641-753-6341 www.MARSHALLTOWN.comWS137
PRIMING THE UNIT
Step 1
Flip toggle switch to FILL/OFF. To
remove the top cap, begin by
loosening the top bolts 1-2 turns.
Step 2
While pulling and holding the top cap
release pin up (red), turn the top cap
counter clockwise until it stops. Lift
up on the cap to remove.
Step 3
Remove piston by squeezing the gun
trigger and pulling upward on the
piston handle.
Step 4
Fill the tank ⁄ full of drywall
compound by pouring mixed mud into
the top of the tank. Insert piston into
tank and push down until it is situated
on top of the mud. A slight twisting or
rocking motion may be necessary to
release the air trapped between the
piston and the mud.
Step 5
Place top cap back onto the tank.
Once the top cap is securely in place,
push down the lock release to ensure
a tight fit.
NOTE: YOU MAY FEEL SUBSTANTIAL
RESISTANCE THE FIRST TIME YOU
TRY TO TWIST THE TOP CAP. THIS
IS CAUSED BY THE SEAL LUBRICANT
THAT WAS APPLIED PRIOR TO
SHIPPING. THIS IS NORMAL.

6 of 14 104 S. 8th Ave. Marshalltown, IA Phone 800-888-0127 / 641-753-0127 • Fax 800-477-6341 / 641-753-6341 www.MARSHALLTOWN.com WS137
SPRAYING
Step 1
Ensure the fill/spray toggle switch is
in the FILL/OFF position and that the
mud flow control is turned all the way
in the counterclockwise direction.
Finally, make sure the air flow control
on the gun is turned to the off
position.
Step 2
Connect the air compressor hose to
the male air inlet on the pneumatic
assembly. Set the air compressor to
40 psi and adjust as desired. DO NOT
EXCEED 120 PSI. DOING SO COULD
RESULT IN SERIOUS INJURY.
Step 3
Once the air compressor hose is
connected, put the backpack on.
There are several adjustments that
can be made to the straps to ensure a
comfortable, snug fit. Once the
backpack is in a secure and
comfortable position, flip the fill/spray
toggle switch to SPRAY and adjust the
gun airflow by opening the ball valve at
the base of the gun.
Step 4
While holding down the trigger of the
gun, begin adjusting the mud flow.
Simply lift and turn the mud flow control
in a clockwise direction to increase flow
and turn counterclockwise to decrease
flow.
Spray on a scrap sheet of mate-
rial and adjust accordingly for desired
texture.
Step 5
Once the desired mud flow is
achieved, lock the mud flow control
by pushing the outer portion of the
dial back down. DO NOT ATTEMPT TO
OVERTIGHTEN THE KNOB. DOING
SO COULD RESULT IN COMPONENT
FAILURE AND SERIOUS INJURY.

7 of 14
104 S. 8th Ave. Marshalltown, IA Phone 800-888-0127 / 641-753-0127 • Fax 800-477-6341 / 641-753-6341 www.MARSHALLTOWN.comWS137
You are now ready to use the ENFORCER™
NOTE: There are several adjustments that can be made to the
ENFORCER™ and the compressor to get the texture of spray you
desire.
• The more open the trigger; the more material will be
applied with a resulting coarser pattern.
• The higher the air pressure, the finer the pattern; the lower
the air pressure, the coarser the pattern.
• The higher the air flow, the finer the pattern; the lower the
air flow, the coarser the pattern.
• Larger orifice openings will produce a coarser pattern
than will a smaller opening.
• Of the three most popular patterns – orange peel,
knockdown, and popcorn – orange peel and knockdown
are generally applied to walls while popcorn aggregate is a
ceiling finish.
• The more open the mud flow control on the ENFORCER™,
the more mud that will be applied.
To apply orange peel: Select the second smallest opening (#6) in
the orifice plate, set the trigger so that the end of the air nozzle is
approximately ⁄" (3.18 mm) from the orifice plate. Air pressure
should be 22–30 psi. Again, before spraying the finished product,
check for the desired texture on a scrap piece of sheetrock.
To apply knockdown: Also referred to as splatter, change the orifice
plate to the middle opening (.315"/8.0 mm dia.) (#4), set the trigger
fully open. The air pressure should be reduced to 18–25 psi. Again,
before spraying finished product, check for the desired texture on a
scrap piece of sheetrock.
To apply popcorn ceiling texture: Use one of the largest open-
ings (#1, 2, or 3) - Which one will depend on the size of the acoustic
aggregate. The trigger setting should be fully open. The air pressure
should be 30–40 psi.
NOTE: The textures described above are made using either a ⁄" or
⁄" I.D. hose. If you are using a ⁄" I.D. hose, use greater air pressures
than specified.
SPRAYING

8 of 14 104 S. 8th Ave. Marshalltown, IA Phone 800-888-0127 / 641-753-0127 • Fax 800-477-6341 / 641-753-6341 www.MARSHALLTOWN.com WS137
REFILLING WITHOUT MUD PUMP
Step 1
Remove the tank from your back and
place on a secure, level surface.
Step 2
Flip the fill/spray toggle switch to the
FILL position.
Step 3
Pull upward on the red lock release
to relieve the built up air pressure.
Ensure all air pressure has been
released before moving to the next
step.
Step 4
To remove the top cap, begin by
loosening the top bolts 1-2 turns.
Next, while holding the red lock
release up, turn the top cap counter
clockwise until it stops. Lift up on the
cap to remove.
Step 5
Remove piston by squeezing the gun
trigger and pulling upward on the
handle.
Step 6
Fill the tank ⁄ full of drywall
compound. Insert piston into tank and
push down until it is situated on top of
the mud. A slight twisting or rocking
motion may be necessary to release
the air trapped between the piston
and the mud.
Step 7
Place top cap back onto the tank by
positioning over the top bolts and
twisting clockwise. Once the top
cap is securely in place, push down
the lock release to ensure a tight fit.
Tighten top bolts as necessary.

9 of 14
104 S. 8th Ave. Marshalltown, IA Phone 800-888-0127 / 641-753-0127 • Fax 800-477-6341 / 641-753-6341 www.MARSHALLTOWN.comWS137
REFILLING WITH MUD PUMP
Step 1
Flip the fill/spray toggle switch to the
FILL position. Ensure all air pressure
is released from the tank before filling
is started. You will know this is done
when the air stops exhausting from
the pneumatic assembly.
Step 2
Remove the cap on the top of the gun
port plug by turning counter clockwise.
Prime the pump until the fill hose has
filled with mud.
NOTE: FAILURE TO DO THIS STEP
WILL FORCE AIR INTO THE TANK
WHICH WILL RESULT IN INCONSIS-
TENT TEXTURES.
Step 3
Place the end of the fill hose over the
fill fitting on the gun.
Step 4
Pump mud from the bucket into the
ENFORCER™. The number of pumps
required to fill the tank will vary
depending on the material viscosity
and pump stroke, but 20-25 pumps is
typical. When the ENFORCER™ is full
it will become significantly harder to
pump. Stop pumping at this point.
NOTE: DO NOT OVER-PUMP. DOING
SO COULD RESULT IN COMPONENT
FAILURE AND SERIOUS INJURY.
Step 5
Once the system is full, remove the
hose from the fill fitting on the gun.
Replace the cap on the top port plug
in the gun ensuring a secure fit. Place
the end of the mud fill hose back into
the bucket to avoid overflow of
material.
Step 6
Flip the toggle switch back to SPRAY
and you’re ready to go.

10 of 14 104 S. 8th Ave. Marshalltown, IA Phone 800-888-0127 / 641-753-0127 • Fax 800-477-6341 / 641-753-6341 www.MARSHALLTOWN.com WS137
CLEANING
The frequency of required cleaning will vary by material, frequency of use, and environment. ALL MATERIALS OTHER THAN
DRYWALL COMPOUND SHOULD BE CLEANED AFTER USE. As a general rule of thumb, if drywall compound will be, or has
been, in the tank for more than 2 weeks without use the unit should be cleaned out.
Performing regular maintenance and cleaning will extend the life of your ENFORCER™ and its components.
NOTE: DO NOT HOOK THE ENFORCER™ UP TO ANY WATER LINE. DOING SO COULD RESULT IN COMPONENT FAILURE
AND SERIOUS INJURY.
Step 1
After every use the orifice of the gun
should be cleaned. For best results,
separate the gun and orifice plate and
flush each with clean water.
Step 2
For a more thorough cleaning, empty
all left over mud by opening the mud
flow control to the highest setting and
spraying the material into a bucket.
Step 3
Open the tank by removing the top
cap assembly and piston and fill with
clean water while washing of the
bottom of the tank.
Step 4
Replace the piston and lid and spray the clean water through.
Repeat steps 3 and 4 until the sprayed water is clear.
Step 5
Remove the gun and scrub as necessary.
Leave the lid and gun off the wet unit to reduce mold build-up.
Step 6
Re-lubricate the piston seals and cap O-rings after cleaning. Now the
ENFORCER™ is ready for the next job
MAINTENANCE
Regularly inspect your ENFORCER™ to ensure all major components are free of damage and are in good working condition.
Replace all worn or damaged components with the appropriate repair part as indicated on page 11.
Re-lubricate the piston seals and cap O-rings after cleaning. Failure to do this will result in poor product performance and
possibly component failure.
After cleaning and re-lubrication, cycle the piston up and down while twisting the piston by hand within the tank to ensure
a good seal between the piston seals and tank walls. Cycling this piston will also ensure the best piston function by
lubricating the inside walls of the tank. If the piston does not move easily and freely within the tank, the gun trigger may be
closed or the piston seals are sandwiched between the piston body and tank wall.

11 of 14
104 S. 8th Ave. Marshalltown, IA Phone 800-888-0127 / 641-753-0127 • Fax 800-477-6341 / 641-753-6341 www.MARSHALLTOWN.comWS137
REPLACEMENT PARTS
C D EB
J K
A
HF G
DET. DESCRIPTION EDI
A PNEUMATIC ASSEMBLY 10404
B BOTTOM CAP 10146
C TOP CAP ASSEMBLY 10403
D PISTON ASSEMBLY 10402
E TOP CAP BOLT SET (SET OF 4) 10408
F BACKPACK ASSEMBLY 10401
G BACKPACK TANK STRAPS 10411
H MUD HOSE KIT 10406
I FILLING HOSE KIT 10407
J TOTAL HOSE KIT 10410
K SEAL KIT 10413
L MUD HOSE BARBED FITTING 10409
M MUD HOSE SWIVEL FITTING 10519
N FILL PLUG 10412
O REPLACEMENT CAPS (SET OF 2) 10415
P ENFORCER™ REPLACEMENT GUN 10339
- ENFORCER™ GUN REPAIR KIT* 10340
O P
I
LN
Parts included are marked in Parts Breakdown on page 13
M

12 of 14 104 S. 8th Ave. Marshalltown, IA Phone 800-888-0127 / 641-753-0127 • Fax 800-477-6341 / 641-753-6341 www.MARSHALLTOWN.com WS137
ENFORCER™ PARTS BREAKDOWN
11
13
10
12
5
8
16
7
1
17
9
15
2
4
14
6
3
DET. QTY. DESCRIPTION EDI
1 1 BOTTOM CAP 10146
2 2 CAP O-RING -
3 1 TANK -
4 4 TIE ROD -
5 1 TANK AIR MANIFOLD -
6 1 TANK AIR MANIFOLD O-RING -
7 1 PNEUMATIC ASSEMBLY 10404
8 1 AIR TUBE FITTING -
9 4 BOTTOM CAP BOLT -
10 1 TOP CLAMPING CAP -
11 1 TOP CAP ASSEMBLY 10403
12 1 PISTON ASSEMBLY 10402
13 4 TOP CAP CLAMPING STUD 10408
14 2 BACKPACK TANK STRAP 10411
15 1 MUD HOSE ASSEMBLY 10406
16 1 AIR TUBE COVER -
17 1 FILL HOSE ASSEMBLY 10407
18 1 BACKPACK ASSEMBLY 10401
19 1 TOTAL HOSE KIT 10410

13 of 14
104 S. 8th Ave. Marshalltown, IA Phone 800-888-0127 / 641-753-0127 • Fax 800-477-6341 / 641-753-6341 www.MARSHALLTOWN.comWS137
1
3
11
22
2
14
4
10
5
5
5
6
21 19
6
20
7
9
12
8
15
17
13
18
16
ENFORCER™ GUN PARTS BREAKDOWN
DET. QTY. DESCRIPTION EDI
1 1 HANDLE CASTING (LEFT) WL220
2 1 HANDLE CASTING (RIGHT) WL219
3 1 TRIGGER* WL217
4 1 BALL VALVE WT232
5 7 SCREW M4 X 18 WT304
6 2 COPPER RING WT223
7 1 AIR TUBE R3867
8 1 RUBBER BOOT* WT222
9 1 E-CLIP RETAINER* EWT246
10 1 HOSE CAP* WT142
11 1 SHAFT R3863
*Part included in ENFORCER™ Gun Repair Kit (EDI 10340), page 11
DET. QTY. DESCRIPTION EDI
12 1 FRONT BUSHING R3871
13 1 MIXTURE NOZZLE* WT236
14 1 REAR BUSHING R2025
15 1 NYLON RING WT245
16 1 CENTER KNOB* WL218
17 1 AIR NOZZLE R3872
18 1 ORIFICE PLATE* WT2181
19 1 COMPRESSION SPRING WT210
20 1 ADJUSTMENT KNOB* WL2221
21 1 SCREW M5 X 16 WT303
22 1 TRIGGER LOCK WT1371

104 S. 8th Ave., Marshalltown, IA
Phone 800-888-0127 / 641-753-0127
Fax 800-477-6341 / 64 1-753-6341
www.MARSHALLTOWN.com
WS137

ENFORCER™
N.º de parte E400 | EDI N.º 10400
104 S. 8th Ave. | Marshalltown, IA
Teléfono 800-888-0127 / 641-753-0127 | Fax 800-477-6341 / 641-753-6341
www.MARSHALLTOWN.com
WS137

2 de 14 104 S. 8th Ave. Marshalltown, IA Teléfono 800-888-0127 / 641-753-0127 • Fax 800-477-6341 / 641-753-6341 www.MARSHALLTOWN.com WS137
CONTENIDO
Precauciones de seguridad .......................................................................................................................................................2
Calcomanías de seguridad.........................................................................................................................................................3
Garantía .........................................................................................................................................................................................3
Montaje..........................................................................................................................................................................................4
Cebado de la unidad ...................................................................................................................................................................5
Rociado .................................................................................................................................................................................... 6- 7
Rellenado sin bomba de pasta ..................................................................................................................................................8
Rellenado con bomba de pasta.................................................................................................................................................9
Limpieza ......................................................................................................................................................................................10
Mantenimiento...........................................................................................................................................................................10
Piezas de repuesto.................................................................................................................................................................... 11
Descripción de las piezas de la ENFORCER™ .......................................................................................................................12
Descripción de las piezas de la pistola ENFORCER™..........................................................................................................13
PRECAUCIONES DE SEGURIDAD
• Los letreros de seguridad PELIGRO o ADVERTENCIA se encuentran ubicados
cerca de riesgos específicos.
•
Las medidas de seguridad generales se enumeran en los letreros de seguridad de PRECAUCIÓN.
CUIDADO: NO UTILICE LA ENFORCER™ HASTA QUE HAYA LEÍDO Y COMPRENDIDO EN SU TOTALIDAD EL
MANUAL DE INSTRUCCIONES Y TODAS LAS ETIQUETAS DE ADVERTENCIA.
NO UTILICE ESTE PRODUCTO A MENOS QUE ESTÉ DISPUESTO A RESPETAR TODAS LAS INSTRUCCIONES
Y ETIQUETAS DE ADVERTENCIA.
ANTES DE CADA USO DE LA ENFORCER, COMPRUEBE TODAS LAS CONEXIONES Y VERIFIQUE QUE
NO TENGA PIEZAS DESGASTADAS. SI ES NECESARIO, REEMPLÁCELAS CON LAS PIEZAS ENFORCER™
ESPECIFICADAS. NO MODIFIQUE DE NINGUNA MANERA ESTE PRODUCTO. HACERLO PODRÍA CAUSAR
LESIONES GRAVES.
Patentes de los E.U.A y en el extranjero pendientes
ADVERTENCIA DE LA PROPUESTA 65 DE CALIFORNIA: Este producto puede exponerlo a químicos que
en el estado de California se conocen como causantes de cáncer, defectos de nacimiento u otros daños
reproductivos.

3 de 14
104 S. 8th Ave. Marshalltown, IA Teléfono 800-888-0127 / 641-753-0127 • Fax 800-477-6341 / 641-753-6341 www.MARSHALLTOWN.comWS137
Si las calcomanías de seguridad están dañadas, puede reemplazarlas comunicándose con servicio al cliente.
&$87,21
&$87,21'212786(7+((1)25&(5
817,/<28+$9()8//<5($'$1'
81'(56722'7+(,16758&7,210$18$/
$1'$//:$51,1*/$%(/6
'212786(7+,6352'8&781/(66<28
$5(:,//,1*722%6(59(7+(6(
,16758&7,216$1':$51,1*/$%(/6
35,2572($&+86(2)7+((1)25&(5
&+(&.$//&211(&7,216$1'&+(&.
)25:2513$5765(3/$&(,)
1(&(66$5<:,7+63(&,),('(1)25&(5
3$57621/<
'212702',)<7+,6352'8&7,1$1<
0$11(5'2,1*62&28/'5(68/7,1
6(5,286,1-85<
86)RUHLJQ3DWHQWV3HQGLQJ
:$51,1*
'2 127 (;&((' $1 ,1/(7 $,5
35(6685(2)36,'2,1*62
&28/'5(68/7,1&20321(17
)$,/85($1'3266,%/(,1-85<
CALCOMANÍAS DE SEGURIDAD
GARANTÍA
Este producto está garantizado solo al comprador original frente a defectos en material y mano de obra bajo un uso
normal, por un año a partir de la fecha de compra. MARSHALLTOWN reparará o reemplazará, sin cargo alguno por
piezas y mano de obra, dichas piezas que se determinen como defectuosas. Todos los cargos de transportación
de las piezas de repuesto deberán ser pagados por el comprador. Para obtener el servicio de garantía, el producto
debe ser enviado, con prueba de la fecha de compra, a MARSHALLTOWN. Comuníquese con el servicio al cliente de
MARSHALLTOWN para determinar el mejor método para enviar el producto que está bajo la garantía. El producto
debe enviarse a más tardar 30 días después del vencimiento del periodo de garantía.
Todas las garantías implícitas, incluyendo aquellas de comerciabilidad e idoneidad para una finalidad en especial,
están limitadas a un año a partir de la fecha de compra por parte el cliente minorista original y en la medida que
lo permita la ley, además se excluyen y se renuncia a todas las garantías implícitas después del vencimiento de
dicho periodo. Algunos estados no permiten limitaciones sobre la duración del periodo de una garantía implícita,
o la exclusión o limitaciones de daños indirectos o consecuentes, por lo que las limitaciones o exclusiones
mencionadas pueden no aplicar a su caso. Esta garantía le otorga derechos legales específicos y es posible que
usted tenga otros derechos que varían de estado a estado.
Exclusión de esta garantía:
1. Todos los daños consecuentes, incluyendo la recolección y entrega de la unidad, comunicación, cargos
por kilometraje y/o renta de una unidad de reemplazo durante reparaciones no están cubiertos por
esta garantía ni tampoco cualquier pérdida de ingresos y/u otras pérdidas que resulten por la falla de
funcionamiento del producto debido a un defecto cubierto por la garantía.
2. Esta garantía no aplicará cuando el producto se vuelva inoperativo debido al mal uso, desgaste normal,
negligencia, mantenimiento inadecuado, accidente o daño en el transporte; no ha sido operado y
mantenido de conformidad con las instrucciones proporcionadas en el manual del operador o ha sido
alterado o modificado sin la aprobación del Departamento de Servicio de la fábrica.
3. Ninguna pieza o producto debe regresarse a la fábrica sin la aprobación previa por escrito de la fábrica.
WS356 WS353

4 de 14 104 S. 8th Ave. Marshalltown, IA Teléfono 800-888-0127 / 641-753-0127 • Fax 800-477-6341 / 641-753-6341 www.MARSHALLTOWN.com WS137
MONTAJE
Paso 1
Fije el ensamble de la manguera
de pasta en la salida del tanque.
Enrosque el adaptador de la manguera
de pasta en la tapa inferior hasta que
quede apretada.
Paso 2
Inserte la manguera azul de aire tipo
bobina en el adaptador de empuje-
bloqueo en la parte inferior de la
cubierta del ensamble neumático
hasta que se inmovilice en su lugar.
Paso 3
Fije el ensamble de la manguera de
pasta en la entrada inferior de la
pistola. Apriételo solamente con la
mano. NO LO APRIETE EN EXCESO.
Paso 4
Conecte el acoplador de desconexión
rápida en la parte trasera de la pistola.
Paso 5
Coloque la parte inferior del tanque
sobre la barra de soporte de la mochila
y ajuste las correas. Asegúrese de que
el conjunto neumático esté orientado
hacia el lado derecho. Apriete las
correas hasta que estén ajustadas con
firmeza.
Paso 6
Haga un corte de ⁄" (13 mm) de
profundidad a lo largo de un extremo
de la manguera de llenado y conecte
este extremo de la manguera de
llenado a la salida de la bomba de
pasta. Apriete la abrazadera con un
destornillador.

5 de 14
104 S. 8th Ave. Marshalltown, IA Teléfono 800-888-0127 / 641-753-0127 • Fax 800-477-6341 / 641-753-6341 www.MARSHALLTOWN.comWS137
CEBADO DE LA UNIDAD
Paso 1
Coloque interruptor de palanca a
la posición FILL/OFF (LLENADO/
APAGADO). Para quitar la tapa
superior, empiece aflojando 1 a 2 giros
los tornillos superiores.
Paso 2
Mientras tira y sostiene hacia arriba el
pasador de liberación (rojo) de la tapa
superior haga girar la tapa superior en
el sentido contrario de las manecillas
del reloj hasta que se detenga.
Levante la tapa para extraerla.
Paso 3
Extraiga el pistón apretando el
gatillo de la pistola y tirando de la
empuñadura del pistón hacia arriba.
Paso 4
Llene el tanque hasta ⁄ de su
capacidad con pasta para paneles de
yeso vertiendo la pasta mezclada en
la parte superior del tanque. Inserte
el pistón en el tanque y empuje hacia
abajo hasta que esté situado sobre la
pasta. Es posible que necesite torcerlo
o sacudirlo un poco para hacer salir el
aire atrapado entre el pistón y la pasta.
Paso 5
Coloque nuevamente la tapa en el
tanque. Cuando la tapa superior
esté fijada en su sitio con firmeza,
apriete hacia abajo el dispositivo de
desbloqueo para asegurar un ajuste
apretado.
NOTA: ES POSIBLE QUE SIENTA
UNA RESISTENCIA CONSIDERABLE
LA PRIMERA VEZ QUE INTENTE
DESENROSCAR LA TAPA SUPERIOR.
ESTO SE DEBE AL LUBRICANTE DEL
SELLO QUE FUE APLICADO ANTES
DEL ENVÍO. ESTO ES NORMAL.

6 de 14 104 S. 8th Ave. Marshalltown, IA Teléfono 800-888-0127 / 641-753-0127 • Fax 800-477-6341 / 641-753-6341 www.MARSHALLTOWN.com WS137
ROCIADO
Paso 1
Asegúrese de que el interruptor de palanca
de llenado/rociado esté en la posición
de FILL/OFF (LLENADO/APAGADO) y de
que el control de flujo de la pasta se haya
girado completamente en la dirección
contraria a las manecillas del reloj.
Finalmente, asegúrese de que el control
de flujo de aire de la pistola se haya girado
hasta la posición de apagado.
Paso 2
Conecte la manguera del compresor
de aire a la entrada de aire macho en
el ensamble neumático. Establezca el
compresor de aire en 40 psi y ajústelo
si fuera necesario. NO EXCEDA LOS
120 PSI. HACERLO PODRÍA CAUSAR
LESIONES GRAVES.
Paso 3
Cuando la manguera del compresor
de aire esté conectada, colóquese
la mochila. Hay varios ajustes que
se pueden hacer en las correas
para asegurar un ajuste cómodo y
firme. Cuando la mochila esté en una
posición segura y cómoda, invierta
el interruptor de palanca de llenado/
rociado a la posición de SPRAY
(ROCIADO) y ajuste el flujo de aire de
la pistola abriendo la válvula de globo
en la base de la pistola.
Paso 4
Mientras mantiene presionado el gatillo
de la pistola, empiece a ajustar el flujo de
pasta. Sólo tiene que levantar y girar el
control de flujo de la pasta en la dirección
de las manecillas del reloj para incrementar
el flujo y en la dirección contraria de las
manecillas del reloj para disminuir el
flujo. Rocíe sobre una hoja de material de
desecho y ajuste según la textura deseada.
Paso 5
Cuando se haya alcanzado el flujo de pasta
deseado, bloquee el control de flujo de la
pasta volviendo a apretar la parte exterior
del cuadrante hacia abajo. NO INTENTE
APRETAR EN EXCESO LA PERILLA.
HACERLO PODRÍA HACER QUE FALLE
EL COMPONENTE Y CAUSAR LESIONES
GRAVES.
Table of contents
Languages:
Other Marshalltown Paint Sprayer manuals