manuals.online logo
Brands
  1. Home
  2. •
  3. Brands
  4. •
  5. Maruson
  6. •
  7. UPS
  8. •
  9. Maruson PowerPro 550VA User manual

Maruson PowerPro 550VA User manual

User Manual
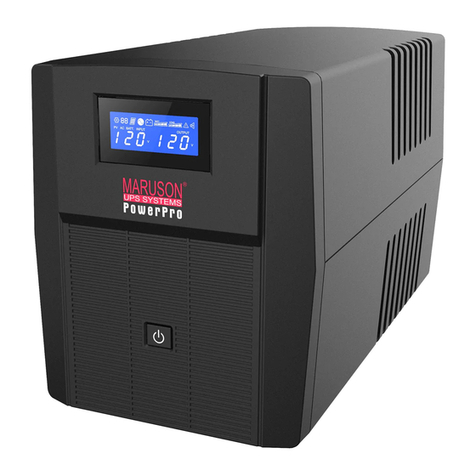
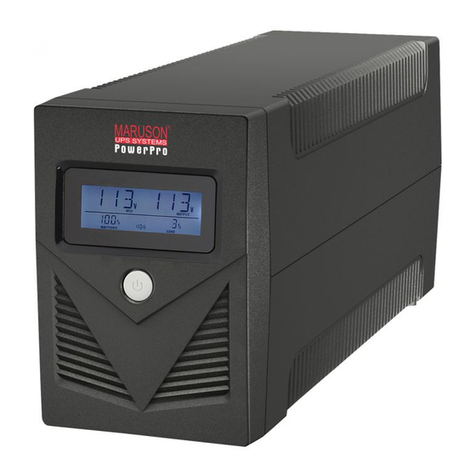
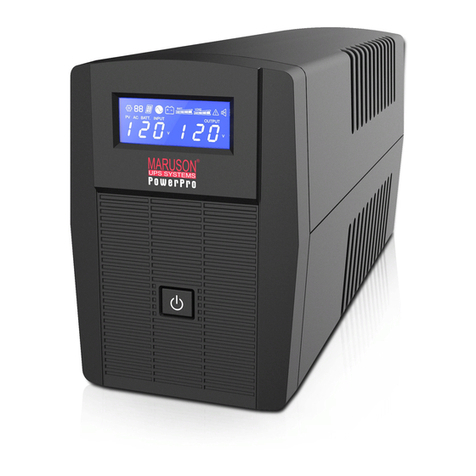
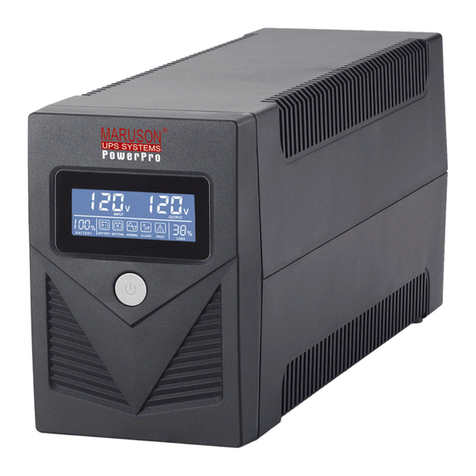
PowerPro UPS 550VA/800VA/1000VA/1500VA/2000VA
INSTRUCTIONS
(SAVE THESE INSTRUCTIONS)
This manual contains important safety instructions. Please read and follow all instructions carefully during
installation and operation of the unit. Read this manual thoroughly before attempting to unpack, install, or
operate your UPS.
CAUTION! This UPS must be connected to a grounded A power outlet . If you need to de-energize this
equipment, turn off and unplug the UPS.
CAUTION! To prevent the risk of fire or electric shock, install in a temperature and humidity controlled
indoor area free of conductive contaminants. (See the specifications for the acceptable temperature and
humidity range.)
CAUTION! To reduce the risk of overheating the UPS, do not cover the UPS' cooling vents and avoid
exposing the unit to direct sunlight or installing the unit near heat emitting appliances such as space
heaters or furnaces.
CAUTION! In the event of an emergency, press the OFF button and disconnect the power cord from the
A power supply to properly disable the UPS.
CAUTION! Do not open the UPS except to replace the battery.
CAUTION! Servicing of batteries should be performed or supervised by personnel knowledgeable of
batteries and the required precautions. Keep unauthorized personnel away from batteries.
CAUTION! When replacing the batteries, use the same number and type of batteries.
CAUTION! Do not dispose of batteries in a fire. The battery may explode. Do not open or mutilate the
battery or batteries. Released electrolyte is harmful to the skin and eyes.
CAUTION! Unplug the UPS prior to cleaning and do not use liquid or spray detergent.
CAUTION! Do not allow liquids or any foreign object to enter the UPS. Do not place beverages or any
other liquid-containing vessels on or near the unit. Do not use with or near aquariums. ondensation from
nearby liquids may come in contact with metal electrical contacts and cause the unit to short out.
This UPS is intended for indoor use on a flat, sturdy surface only.
CAUTION: Do not attach with or to power strip, extension cord, surge suppressor, into its own output, or
daisy-chain with or to another UPS.
CAUTION! Do not attach non-computer-related items, such as medical equipment, life-support equipment,
microwave ovens, or vacuum cleaners to UPS.
CAUTION! Do not use with laser printers to any battery power supplied outlet.
CAUTION! Battery life and runtime will vary based on battery age, maintenance, altitude, ambient
temperatures, power quality A power, and frequency of shorts to the UPS.
INSTALLING YOUR UPS SYSTEM
UNPACKING
Inspect the UPS upon receipt. The box should contain the following: (1) UPS; (1) User Manual
OVERVIEW
Thank you for purchasing the Power Pro Series from Maruson. The Power Pro Series provides automatic
voltage regulation for inconsistent utility power and battery backup during power outages. In the event of a
power outage, the UPS will provide consistent power to your computer system and its included software
will automatically save your open files and shutdown your computer system during a utility power loss.
HOW TO DETERMINE THE POWER REQUIREMENTS OF YOUR EQUIPMENT
1. Insure that the equipment plugged into the battery power-supplied outlets does not exceed the UPS
unit’s rated capacity. If rated unit capacities are exceeded, an overload condition may occur and
cause the UPS unit to shut down or the circuit breaker to trip.
2. There are many factors that can affect the amount of power that your computer system will require.
For optimal system performance keep the attached load below 80% of the UPS’s rated capacity.
HARDWARE INSTALLATION GUIDE
1. Your new UPS may be used immediately upon receipt. However, recharging the battery for at least 8
hours is recommended to ensure that the battery's maximum charge capacity is achieved. harge
loss may occur during shipping and storage. To recharge the battery, plug the UPS into an A outlet.
The unit will charge in both the on and off position.
2. With the UPS turned off and unplugged, connect the computer, monitor, and any equipment into the
battery power supplied outlets. DO NOT plug a lase p inte , copie , space heate , vacuum, pape
sh edde o othe la ge elect ical device into the batte y powe supplied outlets. The powe
demands of these devices will ove load and possibly damage the unit.
3. Plug the UPS into a 2 pole, 3 wire grounded receptacle (wall outlet). Make sure the wall branch outlet
is protected by a fuse or circuit breaker and does not service equipment with large electrical demands
(e.g. air conditioner, refrigerator, copier, etc.). Avoid using extension cords.
4. Depress the power switch to turn the UPS on. The power on indicator light will illuminate and the UPS
will "beep".
5. If an overload is detected, an audible alarm will sound and the UPS will emit one long beep. To
correct this, turn the UPS off and unplug at least one piece of equipment from the battery power
supplied outlets. Wait 10 seconds. Make sure the circuit breaker is depressed and then turn the UPS
on.
6. To maintain optimal battery charge, leave the UPS plugged into an A outlet at all times.
7. To store your UPS for an extended period, cover it and store with the battery fully charged. Recharge
the battery every three months to ensure battery life.
UPS OPERATION
FRONT PANEL FEATURES
PRO-1000/1500/2000L D PRO-550/800L D
1. LCD Display
The LCD will display the UPS status including input voltage, output voltage, runtime, percentage of
load, battery, etc.
2. Powe On/Off/Mute Switch
Press the power switch to turn the UPS ON or OFF.
Press the power switch 2 times
to disable and enable the alarm beeping sound.
3. LED Indicato s
This LED is illuminated when the UPS is ON.
REAR PANEL FEATURES
1. USB Po t
This port allows connection and communication from the USB port on the computer to the UPS. The
UPS communicates its status to the Powe Maste software.
2. Communication P otection Po ts
ommunication protection ports will protect any standard modem, fax, telephone line, or network
cable.
3. Input Ci cuit B eake
The circuit breaker provides overload protection.
4. Input Powe Co d
onnect to utility power. NEMA 5-15P(PRO-550/800/1000/1500L D), NEMA 5-20P(PRO-2000L D)
5. Su ge P otected Outlets
Provides surge protection for devices that don’t require battery backup.
6. Batte y Backup & Su ge P otected Outlets
Provides battery backup and surge protection. They ensure power is provided to connected
equipment over a period of time during a power failure.
REPLACING THE BATTERY (PRO-1000/1500/2000LCD only)
Replace the batteries in a cool, dry location, free of dust. When replacing batteries, replace with the same
size of the battery. Remove watches, rings, or other metal objects, and use tools with insulated handles.
1. CAUTION! Risk of Energy Hazard! Before replacing batteries, remove conductive jewelry such as
chains, wristwatches, and rings. High energy conducted through these materials could cause severe
burns.
2. CAUTION! Do not dispose of batteries in a fire. The batteries may explode.
3. CAUTION! Do not open or mutilate batteries. Released material is harmful to the skin and eyes. It
may be toxic.
4. CAUTION! A battery can present a risk of electrical shock and high short circuit current. The
following precautions should be observed when working on batteries:
CAUTION - RISK OF EXPLOSION IF BATTERY IS REPLACED BY AN INCORRECT TYPE. DISPOSE
OF USED BATTERIES ACCORDING TO LOCAL REGULATIONS.
BATTERY REPLACEMENT PROCEDURE
1. Turn off and unplug all connected equipment.
2. Turn the UPS off and unplug it from the A power source.
3. Remove the screws on the bottom of the front panel and lay aside. You may want to lay the UPS on
its side for easier screw removal.
4. arefully remove the front panel of the UPS: pull and lift it.
5. Remove the battery compartment cover plate.
6. Disconnect the battery wires from the battery.
7. Remove the battery from the compartment.
8. Place the new battery into the compartment.
9. Install the replacement battery by connecting the red wire (+) and black wire (-) to the same color
connectors from the battery pack.
10. Reinstall the battery compartment cover.
11. Fit the front panel on and tighten the retaining screws.
12. Recharge the UPS for 8-16 hours to fully charge the battery.
All manuals and user guides at all-guides.com
all-guides.com
CAUTION - Batteries are considered HAZARDOUS WASTE and must be disposed of properly. Most
retailers that sell lead-acid batteries collect used batteries for recycling, or you can contact your local
recycling center for proper disposal information.
TECHNICAL SPECIFICATIONS
Model PRO-
550LCD
PRO-
800LCD
PRO-
1000LCD
PRO-
1500LCD
PRO-
2000LCD
apacity (VA/W) 550/300 800/450 1000/600 1500/900 2000/1200
Input
Voltage Range 82~148Vac
Frequency 60/50Hz(Auto Sensing)
Output
Voltage (Batt. Mode) Simulated Sine Wave at 110-120Vac
Frequency(Batt. mode
60/50 Hz +/-1Hz
Overload Protection Breaker/Internal urrent Limiting
Physical
Outlets-total 6 8
Bat.&Surge Protected
3 4
Surge Only Protected
3 4
Dimensions
(W X H X D)
3.78 X 5.43 X 11.25 in/
96 X 138 X 286mm
5.82 X 7.0 X 11.73in/
148 X 178 X 298mm
Weight lbs/kg 9.59/4.35
11.19/5.08 19.09/8.66 23.48/10.65
25.04/11.36
Batte y
Type & Quantity 12V/7AH*1
12V/7.2AH* 1
12V/7AH*2
12V/7.2AH*2
12V/9AH*2
Recharge Time 4 Hours to 90% capacity
Wa ning Diagnostics
Indicators Power On, UPS Status Display, apacity Display, Digital Value Display
Audible Alarms On Battery, Low Battery, Overload
Envi onmental
Operating Temp. 0° to 40°
Operating Humidity 0 to 90%
Communication
Power Master
software
Windows 10, Windows 8, Windows 7, Windows Server 2012 R2,
Windows Server 2008 R2, Linux, Mac
Management
Auto- harger Yes
Auto-Restart Yes
USB Yes
RJ-11/45 Protected Yes
DEFINITIONS FOR ILLUMINATED LCD INDICATORS
L D Indicator
Line mode
UPS is running from an
input line power source.
Batte y Mode
UPS is running on
battery mode due to
power failure or severe
input voltage fluctuation.
Fault
UPS detected a fault
Mute/Silent
Press the display key
2 times
to disable and
enable the alarm
beeping sound.
mute function only for
Sounding every 30
seconds on battery
mode.
Bat mode: battery capacity
Line mode:
1. Battery charging: cycle
lighting
2. Battery full charged:
lighting
3. Line mode without
charger: battery capacity
Load Capacity
Reports load-level of the
UPS supported outlets.
Line Mode & BATT. Mode
Initial
A INPUT(Voltage)
V
OUTPUT(Voltage)
V
TROUBLE SHOOTING
P oblem Possible Cause Solution
The UPS does
not perform
expected
runtime.
Batteries are not fully charged.
Recharge the battery by leaving the UPS
plugged in.
Battery is slightly worn out. ontact Technical Support.
The UPS will not
turn on.
The on/off switch is designed
to prevent damage by rapidly
turning it off and on.
Turn the UPS off. Wait 10 seconds and then
turn the UPS on.
The unit is not connected to an
A outlet.
The unit must be connected to a 120Vac
50/60Hz outlet.
The battery is worn out. ontact Technical Support.
Mechanical problem. ontact Technical Support.
Outlets do not
provide power to
equipment
ircuit breaker is tripped due
to overload
Turn the UPS off and unplug at least one
nonessential equipment. Unplug the power
cord of the UPS then press the circuit
breaker knob to depress the breaker.
Batteries are discharged Allow the unit to recharge for at least 4
hours.
Unit has been damaged by a
surge or spike. ontact Technical Support.
Power Guide is
inactive
The serial/USB cable is not
connected.
onnect the serial/USB cable to the UPS
unit and an open serial port on the back of
the computer. You must use the cable that
came with the unit.
The unit is not providing
battery power.
Shutdown your computer and turn the UPS
off. Wait 10 seconds and turn the UPS back
on. This should reset the unit.
FCC COMPLIANCE STATEMENT
FCC Compliance Statement
This device complies with part 15 of the F rules. Operation is subject to the following two conditions: (1)
this device may not cause harmful interference, and (2) this device must accept any interference received,
including interference that may cause undesired operation.
Note: This equipment has been tested and found to comply with part 15 of the F Rules. These limits are
designed to provide reasonable protection against harmful interference in a residential installation. This
equipment generates, uses, and can radiate radio frequency energy and, if not installed and used in
accordance with the instructions, may cause harmful interference to radio communications. However,
there is no guarantee that interference will not occur in a particular installation. If this equipment does
cause harmful interference to radio or television reception, which can be determined by turning the
equipment off and on, the user is encouraged to try to correct the interference by one or more of the
following measures:
- Reorient or relocate the receiving antenna.
- Increase the separation between the equipment and receiver.
- onnect the equipment to an outlet on a circuit different from that to which the receiver is connected.
- onsult the dealer or an experienced radio/TV technician for help.
Impo tant: hanges or modifications not expressly approved by the party responsible for compliance
could void the user's authority to operate the equipment.
Canadian Compliance
AN I ES-3 (B)/NMB-3(B)
SOFTWARE DOWNLOAD (OPTIONAL)
Download the Power Master software to fully utilize this UPS model. The Power Master software provides
a user-friendly interface to configure your UPS settings and provides essential power information at a
glance.
Installation procedure:
1. Download the Power Master software from
http://www.marusonusa.com. Select “Support”
and locate the “Software” option.
2. Double-click the file and follow the installation
steps.
3. When your computer restarts, the Power Master
software will appear as a blue icon located in the
system tray.
opyright © 2017 All Rights Reserved. Maruson® is a registered trademark of Maruson Technology (U.S.
Trademark Register No. 3,150,957). All other trademarks listed are the property of their respective owners.
VER-PRO1709
K01-C000413-00
All manuals and user guides at all-guides.com

This manual suits for next models

4

Other Maruson UPS manuals

Maruson Micro UPS Series User manual

Maruson

Maruson Micro UPS Series User manual

Maruson SUR-809UPS User manual

Maruson

Maruson SUR-809UPS User manual

Maruson SmartDual Series User manual

Maruson

Maruson SmartDual Series User manual

Maruson Power Pro 650VA User manual

Maruson

Maruson Power Pro 650VA User manual

Maruson PRO-400A LCD User manual

Maruson

Maruson PRO-400A LCD User manual

Maruson POP-420B User manual

Maruson

Maruson POP-420B User manual

Maruson PRO-650LCD User manual

Maruson

Maruson PRO-650LCD User manual

Maruson 1100 User manual

Maruson

Maruson 1100 User manual

Maruson UltimaPro 33 Series User manual

Maruson

Maruson UltimaPro 33 Series User manual

Maruson Ultima LiFe RT Series User manual

Maruson

Maruson Ultima LiFe RT Series User manual

Maruson TACOMA LV Series User manual

Maruson

Maruson TACOMA LV Series User manual

Maruson CP-SV414-360W User manual

Maruson

Maruson CP-SV414-360W User manual

Maruson POF-800A User manual

Maruson

Maruson POF-800A User manual

Maruson PRO-550LCD User manual

Maruson

Maruson PRO-550LCD User manual

Maruson Power Pro 550VA User manual

Maruson

Maruson Power Pro 550VA User manual

Maruson PowerMax User manual

Maruson

Maruson PowerMax User manual

Maruson ULT-W1K User manual

Maruson

Maruson ULT-W1K User manual

Maruson POF-800UA User manual

Maruson

Maruson POF-800UA User manual

Maruson 700 User manual

Maruson

Maruson 700 User manual

Maruson ULT-1K User manual

Maruson

Maruson ULT-1K User manual

Maruson TAC-HV1K User manual

Maruson

Maruson TAC-HV1K User manual

Maruson Tacoma HT 1K-3KVA User manual

Maruson

Maruson Tacoma HT 1K-3KVA User manual

Maruson ULTIMA RACK Series User manual

Maruson

Maruson ULTIMA RACK Series User manual

Maruson MIC-500A User manual

Maruson

Maruson MIC-500A User manual

Popular UPS manuals by other brands

Toshiba G8000 Series Installation and operation manual

Toshiba

Toshiba G8000 Series Installation and operation manual

Ablerex KRONOS Installation and operation manual

Ablerex

Ablerex KRONOS Installation and operation manual

bXterra BG350 user manual

bXterra

bXterra BG350 user manual

Liebert GXT2-4500RT230 user manual

Liebert

Liebert GXT2-4500RT230 user manual

Huawei UPS2000-G-1KRTS user manual

Huawei

Huawei UPS2000-G-1KRTS user manual

Janus 230V 750VA user manual

Janus

Janus 230V 750VA user manual

Para systems Minuteman Enspire Series user manual

Para systems

Para systems Minuteman Enspire Series user manual

HP J4367A - UPS R3000 XR user guide

HP

HP J4367A - UPS R3000 XR user guide

Eaton DIN24240DC Advanced user's guide

Eaton

Eaton DIN24240DC Advanced user's guide

Huawei UPS5000-E-300K-SM quick guide

Huawei

Huawei UPS5000-E-300K-SM quick guide

Alpha Technologies FXM 650 Operator's manual

Alpha Technologies

Alpha Technologies FXM 650 Operator's manual

Ever SPECLINE AVR 700 Accessories quick reference guide

Ever

Ever SPECLINE AVR 700 Accessories quick reference guide

ICS Lifeline M95-600 Series operating instructions

ICS

ICS Lifeline M95-600 Series operating instructions

Alpha Technologies CFR 1000 Operator's manual

Alpha Technologies

Alpha Technologies CFR 1000 Operator's manual

CyberPower CP600 user manual

CyberPower

CyberPower CP600 user manual

Atlantis Land OnePower A03-S801 Technical features

Atlantis Land

Atlantis Land OnePower A03-S801 Technical features

Powercom AP-1026 user manual

Powercom

Powercom AP-1026 user manual

Salicru SPS SOHO+ series user manual

Salicru

Salicru SPS SOHO+ series user manual

manuals.online logo
manuals.online logoBrands
  • About & Mission
  • Contact us
  • Privacy Policy
  • Terms and Conditions

Copyright 2025 Manuals.Online. All Rights Reserved.