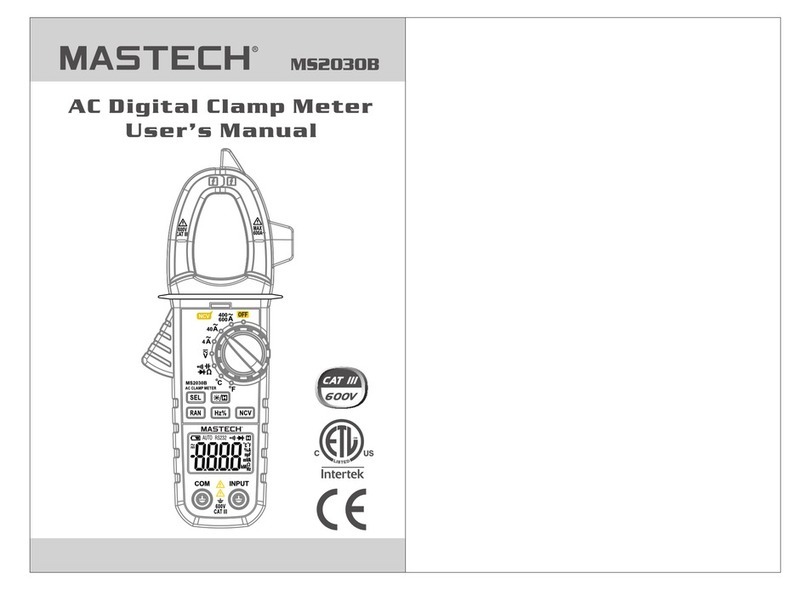
Mastech MS8332C User manual

MS8332C
Digital Multimeter
User Manual
CAT III
600 V

CONTENTS CONTENTS
1. Introduction...............................................1
2. Safety Information.....................................2
3. Product Overview.................................3
3.1 Product External View ..........................3
3.2 Function Keys..........................................4
3.3 Symbols..................................................4
4. Technical Index ................................5
4.1 General Characteristics.............................5
4.2 Electrical Technical Index..............................5
5. Measuring Operations .......................9
5.2 Resistance Measurement............................10
5.1 AC Voltage and DC
Voltage Measurement ...............................9
5.3 Diode Measurement ..................................11
5.4 Continuity Measurement ...........................11
5.5 Capacitance Measurement........................12
5.6 Frequency Measurement ..........................13
5.7 Duty Cycle Measurement ..........................13
5.8 Current Measurement ...............................13
6. Maintenance .................................15
6.1 Battery Replacement ................................15
6.2 Fuse Replacement....................................15
6.3 Cleaning...................................................15

01 02
1.Introduction
The digital multimeter is designed and manufactured
according to safety requirements of EN 61010-1,
EN 61010-2-030, EN 61010-2-033, EN 61010-031 on
electronic measuring instrument and hand held digital
multipurpose meter.
And conforms to UL STD.61010-1,61010-2-030,
61010-2-033, Certified to CSA STD.C22.2 NO.61010-1,
61010-2-030, IEC STD61010-2-033.
The product meets with the requirements of 600V
CAT III and pollution degree 2.
The meter can be used for measuring DC voltage,
AC voltage, resistance,diode, buzzer, Continuity test,
DC current and AC current etc . The unique non-contact
AC voltage detection function can promptly remind you
to pay attention to safety operation , the full scale
AC220V protection design makes you more safe and
relieved.
This series of meters can be widely used for schools,
labs, research institutes, enterprises and factories etc.
various electronic industries Please read this operating
instruction carefully and pay attention to related safe
working standards before using this meter , Protection
provided by the instrument will be impaired if used in a
manner not specified by the manufacturer.
2. Safety Information
The special attention should be paid when using
the meter because the improper usage may cause
electric shock and damage the meter .The safety
measures in common safety regulations and
operating instruction should be complied with
when using. In order to make fully use of its
functions and ensure safe operations please
comply with the usage in this section carefully.
Warning
In order to avoid personal injury and meter damage
caused by electric shock, the following safety tips should
be paid attention to:
• Don’t measure any voltage out of stipulated measuring
range of the meter.
• Don’t apply high voltage (above 100V) at input end
when measuring resistance and diode.
• Don’t use the meter if the test line is damaged or
exposed metal part.
• Avoid using under direct sunlight or high temperature.
• Pay attention to the possibility of electric shock when
measuring voltage in excess of 36V AC or 48C DC.
• Before measuring current, firstly turn off the power of
measured equipment and measured circuit, Electrify to
measure after connecting test leads.
• Pay attention to battery polarity when changing battery.
• Measure known voltage with the meter to verify that the
meter is working properly. If the meter is working abnormally,
stop using it immediately. A protective device may be damaged.
If there is any doubt, please have the meter inspected by a
qualified technician.

AC (Alternating Current)
DC (Direct Current)
Double Insulation
Fuse
Caution,risk of danger(see manual)
03 04
3.2 Function Keys
Function Switching Key, The voltage
current range is used for switching AC/DC
mode,the resistance rangeis used for
switching mode.
Switching key between frequency and duty
cycle, it is used for switching Hz and % at
voltage range and current range.
HOLD/backlight Key, press this key to hold
the data. Press this key 2 second to open
the backlight.
3.3 Symbols
3. Product Overview
3.1 Product External View
1.Non-contact AC Voltage Indicator Light
2.LCD Display
3.HOLD/backlight Key
4.Function Selection Key
5.Select Switch
6.Hz% Switching Key
(MEASUREMENT CATEGORY III) is
applicable to test and measuring circuits
connected to the distribution part of the
building’s low-voltage MAINS installation.
CAT III
1
2
6
5
3
4
Accord with the related EU laws and regulations
Ground
Conforms to UL STD. 61010-1, 61010-2-030 and
61010-031; Certified to CSA STD C22.2
NO. 61010-1, 61010-2-030 and 61010-031

±(0.8% rdg + 3dgt)
±(1.0% rdg +5dgt)
Input Impedance: 10MΩ
Max. Input Voltage: 600V AC
Frequency Range: 40~400Hz
Response: average value response (r.m.s. of sine wave)
4V
40V
400V
600V
1mV
10mV
100mV
1V
4.2.2 AC Voltage
Measuring Range Resolution Accuracy
05 06
• Automatic measuring range is DMM, full range is 3999
counting.
Display: 3 3/4 digits LCD display.•
Overload protection: full range protection.•
Data hold function.•
Relative value measurement.•
Low voltage display.•
Over range display (“OL”)•
Automatic power off.•
Working temperature and humidity: 0~40 (32~104 • ℃ ℉);
relative humidity <80%RH
Storage temperature and humidity: -10~50 (14~122 • ℃ ℉);
relative humidity <70%RH
Altitude < 2000m•
Power Supply: AAA 2*1.5V Battery•
Safety Class: EN61010-1, CAT III 600V•
Dimension (LxWxH): 110X58X33mm, •
Weight: about 150g•
4 Technical Index
4.1 General Characteristics
4.2 Electrical Technical Index
(Ambient Temperature: 23±5°C Relative Humidity: <75%)
400mV
4V
40V
400V
600V
0.1mV
1mV
10mV
100mV
1V
4.2.1 DC Voltage
±(0.5% rdg + 3dgt)
±(0.8% rdg +5dgt)
Measuring Range Resolution Accuracy
Input Impedance:10MΩ
Max. Input Voltage:600V DC
±(1.0% rdg + 3dgt)
±(1.2% rdg +15dgt)
Measuring Range Resolution Accuracy
0.1Ω
1Ω
10Ω
100Ω
1KΩ
10KΩ
400Ω
4kΩ
40kΩ
400kΩ
4MΩ
40MΩ
Open Circuit Voltage: about 0.25V.
Overload Protection: 250V DC or AC (r.m.s.)
4.2.3 Resistance

4000uA
40mA
400mA
10uA
1uA
100uA
400uA 0.1uA
Max.Current:400mA
Overload Protection: mA measuring range: FF 400mA/600V fuse
±(1.8% rdg + 5dgt)
Measuring Range Resolution Accuracy
4.2.5 DC Current
07 08
Measuring Range Function
Display forward voltage drop of diode
The buzzer makes a sound when the
resistance is less than 50±20Ω
Open Circuit Voltage: diode is about 1.5V, buzzer is about 0.5V.
Overload Protection: 250V DC or AC (r.m.s.)
4.2.4 Diode, Continuity
4000uA
40mA
400mA
10uA
1uA
100uA
400uA 0.1uA
Max.Current: 400mA
Overload Protection: mA measuring range:
FF 400mA H 600V, 10KA fuse
Frequency Range: 40~400Hz
Response: Average value (r.m.s. of sine wave)
±(2.0% rdg + 8dgt)
Measuring Range Resolution Accuracy
4.2.6 AC Current
Overload Protection: 250V DC or AC (r.m.s.)
40nF
400nF
4uF
40uF
100uF
0.01nF
0.1nF
1nF
10nF
100nF
Measuring Range Resolution Accuracy
4.2.7 Capacitance
±(5 0% rdg +30dgt).
±(3 0% rdg +15dgt).
±(5 0% rdg +25dgt).
±(1.5% rdg +15dgt)
Measuring Range Accuracy
4.2.8 Frequency
±(2.0% rdg +5dgt)
Measuring Range Accuracy
4.2.9 Duty Cycle
0.5-99.9%
1Hz-5MHz
±(2.0% rdg +20dgt)
Measuring Range Accuracy
4.2.10 Bat test
1.5V
9V

09 10
5. Measuring Operations
5.1 AC Voltage and DC Voltage Measurement
1.To avoid electricial shock or meter damage, any
voltage in excess of 600V DC or r.m.s AC are not
allowed to measure.
2.To avoid electricial shock or meter damage, any
voltage in excess of 600V DC or r.m.s. AC
between meter and earth aren't allowed to apply.
3.Don't measure AC/DC voltages if a motor on the
circuit is being switched ON or OFF. Large voltage
surges may occur that can damage meter.
Warning
The voltage ranges of the meter are:
DC Voltage: 400.0mV, 4.000V, 40.00V, 400.0V, 600V;
AC Voltage: 4.000V, 40.00V, 400.0V, 400.0V.600V
The method of measuring voltage is:
1.Turn rotary switch to position.Hz%
2.Press key and select AC or DC measuring Apply
the two ends of test leads to measure the voltage
value of circuit under test. (Paralleled with circuit
under test).
3.Read measured voltage value with LCD . When
measuring DC voltage ,the display shall display the
voltage polarity connected with red test leads at the
same time.
Notice:
At DC 400mV and AC 4V ranges and under non-input,
the meter shall have several readings because of
outside interference, but its normal usage and
measuring accuracy will not be affected.
5.2 Resistance Measurement
In order to avoid the meter or measured equipment
from being damaged,cut off all power supply of
measured circuits and discharge all high voltage
capacitors before measuring capacitance.
Warning
The resistance ranges of the meter are:
400.0Ω,4.000kΩ,40.00 kΩ,400.0 kΩ,4.000MΩ,40.00 MΩ.
The method of measuring resistance is:
1.Turn rotary switch to position.
2.Press key and select Ω measuring range.
3.Apply the two ends of test leads to measure the
resistance value of circuit under test.
4.Read measured resistance value with LCD.
Notice:
1.Theno-line measured resistance value shall be
different from rated resistance value, because other
elements on circuit are connected with measured
resistance, which is equivalent to parallel connection
of two or multi resistances.
2.When measuring low resistance, for the measurement
accuracy, please firstly make two test leads short
circuit , here read out the displayed resistance value,
minus this displayed value from the correct counting of
measured resistance.
3.When measuring at high resistance range, the reading
can be confirmed after several seconds.
4.Under open circuit , if the meter displays “OL”, it will
show that the measured value exceeds range.
11 12
5.3 Diode Measurement
To avoid the meter or measured equipment from
being damaged, cut off all power supply of
measured circuits and discharge all high voltage
capacitors before measuring diode.
Warning
The method of measuring diode is:
1.Turn rotary switch to position.
2.Press key and select measuring range.
3.Separately connect black and red test leads to
negative pole and positive pole of measured diode.
4.The meter shall display forward bias value of
measured diode.If the poles of the test leads are
connected inversely, the meter will display “OL”.
Notice:
For on-line measuring diode, display forward voltage
drop at forward measurement; the reverse measurement
depends on the values of other elements connected in
parallel at both ends of diode.
5.4 Continuity Measurement
To avoid the meter or measured equipment from
being damaged,cut off all power supply of
measured circuits and discharge all high voltage
capacitors before continuity measurement.
Warning
The method of continuity measurement is:
1.Turn rotary switch to position,.
2.Press key and select measuring range.
3.Separately connect two ends of test leads to the two
ends of measured part and circuit.
4.The meter shall display the approximate resistance
value between measured points.Here if the resistance
value between measured points is less than 50±20Ω,
the buzzer will make a sound.
5.5 Capacitance Measurement
To avoid the meter or measured equipment from
being damaged,cut off all power supply of
measured circuits and discharge all high voltage
capacitors before on/off measurement.
Warning
The capacitance ranges of the meter are:
40.00nF, 400.0nF, 4.000uF, 40.00uF, 100.0uF.
The method of measuring capacitance is:
1.Turn rotary switch to position,
2.Press key and select measuring range.
3.Apply the two ends of test leads to measure the two
pins of the capacitance under test and read measured
value from LCD.
Notice:
1.The meter shall take some time to stabilize the reading
when high capacitance.
2.The small capacitance with less than 10nF shall minus
the distribution capacitance of the meter and lead
(namely displayed base number) when measuring.
measuring

13 14
5.6 Frequency Measurement
The method of measuring frequency is:
1.Turn rotary switch Hz% to position.
2.Press Hz% key and select Hz range.
3.Apply the two ends of test leads to measure the
frequency value of the circuit under test.
4.Read frequency value from LCD.
5.7 Duty Cycle Measurement
The method of measuring duty cucle is:
1.Turn rotary switch to Hz% position.
2. Press Hz% key and select % range.
3.Apply the two ends of test leads to measure the duty
cycle value of the circuit under test.
4.Read frequency value from LCD.
5.8 Current Measurement
To avoid the meter or measured equipment from
being damaged, firstly check the fuse of the meter
before measuring current.When measuring ,
please use correct input socket, function shift and
measuring range.
Don't try to measure current when the open circuit
voltage exceeds 250V.
Warning
The DC current range: 400uA, 4.000mA, 40.00mA,
400.0mA .The AC current range: 400uA, 4.000mA,
40.00mA, 400.0mA
The method of measuring resistance is:
1.Cut off the power of measured circuit. Discharge all
high voltage capacitance on measured circuit.
2.Turn rotary switch to mA or uA position.When the
measured current is less than 400uA, select uA
position.When the measured current is 4mA~400mA,
select mA position.
3.Disconnect the circuit under test. Connect black test
lead to the end of disconnected circuit under test
(with lower voltage), connect red test lead to the other
end of disconnected circuit under test ( with higher
voltage).
4.Switch on the power of the circuit, and then read out
displayed reading.If the display only displays “OL”, it
will show that the input exceeds selected range, and
the rotary switch shall be placed at higher range.
5.Cut off the power of measured circuit. Discharge all
capacitances, take off the test leads and recover the
circuit
Notice:
1.The measuring current of the meter shall be connected
in series,not connected in parallel to avoid from
damaging the meter or endangering personal safety.
2.When measuring DC current, if the test leads are
reversely connected to the circuit , the display will
change into negative,but not affect measuring accuracy.

15
6. Maintenance
To avoid electrical shock,remove test leads before
replacing battery or fuse and cleaning.
Warning
6.2 Fuse Replacement
The step of replacing fuse is:
1.Switch off the power.
2.Open lower cover with screwdriver to take out the
broken fuse.
3.Load the fuse with same Electrical specifications
(FF400mA H 600V,10KA ) ,recover battery cover
and make the screw fixed.
6.3 Cleaning
When the meter surface is required to clean, please
use soft cloth, don't use organic solvent with corrosive
and solvent action to the case.
R-00-05-1383
• Before removing the rear cover, disconnect the probe from
the circuit to be measured.
To protect the internal circuit, replace the fuse with one of •
the same specification: FF 400mA H 600V,10KA
Don't use the instrument until the rear cover is placed back •
and the screws are tightened.
Clean the housing of instrument only with a wet rag dripped •
with little detergent but never chemical solution.
In case of any abnormality, stop using it and sent it for •
maintenance.
6.1 Replacing The Batteries
WARNING
To avoid electric shock, make sure that the test
leads have been clearly move away from the
circuit under measurement before opening the
battery cover of the meter.
6.1.1 If the sign “ ” appears, it means that the
batteries should be replaced.
6.1.2 Loosen the fixing screw of the battery cover and
remove it.
6.1.3 Replace the exhausted batteries with new ones.
Note:
Do not reverse the polarity of the batteries.
WARNING
Do not mix old and new batteries. Do not mix
alkaline, standard (carbon-zinc), or rechargeable
(ni-cad, ni-mh, etc) batteries.
6.1.4 Put the battery cover back and fix it again to its
origin form.
Table of contents
Other Mastech Measuring Instrument manuals

Mastech
Mastech MS5308 User manual

Mastech
Mastech MS6700 User manual

Mastech
Mastech MS2115A User manual

Mastech
Mastech MS2010B User manual

Mastech
Mastech MS8340B User manual

Mastech
Mastech MS5308 User manual

Mastech
Mastech MS2006B User manual

Mastech
Mastech MS2128 User manual

Mastech
Mastech MS5901 User manual

Mastech
Mastech MS2205 User manual

Mastech
Mastech MS8240D User manual

Mastech
Mastech MS8212A User manual

Mastech
Mastech MS2203 User manual

Mastech
Mastech MS6700 User manual

Mastech
Mastech ms6231 User manual

Mastech
Mastech MS2138/R User manual

Mastech
Mastech MS2002 Assembly instructions

Mastech
Mastech MS2009A User manual

Mastech
Mastech MS6701 User manual

Mastech
Mastech MS8238G User manual