5
3. Loading Ice: After merchandiser is operating at required temperature, load with packaged ice. Stacked
packaged ice should not exceed heights that will cause poor refrigeration efficiency. Approximately 6"
needs to be clear from top of stacked ice to top of inside interior for effective refrigerated ice storage. Auto-
Defrost units require good fan air flow for effective circulation. DO NOT block evaporator assembly
fan/grill openings and air channels require unrestricted air flow convection around packaged ice. Cold Wall
units should have ice stacked to allow air access to thermostat sensor located at upper rear interior.
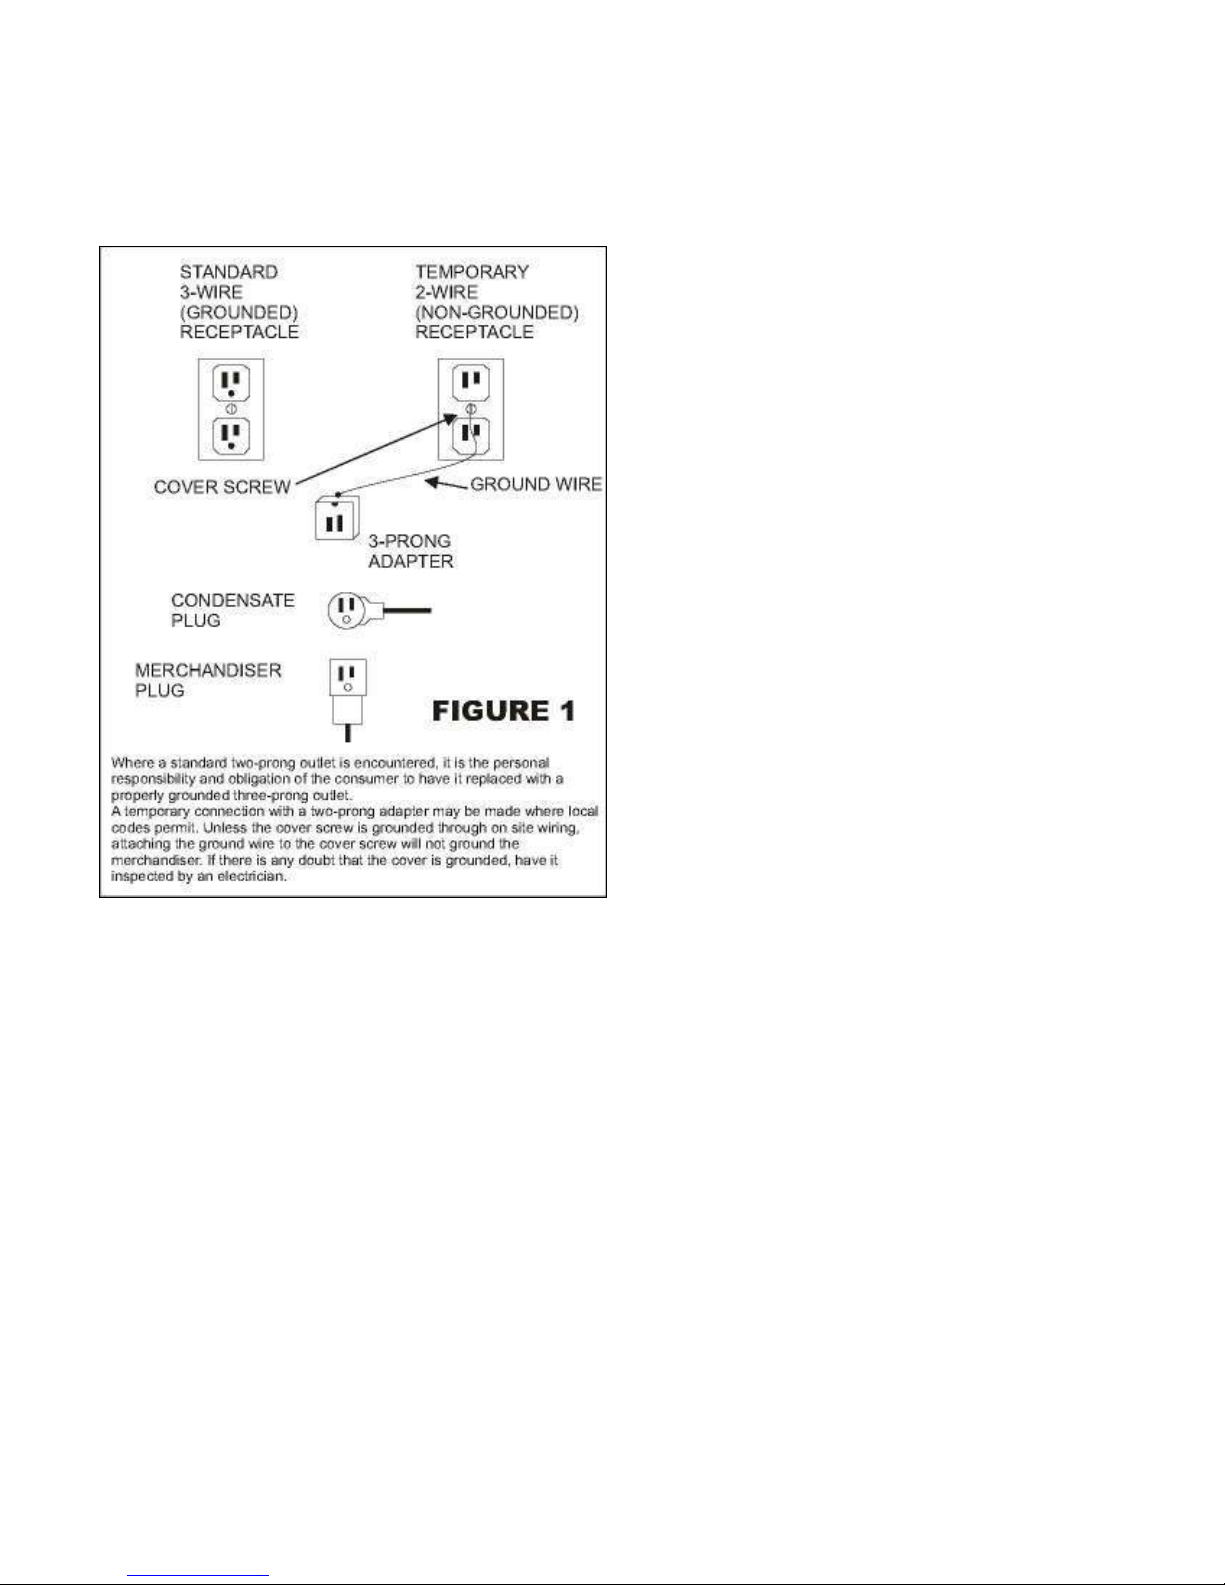
CAUTION: Disconnect power plug before maintenance on electrical components to avoid
risk of electrical shock
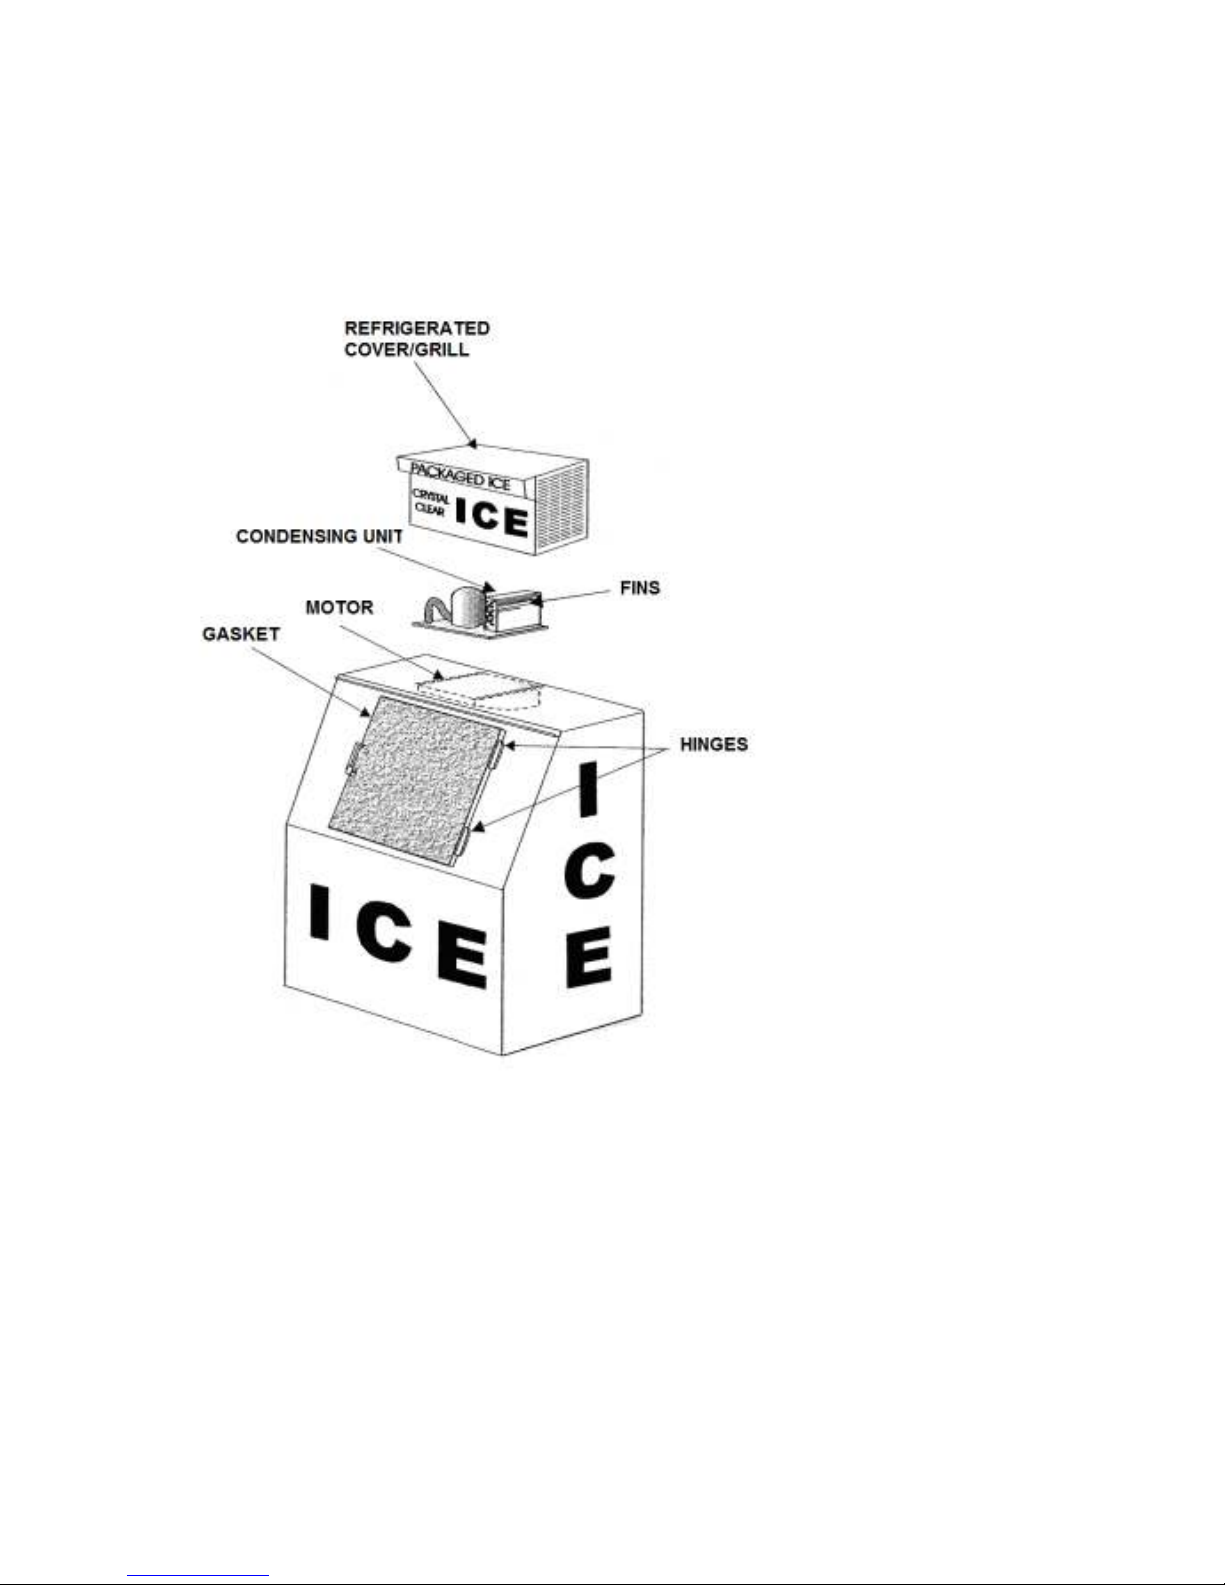
1. Refrigeration: Clean refrigeration cover grill openings, condenser fins, and condenser fan
blades every three (3) months or more often if refrigeration is exposed to dusty environment.
A dirty condensing unit can cause merchandiser to become less efficient, and may lead to
compressor failure.
Note: DO NOT place any type of filter media for dust/dirt collection in front of condenser coil.
Testing has shown filter media alone creates restricted air flow
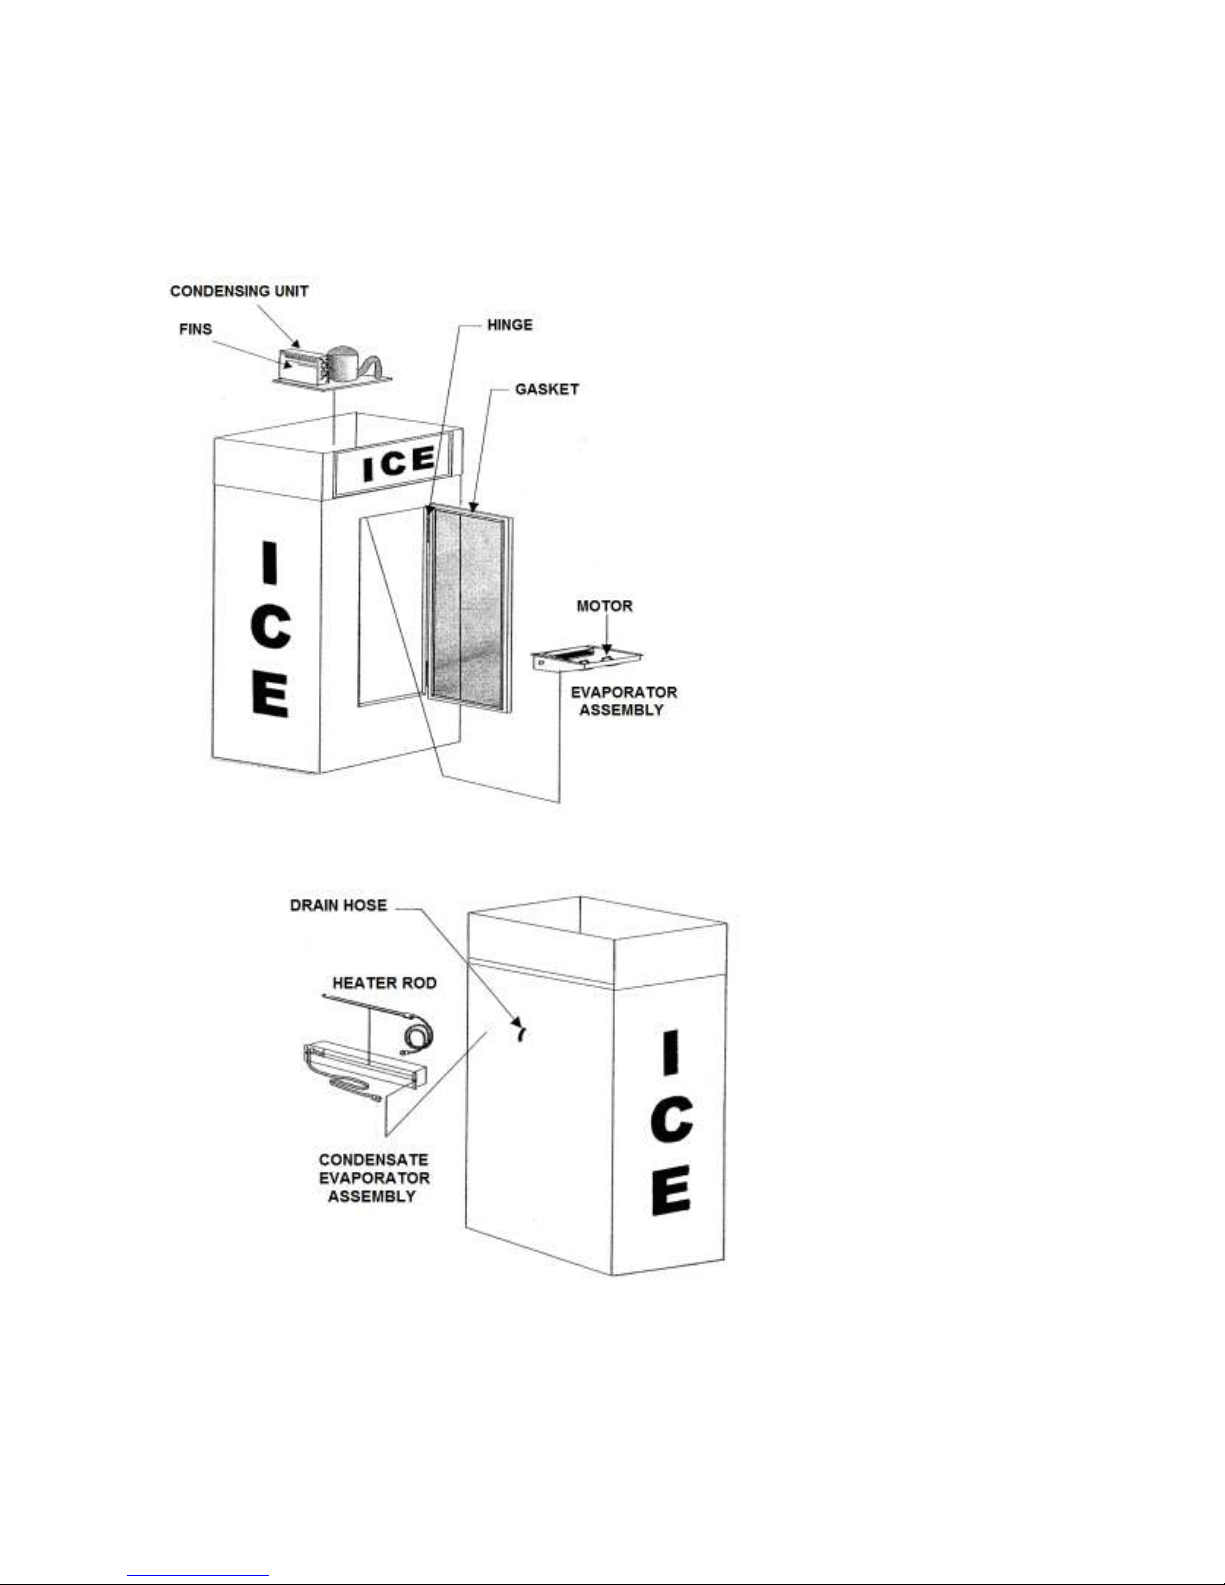
2. Defrosting: Frost forms on the evaporator when door is opened and warm air enters
merchandiser.
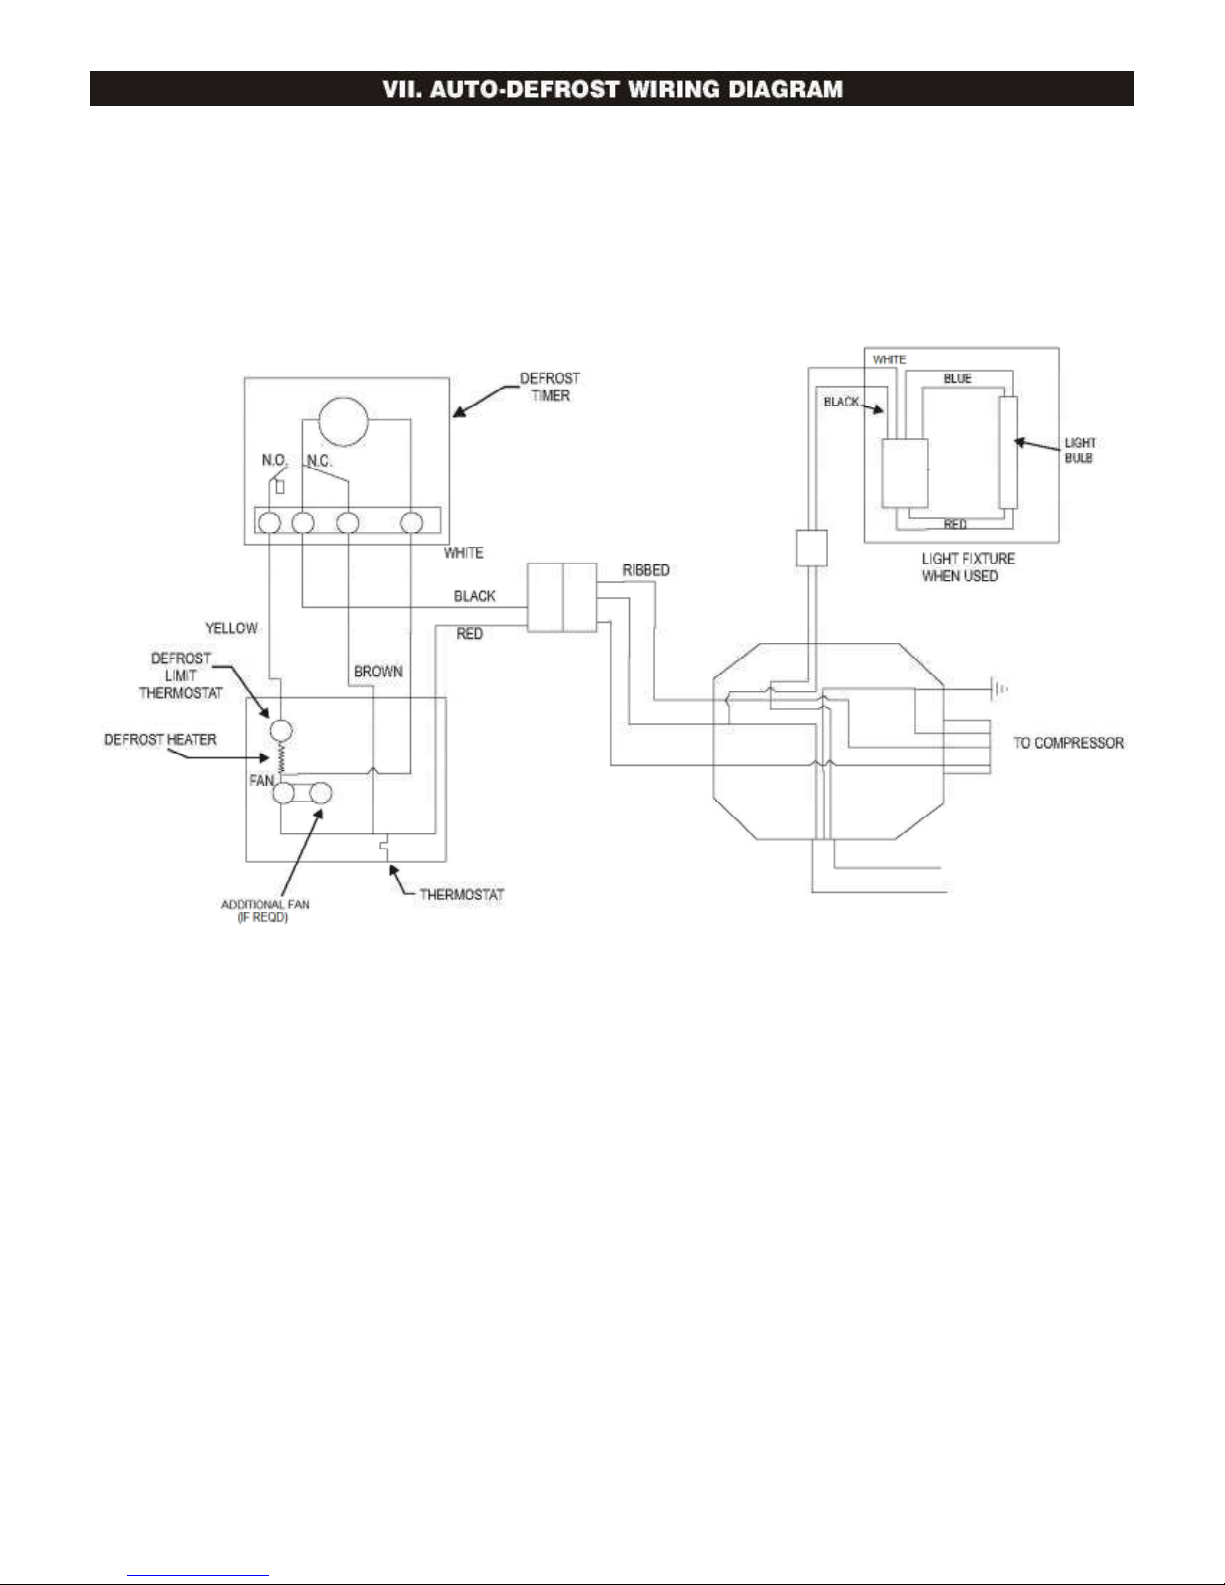
A.
Auto-Defrost (AD) vaporator: Auto-Defrost merchandisers utilize a unit cooler evaporator
with an electric defrost heating element to melt the frost off the evaporator coil. The defrost
cycle is controlled by a defrost timer which energizes a defrost heating element every four
(4) hours for 14 to 16 minutes.
Before each reloading of packaged ice: Inspect operation of unit cooler fan motor(s). Replace
motor(s) not operating or merchandiser refrigeration will not work effectively. Inspect unit
cooler drain hose to be sure it is not kinked or plugged. Water must drain to condensate
evaporator for designed operation. (See condensate evaporation maintenance)
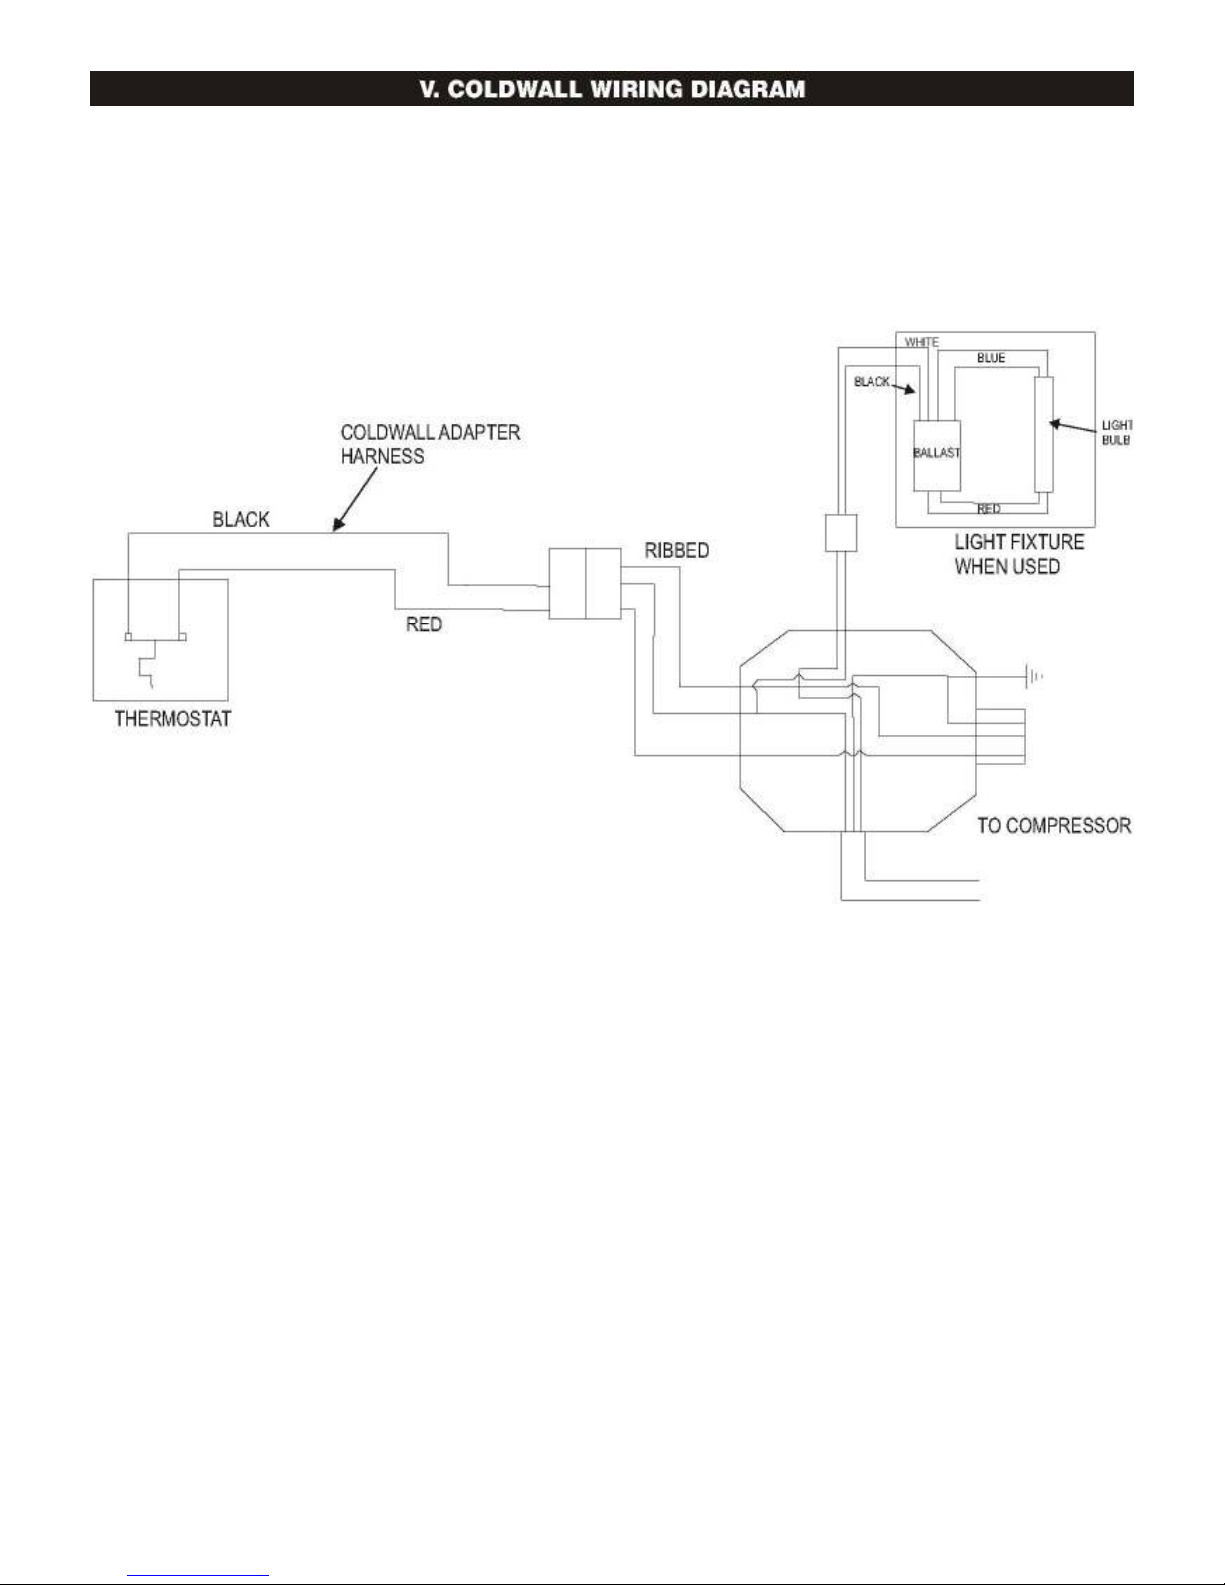
B.
Cold Wall (CW) vaporator: Cold Wall merchandisers utilize the merchandiser's interior
wall surface as the refrigeration evaporator. Therefore, frost accumulation will occur on all
wall surfaces. The merchandiser can be defrosted using a wooden paddle, plastic scraper, or
hot air. DO NOT use a sharp instrument to "chop" the frost as you may penetrate wall and
refrigerant tubing and do irreparable damage. A drain plug is located under the ice pallet to
help allow water to drain.
C.
Condensate vaporator: Inspect operation and condition of evaporator every three (3)
months. The heating rod should be heating and examined for excessive corrosion. Failure of
the heating rod to heat properly can result in the drain pan water overflowing. Also,
accumulative dust buildup may limit proper operation of the unit.