manuals.online logo
Brands
  1. Home
  2. •
  3. Brands
  4. •
  5. Maverick
  6. •
  7. Thermometer
  8. •
  9. Maverick BB-22 PROFESSIONAL User manual

Maverick BB-22 PROFESSIONAL User manual

Other Maverick Thermometer manuals

Maverick BB-44 User manual

Maverick

Maverick BB-44 User manual

Maverick OT-01 Owner's manual

Maverick

Maverick OT-01 Owner's manual

Maverick DGT-160 User manual

Maverick

Maverick DGT-160 User manual

Maverick OT-02 User manual

Maverick

Maverick OT-02 User manual

Maverick ET-706 User manual

Maverick

Maverick ET-706 User manual

Maverick ET-71D User manual

Maverick

Maverick ET-71D User manual

Maverick XR-50 User manual

Maverick

Maverick XR-50 User manual

Maverick Redi Chek Remote ET-71 User manual

Maverick

Maverick Redi Chek Remote ET-71 User manual

Maverick Redi Chek ET-73 Owner's manual

Maverick

Maverick Redi Chek ET-73 Owner's manual

Maverick Redichek PRO ET-32 User manual

Maverick

Maverick Redichek PRO ET-32 User manual

Maverick DMA0058 User manual

Maverick

Maverick DMA0058 User manual

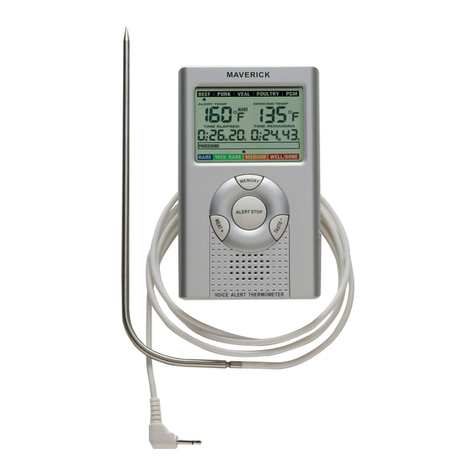
Maverick Remote Thermometer User manual

Maverick

Maverick Remote Thermometer User manual

Maverick Redi Chek CT-01 User manual

Maverick

Maverick Redi Chek CT-01 User manual

Maverick BT-150 STAKE User manual

Maverick

Maverick BT-150 STAKE User manual

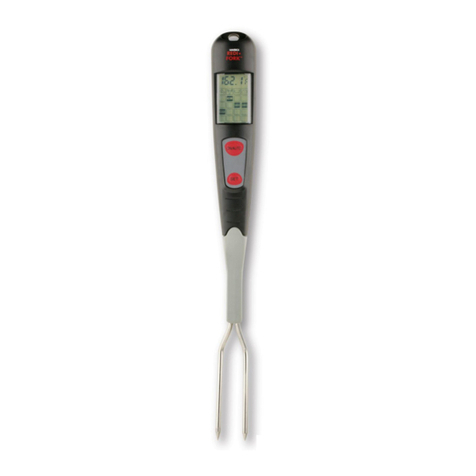
Maverick Redi-Fork ET-68 User manual

Maverick

Maverick Redi-Fork ET-68 User manual

Maverick ET-53 User manual

Maverick

Maverick ET-53 User manual

Maverick Oven-Chek RT-01 Owner's manual

Maverick

Maverick Oven-Chek RT-01 Owner's manual

Maverick DT-09 User manual

Maverick

Maverick DT-09 User manual

Maverick HD-8 User manual

Maverick

Maverick HD-8 User manual

Maverick XR-40 User manual

Maverick

Maverick XR-40 User manual

Maverick ET-41 Owner's manual

Maverick

Maverick ET-41 Owner's manual

Maverick ET-735 User manual

Maverick

Maverick ET-735 User manual

Maverick ET-8 User manual

Maverick

Maverick ET-8 User manual

Maverick ET-733 Redi Chek User manual

Maverick

Maverick ET-733 Redi Chek User manual

Popular Thermometer manuals by other brands

Benetech GM900 instruction manual

Benetech

Benetech GM900 instruction manual

Parton PTD-400 manual

Parton

Parton PTD-400 manual

GAME 15900 owner's manual

GAME

GAME 15900 owner's manual

scigiene FP-180 instruction manual

scigiene

scigiene FP-180 instruction manual

Ametek Land UNO U1 600/1600C-L user guide

Ametek Land

Ametek Land UNO U1 600/1600C-L user guide

Delton 981A instruction manual

Delton

Delton 981A instruction manual

Taylor 5286498 instruction manual

Taylor

Taylor 5286498 instruction manual

Baker MM2P instruction manual

Baker

Baker MM2P instruction manual

Chino IR-FA Series instructions

Chino

Chino IR-FA Series instructions

Vive DMD1010 user manual

Vive

Vive DMD1010 user manual

Tarmo 320281 manual

Tarmo

Tarmo 320281 manual

Citizen CTD 504 instruction manual

Citizen

Citizen CTD 504 instruction manual

TFA 14.1500 instruction manual

TFA

TFA 14.1500 instruction manual

Gotemp THB4002 user guide

Gotemp

Gotemp THB4002 user guide

GREISINGER G 1202 Quick reference guide

GREISINGER

GREISINGER G 1202 Quick reference guide

Amprobe TMD-53W user manual

Amprobe

Amprobe TMD-53W user manual

Trotec BP10 operating manual

Trotec

Trotec BP10 operating manual

Radiance instruments RT616 Series product manual

Radiance instruments

Radiance instruments RT616 Series product manual

manuals.online logo
manuals.online logoBrands
  • About & Mission
  • Contact us
  • Privacy Policy
  • Terms and Conditions

Copyright 2025 Manuals.Online. All Rights Reserved.

INSTRUCTION MANUAL
MODEL #BB-22PROFESSIONAL
REMOTE COOKING THERMOMETER
Introduction
Congratulations
onyourpurchase
ofthe ProfessionalRemoteCookingThermometer,aprogrammable
radiofrequencyfood
themometer.You will nowbeabletoremotelymonitorthetimeandtemperatureof foodcookingonyour grill from anywhere,
eveninyour
home.
Components
1.I -receiverunit
2.1-transmittermit
3.I - detachablestainless
steel
probe
sensor
Receiver Features
LCD(Liquid
CrystalDisplay)
- Displaysallicons,temperatureandtimer.Thebacklightwill flashBlue
oncethetemperahire
increases10F,
will changetoGreen
whenthetemperatureiswithin l5F ofthesettemperatureandwill tumRed
when
it reaches
the
set
temperature.
SeeLCDdiagram
fordetailedinformation.
CLIP
- Battery
compartmentclipallows
you
tobemobile.Clipthereceiverunittobelt.
BATTERY
COMPARTMENT
- Holds2AAA batteries.
Buttons
L MODE
- Presstoselectthermometerortimermode.Press& holdfor2secondstoregisterwiththetransmitter. '
2.HR - Intimer
mode,
press
tosethour.Press& holdfor2 seconds,thehourswill increase10hours
per
second.Inthermometer
mode,
press
toincreasethetemperaturevalue.Press
& holdfor2seconds,
thetemperaturevaluewill increasel0 degrees
per
second
3.ON-OFFfF-"C
- Press
andholdfor2secondstumsreceiverfunctionsonandoff.Inthermometermode
press
toselect
temperaturereadings
inCelsiusorFahrenheit.
4.MIN - Intimermode,
press
tosetminutes.Press& holdfor2seconds,theminutes
will increasel0 minutes
per
second.In
thermometer
mode.
press
todecreasethetemperature
value.
Press& holdfor2 seconds,thetemperarure
value
will decrease10
degrees
per
second. ,t
5.MEAT- Inthermometer
mode,
press
toselectmeattype,PROG
(program),
GBEEF
(ground
beef),GPOUL
(groundpoultry)
,
BEEF,VEAL, CHCKE
(chicken),
PORK,POULT
boultry) ,LAMB & FISH.InTimermode
switchesbetweenhour/minute
tiner
toaminute/secondtimer
andback.
6.STARTSTOP-Intimer
mode.
press
tostartorstopthetimer.
7.TASTE
- Inthermometer
mode,selectthemeattastelevel,RARE,MEDRARE,
MEDILJM,
MEDWELL andWELL DONE.
LCD
!@!& Thomomeni$mode
Settempemturo roading
BACK
Transmitter Features
FRONT
Stand
- Fold
upstand
foreasystorage.
BATTERY
COMPARTMENT
- holds
2AAA batteries.
S
- plug
inforstainless
steel
probe
sensor
Buttons
l. ON-OFFfF-"C
- Pressmd hold
for2seconds
tums
transmitter
onand
off.Press
toselect
temperatue
readings
inCelsius
or
Fahrenheit.
Registration Procedures
Openthe
battery
compartment
ofreceiver
andinsert
the
two"AAA" batteries.
open
the
battery
compartment
oftransmitter
and
insert
the
two"AAA" batteries.
The
Professional
Remote
Cooking
Thermometer
needs
thereceiver
toregisterthe
radio
frequency
signal
fromthe
transmitter.
Transmitter
& Receiver
areoff.
l. Plugthe
stainless
steel
probe
sensorinto
the
plug
inofthetransmitter.
2.Tumtransmitter
on
bypressing
andholding
the
oN-oFFfF-.c button
ontheside
for2seconds.
3.Tumthe
receiver
on
bypressing
andholding
theON-OFF/"F-"C
buttonfor2seconds.
4.Registration
iscomplete
whenthe
receiver
shows
the
probe
temperature
where
the
..--J,
was.
AutoOff feature:
The
receiver
will turnoff automatically
if it hasn't
receive
thetemperature
signalfromthehansmitter
for morethan
30minutes
orthetemperatue
received
isalways
lower
than
50c (
122F)
in 30minutes.
However,
the
Autooff feature
will be automatically
disabled
ifthe timer
isrunning.
The
transmitter
will tumoffautomatically
ifthe temperature
measured
isalways
lower
than50
C(122F)
in30minutes.
Measure
meat
temperature
toUSDA
doneness
temperature
rang€
l. Press
MODEtoselect
thermometer
mode.
The
upper
display
witl show
asmall
MEATandameai
type
suchas
BEEF.
2..Press
MEATto
select
meattype.
PROG
(program),
GBEEF
(ground
beef),
Gpoul (gr$rnd
poultry)
,BEEF,
VEAL,cHcKE
(chicken),
PORK,
POULT(poultry),
LAMB & FISH.
3.Press
TASTE
toselect
thelevel
ofdoneness
fortherneat
type
selected.
RARE,
MEDRARE,
MEDIIT\,{,
MEDWELLand
wELL
DONE.
Note:
The
temperature
displayed
totheright
ofthe
actual
meattemperature
PRoBE
TEMpwill show
the
preset
temperature
TEMp
SET
according
toUSDAdoneness
levels.
Example:
Beefwill beWellDoneat165
oF.
4.Once
thetemperature
ofmeatreaches
the
preset
doneness
level
thereceiver
will beep
andthe
LCDbacklight
will tumred.
Measure
meat
temperature
settoyour specific
taste
l. Press
MODEtoselect
thermometer
mode.
Theupper
display
will showasmallMEATand
ameat
type
suchas
BEEF.
2.Press
HRorMIN toraise
orlower
the
settemperature.
Asyoupress
HRorMin the
display
changes
topROG
(program).
Holding
the
button
will raise
orlowerthe
temperatue
setting
rapidly.
i,ressing
MEATwill retum
you
tothe-preset
USDA
ranges.
3.Once
thetemperature
ofmeatreaches
the
preset
doneness
level
thereceiver
will beep
andthe
LCDbacklight
will tumred.
Using
theTimer
Count
down
1.
Press
MODEtoselecttimer
mode.
The
upper
display
will show
asmall
rIMER and0:00. I
2,Press
HRand
MIN button
toset
the
timer.
Press
START/SToP
buttontostart
countdown.
"V" will blinkforevery
second.
SIDE
ffi
3.Tostopthecountdown
process
,press
START/STOP
button.
The
"Y" becomessolid'
4.PressHR & MIN buttonstogether
to clear
thesetting
back
to 0:00.
Note;Theminimumsetting
forthetimeris 1minute.When
thetimer counts
downbelow t hour1:00thedisplay
will change
to
59'59"display
advising
59minutes
59seconds.
Theseconds
will beshown
counting
down
then.
When
thecountdown
reaches
0'00',
thetimerstartscounting
upandit will beepfor60seconds.
The
timerand"AV" will blink.
Press
theSTART/STOP
button
tostop
beeping.When
thecount
upreaches
23:59:59
(59
seconds
are
notdisplayed)
thedisplay
will tumto0:00,
theunitbeeps
and
"AV" will blinkfor60seconds.
Count
up
1.PressMODE
toselecttimer
mode.
Theupper
display
will show
asmall
TIMERand0:00'
2.Press
START/STOP
button
to start
countup.The"A" will blink for everysecond.
3.Tostop
thecountup
process
,press
START/STOP
button.
The
"A" becomes
solid.
4.PressCLEARbutton
toclear
thesetting
back
to0:00'
Procedure for typical useon an outdoor grill:
Thefollowing typicalexample
will gotkough thesteps
tohave
theProfessional
Remote
CookingThermometer
alertyouto whena
beefsteak
iscooked
tomedium
(USDA
doneness
level)and
remind
you
torotate
hotdogs
in5minutes.
1.
Tumonthe
grill.
2.Followthe
registration
procedure.
3.Placesteak
andhotdogs
on
grillrack.
4.Insert
probe
sensor
intothecenter
ofthickest
portion
ofthesteak.
Avoidtouching
bone
orheavy
fatareas.Assume
themeat
temperature
is45
"F.
5.Position
theprobe
sensor
wire so
theywill notcome
into contact
with flamesand
exitthegrill surface
area
withoutbeing
pinched/crushed
by thegrill cover.
^6.
St*d th. ttunr.itter iway fromheatsource
ofgrill. DONOT puthansmitter
onclosed
cover
orunder
thecover.
Thetransmitter
isnotwaterproof
DONOTuse
inthe
rain.
7.PressMEAT soBEEF
isdisPlaYed.
8.Press
TASTEsoMEDIUMisdisplayed
and
150
"F will beshown
as
the
TEMPSET'
9.Press
MODEtochange
totimer
mode.
10.PressMIN 5timestosetfor5minutes
sothat
0:05isdisplayed.
PressSTART/STOP
tostart
thecountdown.
PressMODE
togo
baek
tothermomeJermode,-- : -
1l. Clipthereceiver
toyour
belt
orpocket
and
moveup
to 100ft away
from
theoutdoor
grill.Goindoors
if desired.
12.When
5minutesareup
the
receiverwill beep
for60seconds.
13.whenthetemperature
ofprobe
inthesteak
reaches
55
"F theLCDbacklight
will flashblue.
14.When
thetemperature
ofprobe
inthesteak
reaches
135
"F theLCDbacklight
will flash
green.
15.When
thetemperatureofprobe
inthesteak
reaches
150
"F MEDIUMthe
receiver
will beep
andthe
LCDbacklight
will flash
red.
16.
Press
STOP
totumoffthealert.
15.Tumoffgrill. Remove
the
probe
sensor
fromsteak.
Alwayswear
aheat
resistant
glove
totouchthe
stainless
steel
probe
sensor
orwireduringorjustaftercooking.
Donot
touchwithbarehands.
16.Clean
thestainlesssteel
probe
anddry
thoroughly
aftereach
andevery
use.
17.
Tumoffthetransmitter.
HELPFUL HINTS 'i
Ifthe receiverand/or
thetransmitter
disptay
LLL orHHHinsteadoftheprobe
temperature,
waitforprobe
toreachroom I
temperature.IfLLL orHHHisstilldisilaied it islikely
theintemal
probe
wire
hasshorted
outeither
through
moisture
orheat
damage.
Donotimmerse
theprobe
in water
whilecleaning.
Donotallowtheprobe
orprobe
wire to come
intocontact
with flames.
If cooking
with grill cover
closed,onlyuse
medium
or
low heat.
If theprobe
becomes
defective
within 90daywarrantyperiodpleasereturn defective
probe
to addressbelow
along
with
return address
rnd wewill send
younew
probe
nocharge.
Ifthe temperature
displayed
seems
to read
toohighorthetemperature
seems
to increase
tooquicklycheck
to make
sure
theprobe
tipisnot
ioking tbroughthe
food
tooutside.
Reposition
the
probe
1ip
inthe
centerofthethickest
part
offood.Avoidtouching
bone
orhealy fatareas.
Cautions:
Alwayswear
aheat
resistant
glove
totouch
thestainless
steel
probe
sensor
or wire duringor iust aftercooking,
Donottmch
with barehands.
\I
Keepthe stainless
steel
probe sensorandwire awayfrom children.
NotIntended
for UsebyPersonsages
12andUnder
Clean
thestainless
steel
probe
anddry thoroughlyaftereachandeveryuse.
Donotimmersetheprobe
or wire in water.Clean
usingadamp,soapycloth,
Donot use
thereceiveror transmitter
in therain.Theyarenotwaterproof.
Donotexposetheplugofthe stainlesssteel
probe
or the
plugin holeof thetiansmitterto wateror anyliquid.Tbiswill
result
in abadconnectionandfaultyreadings.
Donotexposethereceiver
ortransmittertodirectheat
or surface.
Donotusestainless
steel
probe
in microwave
oven.
TheProfessional
RemoteCookingThermometer
registerstemperaturesasIowas14
"F(-10'C) andashigh482
"F (250
"C).
LLL will bedisplayed
below14
oF
andIIHH will bedisplayedabove410
oF.
Donotusethestainless
steel
probesensorabove
482"F. Doing sowill deterioratethe wire.
Cleaning
Always'wear
aheatresistant
glove
totouchthestainless
steel
probe
sensororwireduringorjustaftercooking.Donottouchwith
barehands.
Keepthe
stainlesssteel
probe
sensorandwireawayfromchildren.
Wash
themetal
probe
tip with hotsoapywater
anddry thoroughly.Do notimmersetheprobe
in waterwhile cleaning.
Wipethetransmitter
andreceiverwithdampcloth.Donotimmerseeitherinwater.
LIMITED NINETY DAY WARRANTY
' Mavericklndustries
Inc.warrantstheProfessional
RemoteCookingThermometer
tobe{ieeofdefectsinpa(s,materialsand
workmanship
fora
period
of90 days,from
dateofpurchase.Shouldanyrepairsorservicingunderthiswananty
berequired,contact
Maverick
Customer
Servicebymailorphone
forinstructions
onhowtopack
andshiptheProfessional
RemgteCooking
Thermometer
toMaverick's
NationalServiceCenterlocated
asfollows:
MaverickCustomer
Service
94Mayfield
Ave.
EdisonNJ
08837
www.maverickhousewaxes.com
Telephone:
(7
32)417
-9666
Hours:
Weekdays8:30AM- 4:30PM
Donotsend
any
parts
orproduct
toMaverick
without
callingandobtainingaRetumAuthorization
Number
and
instructions.
This
wanantyisVOID ifinstructions
forusearenotfollowed;foraccidentaldamage;forcommercialuse;fordamageincuned.
whileintransit;
orifthe Professional
RemoteCookingThermometer
hasbeentamperdwith
Thiswarrantygivesyou
specificlegalrightsand
you
mayalsohaveotherrightswhich
varyfromstateto state.
I
Replacement Probes
Topurchase,
out
ofwananty,stainless
steelreplacement
probesplease
mailusachecktothe
addressbelowandspeciff
probe
rype:
BB-22 Probe $12.00/ea
All prices
include
shipping& handling.
NJresidentsadd7%
salestax.
AttnCustomer
Service
Maverick
Industries,Inc.
94Mayfield
Ave.
Edison
NJ
08837