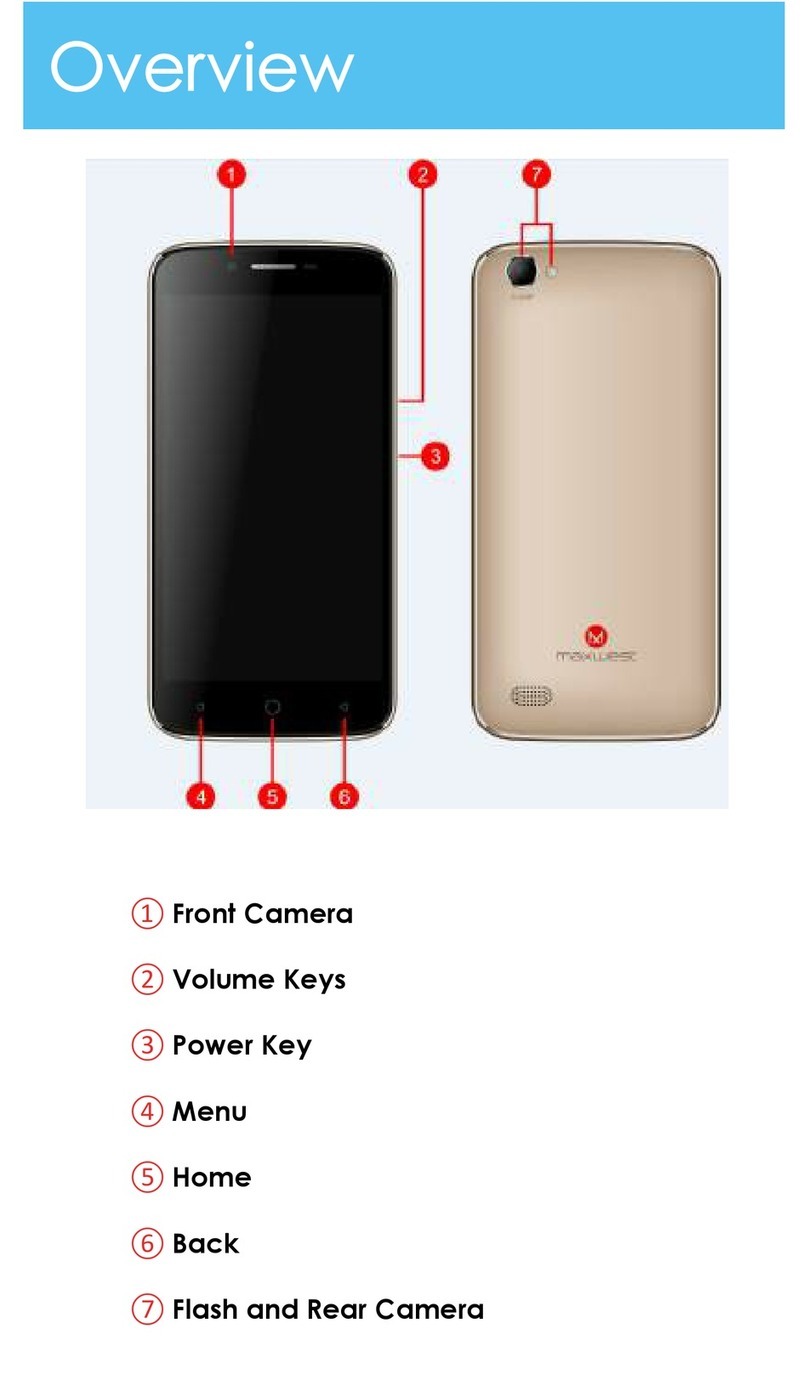
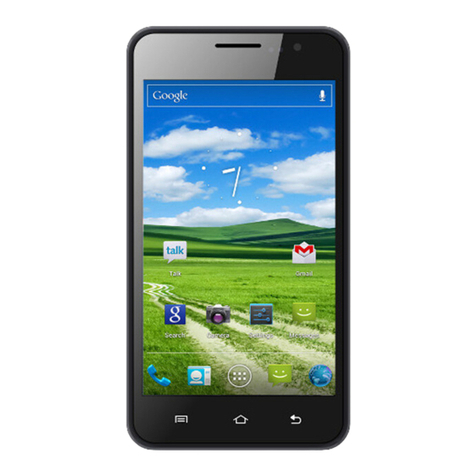
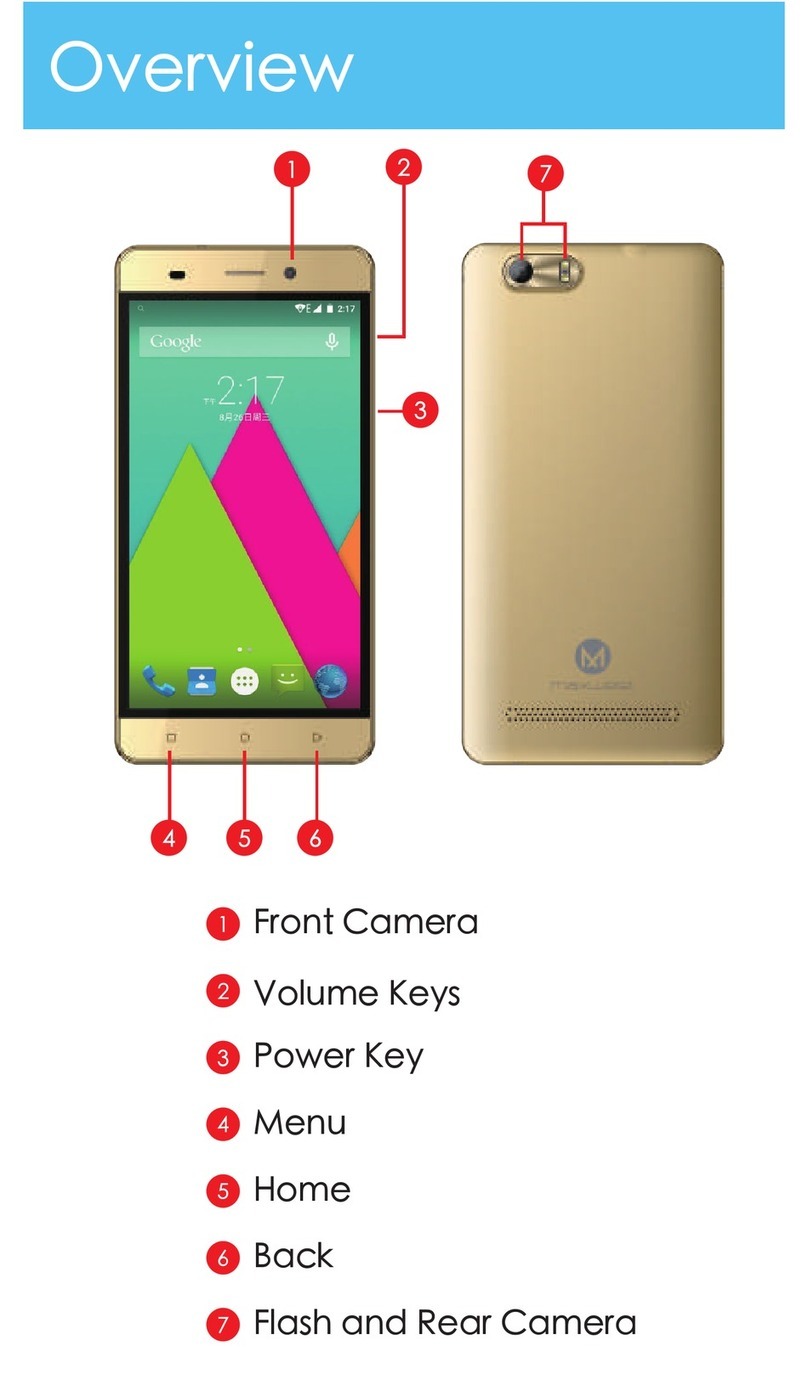
MaxWest NEO CLAM User manual

®
maxwest
DEVICE
LAYOUT
USER
MANUAL
NED
CLAM
e
~===~mrmOO
Lon
g
Press
to
open
SOS
0
~=:i
~dtd
numbj!
r
or
to
a
ccept
incomingcatl
I)
=:~~~=Screen
to
tumonthe
Ugl'lt:Torch

St•tus
Icons Turn
the
d..nc•
ON
or
OFF
Send
Text/Multlmeclla
Messages
Long
l'Tess
the
PowerButton{-
).
Ent
er
Unl
ock
Pin,
+-
~.u
Ent
e<
the
Messa
ge
Applicatio
n
by
•nterlngt
h•
Menu
(Le
ft
Airpl
ane
Mode
GS
MNe
tw
ork
If
necessary. Soft
Ke
y)
and
sc
roll
up
wit
hi
the
navigation
button
to
t
he
LJ
Application
Message.
Lil No
SIM
In
serted SD Card
In
serted
To
Unlock
thedevice
Press
th
e
Le
ftSoft
Key
(-),then
the
Starkey( * ) Select
Write
message, (1) for
Text
Message
press
SMS
or
lal Meeting Mode
~
Silent Mode
(2)
for
Multimedia
Message pr•ss
MMS.
M.b
or
•nswer
•
C.11
~
*
(I)
toEnter
the
redpi
en~
ent
er
the
phone number.
Scroll
down
Indoor
Mode
Outdoor
Mode
To
make a
cal~
go
to
the
Home
Screenandenter
the
number.
to
enter
the
messagePortion
of
the t
ext.
Oncecomplete,
B Once
the
numberiscompleted.Press
the
Call
button(- )
S@lect
OptionsandSelectSend
-Battery Pen:entage Unread M
essage
For
incomingcalls.
to
accept tile
call
press
the
canbutton (2)
to
Enter
the
recipient.
enter
the
phone
number
.
Ent
er
the
(-
).
To
reject the
call,
press
the
Cancel
button(- )
de~red
infonnall
on
(Subjecl,
Text.
Image.Videoor
Audio).
Once
complete,
se
lectOptionsand Select Send
ChangingAudioProfiles
C.lllng
Options
••mrrntHD
Changing t
he
Audio
l'To
fi
les
allows
you
to
change thedevice
To
EnterSpeaker
Mode
duringa phone
call,
press
th
e To
View
t
he
receivedmessages. press
lnbox.
volume
level~
This
menu
will
befound
In
Confirmation Button
To
View
thesending messages, press Outbox.
Home
Screen
>
Menu{-)
> Settings >
l'Tofi
les
To
View
thedraft messag
•s.
press
Draft.
To
Adjust
the
volume l
evels,
pressupanddownon
the
To
View
th
@
sent
messages,
prMSSentbox.
Therearepreset
Audio
Profiles:
Navigation Button
1.
General
-Thesearethedefault audio
levels
recommend
otspi.y
~lngs
2.
Si
lent-Thesesettingsmuteallaudionollficatlon
To
End
the
call
presst
he
cancelbutton{- )
3.
Meeting
-Thesesettings putallaudio
to
v
lb<a
tlon
4. Indoor-Thesesettingsmake all audio l•velslow
For
moreoptions, select Menu bypressing
Left
Soft
Key
( - )
In
Display
selling
you
aroab!•
lo
chango
your
wallpaper,
S.Outdoor -These settingsmake
all
audio
to
max
In
thismenuyou can
Add
a
new
call,
Place
call
on
Hold,
SU
rt adjustbrightnesssettings,changescreen timeout.change
,.cord
ing
ca
ll,
Muto
call, adjustvolume,
U$e
contacts,
call
logs,
thekeypad
loc;k
ti
me,
andchange
your
screensaversettings.
You
canedit any
of
thesesettings
by
selectingOption{- ) oropen messages. Y
ou
will
fi
nd this
menu
In
In
these sett
in
gsyou
will
be
ab
le
to
change
the
ri
ngt
o
ne~
Homesaeen >
Menu
(-)
> Settings >
Di
sp
l
ay
Settings
adjust
vo
lume lev
els,
se
l
ect
ring type,
and
additional audio
settings
Contact
Menu
In
the
Contact
Menu
you
can
save,
edit.
Import,
and
export
yo
ur
con
tacts.
You
can
access
yourcontacts by
H
ome
Screen >
Contacts(-)
•
·
x:rmm~ma.wra•
To
addanewcontact
selec
t
1.
Select
Options
LSK
(-)
2.
Select
New
3.
Inserta
ProfiJe
Picture,
Name,
Mobilenumber, Home
number,add
to
agroup,orsettheringtooe
4.
Select
Save
LSK
(-)
ftiii!.!
·
i!l@k@"®'
To
addanumber
to
speed
dial,followthe
steps
bel
ow
:
1.
Select
Options
LSK
(-)
2.
Select
Othe«
3.
Select
Speed
dial
4.
Select
which number
you
want
to
set
up
S.
Inputthenumber
6.
Selectok
Importing/Exporting
Contacts
To
import/export
your
contacts
you
must
have
them
in
cllfFormat:
1.
Select
Options
LSK
(-)
2.
Select
Import/Export
3. Selectwhich
one
you
would
like
to
do
Browser
Menu
The
Browser
Applicationallows
you
tonavigatethe
Wo~d
WideWeb.
To
enterthe
browser,
followthe
steps
below:
Home
Screen >
Menu
> I
nternet
To
search
somethingonllne:
1.
Select
Input
URL
2. Enter
the
website
URL
you
wou
ld li
ke
to
search
ftji!f!UGr:tm!
·
'33-''""
To
setup thenetwork
GPRS
setting:
1.
Select
Options
LSK
2.
Select
Settings
3.
Select
SlM
l
/2
Networkaccounts
4.
Select
your
SIM
carrierfromthe
J)<eset
network
accounts
To
access
pages
fas
t
er,
use
bookmarks.
Tilerearepresetpages like Facebookwhere
you
can check
youraccount
You
can create your
own
bookmarkpagesaswell.
1.
Select
Bookma
r
ks
2.
Select
Options
3.
Select
Add
4.
Select
Bookmark
S. I
nput
the
information
and
save
it
Typi
ng
with
keyboard
The
device
uses
T9
keyboard settings.
These
are
the
keys
for
each
letter
1-
Press
multipletimes
to
select differentpunctuation
marks
2-ABC
3-DEF
4-
GHI
5- JKL
6-
MNO
7-PQRS
8-TUV
9 -
WXYZ
0-Space
*-All
th
e symbols
in
this
menu
# -
Allows
you
to
change Abe,
abc.
ABC.
1
23
, orwriting lang.
To
create
text,
see
th
is
samp
le:
To
spell
out thework•World•
W-
Press
number9
key
onetime
o·
Pres
snumber6
key
threetimes
r·
Press
number7
key
threetimes
I-
Press
numberS
key
threetimes
d
·Press
number
3
key
one
time
To
input
a
number
in
text
1.
Select
theI
key
and
select
123
2.
input
the
nu
m
ber

Phone
Setti
ng
s
To
access
the
phone
settings,
go
to:
HomeScreen > Menu > Settings
:;:..
PhoneSettings
•·na
~
111,,1-
In
th
ismenuyou will
be
able
to
set
time, setdate,
change
timeformatchangedateformatorchange updatetime
settings
UJWWHitUO.•
·
tww
This
menu
can
all
ow
you
to
change
the
language
from
English. French,
Span
i
sh,
or
Portuguese
f1
i'
·
11
A
11
f1#"':!.f
This
menuallowsyou
to
change thehome
screen
shortcut
keys
to
differentapplications.
i ·ffii.i.].@§i.!,f#1i
MM
This
menu
can
setyour device
to
automaticallypoweron/off
on preset
times.
'i
·@j§M,
E!
.
1§
..
1§,jM
This
menu showsthebatterypercentage
of
the
device.
•;GU
·
@ffii.1'
Th
is
menu
wi
ll erase
all
data
on
the
dev
i
ce
,
password is
0000
SOS
Settings
The
SOS
func
tionality
on
the
d
evice
all
ows
you
to
set
up
five
(5)
emergency
numbers
th
at wi
ll
receivea
custom
text
message
and willautomatically
ca
llthenumbersinthe
orderthey
are
set.
D
is
claimer:Nonumbersare presetto
the
device,user mustset
theirown
numbers.
Device
must
have
an
active
service
running
forthisfunctiontoworkproperly.
lii!i,!l
.!.fj•&tf1iW'
99
SOSfunctionality
can
be
turned
on/off
at
any
time.
Select
SOS
turnon/off, ch
eck
mark
is
on
ny
defa
ult
Adding
Telephone
Numbers
To
addatelephonenumber
1. SelectTelephonenumber
2,
Select
thepriority
of
thenumber
3.Inputthe number
Edit
Message
Content
To
editthe
message
content
1.
Select
Message
content
2.
Editthe
exist
ing
message
3.
Select
Ok
Activating
SOS
To
activatethe
SOS,
longpr
ess
the
SOS
button
WARNING
• A
ny
ch&r'lfiC:S
Of
modificilltiOn$
not
t:
10pr
c:.ss
ly
approw:d
by
the
P.llrtv
res1><>nsl
bl
c
fo
r compliancecould void tl'le user's a
ut
hority
to
01>erate
the
eq
uipment.
This device
complies
wltn
pa
rt
15
of
the
FCC
Aules.
Opcratlon Is
""b
l
~
to
the
followtn1
two
condition
s;
(
1)
this
dev
ice
may
not
cause
Interference
(2)
this
devi«
m1o1st
a«e
pt
•
nv
interfe
r
ence,
inch.1din5 i
nt
erferenc
e
tt<.
at
may
c;;iuse undesiredope,...tlon
of
the
devk:e.
Note
:
This
equ
i
pment
h.as
been
tested
.and
found
to
comp
ly
wt
th th
e
limits
for
a Cl
.;a
ss
El
dl
S
IQI
devke,
pursu
<11
nt
to
pa
rt
15
of t
he
FCC
rules.
Th
e~
llmlu.
are
de.sls
ned
to
pro\lkle
reason.abl e
pro
tection
agai
ns
t
h.oirmful I
nterfe
ren
ce
In
.a
reskle
nd
oa
l lnn.oiilla
tlo
n.
Thls
equl
prne
nt
gene
rat
es
,
uses
a
nd
ce
n
ra
dia
te
radio
fr
eci
u
ency
ene
r
gy
and.
If
not
installed
and
Ulied in
ilCCOr
danc;e with
the
in
~r
u
ctions.
may
c;ause
harmfu
l
in
te
rf
e
renc
e to
radio
comm
uni
ca
ti
ons
.
However.
t
here
is
no
guarant
ee
taht
interfe
r
enc
e
wi
ll
not
occ
tir
in a
particu
l
ar
i
n$ta
ll
at
iQ
n
It
this
eq
ui
pment
does
cause
harm
ful
interferen
ce
to
radi
o or t
e!evs
i
on
rec;epti
on,
whic
h
can
be
de
te
rmined
by
tu
r
ning
t
tie
equip
ment
off
and
on
,
tMe
us
er
Is e
nco
u
rage
d to
try
to
cor
r
ect
tMe
in
terfe
r
ence
by
one
or
more
of
th
e
follo
w'ing
measures:
-
Reorie
nt
or
r
eloc
a
te
t he
receiv
ing
antenna
.
-I
nc
r
ease
the
se
pa
r
at
i
on
between
the
eq
uipment
a
od
rece
iver.
-Connect
the
equ
i
pme
nt i
nto
an
ou
tlet
an
a
circu
it
d
iffe
re
nt
fro
m
th
at
to
whic
h
the
receiver
is
conn
ected.
-Consu
lt
the
de:al
er
or
an
expe
r
ienced
ra
di
ofT\I
tectmluan
fo
r
help.
• SAR
tests
are
conducted
using
s
ta
nda
rd
operat
ina
positions
a
ccepted
by
the
FCC
with
the
d
ev
i
ce
tnli
nsm
l
tt
l
ng
at
Its
hig
hest
certl
f i
e:d
powe
r
leve
l
in
all
teste:d
fre
ci
u
ency
band
s,
altho
u
sh
tt"ae
SAR Is
det
er
mi
ned
at
th
e
hichest
certif
ied
powe
r leW"I,
th
e
act
ua
l
SA.R
lev-el of ti-le
devic
e
wh
ile
operating
can
be
well
be
l
ow
the
maximum
va
l
ue,
In
se
oera
l,
the
cl
oser
you
ar
e
to
a
wireless
b
ilse
stat
ion
iln
t
enna,
th
e
low
er
t
ile
po
we
r
ou
tput.
•
Before
a
new
de
vice
is
ii
crvail.able
for
sale
to
the
public,
it
must
be
telited
and
certif
ied
to
the
FCC
that
it
does
n
ot
e1teeed
th
e
expos
u
re
li
mit
established
by
t
he
FC
C.
T
ests
fo
r
each
devi
ce are
perfor
med
in
positio
ns
and
l
ocat
ions
as
requ
i
red
by
the
FCC
.
• For body
worn
op~ratlon,
ttlls
devtc:o
nas bel!n
tested
and
moeu
d'le F
CC
RF
exp
os
ure
gu
ide
li
nes
when
used
with
an ac
cessory
de
s
ign
at
ed
for
this
pr
od
u
ct
or w n
en
use
d
with
an
ac
cessory
t
hat
con
t ai
ns
no
met
al a
nd
th
at
positions
th
e h
andset
a m
in
i
mum
ofS
mm
from
t
n.e
body.
•
Non
-com
pli
an
ce
wi
th
the
above
res
tr
iet
ions
may
re-suit
in
viO
kl
ti
on
of
RF
expow
1
eguktti
ll
nes
.
Other MaxWest Cell Phone manuals

MaxWest
MaxWest Gravity 5 LTE User manual

MaxWest
MaxWest Nitro 55M User manual

MaxWest
MaxWest UNO X2 User manual

MaxWest
MaxWest ASTRO 5.5 User manual

MaxWest
MaxWest UNO X2 User manual

MaxWest
MaxWest ORBIT 5400T User manual

MaxWest
MaxWest UNOM3 User manual

MaxWest
MaxWest MX110 User manual

MaxWest
MaxWest MX-100 User manual

MaxWest
MaxWest Gravity 5 User manual