2007-2009 Jeep JK 4dr Roof Rack Kit
1. Mark the holes to be drilled in the factory hardtop using the
supplied Hole Templates. There is a front and rear
template. LH and RH are mirror image of each other and will
use the same template. Trim the template and tape it to the
inside of the hardtop. ENSURE THE PR FILE F THE
TEMPLATE F LL WS THE PR FILE F THE SIDE
WIND W AND FLUSH WITH THE L WER LIP. Using a
fine point marker, mark the center point of the hole. Repeat
for all 1 hole locations. Refer to Figure 1.
2. Remove the 4 corner factory hard top mounting bolts,
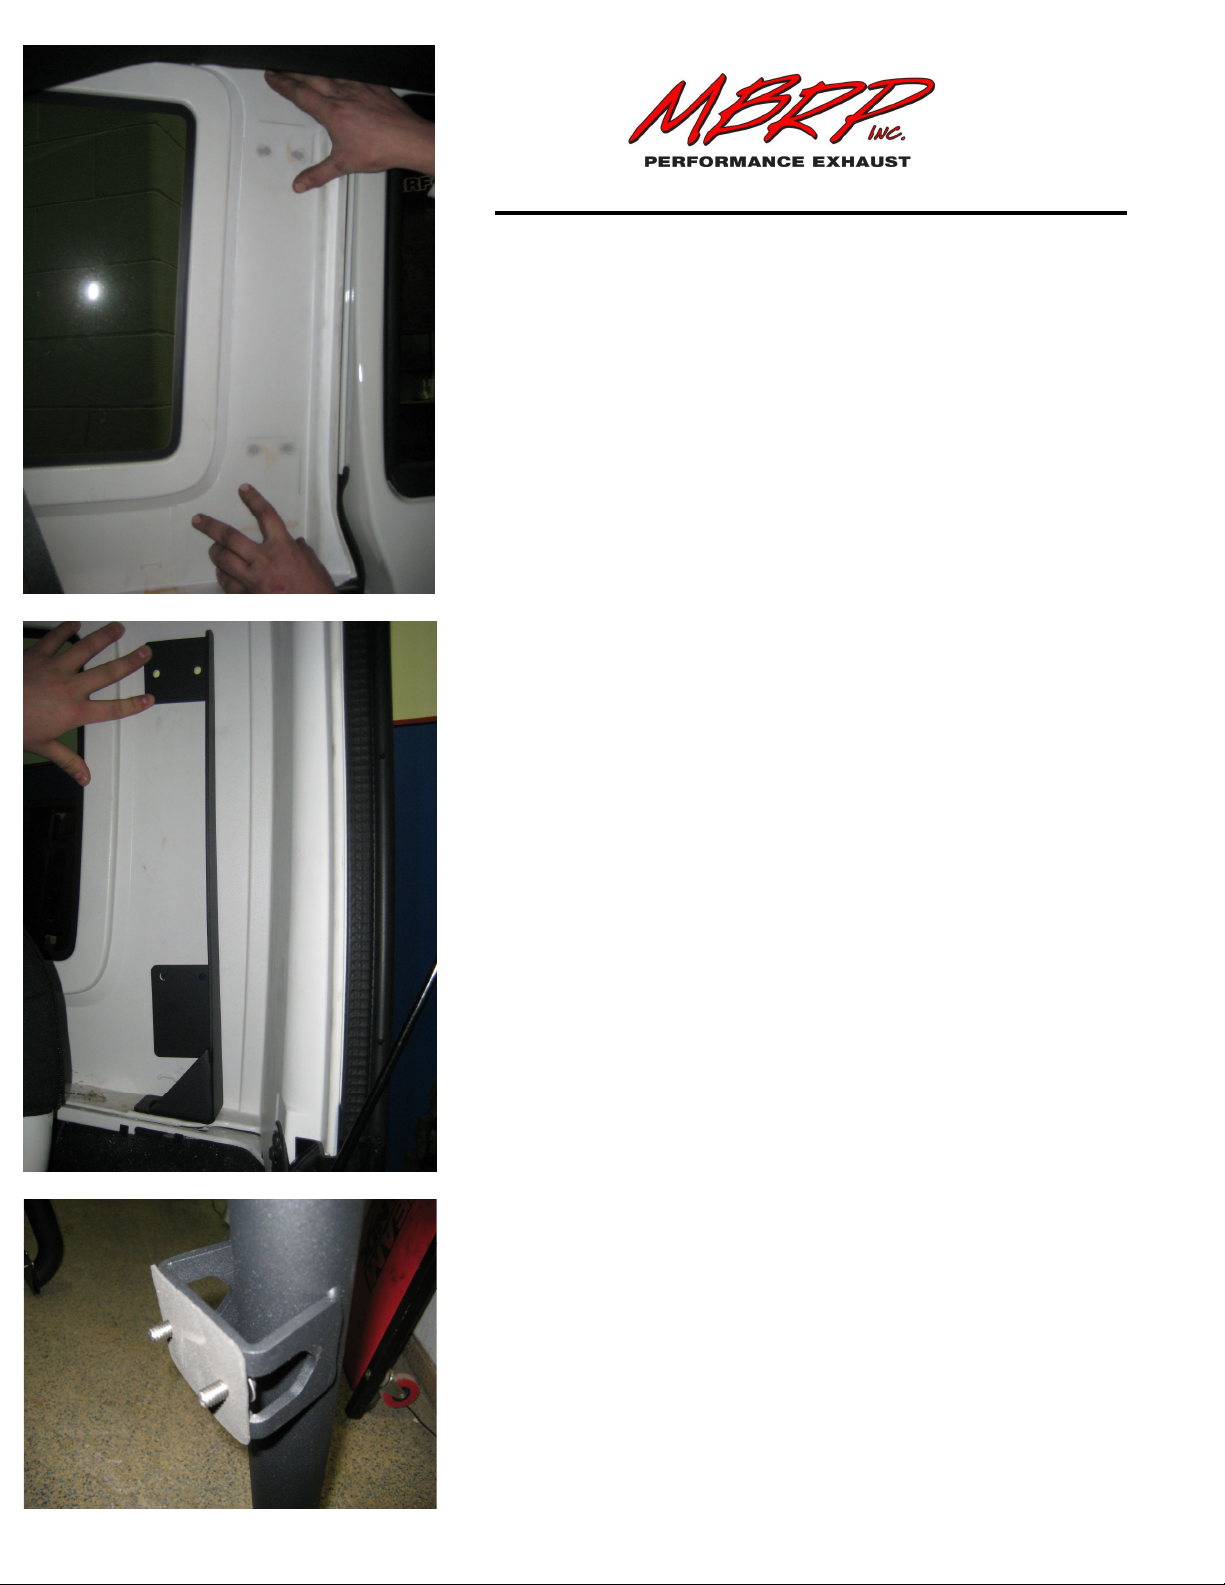
leaving the center 2 in place. Loosely attach the Driver and
Passenger side, Front and Rear mounting Brackets using
the previously removed bolts. The front brackets can easily
be identified by the cut-out in the lower pad for light wiring
access. NOTE, the mounting pads on these brackets may
not be completely flush with the inner surface of the hardtop.
This is normal. Refer to Figure 2.
3. VERIFY ALL 16 H LE L CATI NS LINE UP WITH THE
CENTER MARKS Y U MADE IN STEP 1.
BEF RE Y U DRILL ANY H LES.
The inner brackets are flexible and have provisions for
adjustment within reason. If your brackets will not line up
with the template, please contact MBRP Inc. before
continuing.
4. Once you have verified that the mounting holes will line
up correctly, remove the inner brackets and use a 3/8” drill
bit to drill the mounting holes in the hardtop as marked in
step 1.
5. Reinstall the 4 inner brackets leaving the mounting bolts
loose.
. Install the Driver Side Assembly by pre assembling with
the supplied 5/16”x1” Button Head Screws. Be sure to
place a 5/16” Washer under the head of the screws. Next
slide the supplied Upper and Lower Gaskets over the
threads of the screws. The Gasket will help hold the screws
in place while installing the assembly. Refer to Figure 3.
0130717 03/09 Page 2 of 4
Figure 1
Figure 2
Figure 3


