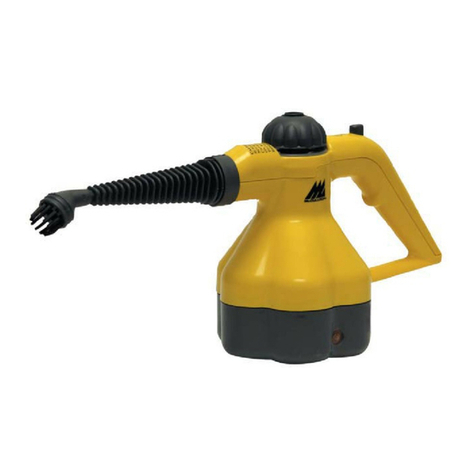
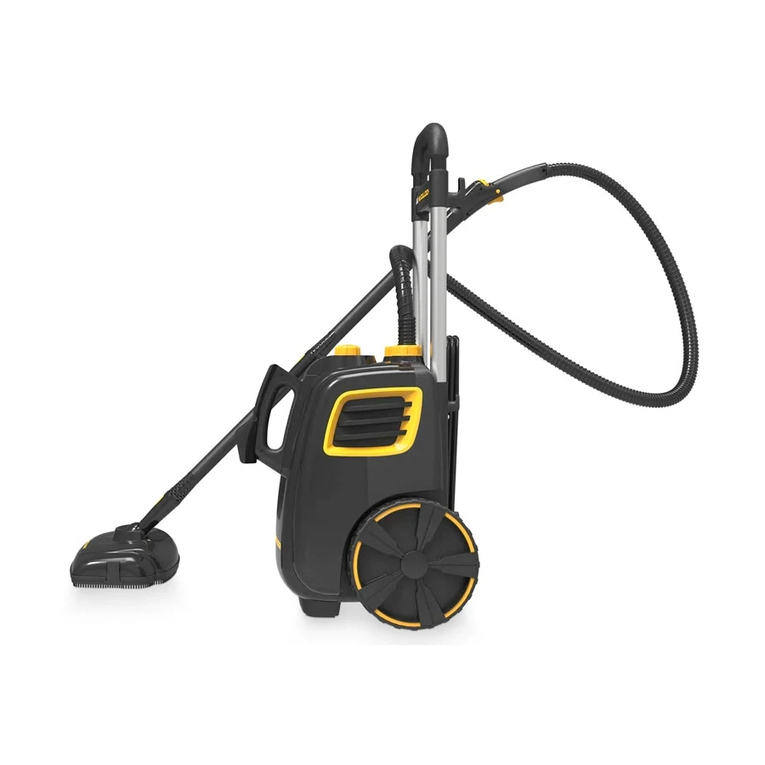
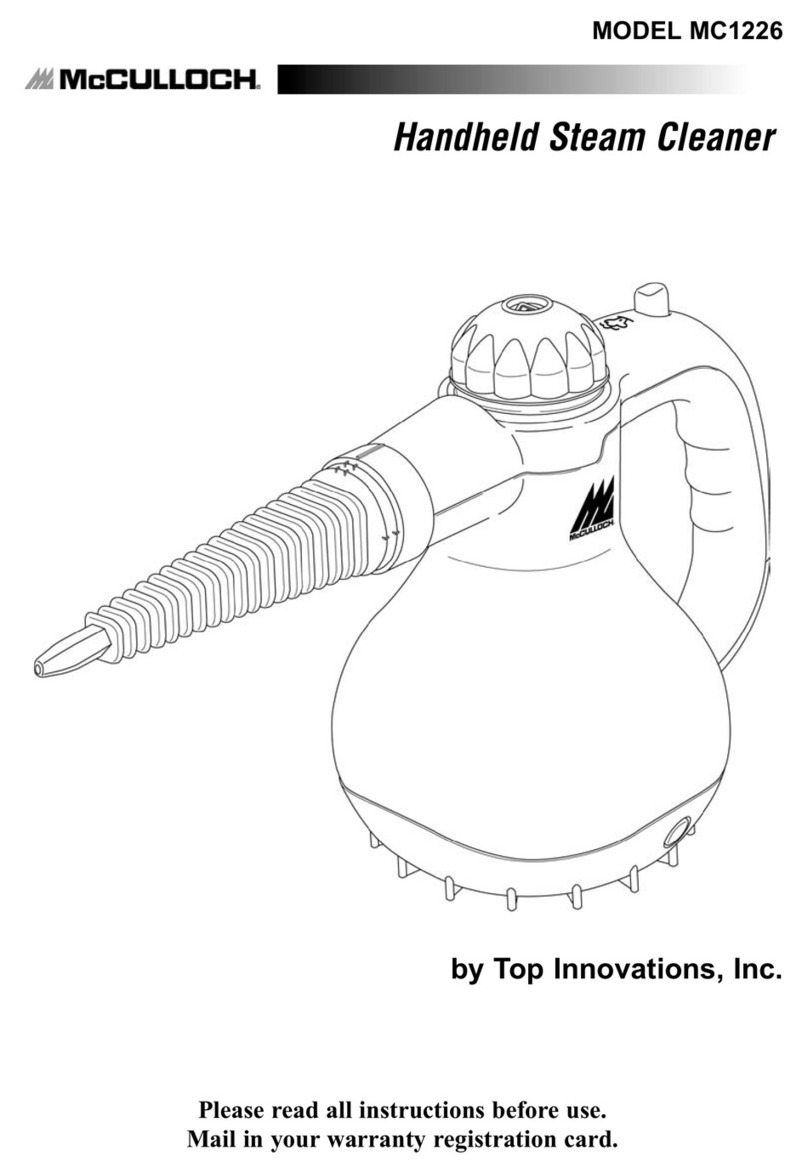
McCulloch MC1230 User manual

Handheld Steam Cleaner
Limpiador a vapor portátil
Nettoyeur à vapeur portatif
Owner’s Guide
Guía del Usuario
Mode D’emploi
Model MC1230
Modelo MC1230
Modéle MC1230
KEEP YOUR RECEIPT FOR WARRANTY PURPOSES
Please read all instructions before use.
GUARDE SU RECIBO A EFECTOS DE LA GARANTÍA
Lea todas las instrucciones antes de usarlo.
GARDEZ VOTRE REÇU AUX FINS DE LA GARANTIE
Veuillez lire toutes les instructions avant l’utilisation.
English p. 2
Español p. 18
Français p. 34

2 |ENGLISH
IMPORTANT SAFETY INSTRUCTIONS
1. The Handheld Steam Cleaner Water Tank is designed to hold a maximum of 6 oz. (177 ml.) of
water. Unplug electrical cord before lling with water.
2. DO NOT leave your Handheld Steam Cleaner unattended when plugged in or not in use. Use
only for its intended purpose as indicated in this manual.
3. This unit is not a toy. Close supervision is required when using unit near children, pets, and
plants. Steam produced by unit is hot and pressurized. Care must be taken to avoid burns or
other injuries. Never point nozzle at people or pets.
4. To reduce the risk of contact with hot water emitting from steam vents, hold appliance away
from body and check for signs of condensation or leakage.
5. DO NOT use this unit if electrical cord or outlet is damaged. DO NOT use unit if it is not work-
ing properly or has been dropped, damaged or left outdoors. If such damage occurs, DO NOT
disassemble or attempt repairs, take unit to a qualied service person for examination and
repair. Incorrect reassembly or repair could cause a risk of re, electrical shock, or injury to
persons when steam cleaner is used.
6. To reduce risk of electrical shock, DO NOT immerse in water or other liquids. DO NOT use
electrical cord as a handle. DO NOT allow cord to be crimped by closing it in doors. DO NOT
pull or stretch cord around sharp corners or edges.
7. Do not allow cord to touch hot surfaces. Let appliance cool completely before putting away.
Loop cord loosely around appliance when storing.
8. DO NOT use this unit with extension cords or electrical outlets that have inadequate current
capacity. A three-prong outlet or a properly grounded adapter is necessary when using Hand-
held Steam Cleaner.
9. In order to unplug Handheld Steam Cleaner, grasp plug and pull smoothly and rmly from
outlet. DO NOT attempt to unplug unit by pulling or tugging on cord.
10. Use caution, as burns could occur from touching hot metal parts, hot water or steam.
WARNING: To reduce the risk of re, electrical shock, or injury, the following
basic safety precautions should always be followed when using an electrical
appliance.
READ ALL INSTRUCTIONS BEFORE USE
ENGLISH |3
WARNING: To reduce the risk of electrical shock, this appliance has a three-
pronged plug. This plug will t in a polarized wall outlet only one way. If the plug
does not t fully in the outlet, contact a licensed electrician to install a proper
outlet. DO NOT attempt to modify the plug or defeat this safety feature.
Questions or comments?
• www.mccullochsteam.com
•1-800-711-6617
SAVE THESE INSTRUCTIONS
fOR HOUSEHOld USE ONly
11. The Handheld Steam Cleaner is only meant to be used with recommended Handheld Steam
Cleaner accessories. Other types of attachments are not to be used with the Handheld
Steam Cleaner. Doing so may cause injuries or damage to unit.
12. Attachments become hot during use. To avoid injuries, DO NOT touch attachments while us-
ing this appliance. DO NOT attempt to change attachments while unit is emitting steam.
13. When lling your Handheld Steam Cleaner, only water should be used in unit. Other cleaning
agents will damage unit and can cause injuries.
14. DO NOT operate unit if steam opening is blocked. Should this occur, immediately cease us-
age and unplug from electrical outlet.
15. Store your Handheld Steam Cleaner in a cool, dry place.
16. To avoid burns from escaping steam when removing Boiler cap to rell unit:
• Always allow unit to cool for 20 minutes.
• Press and hold Steam Trigger to release ALL remaining steam.
IMPORTANT SAFETY INSTRUCTIONS

4 |ENGLISH
UNIT FEATURES
Boiler Cap
Steam Trigger
Steam Trigger Lock
15' Power Cord
Steam Nozzle
Steam Indicator Light
On/Off Switch
1
2
3
4
5
6
7
Product Information
These features and accessories are included with your Handheld Steam Cleaner. To obtain
additional parts, refer to Product Support on Page 16 of this manual.
1
2
3
4
5
6
7

ENGLISH |5
• The Boiler Cap (1) is designed to safely contain steam inside the Boiler. The Boiler Cap must
be unscrewed and removed in order to ll the Boiler with water.
• The Steam Trigger (2) must be pressed in order to start the ow of steam from the Steam
Nozzle.
• The Steam Trigger Lock (3) locks the Steam Trigger for continuous steam.
• The 15' Power Cord (4) conveniently helps to reach all your cleaning tasks.
• The Steam Nozzle (5) emits a ow of hot, penetrating steam when the Steam Trigger is acti-
vated.
• The Steam Indicator Light (6) illuminates green once steamer has reached the amount of pres-
sure which is required to operate, indicating it is ready for use. During use, the light may turn
Red, indicating the steamer is recovering the necessary pressure. Unit can be used at a lower
pressure.
• The On/Off Switch (7) powers the unit On or Off.
Product Information

6 |ENGLISH
Storage Bag
A1230-010
Product Information
ACCESSORIES
5.5" Jet Nozzle
4" Triangle Brush
6"x 4.5" Large Brush
34" Extension Hose
3" Scraper
Storage Bag
Fill Cup
1 - 2.5" Round Scrub Pad
2 - 1.5" Nylon Utility Brush
1 - 1.5" Brass Utility Brush
1
2
3
4
5
6
7
8
9
10
5.5" Jet Nozzle
A1230-001
4" Triangle Brush
A1230-002
6" x 4.5" Large Brush
A1230-003
34" Extension Hose
A1230-004
3" Scraper
A1230-009
Fill Cup
A1230-008
1.5" Nylon Utility Brushes
A1230-005
1.5" Brass Utility Brush
A1230-006
2.5" Round Scrub
Pad A1230-007
1
10987
6
54
2
3

ENGLISH |7
• The 5.5" Jet Nozzle (1) connects to the Steam Nozzle and is designed to focus the ow of
steam for concentrated cleaning. The Nylon Utility Brush, Brass Utility Brush and Round Scrub
Pad all connect to the Jet Nozzle. Alternatively, the Jet Nozzle may be connected to the end of
the Extension Hose.
• The 4" Triangle Brush (2) connects to the Steam Nozzle or Extension Hose, and is designed
for cleaning corners and other difcult angles.
• The 6" X 4.5" Large Brush (3) attaches to the Triangle Brush to cover large surfaces.
• The 34" Extension Hose (4) connects to the Steam Nozzle and is designed to provide addi-
tional freedom to easily reach a variety of spaces. The Jet Nozzle should be connected to the
male end of the Extension Hose in order to safely focus the ow of steam.
• The 3" Scraper (5) connects to the Steam Nozzle and is designed to help scrape and remove
baked on food from ovens or other hard to remove materials.
• The Storage Bag (6) is provided to store all attachments neatly in one convenient bag.
• The Fill Cup (7) is used to ll the boiler without spills.
• The 2.5" Round Scrub Pad (8) connects to the Jet Nozzle and is designed to scrub tough dirt
and scuffs from surfaces.
• The 1.5" Nylon Utility Brush (9) connects to the Jet Nozzle and is designed for scrubbing
especially tough stains. It is ideal for use on many surfaces around the home, including carpet,
ceramic tile, grouting, and more.
• The 1.5" Brass Utility Brush (10) connects to the Jet Nozzle and is designed for scrubbing es-
pecially tough stains. It is perfect for use on BBQ grills, oven racks, automobile engines, shop
tools and other hard metal surfaces.
Product Information

8 |ENGLISH
STEAM CLEANING ACCESSORIES
WARNING: Do not connect accessories while unit is emitting steam.
JET NOZZLE / SCRAPER / EXTENSION HOSE / TRIANGLE BRUSH
1. Select one of the four accessories (Jet Nozzle shown as example) and push onto the Steam
Nozzle (A).
2. Rotate accessory until the yellow lock/release button snaps into the accessory hole (B).
NOTE: The Jet Nozzle, Scraper and Triangle Brush can be connected to the end of an
Extension Hose for reaching high or difcult spots. Connect the Extension Hose, then
connect your desired accessory in the same way as you would normally connect to the
Jet Nozzle.
UTILITY BRUSHES / SCRUB PAD
NOTE: These accessories connect to the Jet Nozzle, not the
Steam Nozzle.
1. Firmly press accessory onto tip of Jet Nozzle. Press it on as far
as possible to prevent steam leakage (See gure 1).
2. To remove Utility Brush, simply grip it rmly and pull it off Jet
Nozzle.
Assembling Your Handheld Steam
Cleaner
FIGURE 1
A B

ENGLISH |9
LARGE BRUSH
NOTE: Large Brush connects to the Triangle Brush, not the Jet
Nozzle.
1. Place Large Brush over the Triangle Brush, and rmly press it on to
the Triangle Brush until it snaps into place (See gure 2).
2. To remove Large Brush, simply grip it rmly and pull it off of the
Triangle Brush.
ORDERING ACCESSORIES & PARTS
Replacement accessories and parts for your Handheld Steam Cleaner (model MC1230) may
be ordered through our Website:
www.mccullochsteam.com
You may also contact Consumer Service directly:
Assembling Your Handheld Steam
Cleaner
FIGURE 2

10 |ENGLISH
NOTE: Before cleaning electrical appliances, check and follow appliance manufacturer’s clean-
ing guidelines. Never apply to electrical parts.
NOTE: Some delicate surfaces, such as painted wood or stainless steel may be scratched or
damaged by the bristle of the brushes, especially the Brass Utility Brush. Use careful judgment
when deciding what surface to clean with any of the brushes. If you are unsure if a surface will
be damaged, it is recommended that you test a small inconspicuous spot before proceeding.
Accessory Recommendations
Jet Nozzle Dirt, Grease, Grime, Cracks and Crevices, Golf
Clubs, Tread of Running Shoes
Triangle Brush Corners on Countertops, Bathtubs, Floors
Large Brush Floors, Grout
Scraper Baked on Food, Grime, Grease, Stove Tops, Ovens
Round Scrub Pad Countertops, Bathtubs, Sinks, Refrigerators, Ovens,
Slate
Nylon Utility Brush Ovens, Stove Tops, Faucet Fixtures, Microwaves,
Sports Equipment, Tile, Grout, Refrigerators, Toys,
Door Knobs, Showers, Bathtubs, Changing Tables
Brass Utility Brush BBQ Grills, Oven Wire Racks

ENGLISH |11
FILLING THE BOILER
1. Place Handheld Steam Cleaner on a at, level surface.
2. Make sure On/Off Switch is turned to “Off” and grounded power cord is unplugged from electri-
cal outlet.
If unit has been in use, always use the following safety precautions before
removing the Boiler Cap to add water:
•Allow unit to cool for 20 minutes.
•Press and hold Steam Trigger to release ALL remaining steam.
WARNING: Failure to follow these precautions may result in burns from escaping steam
when the Boiler Cap is removed.
3. Cautiously unscrew and remove Boiler Cap.
4. Drain any water remaining inside Boiler.
NOTE: Boiler should be emptied after each use – this will help minimize mineral build-
up and prevent over-lling.
5. Fill the Fill Cup to maximum ll line (6 oz. / 177 ml.) with water.
NOTE: In order to signicantly reduce mineral build-up and prolong the life of your
Handheld Steam Cleaner, use of distilled or de-mineralized water in the unit is highly
recommended. Refer to Page 13 for more information about mineral build-up.
6. Carefully pour water from Fill Cup into Boiler.
WARNING: Caution should always be used when pouring water into the Boiler. Do not
look directly down into ll hole when lling. Keep your free hand and any children or
pets at a safe distance.
7. Replace Boiler Cap, ensuring that it is screwed on tightly to prevent hot steam from escaping
and causing injury.
Using Your Handheld Steam Cleaner

12 |ENGLISH
GENERAL OPERATION
NOTE: Be sure that Boiler has been lled and that all desired accessories are connected
before following these steps.
1. For rst time use, remove protective plastic cover from electrical plug. Plug power cord into a
electrical outlet.
2. Press On/Off Switch to “On” position. Steam Indicator Light will illuminate Red. Once unit is
ready to steam, Steam Indicator Light will turn Green. During use, the light may turn Red, indi-
cating the steamer is recovering the necessary pressure. Unit can be used at a lower pressure.
3. Direct Nozzle (and any connected accessory) towards surface you desire to steam, and press
Steam Trigger. To sanitize surfaces, point Nozzle, press Trigger and hold approximately 1/2 inch
from surface for at least 5 seconds. This will insure that you have killed germs and bacteria.
CAUTION: Always be sure that Nozzle and any accessory are pointed in a safe direction
(away from yourself, other people, pets, and plants) before pressing Steam Trigger.
4. Keep Steam Trigger pressed for a continuous ow of steam. You may also hold the Steam Trig-
ger, then push the Steam Trigger Lock to lock it down. This will allow a continuous ow of steam
without need of holding the Steam Trigger down manually.
5. Using a back-and-forth motion over the area you are steaming will further enhance the clean-
ing process. Wipe steamed areas with a clean cloth to remove loosened dirt and grime. Wip-
ing the area while it is still wet is recommended, but use caution when wiping surfaces such as metal
that may still be hot.
6. Once steaming tasks are complete, turn the unit “Off” and unplug. Follow steps under Proper
Storage procedure on Page 13 of this manual.
Using Your Handheld Steam Cleaner

ENGLISH |13
PROPER STORAGE
Preparing your Handheld Steam Cleaner for storage is quick and simple. When you have n-
ished your steaming tasks, follow the steps listed below.
1. Turn unit “Off” and unplug power cord.
2. Press and hold Steam Trigger to release all remaining steam.
3. Allow unit to completely cool (at least 30 minutes).
4. Remove all accessories from unit.
5. Carefully remove Boiler Cap.
6. Drain any remaining water from Boiler into a sink or tub – this will help to minimize mineral
build-up and prevent over-lling during your next use. Replace Boiler Cap loosely.
7. Store accessories. Accessories can be conveniently stored in the Storage Bag.
8. Store Handheld Steam Cleaner in a cool, dry location.
MINERAL BUILD-UP
A common maintenance need for steam appliances is the removal of build-up caused by high
mineral content in many municipal water supplies. This mineral build-up may limit the effective-
ness and reduce the life of your Handheld Steam Cleaner.
The best way to minimize mineral build-up is to use distilled or de-mineralized water when using
your Handheld Steam Cleaner. If you are unable to use distilled water, it is recommended that
the following procedure be followed monthly to remove any mineral build-up:
1. Turn unit “Off” and unplug power cord.
2. Allow unit to completely cool (at least 30 minutes).
3. Press and hold Steam Trigger to release all remaining steam.
4. Remove all accessories from unit.
5. Carefully remove Boiler Cap.
6. Drain water from Boiler into a sink or tub.
7. Using Measuring Cup, measure of 6 oz. (177 ml.) vinegar.
8. Slowly pour vinegar into Boiler.
9. Allow to stand for 40 minutes.
10. Drain vinegar from Boiler.
11. Rinse Boiler with fresh water, drain and repeat until vinegar odor dissipates.
12. Replace Boiler Cap.
Storage & Care

14 |ENGLISH
Unit fails to heat up.
Steam output is weak or
intermittent.
Excessive amount of water in
steam.
NOTE: Unit produces wet steam
– it is normal for steam to
contain some amount of water.
Unit is not plugged in. Household
circuit breaker / ground fault inter-
rupter has tripped or blown a fuse.
Mineral build-up in unit.
Unit is damaged or otherwise in
need of repair.
Water level in Boiler is running
low.
Boiler is empty.
Water condensation in Extension
Hose.
Boiler has been
overlled.
Plug power cord into electrical outlet.
Refer to Mineral Build-up section
on Page 13 for cleaning procedure.
Refer to Mineral Build-up section
on Page 13 for cleaning procedure.
Reset circuit breaker / ground
fault interrupter, or replace fuse.
If you need assistance, contact a
licensed electrician.
Immediately cease usage and
unplug. Contact Consumer
Service for further assistance
(see Page 16 for details).
Refer to Filling The Boiler proce-
dure on Page 11.
Refer to Filling The Boiler proce-
dure on Page 11.
Point nozzle towards sink, tub or
ground and shake while pressing
Steam Trigger. Continue until
excess water is released.
Filling Boiler with more than 6 oz.
(177 ml.) of water interferes with
steam production, resulting in
water condensation in steam.
Always use included Fill Cup to ll
unit with correct amount of water.
(see Page 11 for details)
PROBLEM POSSIBLE CAUSE SOLUTION
Accessories do not stay rmly
connected to Steam Nozzle.
Accessories not properly installed. Check to make sure that acces-
sories are properly connected, per
procedures on Pages 8-9.
Troubleshooting

ENGLISH |15
Refer to the part numbers below when ordering parts and accessories
for your Handheld Steam Cleaner.
Replacement Accessories
Part Numbers for Fast Reordering at www.mccullochsteam.com
Jet Nozzle A1230-001
Triangle Brush A1230-002
Large Brush A1230-003
Extension Hose A1230-004
Nylon Utility Brush - 5 Pack A1230-005-5
Brass Utility Brush - 5 Pack A1230-006-5
Round Scrub Pad - 5 Pack A1230-007-5
Fill Cup A1230-008
Scraper A1230-009
Storage Bag A1375-010
Replacement Parts
Available via Consumer Service at 1-800-711-6617
Boiler Cap T1230-001
Replacement Parts & Accessories

16 |ENGLISH
Product Support
CONSUMER SERVICES
For problems with your Handheld Steam Cleaner, please refer to the Troubleshooting guide located on Page
14 of this manual. Additional inquiries should be directed to our consumer support services through our
website, www.mccullochsteam.com.
If you do not have internet access, you may also contact our Consumer Service Department by telephone,
at 1-800-711-6617.
NOTE: In order for our Consumer Service representatives to help you as quickly and efciently as
possible, please have the following information ready before calling:
• Purchase information (where and when you purchased this product)
• Copy of purchase receipt / proof of purchase
• Product serial number (located on electrical specication label on back of unit)
• Date code (4-digit number located on electrical specication label)
PRODUCT SPECIFICATIONS
MC1230
120V
900W
6 oz. (177 ml)
2 min. (approximate)
10 min (approximate)
3 lbs. (1.4 kg.)
10.70" x 5.13" x 8.00" (27.2 cm x 13.0 cm x 20.3cm)
MODEL
VOLTAGE
POWER
WATER CAPACITY
HEATING TIME
CONTINUOUS STEAM TIME
UNIT WEIGHT
UNIT DIMENSIONS
1-YEAR LIMITED WARRANTY
What is covered
McCulloch® is a licensed brand of Steamfast, a division of Vornado Air, LLC (“Steamfast”). Subject to the terms and condi-
tions of this 1-Year Limited Warranty (“Warranty”) as set forth below, Steamfast warrants to the original consumer or pur-
chaser (“Buyer”) that this McCulloch®-branded steam product, excluding all accessories and attachments, (the “Product”) is
to be free from defects in material and workmanship for a period of one (1) year from the date of purchase when used and
maintained in accordance with the Owner’s Guide (the “Warranty Period”).
In the event Buyer noties Steamfast of a defect in the Product within the Warranty Period, Steamfast will replace the
Product and/or defective component parts, as applicable and necessary. Any such replacement will be made at no charge
to Buyer for parts or labor, provided that Buyer shall be responsible for all shipping and transportation costs associated with
returning the Product to Steamfast for inspection and covered replacement.
What is not covered
This Warranty shall not be applicable to damage or loss caused in whole or in part by:
• Repairs, modications or alterations to the Product by anyone other than Steamfast.
• Use or operation of the Product outside the permitted or intended uses described by Steamfast in the Owner’s Guide, or
other careless operation, handling, misuse, or abuse of the Product.
• Lack of proper maintenance or timely cleaning of the Product as specied in the Owner’s Guide.
• Use of the Product other than for normal household purposes.
Warranty Information

ENGLISH |17
• Normal wear and tear.
• Used consumable parts, accessories and attachments, including, but not limited to, brushes, hangers, scrub pads and
mop pads.
• Use of parts and accessories other than those produced or recommended by Steamfast.
• Cosmetic damage, such as scratches, nicks and dents.
• Damage caused by accident, water, ood, re or other acts of nature or external causes.
Warranty limitations and exclusions
• NO OTHER EXPRESS WARRANTY IS GIVEN BY STEAMFAST TO BUYER AND NO REPRESENTATIVE HAS THE
AUTHORITY TO MAKE REPRESENTATIONS OTHER THAN THOSE PROVIDED HEREIN.
• THERE ARE NO WARRANTIES WHICH EXTEND BEYOND THE DESCRIPTION ON THE FACE HEREOF AND ALL
IMPLIED WARRANTIES, SPECIFICALLY THE IMPLIED WARRANTIES OF MERCHANTABILITY AND FITNESS FOR
A PARTICULAR PURPOSE, ARE HEREBY EXPRESSLY LIMITED TO THE DURATION OF THE WARRANTY PERIOD,
UNLESS A SHORTER PERIOD IS PERMITTED BY LAW.
• STEAMFAST’S REPLACEMENT OF THE PRODUCT IS THE EXCLUSIVE REMEDY. UNDER NO CIRCUMSTANCES
SHALL STEAMFAST BE LIABLE TO BUYER OR ANY OTHER PERSON FOR ANY INCIDENTAL, SPECIAL, CON-
SEQUENTIAL, OR OTHER DAMAGES, EVEN IF STEAMFAST HAS BEEN ADVISED OF OR COULD REASONABLY
FORESEE THE POSSIBILITY OF SUCH DAMAGES, INCLUDING, BUT NOT LIMITED TO, LOSS OF PROFITS OR
DAMAGE, WHETHER RISING OUT OF BREACH OF WARRANTY, BREACH OF CONTRACT OR UNDER ANY OTHER
THEORY OF LAW.
• THIS WARRANTY GIVES BUYER SPECIFIC LEGAL RIGHTS. BUYER MAY ALSO HAVE OTHER RIGHTS WHICH
VARY FROM STATE-TO-STATE. SOME STATES DO NOT ALLOW THE EXCLUSION OR LIMITATION OF INCIDENTAL
OR CONSEQUENTIAL DAMAGES, AND SOME STATES DO NOT ALLOW LIMITATIONS ON HOW LONG AN IMPLIED
WARRANTY LASTS, SO THE ABOVE LIMITATION OR EXCLUSION MAY NOT APPLY TO BUYER.
How do you register the Warranty
Buyer must complete an application to register this Warranty within sixty (60) days following date of purchase. Buyer
may either visit Steamfast’s website at www.mccullochsteam.com and complete an online application or mail a completed
application to Steamfast. Failure to register this Warranty within sixty (60) days following date of purchase will render this
Warranty null and void.
Warranty service
tion (“RA”) form. Include the Product model number and serial number, as well as Buyer’s name, address, city, state, zip
code and phone number when contacting Steamfast for warranty service. Buyer may be required to provide the original
sales receipt for purposes of verifying date of purchase. After receiving the RA form, the Product must be shipped, postage
prepaid by Buyer, to:
Steamfast
Attn: Warranty & Repair
415 E. 13th Street
Andover, KS 67002
To assure proper handling, packages must be clearly marked with the RA number. Packages not clearly marked with the RA
number may be refused at the receiving dock.
Important: After receiving return authorization, carefully pack the Product to avoid damage in shipping. Damage in shipping
is not covered by the Warranty and shall be the sole responsibility of Buyer. Damage or loss not covered by this Warranty or
occurring outside the Warranty Period will require a fee to cover the cost of handling and shipping. All such fees and costs
shall be the sole responsibility of Buyer.
Please allow at least 1-2 weeks for return of the Product after it is received by Steamfast. For ease of recordkeeping, it is
recommended that Buyer staple or attached the original sales receipt to this Owner’s Guide and record the Product serial
number (located on the Product specications decal) here:
________________________________________________
© 2013 Vornado Air, LLC • Andover, KS 67002
Specications subject to change without notice. Steamfast® is a trademark owned by Vornado Air, LLC.
Manufactured in China.
Steamfast Consumer Service W: www.mccullochsteam.com • P: 1-800-711-6617 •
Warranty Information

18 |ESPAÑOL
SALVAGUARDIAS IMPORTANTES
1. El Depósito de Agua de la Unidad ha sido diseñado para contener un máximo de 6 oz. (177 ml.) de
agua. Desenchufe el cordón eléctrico antes de llenarlo con agua.
2. NO DEJE su Limpiador A Vapor Portátil desatendida cuando esté enchufado o cuando no lo esté
utilizando. Usélo sólo como está intencionado como indicado en este manual.
3. Esta unidad no es un juguete. Se debe supervisar de cerca cuando use la unidad cerca de niños,
mascotas y plantas. El vapor que la unidad produce está caliente y presurizado. Se debe tomar
cuidado para evitar quemaduras u otras heridas. Nunca apunte con la boquilla a personas o mas-
cotas.
4. Para reducir el riesgo de contacto con agua caliente que se emite de la ventilación, mantenga el
aparato alejos del cuerpo y chequéelo el aparato por signos de condensación o agoteando.
5. NO USE esta unidad si el cordón eléctrico o el enchufe está dañado. NO USE la unidad si no fun-
ciona apropiadamente o si ésta se ha caído, dañado, o dejado al aire libre. Si tal daño ocurre, NO
DESMONTELO o intente de hacer reparaciones, sino devuelva la unidad a un técnico licenciado
de servicio para examinación y reparaciones. El remontar o reparar incorrectamente podría causar
riesgo de fuego, choques eléctricos, y heridas a la gente cuando se use el limpiador a vapor.
6. Para reducir el riesgo de choques eléctricos, NO LA SUMERJA en el agua. NO USE el cordón
eléctrico como asa. NO PERMITA que el cordón se rice por cerrarlo en las puertas. NO TIRE NI
ESTIRE el cordón cuando éste se encuentre alrededor de esquinas o bordes puntiagudos.
7. Asegurese de mantener el cordón eléctrico alejado de todas supercies calientes. Deje que el
aparato se enfría completamente antes de almacenarlo. Ponga el cordón sueltamente alrededor del
aparato cuando lo almacena.
8. NO USE esta unidad con cordones de extensión ni con receptáculos eléctricos que tengan una ca-
pacidad de electricidad inadecuada. Un receptáculo de tres puntas o un adaptador bien conectado
a tierra es necesario cuando esté usando El Limpiador A Vapor Portátil.
9. Para desconectar el Limpiador A Vapor Portátil, apriete el enchufe y tire suavemente y rmemente
del receptáculo. NO INTENTE desconectar la unidad tirando o arrastrando del cordón.
AVISO: Para reducir el riesgo de fuego, choques eléctricos o daños, debe de
siempre seguir las siguientes precauciones básicas de seguridad cuando esté
usando un aparato eléctrico.
LEA TODAS LAS INSTRUCIONES ANTES DE USAR

ESPAÑOL |19
AVISO: Para reducir el riesgo de un choque eléctrico, éste aparato tiene un enchufe
de tres puntas. Este enchufe cabrá en un receptáculo de pared polarizado de una
sola manera. Si el enchufe no entra completamente en el receptáculo, contacte a
un electricista licenciado para que instale un receptáculo apropiado. NO TRATE de
modicar el enchufe o derrotar.
¡CONSERVE ESTAS INSTRUCCIONES!
SÓLO PARA USO DOMÉSTICO
¿Preguntas o comentarios?
•www.mccullochsteam.com
•1.800.711.6617
SALVAGUARDIAS IMPORTANTES
10. Tenga cuidado, ya que las quemaduras pueden suceder al tocar piezas calientes de metal, agua
caliente o vapor.
11. El Limpiador A Vapor Portátil ha sido diseñado para ser utilizado solamente con los accesorios
recomendados del Limpiador A Vapor Portátil. No se deben usar otros tipos de accesorios con El
Limpiador A Vapor Portátil. El hacerlo podría causar heridas o daños a la unidad.
12. Cuello de Acople y los accesorios se calientan durante el uso. Para evitar heridas, NO TOQUE
Cuello de Acople mientras usa este aparato. NO TRATE DE cambiar los accesorios mientras la
unidad emita vapor.
13. Cuando llene su Limpiador A Vapor Portátil con agua, sólo debe usar agua en la unidad. Otros
agentes de limpieza dañarán la unidad y podrían causar lesiones.
14. NO UTILICE la unidad si la abertura del vapor está bloqueada. Si pasara esto, apague
inmediatamente la unidad y desconéctela.
15. Guarde su Limpiador A Vapor Portátil en un lugar aireado y seco.
16. Para evitar quemaduras a causa del vapor que sale al quitar la Tapa del tanque de agua para
llenar la unidad:
• Siempre deje que la unidad se enfríe durante 20 minutos.
• Presione y mantenga presionado el Botón de vapor para que salga TODO el vapor restante.

20 |ESPAÑOL
PARTES DE LA UNIDAD
Tapa Del Tanque
Disparador De Vapor
Traba Del Disparador De Vapor
Cable De Energía De 15'
Boquilla De Vapor
Luz Indicadora De Vapor
Interruptor De Encendido/Apagado
1
2
3
4
5
6
7
Información Del Producto
Estos artículos y accesorios están incluídos con su Limpiador A Vapor Portátil. Para obtener piezas
que posiblemente estén perdidas, reérase a la sección de Apoyo al Cliente en la página 32 de
éste manual.
1
2
3
4
5
6
7
Table of contents
Languages:
Other McCulloch Steam Cleaner manuals

McCulloch
McCulloch MC1226 User manual

McCulloch
McCulloch MC1275 User manual

McCulloch
McCulloch MC1270 User manual

McCulloch
McCulloch MC1350 User manual

McCulloch
McCulloch MC1220 User manual

McCulloch
McCulloch MC1375 User manual

McCulloch
McCulloch MC1220 User manual

McCulloch
McCulloch MC1227 User manual

McCulloch
McCulloch MC1385-AU User manual

McCulloch
McCulloch MC1275 User manual