MEDIGATE MeCA812i User manual
User Guide
MeCA812i
Warnings and Cautions
- Avoid humidity, high temperature, dust in the air, salt or sulfuric
material and avoid the unventilated place or the direct sunlight.
- Avoid vibration or mechanical shock.
- Avoid fire and explosion hazard. An explosion hazard may
result from the use of flammable anesthetics, skin cleansing
agents and disinfectants.
- Dispose of the packaging material, observing the applicable
waste control regulations. Keep the packaging material out of
children’s reach.
- If in doubt the integrity of the AC power source, the device
must be operated from its internal battery.
- Check the voltage rating before you connect the device to an
electrical outlet to ensure that the required voltage and frequency.
- If use multi-tap inevitably, use the one provided with earth pin
by all means.
- Unplug the AC power cord from AC outlet before the device
cleaning or disinfecting its surface.
- Do not spray, pour, or spill any liquid directly to the device for
cleaning or disinfection.
- When cleaning or disinfecting surface of the device or electrode,
fully dry and use it.
- Due to the risk of electrical shock, do not open the cover of
the equipment unless absolutely necessary and disassembly of
the machine should be done only by a maintenance worker who
has the license from MEDIGATE Inc.
Caution: Indicates a potential hazard. If not avoided,
this hazard may result in minor personal injury and/or
product/property damage.
Warning: Indicates a hazard. If not avoided,
the hazard can result death or serious injury.
- For your safety check the device before using.
- If put the electrodes too long time, they may cause skin problems.
Therefore, use them for measurement only
MEDIGATE Inc.
42-10, Taejanggongdan-gil, Wonju-si, Gangwon-do, Korea
Tel: (+82) 33-747-3552, Fax: (+82) 33-747-3691
© 2011-2014 MEDIGATE Inc. All rights reserved.
MeCA812i User Guide
Part No-Rev. : L05351-03
Date of Revision: 2014-02-03
Printed in Korea
Default setting
1) Press the button to enter the Configuration menu.
2) Press Enter button on System>Default Setting.
Note: After the default setting, all custom setting value
will be lost.
Checklist before using
□ Not physical damage on surface of device.
□ A Device was not get wet .
□ Rated power is supplied.
□ No physical damages on the patient cable.
□ No physical damages on the electrodes.
-Check the connection lead and electorde.
-Make sure all electrodes puts right place
and contacts well.
-If electrod gel gose dry it may block the contacts.
-Check the AC filter setting.
-Electrical blanket or heavy energy consume
electrical device may occur heavy noise.
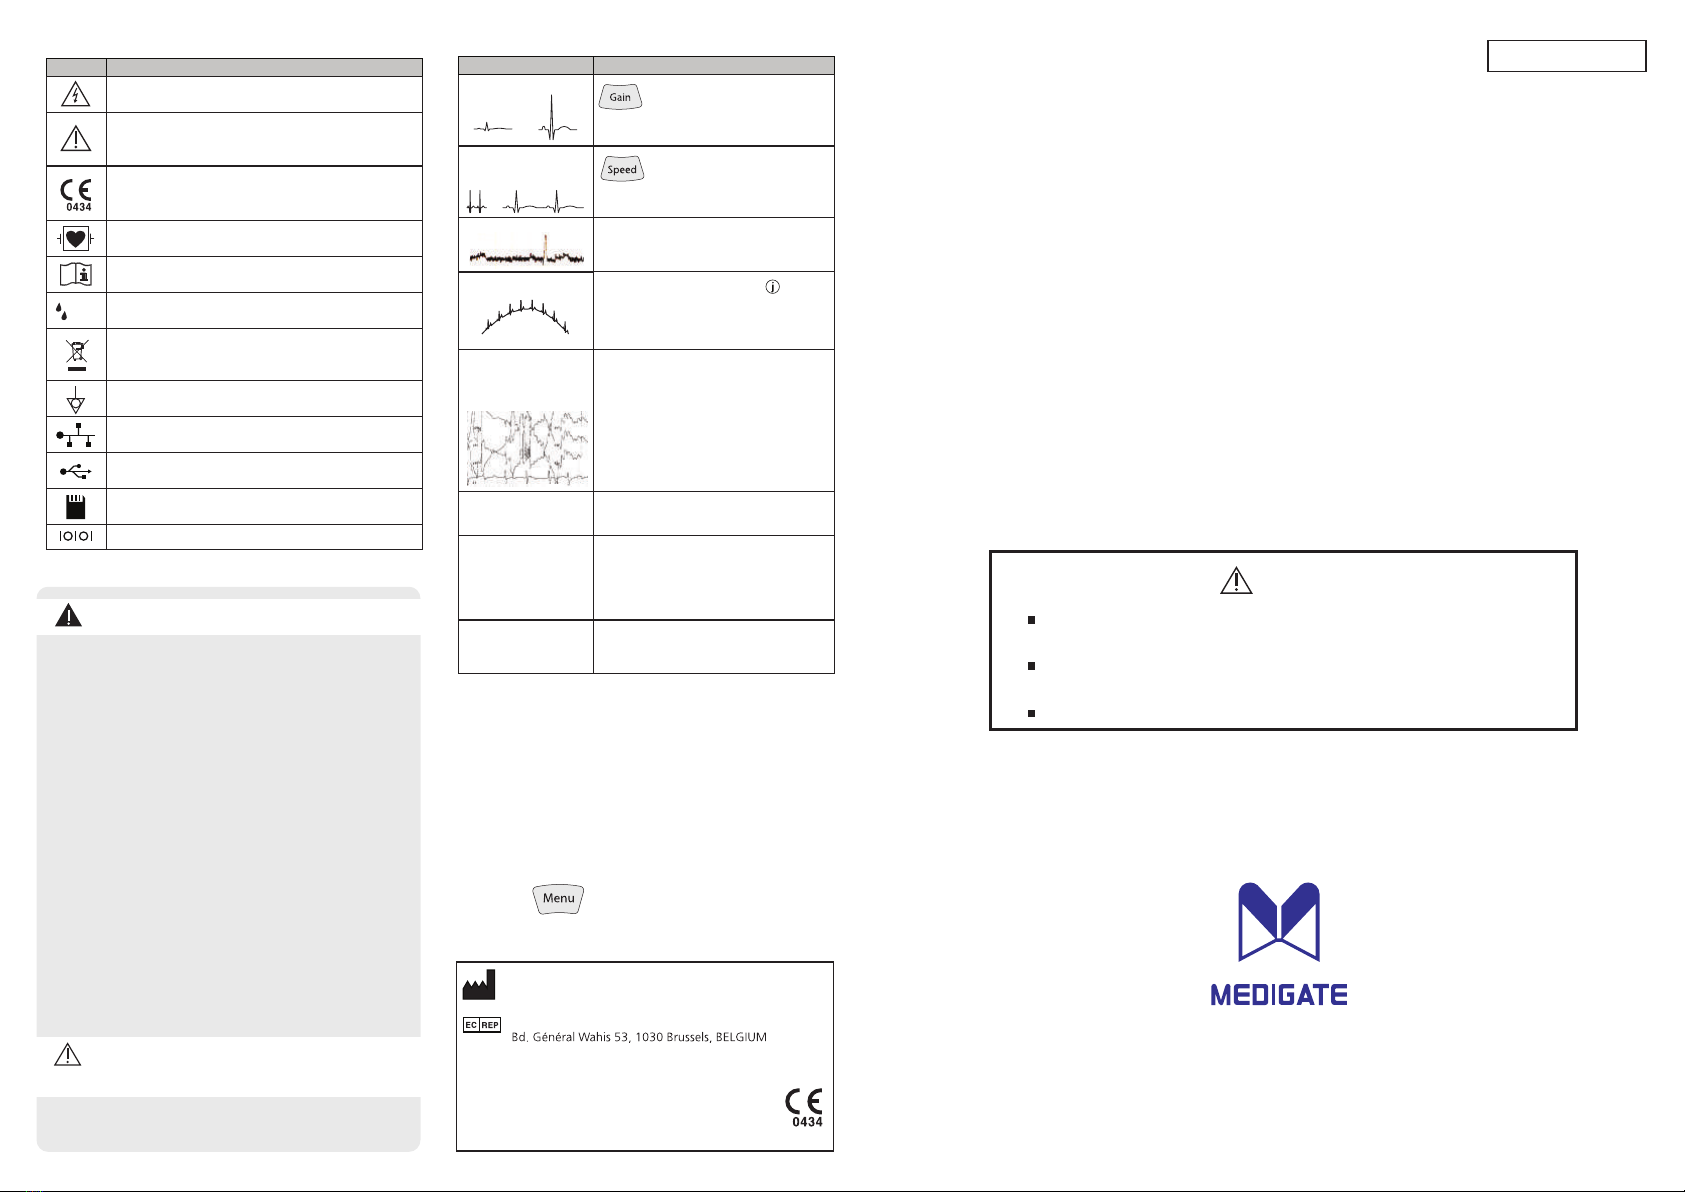
Problem Check or Possible Solutions
You can adjust the Gain value
with the Gain button.
Recommended: 10mm/mV
You can adjust the Speed Value
with Speed button.
Recommended: 25mm/s
-Device needs some checks. See the operator’s
manual Chapter7.
-Use stronger Low Pass filter.
[weak 150 - 100 - 40 (Hz) strong]
Note: Stronger filter may make distortion.
-Enable the AFS. Refer to Screen
-Use stronger High Pass filter.
[weak 0.05- 0.16 - 0.3 - 0.5 (Hz) strong]
Note: Stronger filter may make distortion.
-Too small or too big
ECG wave.
-ECG waves looks too
tight or too loose.
-There is too much
noise in ECG wave.
-I can’t recognize the
ECG signal.
-Error message shows
up after the operation
stops.
-High frequency noises are
added.
-Too much ECG baseline
wandering.
Troubleshooting
-Check the printer cover if it is opened.
-Check the printer cover may open.
-Grid side of paper must contact with
the printer header.
-Printer crumples up
paper.
-Printer does not work.
-Printer ejects blank
paper continously.
-Paper comes out but
not printed.
Medical Device
The electrocardiograph is intended to be used in a hospital and
hospital facilities environment by trained medical personnel.
For operator and patient’s safety, before you use the device,
read the Operator’s manual in enclosed CD.
This User Guide contains only minimum information of product.
Caution
Classification of electrical protection symbol: This symbol
means the device is CF type(cardiac floating) protection applied.
Serial port symbol: This symbol means Serial port (RS-232).
High Voltage Caution:
This symbol means high voltage parts included.
CE Marking: CE Marking means this device is conformity
with provisions of the EU MDD(Medical device directive).
It is certified by DNV(NB No. 0434).
EU-Consult instructions for Use: This symbol means read
manuals or descriptions from manufacture.
IPX0 IPX Level: This symbol means waterproof level.
(IPX0 = No waterproof)
EU-Electronics and Battery Disposal Information:
This symbol means that the product and battery should
be recycled separately from household waste.
GND symbol: This symbol means equivalent ground terminal
Network symbol: This symbol means TCP/IP terminal
USB device symbol:
This symbol means Universal Serial Bus terminal.
SD card symbol: This symbol indicates SD card slot.
EU-Warning or Caution: This symbol indicates hazard.
If not avoided, the hazard can result death or serious injury,
minor personal injury or product damage.
Symbol Description
Symbols
Obelis s.a
Tel: (+32) 2-732-5954, Fax: (+32) 2-732-6003

1. Open the printer cover.
2. Fold out the first sheet.
The marker should be placed at the bottom. 4. Fold out the first sheet of the pad to the left
and close the cover.
Paper loading
Items Code Unit
Z-fold Paper A50100-00 1 Pad
Ordering information
Warning: A qualified physician must overread
all interpretation results and computer-generated
tracings. Computerized interpretation is only
significant when used in conjunction with clinical
findings
Screen
aDisplaying ECG waveforms.
ㅣ
mSD card ready indication.(option)
kDisplaying selected rhythm lead. Rhythm lead selection
is available on Auto or Manual menu of Rhythm Leads.
Displaying heart rate.
Displaying selected report format.
*This indication is enabled when ‘Automatic’ mode.
*This screen is default settng.
Operating
1. Automatic mode
1-1. Turn the device on and attach electrodes.
1-2. Press AUTO button to mode select.
1-3. Wait until the ECG signals on LCD are stabilized.
1-4. Press RUN button to start record.
The report will be printed by the Acquisition,
Analysis, Printing process. Please wait a while.
2-1. Turn the device on and attach electrodes.
2-2. Press MANUAL button to mode select.
2-3. Wait untill the ECG signals on LCD are stabilized.
2-4. Press RUN button to start record.
2-5. Press STOP button to stop record.
2. Manual mode
Automatic mode provides about 10 sec ECG signal
and simple diagnosis report print.
Manual mode provides continuous printing function.
Warning: Shock Hazard
Use only provided by MEDIGATE
cable and accessories.
Other product may cause safety
problems.
Installing and Connecting
1-1. Connect AC power cord and device.
1-2. Plug the AC power cord to grounded AC outlet.
3. Connect a patient cable to a cable port on MeCA812i
4. Press the power button to turn on.
6. Attach electrodes to the body of patient.
C1
RL
Chest Lead
NF
C2
C4
C3 C5 C6
RA V2
C2L
LA
R N
RL LL
F
V1
C1
V3
C4 C5 C6
V4 V5 V6
C3
Limb Lead
AHA
IEC
Chest Lead
Short press to turn on,
long press to turn off.
5. Connect electrodes with leads.
When electrodes connecting, please screw to
clockwise the hold screw of electrode for tight.
Loose contact may cause noise on the ECG signal.
2. AC plugged-in indicator turns on.
Lift up the door to open.
3. Insert the paper into the feeder
The first page should be positioned at under the guide
roller.
Displaying gain of waveforms. The adjustment is
available with ‘Gain’ button.
*5, 10 or 20mm/mV
b
eDisplaying the selected frequency of AC line noise
filter. This parameter setting is available on
the System Setup>AC Line Filter.
Displaying AFS(Anti-Floating System) on or off.
AFS on or off menu is located on the
System Setup>AFS.
*AFS reduces the baseline wandering.
j
iDisplaying current date. The adjustment menu is located
on the System Setup>Date.
*Default date format is ‘dd/mm/yy’.
dDisplaying the selected cut off frequency of low cut
filter. The adjustment menu is available with
‘Filter’ button. *lowcut 0.5, 0.3, 0.16 or 0.05Hz
fDisplaying the selected cut off frequency of high cut filter.
The adjustment menu is available with ‘Filter’
button. *highcut> 40, 100, 150Hz or Off
gDisplaying the selected EMG(Electromyogram) filter.
This filter reduces EMG noise. The adjustment
menu is available with ‘Filter’ button.
*EMG> On or Off
*EMG on = ‘EMG’ display, off = No display
Filter
hDisplaying current operation mode.
MeCA812i is provide two operation modes.
‘Auto’ or ‘Manual’ button to change
operation mode.
cDisplaying printing speed. The adjustment is
available with ‘Speed’ button.
*5, 10, 25 or 50mm/s
Note: It takes about 6 hours for full-charged.
LED
Name
Description / Function
AC plugged-in
Off Disconnect AC power line
Solid Green Connect AC power line
Power-On
Off The device is off
Solid Green The device is on
Battery
Charging
Off Battery Operation(at device On)
Blinking Orange The battery is charging
Solid Orange The battery is fully charged
Warning:
-For your safety use grounded AC power or use earth
connection.
-Connect equivalent ground when use with other devices.
-When connect the patient with several electrical device,
it may increase electrical shock hazard by leakage current.
Warning
- Operator shall not touch patient and device simultaneously.
- During use of device, avoid contact between the metal part of device and the patient.
- Remove all the metal accessories of patient wears before the perform measurement.
- Do not touch the patient, the patient cable, or the device while defibrillator is operating.
Notice: Don’t print more than 10 minutes.
If the printer is overheated, it may reduce device’s
life time.
Popular Medical Equipment manuals by other brands

ARDET
ARDET ORIX 70 operating instructions

Mizuho
Mizuho Seat Extension Instructions for use

Park House Healthcare
Park House Healthcare WARWICK user manual

elektron eye technology
elektron eye technology Henson 7000 quick start guide

idi
idi Aspect Iso-Drive Q-CARD quick start guide

BRONKHORST
BRONKHORST M+W Instruments SW-10n Series instruction manual

Optec
Optec 5000PG Reference and instruction manual

Qiagen
Qiagen RT2 First Strand Kit manual

RADIOMETER
RADIOMETER FLEX ABL90 Operator Training Guide

Omron
Omron HEM-7530T-E3 Information sheet

Terumo
Terumo Medisafe Finetouch II manual

PamMobility
PamMobility PULSE 7M009001 NP Instructions for use and maintenance


