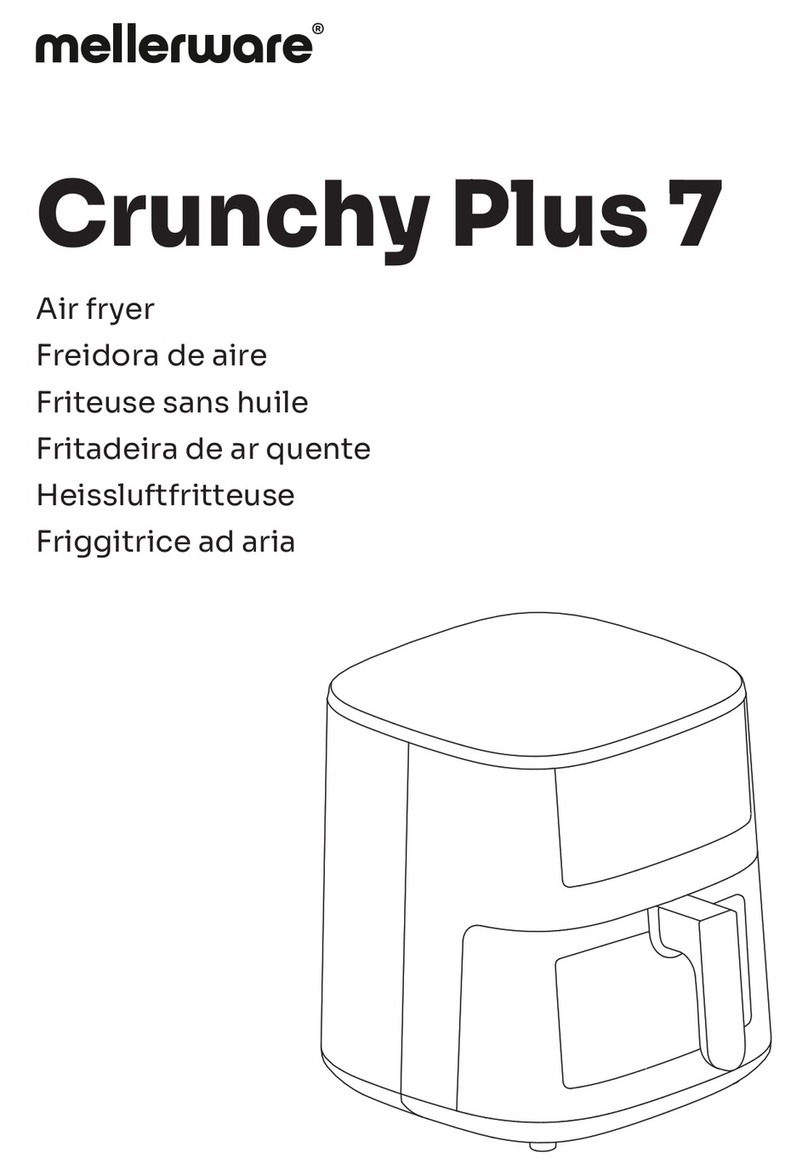
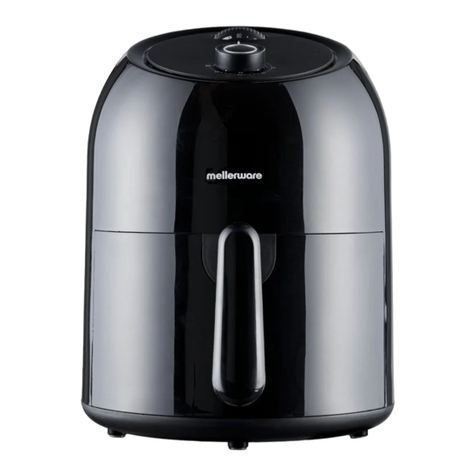
Mellerware Crunchy! Plus User manual

Crunchy! Plus
Air fryer
Freidora de aire
Friteuse sans huile
Fritadeira de ar quente
Heissluftfritteuse
Friggitice ad aria


A
B
C
D
EF
G
H
I
54321
9
8
7
6
12 11 1013
17
16
15
14

Fig.2
Fig.3
Fig.1
5 in
(13 cm)
5 in
(13 cm)
Symbol Default temperature Default time
180°C 8 min
180°C 16 min
200°C 15 min
180°C 10 min
60°C 5 min
200°C 18 min
200°C 20 min
200°C 9 min
200°C 14 min
//
190°C 3 min

Fig.5
Fig.4

ENENGLISH
Dear customer,
Many thanks for choosing to
purchase a Mellerware brand product.
Thanks to its technology, design and
operation and the fact that it exceeds
the strictest quality standards, a fully
satisfactory use and long product life
can be assured.
Read these instructions
carefully before
switching on the
appliance and keep
them for future
reference. Failure to
follow and observe
these instructions could
lead to an accident.
Clean all the parts of
the product that will be
in contact with food,
as indicated in the
cleaning section, before
use.
This appliance can be
used by people unused
to its handling, disabled
people or children aged
from 8 years and above
if they have been
given supervision or
instruction concerning
use of the appliance
in a safe way and
Safety advice and
warnings
hazards involved.
Keep the appliance
and its cord out of
reach of children
aged less than 8 years.
Cleaning and user
maintenance shall
not be made by
children unless they
supervised.
are older than 8 and
This appliance is not
a toy. Children should
be supervised to
ensure that they do
appliance.
not play with the
Do not use the
appliance in
association with a
programmer, timer
or other device that
automatically
switches it on.
If the supply cord is
damaged, it must
be replaced by the
manufacturer, its
similar qualified
service agent or
avoid a hazard.
person in order to
This appliance is for
household use only,
not professional,
industrial use.
1.
3.
4.
5.
6.
7.
2.
8.
9.
understand the

EN
overheating do not cover the
appliance.
Do not use or store the
appliance outdoors.
Do not leave the appliance out
in the rain or exposed to
moisture. If water gets into the
appliance, this will increase the
risk of electric shock.
Do not use the appliance in the
case of persons insensitive to
heat (the appliance has heated
surfaces).
Do not touch the heated parts of
the appliance, as it may cause
serious burns.
USE AND CARE:
Fully extend the appliance’s
power cable before each use.
Do not use the appliance if the
properly fitted.
parts or accessories are not
Do not use the appliance if
the accessories attached to it
are defective. Replace them
immediately.
paper.
aluminum foil or greaseproof
inside the fryer. You can use
plastics or similar materials
Do not add paper, cardboard,
oil or any other type of fat.
only. Never fill the basket with
The air fryer works with hot air
empty or without the basket.
Do not use the appliance when
Do not move the appliance
while in use.
Do not force the power cord.
Never use the power cord to lift
up, carry or unplug the appliance.
Do not clip or crease the power
cord.
Do not allow the power cord to
hang or to come into contact with
the hot surfaces of the appliance.
Check the state of the power
cord. Damaged or tangled cables
increase the risk of electric shock.
Do not touch the plug with
wet hands.
Do not use the appliance if the
cable or plug is damaged.
If any of the appliance casings
breaks, immediately disconnect
the appliance from the mains to
prevent the possibility of an
electric shock.
fallen on the floor, if there are
Do not use the appliance if it has
visible signs of damage or if it has
a leak.
Keep the working area clean and
well lit. Cluttered and dark areas
invite accidents.
Use the appliance in a well-
ventilated area.
Do not place the appliance on hot
surfaces, such as cooking plates,
gas burners, ovens or similar.
horizontal, flat, stable surface,
Place the appliance on a
suitable for withstanding high
temperatures and away from
other heat sources and contact
with water.
CAUTION: In order to prevent
–
–
–
–
–
–
–
–
–
–
–
–
–
–
–
–
–
–
–
–
–
–
EN
–
–
–
–
BASKET TIPS:
Press the release button (G) to
separate the inner basket from
basket not to the outer one. (Fig.1)
is attached only to the inner
basket is on a surface. The handle
release button only if the outer
Important: Press the basket
baskets.
Pull the handle to remove the
the outer one.
–
–
Store this appliance out of reach
of children and/or persons with
mental or lack of experience and
physical, sensory or reduced
knowledge.
Service
Any misuse or failure to follow the
instructions for use renders the
guarantee and the manufacturer's
liability null and void.
Description
CONTROL PANEL
1 - Shellfish
2 - Fries
3 - Frozen food
4 - Meat
5 - Pizza
6 - Chicken
9 - Time setting
8 - Fish
7 - Pastry
A - Air inlet
B - Air outlet
C - Cable
D - Control panel
E - Inner basket
F - Basket lock button
I - Outer basket
H - Handle
G - Basket release button
If the model of your appliance
does not have the accessories
described above, they can also
Technical Assistance Service.
be bought separately from the
Instructions for use
BEFORE USE:
Make sure that the entire product’s
packaging has been removed.
above the air fryer.
Leave 13 cm of space behind and
cleaning section.
in the manner described in the
will come into contact with food
first time, clean the parts that
Before using the product for the
To keep the non-stick treatment
in good condition, do not use
metal or pointed utensils on it.
Disconnect the appliance from
the mains when not in use and
task.
before undertaking any cleaning
–
–10 - Delay function
11 - On/off
12 - Menu selection
13 - Fryer indicator
14 - Start / pause
15 - Temperature setting
time, press and hold or .
decrease the temperature or
NOTE: To quickly increase /
17 - Preheat
16 - Keep warm

–
button (G) while carrying the
USE:
baskets.
Never press the basket release
–
–
–
–
–When cooking, remove the
baskets from the fryer and
shake the food.
Place the baskets on a surface
(suitable for high temperatures)
and shake. DO NOT press the
basket release button (Fig. 4).
only the first one. In this case,
from the outer basket and shake
shake, remove the inner basket
If the baskets are too heavy to
SHAKING FOOD
–
–Press to pause cooking. The
fryer will stop heating, the
symbol will disappear from
the display and the indicator
will flash until you press again
to resume cooking.
This function allows you to
without removing the baskets.
pause the cooking program
–Remove the inner basket from
outer bowl.
fats that may remain in the
ATTENTION: Beware of hot oil /
the outside to serve the food.
–
–
–
–
–
–
–
–
The display shows the preset
button 14 to start cooking.
When selecting the menu, press
time and temperature and the
indicator 13 will begin to flash.
You can adjust the temperature
at any time.
and time using buttons 9 and 15
–
–
–Put the inner and outer basket
back into the appliance.
(11) to start.
mode. Press the on / off button
The appliance is in standby
–
–
EN
When you remove the baskets,
the fryer stops automatically
and the display turns off. When
you put the baskets back in,
the fryer resumes and
continues its program.
When the fryer finishes the
and the display will turn off.
cooking, 1 “beep” will be heard
release button from being
accidentally pressed.
The lock button (F) protects the
Unroll the cable completely
before plugging it in.
Connect the appliance to the
mains.
Remove the inner and outer
basket (E, I) from the fryer.
Put the ingredients you want
to fry, roast or cook in the inner
basket (E).
IMPORTANT: If the food basket
overfills, it will not cook evenly
the MAX mark on the basket.
(Fig. 5). Do not put food above
Select the default menu (Fig.3)
through button 12. Press this
button continuously to select
the desired menu.
PAUSE

EN
If the air fryer has no active
cooking programs, it will turn
–
AUTO SHUT OFF
The appliance has the function
to delay the start of cooking
until desired.
Set the timer after selecting
the desired menu.
Press and select the desired
time using the time adjustment
buttons (9).
The timer will be displayed on
cooking.
has elapsed, the fryer will start
the screen and after the time
–
This function can be adjusted
maximum of 12 hours.
in 15 minutes intervals, with a
–
–
–
–
make sure no liquids are dripping
from the inner basket.
When removing the baskets, the
fryer stops automatically and the
display turns off. When putting
the baskets back in, the fryer
resumes and continues its
program.
Avoid shaking food for more
does not cool down.
than 30 seconds so that the fryer
DELAY FUNCTION
What kind of food need to be
shaken?
Without shaking, food may not
be crispy or evenly cooked.
–
Small food such as fries,
vegetables or nuggets usually
need to be shaken for optimal
cooking.
off, after 3 minutes of inactivity.
–
–
–
–
–
–
–
–
–
–
–
ONCE YOU HAVE FINISHED
USING THE APPLIANCE:
Unplug the appliance from
the mains.
Clean the appliance as it is
section.
explained on the cleaning
SAFETY THERMAL PROTECTOR:
The appliance has a safety
device, which protects the
If the appliance turns itself off
appliance from overheating.
and does not switch itself on
again, disconnect it from the
mains supply, and wait for
approximately 15 minutes before
If the machine does not start
again seek authorised technical
assistance.
Cleaning
Disconnect the appliance from the
mains and allow it to cool before
undertaking any cleaning task.
Clean the equipment with a damp
cloth with a few drops of washing-
up liquid and then dry.
Do not use solvents, or products
with an acid or base pH such as
If the air fryer overheats, it will
before using it again.
Allow the air fryer to cool down
a safety feature.
automatically shut down as
–
–
OVERHEAT PROTECTION
reconnecting.

ESEN
Anomalies and repair
Take the appliance to an
authorised technical support
service if product is damaged
or other problems arise. Do not
attempt to disassemble or repair
the appliance yourself as this may
be dangerous.
For EU products
versions and/or in case
that it is requested in
your country:
ECOLOGY AND RECYCLABILITY OF
THE PRODUCT
The materials of which the
packaging of this appliance
collection, classification and
consists are included in a
recycling system. Should you
appropriate public recycling bins
for each type of material.
The product does not contain
concentrations of substances
that could be considered
harmful to the environment.
- This symbol means that in
case you wish to dispose of
the product once its working
life has ended; take it to an
authorised waste agent
for the selective collection of
Waste from Electric and
Electronic Equipment (WEEE).
This appliance complies with
Directive 2014/35/EU on Low
Voltage, Directive 2014/30/EU on
Electromagnetic Compatibility,
Directive 2011/65/EU on the
restrictions of the use of certain
hazardous substances in
electrical and electronic
equipment and Directive
2009/125/EC on the ecodesign
products.
requirements for energy-related
Warranty and
technical assistance
This product enjoys the
recognition and protection of
the legal guarantee in
accordance with current
You can find the closest one
web link: www.mellerware.com
by accessing the following
rights or interests you must
legislation. To enforce your
technical assistance services.
go to any of our official
–
–
bleach, or abrasive products, for
cleaning the appliance.
Never submerge the appliance in
water or any other liquid or place
it under running water.
It is advisable to clean the
appliance regularly and remove
any food remains.
If the appliance is not in good
condition of cleanliness, its
surface the duration of the
appliance’s useful life and could
become unsafe to use.
The inner and outer basket can
be washed in the dishwasher.
–
–
–
–

EN
You can also request related
information by contacting us.
You can download this instruction
manual and its updates at
www.mellerware.com

Troubleshooting
EN
greasy.
Make sure the pan is properly cleaned and not
chat on the web www.mellerware.com
Contact the technical support service, sending
chat on the web www.mellerware.com
Contact the technical support service, sending
baskets and clean.
burning. Wait for it to cool down to remove the
Unplug the fryer immediately. The food may be
normal, and should not affect cooking.
and the baskets may be hotter than usual. This is
outer basket. This oil will produce white smoke,
Cooking greasy foods will cause oil to leak into the
you use it for the first time. This is normal.
The air fryer may produce some white smoke when
Foods are not crispy .
securely.
“E2”
Display shows Error code
“E1”
Display shows Error code
out of the air fryer.
Black smoke is coming
out of the air fryer.
White smoke is coming
into the air fryer
Baskets will not slide
unevenly.
Foods are cooked
cooked.
Foods are not completely
turn on.
The air fryer does not
Push the baskets securely into the air fryer.
cooking.
the outer basket.
Make sure the inner basket is securely inside
Make sure the basket is not overfilled with food.
can increase crispiness.
Spraying or brushing a small amount of oil on foods
or close to each other need to be shaken during
Ingredients that are stacked on top of each other
will be uncooked.
basket. If the basket is overstuffed, then ingredients
Increase cooking temperature or time.
Place smaller batches of ingredients into the inner
Make sure the air fryer is plugged in.
SolutionProblem

ES
Distinguido cliente:
Le agradecemos que se haya
decidido por la compra de un
producto de la marca Mellerware.
Su tecnología, diseño y funcionalidad,
junto con el hecho de superar las
más estrictas normas de calidad
le comportarán total satisfacción
durante mucho tiempo.
Leer atentamente este
folleto de instrucciones
antes de poner el
aparato en marcha
y guardarlo para
posteriores consultas.
La no observación y
cumplimiento de estas
instrucciones pueden
comportar como
resultado un accidente.
Antes del primer uso,
limpiar todas las
partes del producto
que puedan estar
en contacto con
alimentos, procediendo
tal como se indica en el
apartado de limpieza.
Este aparato puede ser
utilizado por personas
no familiarizadas
con su uso, personas
discapacitadas o
niños mayores de 8
Consejos y advertencias
de seguridad
años siempre que lo
hagan bajo supervi-
sión o hayan recibido
formación sobre el
uso seguro del apara-
to y entiendan los pe-
ligros que comporta.
Mantener el aparato y
su conexión red fuera
del alcance de los ni-
ños menores de 8 años.
Los niños no deben
realizar operaciones
de limpieza o
mantenimiento del
aparato a menos
que sean mayores
de 8 años y tengan
la supervisión de un
adulto.
Este aparato no
es un juguete. Los
niños deben estar
bajo vigilancia para
asegurar que no jue-
guen con el aparato.
No usar el aparato
asociado a un
programador,
temporizador u
otro dispositivo que
conecte el aparato
automáticamente.
Si el cable de
alimentación está
1.
3.
4.
5.
6.
2.
7.
8.
ESPAÑOL

ES
dañado, debe ser
substituido por el
fabricante, por su
de evitar un peligro.
cado similar con el fin
por personal cualifi-
servicio postventa o
Este aparato está
pensado únicamente
para un uso domés-
tico no para uso profe-
sional o industrial.
dañados o enredados aumentan
el riesgo de choque eléctrico.
No tocar la clavija de conexión
con las manos mojadas.
No utilizar el aparato con el cable
eléctrico o la clavija dañada.
Si alguna de las envolventes del
aparato se rompe, desconectar
inmediatamente el aparato de la
red para evitar la posibilidad de
sufrir un choque eléctrico.
No utilizar el aparato si ha caído,
si hay señales visibles de daños,
o si existe fuga.
Use el aparato en una zona
ventilada.
superficies calientes tales como
No colocar el aparato sobre
placas de cocción, quemadores
de gas, hornos o similares.
superficie horizontal, plana,
Situar el aparato sobre una
estable y apta para soportar altas
temperaturas, alejada de otras
fuentes de calor y de posibles
salpicaduras de agua.
ADVERTENCIA: A fin de evitar un
sobrecalentamiento, no cubrir el
aparato.
Este aparato no es adecuado para
No exponer el aparato a la lluvia o
uso en exteriores.
condiciones de humedad. El agua
que entre en el aparato aumentará
No usar el aparato, en el caso de
el riesgo de choque eléctrico.
que el aparato tiene superficies
personas insensibles al calor (ya
calefactadas).
red, verificar que el voltaje indi-
Antes de conectar el aparato a la
cado en la placa de característi-
cas coincide con el voltaje de red.
Conectar el aparato a una base
de toma de corriente que soporte
como mínimo 10 amperios.
La clavija del aparato debe
adaptadores de clavija.
la toma de corriente. Nunca
coincidir con la base eléctrica de
modificar la clavija. No usar
No forzar el cable eléctrico de
conexión. Nunca usar el cable
o desenchufar el aparato.
eléctrico para levantar, transportar
No dejar que el cable eléctrico
de conexión quede atrapado o
arrugado.
No dejar que el cable eléctrico
Verificar el estado del cable
con las superficies calientes del
de conexión quede en contacto
aparato.
eléctrico de conexión. Los cables
9.
–
–
–
–
–
–
–
–
–
–
–
–
–
–
–
–
–
–
ES
–
–
–
–
–
–
–
–
–
–
–
No tocar las partes calefactadas
del aparato, ya que pueden
provocar quemaduras.
UTILIZACIÓN Y CUIDADOS
Antes de cada uso, extender
completamente el cable de
alimentación del aparato.
No usar el aparato si sus
accesorios no están
debidamente acoplados.
No usar el aparato si los
accesorios acoplados a él
presentan defectos. Proceda a
sustituirlos inmediatamente.
No utilizar el aparato vacío y sin
el cestillo.
La freidora de aire funciona solo
con aire caliente. No rellenar
otro tipo de grasa.
nunca el cestillo con aceite ni
No añadir papel, cartón, plásticos
o materiales similares dentro de
la freidora. Se puede utilizar papel
de aluminio o papel vegetal.
No mover o desplazar el aparato
mientras esté en funcionamiento.
Para conservar el tratamiento
antiadherente en buen estado,
no utilizar sobre el utensilios
metálicos o punzantes.
Desenchufar el aparato de la red
cuando no se use y antes de
realizar cualquier operación de
limpieza.
Guardar este aparato fuera del
alcance de los niños y/o personas
con capacidades físicas,
conocimiento.
o falta de experiencia y
sensoriales o mentales reducidas
Servicio
Toda utilización inadecuada, o en
desacuerdo con las instrucciones
de uso, puede comportar peligro,
anulando la garantía y la
responsabilidad del fabricante.
Descripción
1 - Marisco
2 - Patatas
3 - Alimentos congelados
10 - Función delay
11 - On/off
12 - Selección menús
17 - Pre-canlentar
16 - Mantener caliente
15 - Ajuste temperatura
14 - Empezar/Pausar
13 - Indicador freidora
4 - Carne
5 - Pizza
6 - Pollo
9 - Ajuste tiempo
8 - Pescado
7 - Repostería
A - Entrada del aire
B - Salida del aire
C - Cable
D - Pantalla
E - Cestillo interior
F - Botón bloqueo cestillo
PANEL DE CONTROL
I - Cubeta exterior
H - Asa
G - Botón liberación del cestillo

ES
–
NOTA: Para aumentar/disminuir la
te, éstos también pueden
accesorios descritos anteriormen-
aparato no disponga de los
En caso de que su modelo de
mente, mantener pulsado el botón
temperatura o el tiempo rápida-
adquirirse por separado en los
USO DEL CESTILLO:
NOTAS PREVIAS AL USO:
Modo de empleo
Servicios de Asistencia Técnica.
–
–
–
–
Presionar el botón de liberación
(G) para separar el cestillo
interior del exterior.
Tirar del asa para quitar los
cestillos.
una superficie. El asa está unido
El botón de bloqueo (F) protege
el botón de liberación para que no
únicamente al cestillo, no a la
cubeta. (Fig.1)
IMPORTANTE: Presionar el botón
de liberación del cestillo solo si
la cubeta exterior está encima de
–
–
–
Asegúrese de que ha retirado
todo el material de embalaje
del producto.
Antes de usar el producto por
primera vez, limpie las partes en
Dejar un mínimo de 13cm de
espacio entre la parte trasera y
superior de la pared (Fig.2).
contacto con alimentos tal como
se describe en el apartado de
Limpieza.
durante su transporte.
liberación del cestillo (G)
No pulsar nunca el botón de
sea pulsado accidentalmente.
USO:
–
–
cocción puedes ajustar la
En cualquier momento de la
–
–
–
–
Volver a introducir el cestillo
interior y exterior en el aparato.
El aparato se encuentra en modo
espera. Pulsar el botón on/off (11)
para empezar.
botón continuamente para
el botón 14 para empezar la
parpadear.
y el indicador 13 empezará a
y la temperatura preestablecida
En la pantalla aparece el tiempo
cocción.
seleccionar el menú deseado.
Al seleccionar el menú, pulsar
Seleccionar el menú
predeterminado (Fig.3) a través
del botón 12. Ir pulsando este
–
–
–
–
Desenrollar completamente el
cable antes de enchufar.
Enchufar el aparato a la red
eléctrica.
Sacar el cestillo interior y
cestillo (E).
cocerán de manera uniforme
cestillo.
encima de la marca MAX del
(Fig.5). No poner alimentos por
IMPORTANTE: si se sobrellena el
cestillo de alimentos, no se
exterior (E,I) de la freidora.
Poner los ingredientes que
desea freír, asar o cocinar en el

ES
de los botones 9 y 15.
exteriorpara servir losalimentos.
Sacar el cestillo interior del
aceite/grasas calientesque
ATENCIÓN: Cuidado con el
pueden quedar en la cubeta
sacudir. NOpulsar el botón de
para temperaturas altas) y
encima de una superficie (apta
Para hacerlo, colocar los cestillos
o sacudir la comida.
cestillos de la freidora y remover
Durante la cocción, sacar los
–
–
los cestillos de la freidora.
programa de cocciónsin sacar
Estafunción te permite pausarel
–
cocción.
a pulsarpara reanudar la
parpadeará hastaque vuelvas
cerá de la pantalla y el indicador
calentar, el símbolo desapare-
cocción. La freidora dejará de
Pulsar el botón para pausarla
SACUDIR / REMOVER
PAUSAR
exterior.
–
–
–
se detiene automáticamente y la
Al sacar los cestillos, la freidora
colocar los cestillos, la freidora
pantalla se apaga. Al volver a
se reanuda y sigue su programa.
pantalla se apagará.
la cocción, se oirá 1 “beep” y la
Cuando la freidora hayaterminado
liberación del cestillo (Fig.4).
Si el cestillo pesa demasiado
para sacudirlo, sacar el cestillo
interior del cestillo exterior y
sacudir solo el primero.En este
caso, asegurarse de que el
cestillo no gotea.
Evitar sacudir o remover los
alimentos más de 30 segundos
para que la freidora no seenfríe.
FUNCIÓN DELAY
un máximo de 12horas.
incrementos de 15 minutos,con
Esta función se puede ajustar en
de ajuste de tiempo.
deseado a través de los botones
Pulsar y seleccionar el tiempo
de seleccionar el menú deseado.
Ajuste el temporizador después
cocción hasta que se desee.
retrasar el comienzo de la
El aparato tiene la función para
¿Qué alimentosremover?
bien cocidos.
queden crujientes o no estén
posible que losalimentos no
Sin sacudir o remover, es
–
–
–
–
–
cocción óptima.
sacudidos para conseguir una
normalmente necesitan ser
verduras cortadas o nuggets
puedenser patatas fritas,
Los alimentos pequeños como
Al sacar los cestillos, lafreidora
se detieneautomáticamente y la
pantallaseapaga. Al volver a
colocar los cestillos, la freidora
se reanuda ysigue su programa.
–
–
–
–
–
–
temperatura y el tiempo a través

ES
–
–
SOBRECALENTAMIENTO
Si la freidora se sobrecalienta,
se apagará automáticamente.
volver a utilizarla.
Dejar que se enfríe antes de
PROTECCIÓN
–La freidora se apagará
automáticamente después de 3
minutos, si no hay ningún
programa de cocción activo.
–El temporizador se mostrará en la
pantalla y una vez transcurrido el
tiempo, la freidora empezará a
cocinar.
APAGADO AUTOMÁTICO
ES
UNA VEZ FINALIZADO EL USO
DEL APARATO:
Desenchufar el aparato de la red
eléctrica.
Limpiar el aparato.
PROTECTOR TÉRMICO DE
SEGURIDAD:
El aparato dispone de un
dispositivo térmico de seguridad
que protege el aparato de
cualquier sobrecalentamiento.
Si el aparato se desconecta por sí
mismo y no vuelve a conectarse,
proceder a desenchufarlo de la
red, esperar unos 15 minutos antes
de volver a conectarlo, Si sigue
sin funcionar, acudir a uno de los
servicios de asistencia técnica
autorizados.
Se recomienda limpiar el
aparato regularmente y retirar
todos los restos de alimentos.
Si el aparato no se mantiene en
buen estado de limpieza, su
superficie puede degradarse y
lavavajillas.
aptos para su limpieza en el
El cestillo interior y exterior son
peligrosa.
conducir a una situación
duración de la vida del aparato y
afectar de forma inexorable la
–
–
–
No utilizar disolventes, ni
productos con un factor pH
ácido o básico como la lejía, ni
productos abrasivos, para la
limpieza del aparato.
No sumergir el aparato en agua
el grifo.
u otro líquido, ni ponerlo bajo
–
–
Desenchufar el aparato de la red
y dejarlo enfriar antes de iniciar
cualquier operación de limpieza.
Limpiar el aparato con un paño
húmedo impregnado con unas
gotas de detergente y secarlo
después.
Anomalías y reparación
En caso de avería llevar el aparato
a un Servicio de Asistencia
Técnica autorizado. No intente
desmontarlo o repararlo ya que
puede existir peligro.
Limpieza
–
–
–
–
–
–

www.mellerware.com
actualizaciones en
instrucciones y sus
Puede descargar este manual de
aparece al final de este manual.
nosotros por el teléfono que
poniéndose en contacto con
información relacionada
También puede solicitar
web: www.mellerware.com
accediendo al siguiente enlace
Podrá encontrar el más cercano
de asistencia técnica oficiales.
ES
–Este aparato cumple con la
Directiva 2014/35/EU de Baja
2014/30/EU de Compatibilidad
Tensión, con la Directiva
Electromagnética, con la
Directiva 2011/65/EU sobre
restricciones a la utilización de
determinadas sustancias
peligrosas en aparatos eléctricos
–
–
Para las versiones UE
del producto y/o en el
aplique:
caso de que en su país
ECOLOGÍA Y RECICLABILIDAD
DEL PRODUCTO
Los materiales que constituyen
el envase de este aparato, están
recogida, clasificación y reciclado
integrados en un sistema de
de los mismos. Si desea
deshacerse de ellos, puede utilizar
los contenedores públicos
apropiados para cada tipo de
material.
El producto está exento de
concentraciones de sustancias
para el medio ambiente.
que se puedan considerar dañinas
Garantía y asistencia
técnica
cualquierade nuestros servicios
intereses debe acudir a
hacer valer sus derechos o
con la legislación vigente. Para
la garantía legal de conformidad
reconocimiento y protección de
Este producto goza del
ES
–Este símbolo significa que
si desea deshacerse del
Electrónicos (RAEE).
de Aparatos Eléctricos y
la recogida selectiva de Residuos
gestor de residuos autorizado para
medios adecuados a manos de un
mismo, debe depositarlo por los
transcurrida la vida del
producto, una vez
la energía.
los productos relacionados con
de diseño ecológico aplicable a
2009/125/EC sobre los requisitos
y electrónicos y con la Directiva
Table of contents
Languages:
Other Mellerware Fryer manuals

Mellerware
Mellerware TEMPURA 27103A User manual

Mellerware
Mellerware ALONZO 27550B User manual

Mellerware
Mellerware TEMPURA 2100W User manual

Mellerware
Mellerware Executive Tempura 27103 User manual

Mellerware
Mellerware 2 7 5 5 01500W User manual

Mellerware
Mellerware Crunchy Medium User manual

Mellerware
Mellerware Crunchy Plus 7 User manual

Mellerware
Mellerware VITALITY 1400W User manual

Mellerware
Mellerware 27100 User manual

Mellerware
Mellerware WONTON User manual