..........................................................................................................
1.2 Product safety and dan
ers ................................................................................................
1.3 Requirements of the operatin
personnel..........................................................................
1.4 Responsibility of the owner
.................................................................................................
....................................................................................................
1.6 Behaviour in case of malfunctions and irre
..........................................................
nts..........................................................................................
1.8 Switching off incubator in an emergency
...........................................................................
n................................................................................................................................1
n.............................................................................................................................11
2.3 Optiona
extras..................................................................................................................11
2.4 Mat
.............................................................................................................................1
..........................................................................................................
ns.......................................................................................................................1
......................................................................................................................
14
2.8 EC Declaration of Conformit
...........................................................................................15
2.9 Desi
...................................................................................................15
2.1
ata....................................................................................................................1
ns...........................................................................................................1
..........................................................................................................1
ulations..............................................................................................................1
Transport............................................................................................................................1
..............................................................................................................................
.................................................................................................................................2
................................................................................................................................
........................................................................................................................
.............................................................................................................
.........................................................................................................
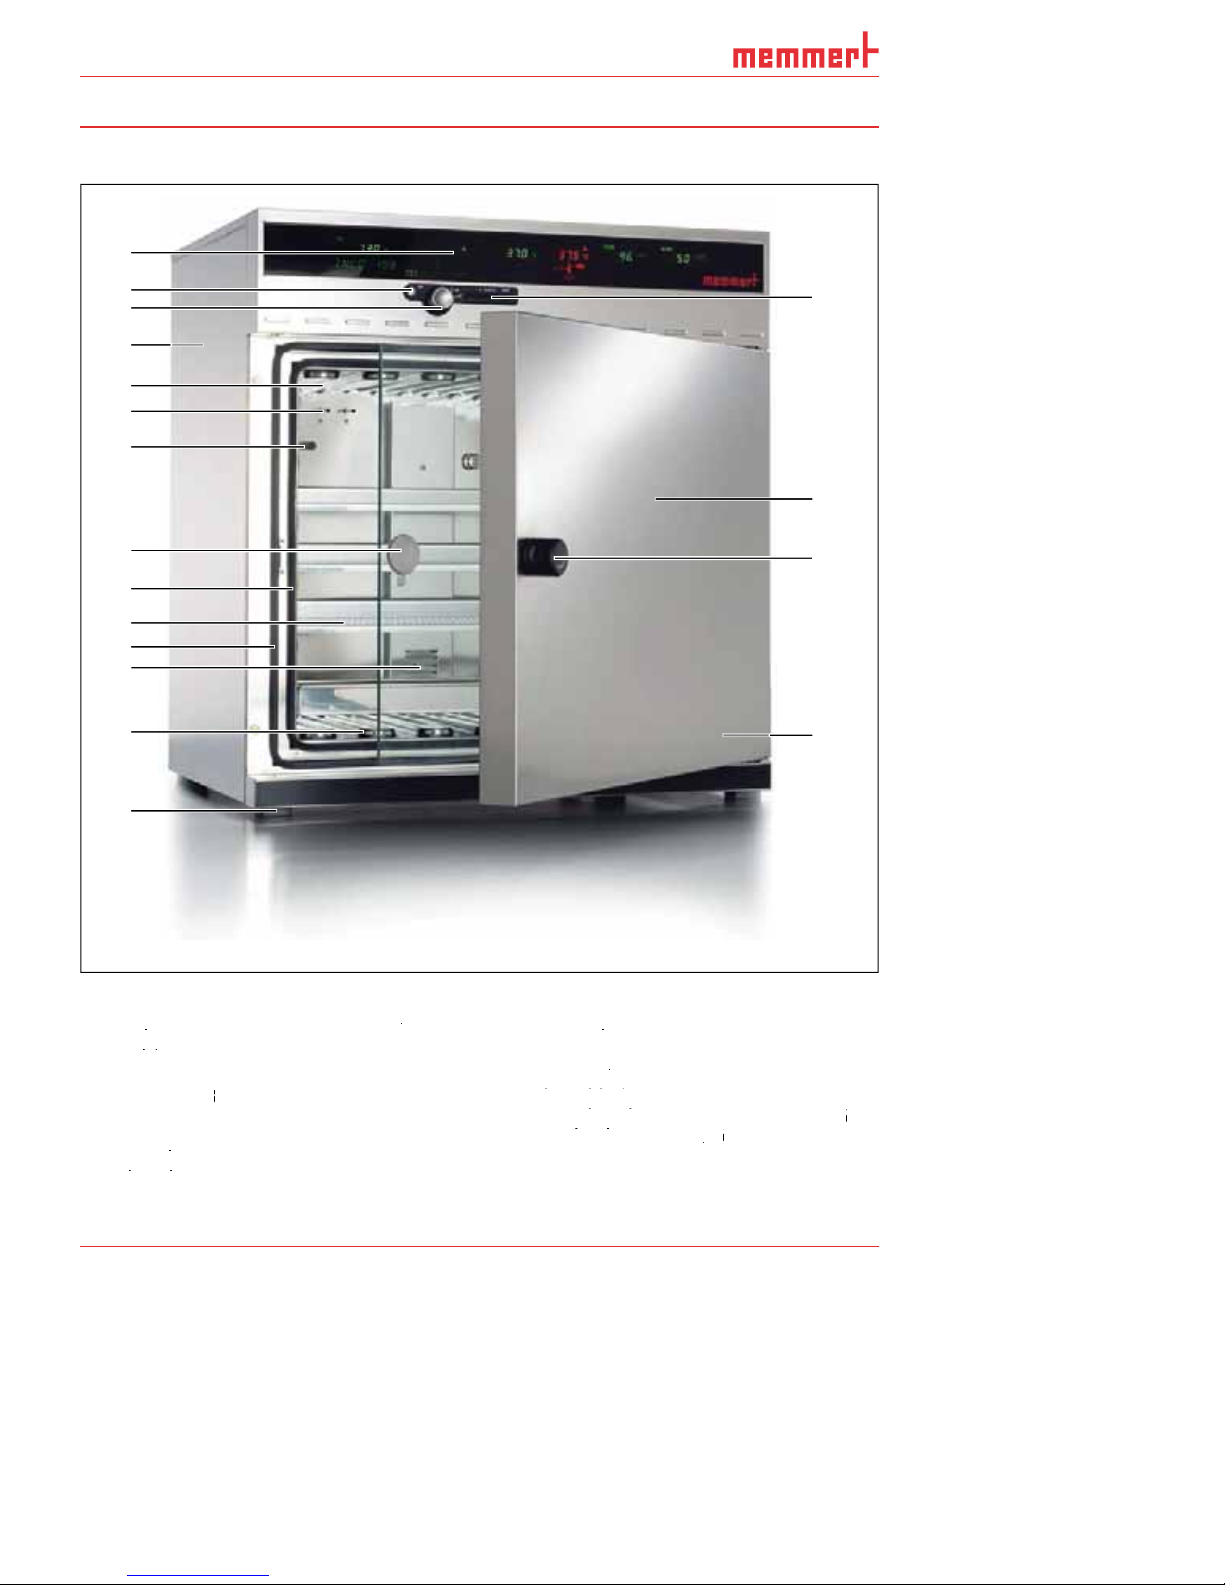
oor ............................................................................................................
5.3 Loading the incubator
.......................................................................................................
.......................................................................................................
...........................................................................................................
..........................................................................................................
on..................................................................................................................
parameters............................................................................................................
es...............................................................................................................2
5.10 Setting the operating mode
..............................................................................................2
on...............................................................................................................
operation...............................................................................................................
............................................................................................................
iance errors ....................................................................................................
......................................................................................................................