Menzer VCL 530 PRO User manual
Deutsch
English
Français
Italiano
Nederlands
Español
Português
Dansk
Norsk
Svenska
Suomi
Ελληνικά
Türkçe
Русский
Magyar
Čeština
Slovenščina
Polski
Româneşte
Slovenčina
Hrvatski
Srpski
Български
Eesti
Latviešu
Lietuviškai
Українська
6
12
18
24
30
36
42
48
54
60
66
72
78
84
90
96
102
108
114
120
126
132
138
144
150
156
162
59800620 08/22
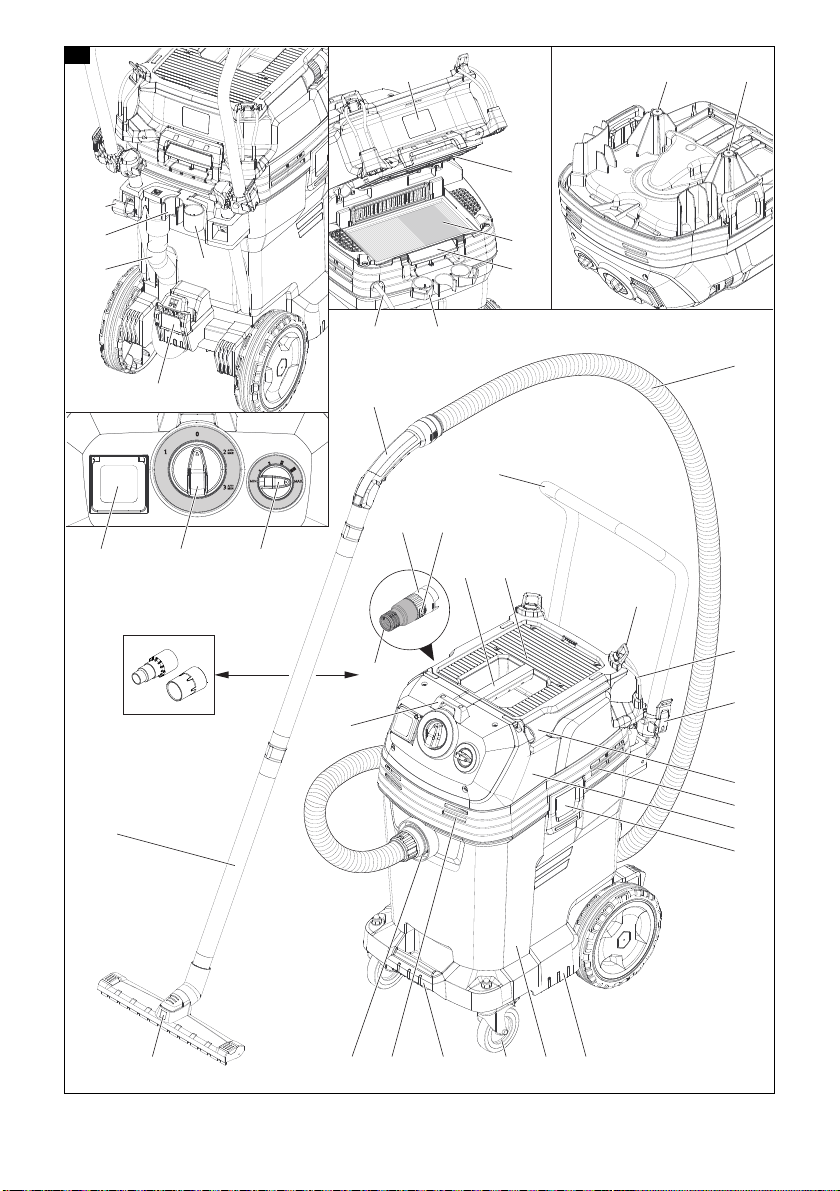
11
2
3
5
8
1315
16
21 20
19
24
17
7
101114 12
18
22
29
9
28
31
37
33
36
38
6
23
30
30
32
35
34
4
27 26 25
A
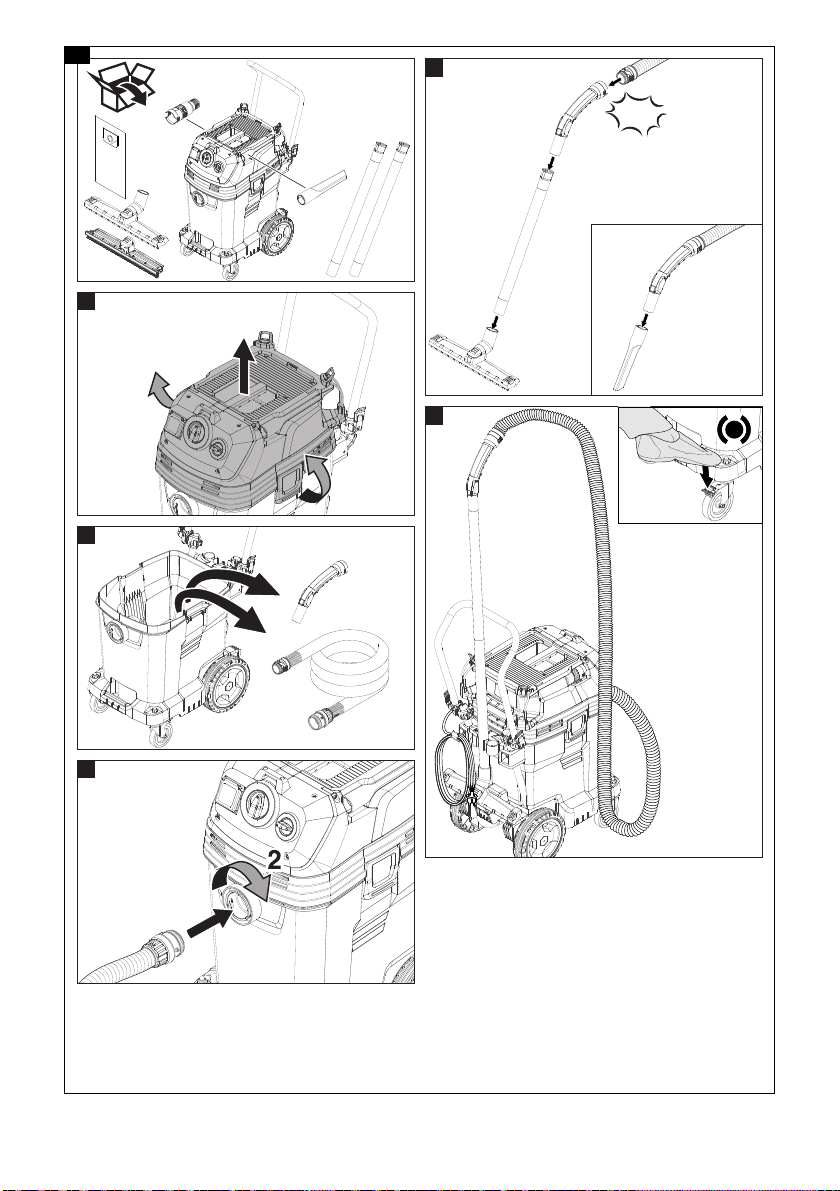
1
2
3
“Click”
2x
4
5
1
2
1
1
B

C D
2.
1.
3.
1.
4.
5.
5.
E
1.
3.
2.
F
2.
1.
G H
2.
1.
I
“Click”
J

K
2.
1.
L
M N
O
ü
û
P
This manual suits for next models
1
Table of contents
Languages:
Other Menzer Vacuum Cleaner manuals

Menzer
Menzer VC760 Quick guide

Menzer
Menzer VCL 320 Operational manual

Menzer
Menzer VCM 530 PRO User manual

Menzer
Menzer VC760 Operation instructions

Menzer
Menzer Pro Series Quick guide

Menzer
Menzer VC 620 M Quick guide

Menzer
Menzer VC 620M Quick guide

Menzer
Menzer VCH 530 PRO User manual

Menzer
Menzer VC 660 M Quick guide


