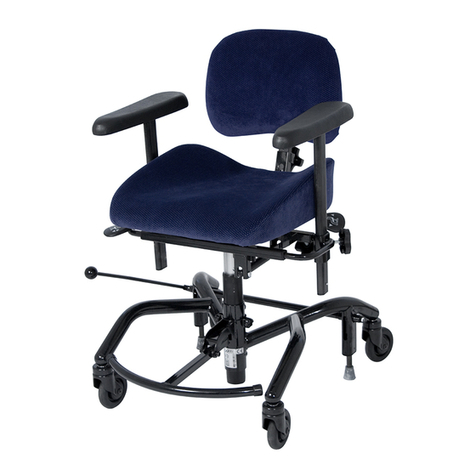
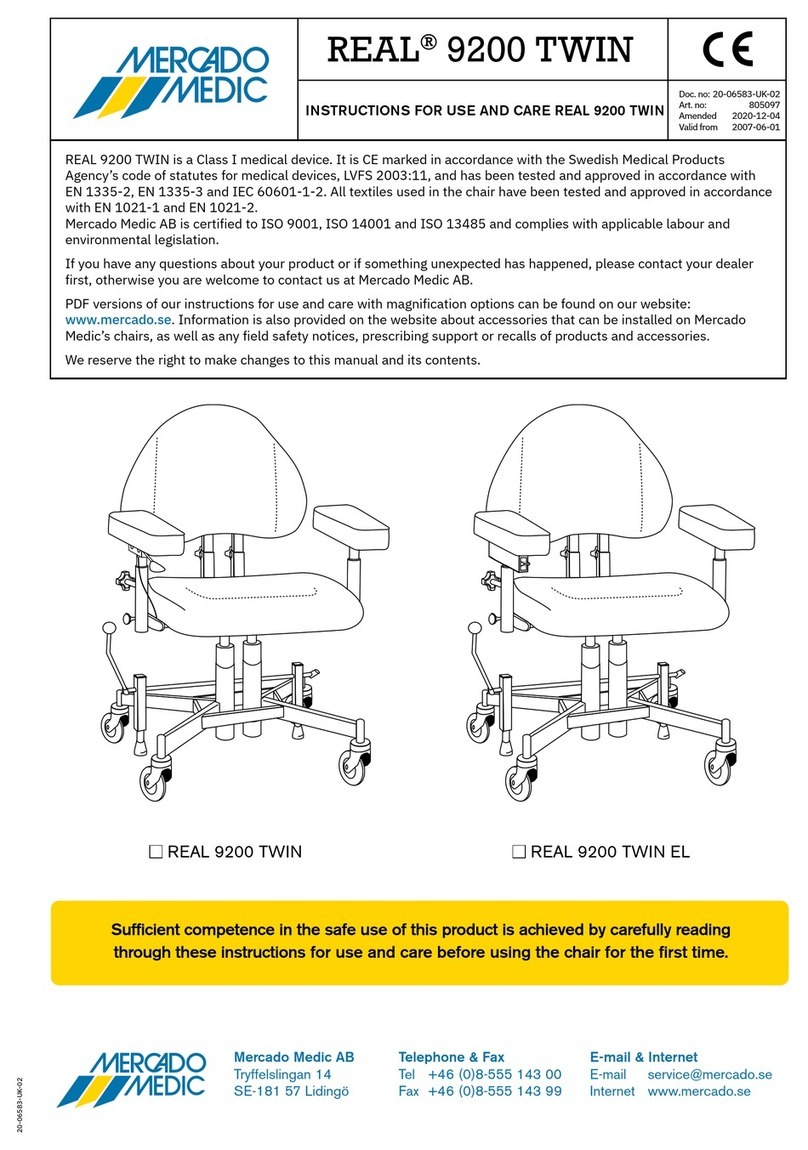
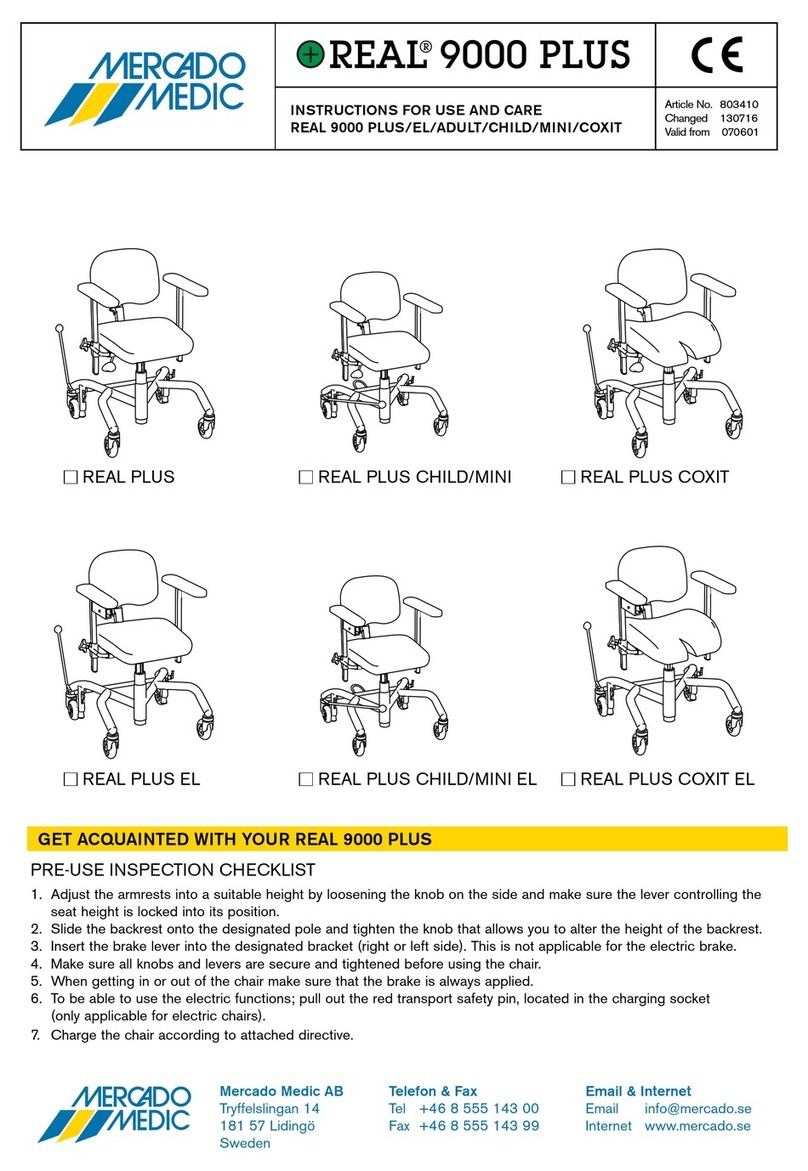
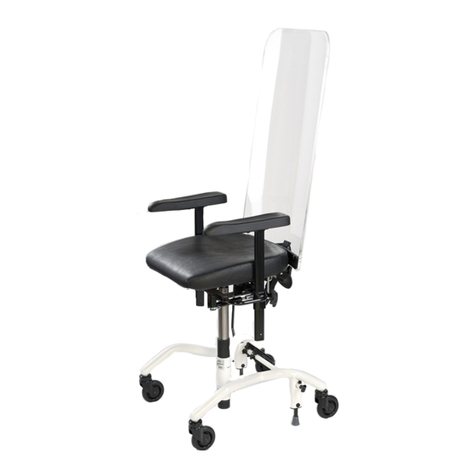
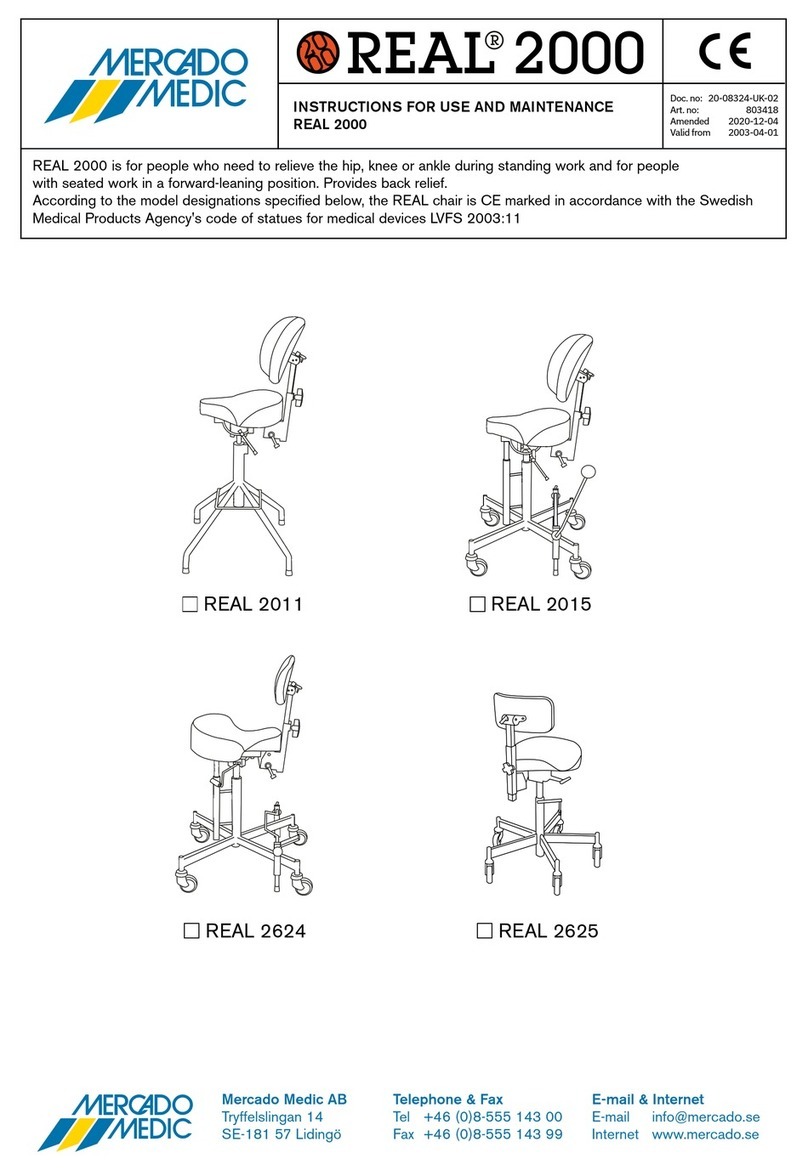
Mercado Medic REAL 2000 Series User manual

in the REAL 2000 series, as well as the
REAL9500 PLUS and REAL 9600 PLUS EL 24V series
Instructions for use and care
Translation of manual
Item number: 21-08907-UK
Revision: 01
Valid from: 2021-05-26
Amended: -
INSTRUCTIONS FOR USE
for medical standing support and chest support
chairs
UK

[Space for device label with
serial number]

Table of contents
User information
1. Introduction ....................4
1.1. Contact details ....................5
1.2. Warranty ..........................5
2. Getting started ..................6
2.1. Before use ........................6
2.2. Electrical and manual height
adjustment ........................9
2.3. Charging ........................ 10
2.4. Transfers........................ 11
3. Caring for the device ........... 12
3.1. Padded parts .................... 12
3.2. Castors and brake feet ............ 12
3.3. Other parts ...................... 12
3.4. Transport and storage ............ 13
Device information
4. Intended use.................. 14
4.1. Operating environment ........... 14
5. Configurations and settings ..... 15
5.1. Required level of competence
forsetting and adjusting........... 15
5.2. Basic design..................... 16
5.3. Electrical functions ............... 16
5.4. Seat ............................ 19
5.5. Manual height adjustment ......... 21
5.6. Manual seat tilt .................. 21
5.7. Backrest ........................ 23
5.8. Backrest mechanism ............. 24
5.9. Chest support ................... 25
5.10. Chest support mechanism........ 26
5.11. Armrest panel .................. 27
5.12. Armrest mechanism ............. 28
5.13. Base .......................... 29
5.14. Manual brake................... 30
5.15. Individual adaptation ............ 32
6. Important safety information.... 34
6.1. Standards met and classification ... 34
6.2. Warnings........................ 35
6.3. Expected service life.............. 36
6.4. Reporting of adverse events
andincidents .................... 37
Service manual
7. Technical information .......... 38
7.1. Symbols ........................ 40
8. Servicing & reconditioning ...... 43
8.1. Troubleshooting guide ............ 44
8.2. Battery replacement.............. 46
8.3. Reconditioning and periodic
maintenance .................... 47
9. Instructions for destruction ..... 53
9.1. Recycling ....................... 53
Instructions for use for medical standing support and chest support chairs
21-08907-UK-01

4
Instructions for use for medical standing support and chest support chairs Introduction
21-08907-UK-01
1. Introduction
Thank you for choosing Mercado Medic as the supplier of this device. By choosing
a REAL chair, you get to learn about a 50-year history of developing medical
devices with high function, safety, quality and flexibility. We manufacture all our
different medical chairs under our own management in Sweden.
Mercado Medic is certified to ISO 13485, ISO 9001 and ISO 14001, and complies with
applicable labour and environmental legislation.
We reserve the right to make changes to this manual and its contents.
Sufficient competence in the safe use of this device is achieved by carefully reading through
these instructions for use before using the device for the first time.
PDF versions of our instructions for use with zoom options are always available in
their most current version on our website www.mercado.se.

5
Instructions for use for medical standing support and chest support chairs Introduction
21-08907-UK-01
1.2. Warranty
All components of Mercado Medic's devices
are covered by warranty, under the time
periods and general terms and conditions
set out below, unless other specific periods
and conditions are agreed in writing between
Mercado Medic and the contracting customer
in connection with major procurements.
As a user, you should contact your prescriber,
assistive technology centre or distributor if
you experience problems with the device.
Distributors in turn should contact Mercado
Medic using the contact details available
under Section 1.1. Contact details.
Warranty periods
• Metal structures: 3 years.
• Lifting mechanism (electric and gas spring):
2 years.
• Other components (e.g. wheels, batteries,
padded parts): 1 year.
General terms and conditions
The warranty does not cover:
• Damage or condition considered to be
normal wear and tear.
• Damage caused by negligence or misuse.
• Spare parts, components or accessories
not sold by Mercado Medic.
• Adjustments to the device made by
unauthorised service technicians.
• Components previously fitted to devices
other than the item in question.
• Bleaching or natural variations in the
colours of fabrics, synthetic leather and
natural leather.
1.1. Contact details
Manufacturer
Street address: Mercado Medic AB,
Tryffelslingan 14, SE-181 57 Lidingö, Sweden
Postal address: Mercado Medic AB,
Box 1074, SE-181 22 Lidingö, Sweden
Telephone: +46 (0)8 555 143 00
Email: info@mercado.se
Website: www.mercado.se
Servicing and technical support
Telephone: +46 (0)8 555 143 08
Email: service@mercado.se
To report warranty claims, adverse events
and incidents or other feedback please use
the form at www.mercado.se/en/support.
Distributor
Responsible person: Henrik Sellberg
Mercado UK Ltd
Repton House, Bretby Business Park,
AshbyRoad
DE15 0YZ Burton on Trent
United kingdom
+44 (0)3330 033666
www.mercado-medic.co.uk
Space for additional distributor contact
details:

6
Instructions for use for medical standing support and chest support chairs Getting started
21-08907-UK-01
2. Getting started
This section is primarily aimed at you as a user of the device. It describes how to prepare
the device for use, adjust the seat height, charge electric models, and how to create good
conditions when moving. For care instructions, see 3. Caring for the device.
If you have any questions about your device or if something unexpected has happened, please
first contact your prescriber or dealer. You can find up-to-date contact details in Section 1.1.
Contact details. You are also welcome to contact us at Mercado Medic.
2.1. Before use
All devices come with a seat, back support
or chest support and a brake. Upon delivery
from Mercado Medic, the back support, chest
support and brake lever are unattached.
These should always be fitted before the
device is first used.
Brake lever
For models with a brake lever, insert the
brake lever into brake-lever bracket (A) (see
Figure 2.1). The brake lever can be placed on
the right or left side. For models with a foot
brake, no installation is necessary.
Backrest mechanism
For models with back support, insert the
backrest pole into the backrest mechanism
(B) and adjust to the desired height (see
Figure 2.1). Tighten all controls (B). The image
shows one of several back mechanisms
available for Mercado Medic devices. Other
back mechanisms are mounted in the same
way, although the appearance may differ
from that in the image.
Chest support mechanism
For models with chest support, insert the
chest-support pole into the chest support
mechanism (C) and adjust to the desired
height (see Figure 2.2). Tighten all controls
(C).
Armrests
For models with armrests, loosen the armrest
control (D) and adjust to the desired height
and width (see Figure 2.1). Tighten all controls
(D).
Battery
Before first use, the battery in electric
models must be activated and charged. This
is done by connecting the battery charger
to the device's charging socket and to a
wall outlet (E), see Figure 2.1. The charging
socket can be placed in different places
on the device. The most common is that
the device comes with the charging socket
mounted at the rear edge of the left armrest.
Wait until the battery is fully charged before
using the device. This normally takes 2 to 5
hours. When the battery is fully charged, the
LED on the charger lights up green. For other
charging instructions, see 2.3. Charging.

7
Instructions for use for medical standing support and chest support chairs Getting started
21-08907-UK-01
Figure 2.2. Preparations before starting to use models with chest support.
Figure 2.1. Preparations before starting to use models with back support.
Armrests
Battery
Brake lever
Backrest mechanism (Medic)
A
B
D
E
Chest support
C

8
Instructions for use for medical standing support and chest support chairs Getting started
21-08907-UK-01
interrupted by pressing the button for
movement in another direction.
• Emergency stop for hand-held controller:
If, for whatever reason, the system
does not interrupt a movement after
the corresponding control button has
been released, the movement can be
interrupted by pressing any of the other
buttons on the hand-held controller.
• Button lock on hand-held controller:
To enable or disable the button lock
for a function, press and hold both of
the directional buttons of the relevant
function for at least three seconds.
The button lock locks only the current
function. To lock multiple functions, each
function must be locked separately.
Warning! As a user, you should
contact your prescriber, technical
aids centre or distributor if the
device shows reduced or altered
performance. A device showing a
loss of or change in performance
must immediately be taken out of
use in order to avoid an accident.
The device must not be used again
until an authorised technician has
examined the device.
Warning! To maintain safety, the
device should only be used by the
person and purpose for which it is
intended. The device is set up for a
single user. Changing settings may
affect the user's seating position,
which may result in damage or injury.
Warning! You are not permitted to
modify the device yourself. If you
would like individual customisation,
contact your prescriber or distributor.
If the device is modified, the CE
marking no longer applies and
Mercado Medic may no longer have
full device liability. Modifications
may affect the safety of the device
and lead to accidents.
Consider the following before and during
use of the device
• All settings controls should be tightened
before using the device.
• The device must not be used without
fitting the backrest.
• The device must not be used without
fitting the armrests.
• The device’s brake must always be
applied when sitting down and getting up.
• The braking capacity of the device may be
impaired on heavily sloping floors.
• The braking capacity of the device may be
impaired on uneven floors.
• The device must be operated with care.
Always be aware of your surroundings
before moving. Pets or children on the
floor could be easily hit.
• The optional foot support ring is designed
to rest your feet on, not to stand on.
For models with electrical functions,
• Charge the device according to these
instructions for use, see Charging.
• The electrical functions cannot be used
when the device is charging.
• If the device is equipped with leg support,
your feet should always be in contact with
the footplate when using the electrical
functions.
• The seat must never be set to a height
where you are unable to get out of the
device safely.
• The device must not be moved when the
seat is in the raised position.
• Emergency stop for control buttons:
If, for whatever reason, the system
does not interrupt a movement after
the corresponding control button has
been released, the movement can be

9
Instructions for use for medical standing support and chest support chairs Getting started
21-08907-UK-01
Warning! The device may be
equipped with long cables or
wires that cannot be secured in
order for the device to function
properly. Cables and wires can
pose strangulation risks to small
children, for example. Do not leave
the device unattended with small
children nearby.
Warning! The device is equipped
with small parts such as screws
that can come loose. Small parts
that have come loose can pose
choking hazards for children and
pets.
Warning! Metal surfaces may
become very hot if they are
exposed to direct sunlight. Skin
contact with hot surfaces can lead
to burns. Avoid exposing metal
surfaces to direct sunlight.
Warning! Always ensure that the
device’s brake is applied when
sitting down and getting up. If the
device is not braked, it risks rolling
away when you get up or sit down,
which can lead to fall injuries.
Figure 2.3. Controls on the electric model.
Figure 2.4. Controls on manual models.
2.2. Electrical and manual height adjustment
Depending on the model, the device has
electric or manual height adjustment. To
adjust the height electrically, use the hand
control or button placed under the right
armrest (see Figure 2.3). To adjust the height
manually, use the control placed under the
seat or under the right armrest (see Figure
2.4). See 5. Configurations and settings for
detailed information about all the features
and controls of the device.

2. Connect the charger plug into the wall
socket. The LED on the charger will
indicate that charging is underway.
3. The battery is fully charged when the
LED on the charger changes colour from
red to green. If you are using the hand-
held controller, this will also be indicated
by the three green battery LEDs on the
controller, which will start to flash at the
same time.
If the electrical functions have not been
used for 7 days, the battery switches off
automatically. To reconnect the battery,
connect the battery charger to the charging
socket and the wall outlet and wait at least
5 seconds before unplugging the charger.
Itis recommended to charge the battery fully
after the battery has been disconnected.
If no electrical functions are working, try
charging the battery. If electrical functions
still do not work, contact your prescriber or
distributor, see 1.1. Contact details.
10
Instructions for use for medical standing support and chest support chairs Getting started
21-08907-UK-01
2.3. Charging
For electric models, the battery should
be charged once a day. Fully charging the
battery on a daily basis will take 2 to 5 hours.
It is important that the battery is never
completely discharged, as this helps to
prolong the life of the battery. Daily charging
of the battery is especially important on the
configurations with electric brake, electric
seat tilt and electric back recliner, to ensure
that you as a user can always get in and out
of the device safely. The device emits a low
battery level warning sound, for both low and
critical. Low battery is indicated by a short
signal. Critical battery level is indicated by
a short signal that ends with a loud beep.
Ifthe device is equipped with hand control,
the battery level can also be read on the
indicator lights (see Figure 2.5).
The device must be charged in a safe
manner. The electrical functions cannot be
used when the device is charging. For this
reason, choose an easily accessible wall
socket to plug the charger into. The charger
cable to the wall socket is 1 metre long and
must not be extended. In case of emergency,
disconnect the device from the mains by
unplugging the charger from the wall socket.
How to charge the device
1. Inset the plug into the charging outlet
(see Figure 2.6). The charging socket
is normally located at the rear edge of
the left armrest, but can also be located
under the seat, for example.
Figure 2.6. Connecting the plug to the charging socket
under the armrest.
Figure 2.5. Battery level indicator on hand-held controller.

11
Instructions for use for medical standing support and chest support chairs Getting started
21-08907-UK-01
2.4. Transfers
When moving around while sitting in the
device, it is important to make good contact
with the floor. For example, rubber-soled
indoor shoes can provide better grip and thus
facilitate movement. Rugs and carpets make
the movement more difficult. It is therefore
recommended to remove rugs or carpets if
you want to move while sitting.
For negotiating thresholds using the
REAL9500 PLUS and REAL 9600 PLUS EL
24V models, you will get more power by
backing over thresholds, mouldings and
gaps. Lower the seat and, if possible, adjust
the seat tilt forward slightly to get over the
threshold.
Do not remain seated on the REAL 2015
or REAL 2624 models when negotiating
thresholds, mouldings or gaps.
To find your device’s model number, see the
label on the device base or section 5.2 Basic
model.
Warning! Always ensure that the
device’s brake is applied when
sitting down and getting up. If the
device is not braked, it risks rolling
away when you get up or sit down,
which can lead to fall injuries.

3. Caring for the device
Clean the device according to the instructions in this section to maintain its functions and
service life. If you still have issues that cannot be resolved using available home resources,
please contact your prescriber or distributor for reconditioning.
PLEASE NOTE! Do not wash the device with water or other liquids and chemicals.
3.1. Padded parts
To maintain good device hygiene, the device’s
padded parts should be cleaned regularly.
Ifpadded parts are not regularly cleaned,
thedevice may require reconditioning.
Plush padded parts
Use a foam cleaner to clean plush padded
parts. Start by removing any loose debris.
Then use a cloth to distribute a thin layer of
foam. Wipe with a clean, damp cloth. Finish
by vacuuming the upholstery after it has
dried.
Synthetic leather padded parts
Use soap and water or surface disinfectant
to clean synthetic leather padded parts.
Start by removing any loose debris. Then
use a cloth to clean the upholstery with soap
and water or surface disinfectant. If the
upholstery is cleaned using soap and water,
finish by wiping with a clean, damp cloth.
Leather padded parts
Use water to clean leather padded parts.
Start by removing any loose debris. Then
clean the upholstery with a clean, damp
cloth. For best effect, padded parts should
be cleaned immediately after something
is spilled on it. To extend the service life
of padded parts, avoid direct contact with
chemicals or prolonged sunlight.
3.2. Castors and brake feet
Regular cleaning of castors and brake feet
is required to maintain the operation of the
device. Wipe castors and brake feet with
a damp cloth. Remove any hair from the
castors using a thin crochet needle or similar
implement.
3.3. Other parts
Do not wash or clean the device’s lifting
mechanism or other actuators (found by the
electric seat tilt and brake, see Figure 3.1).
This is because there is a risk that the grease
required for these mechanisms to function as
intended might be removed during cleaning.
If necessary, a dry cloth can be used to
remove dust from any electronic parts of
the device. Clean the other non-electronic
parts of the device once a week or when
12
Instructions for use for medical standing support and chest support chairs Caring for the device
21-08907-UK-01
Figure 3.1. device’s lifting mechanism and other actuators.

13
Instructions for use for medical standing support and chest support chairs Caring for the device
21-08907-UK-01
necessary. Use a clean, damp cloth with mild
detergent (pH 7-12), surface disinfectant or
use a steam cleaner (max. 8 bar).
3.4. Transport and storage
When transporting and storing the device,
keep the following in mind:
• The device moves by rolling on a flat
surface.
• The device should be lifted by two people.
Suitable grip points are at the front,
rear, right and left sides of the seat, see
Figure3.2.
• The device is intended to be transported
and stored at between -25°C to +60°C
and up to 90% non-condensing relative
humidity.
• The device must be transported in the
intended cardboard box on a pallet.
If the device is transported by car, it
must be strapped in place using straps
over both the base and the seat, and it
should be set to the lowest possible seat
height. To reduce the size of the device
during transport, the backrest can be
removed and the armrests lowered. Be
sure to select the settings so that they
can be easily reset. Tape or similar easily
removable marking is recommended.
• The device must not be used as a seat
when transported in a car or aircraft, for
example.
• In the case of air transport, the device
must be stored in the hold. Original
Mercado Medic batteries are approved for
air transport. For information on battery
type, see 7. Technical information.
Figure 3.2. Suitable grips when lifting.

The REAL 2000 product series, as well as
REAL 9500 PLUS and REAL 9600 PLUS EL
24V (Mercado Medic’s standing support
and chest support chairs below) comprise
modular activity chairs intended for indoor
use by persons requiring assistive devices
to manage dynamic activities that are
usually done standing up, when moving by
their own effort or for standing up from a
seated position. The devices are designed
to maximise the user’s physical ability,
which is why they are individually adaptable
and come in a wide variety of versions. The
devices are also intended for use by people
who have problems with pain and people
undergoing rehabilitation for working in a
forward-leaning position. In these cases,
the device is configured with chest support
rather than back support. The devices are
designed to relieve pressure on lower limbs,
muscles, joints and bones and to soothe pain
caused by passivity.
Mercado Medic’s standing support and
chest support chairs are designed and
recommended for one or more of the
following indications:
• Difficulty or inability to stand up from
sitting.
• Difficulty standing up or inability to stand.
• Difficulty or inability to walk.
• Pain or exhaustion arising from everyday
tasks at home or at the workplace that are
usually done standing up.
Contraindications
There are no known contraindications for
using Mercado Medic’s standing support
and chest support chairs. If the device
is purchased without prescription from
qualified healthcare professionals, the user
should consult their doctor whether there are
any contraindications.
4.1. Operating environment
• The device is intended for indoor use only
and must not be used outdoors.
• The device is intended to be used at
between -5°C to +40°C and 15-90%
non-condensing relative humidity. If
the device is stored in an environment
outside these limits, the device must be
acclimatised for up to 4 hours to achieve
an approved temperature before use.
• The device must not be used at altitudes
greater than 2000 m above sea level.
• The device must not be exposed to
extreme cold or heat, prolonged sunlight
or other radiation.
• The device must not be exposed to water,
liquids or chemicals to any extent other
than that specified in the care information
in Section 3. Caring for the device.
4. Intended use
14
Instructions for use for medical standing support and chest support chairs Intended use
21-08907-UK-01

5. Configurations and settings
This section is primarily aimed at you as a
prescriber of the device. It describes the
device's models, options when configuring
the device, and information about setting
and adjusting the device's functions. For
dimensions and performance, see 7.
Technical information.
The device is available in several configurable
models. The basic design of each model
is described below, see 5.2. Basic design.
In addition to the basic design, there are
a large number of options to personalise
the device. For available options, see the
description for each function in this section.
The models can also be equipped as
positioning chairs with, for example, torso
support, side support and neck support, and
further adapted both inside and outside the
CE marking, see 5.15. Individual adaptation.
For information about accessories and
current combination agreements please
visit our website www.mercado.se. For an
overview of accessories, read the document
'Accessories'.
The device is compatible with the upholstery
in Mercado Medic’s seat system for standing
support chairs, including Classic, Medic
and ErgoMedic. The seat system comprises
seats, back supports and armrests. The
padded parts can be combined as needed
for support, relief and stability when sitting.
A memory foam version is available for users
who have problems with pain. This variant
contains a pressure-relieving foam that is
activated by body heat. Further details about
the seat system and other upholstery are
available on our website www.mercado.se.
For an overview of available upholstered
details, read the document 'Seat systems'.
On www.mercado.se there are various forms
of prescription support such as information
sheets, order forms and a digital chair
configurator. There are also instructions for
use and device information for all Mercado
Medic devices.
5.1. Required level of competence for setting
and adjusting
The functions and accessories for positioning
and relief sitting should only be set by the
prescriber of the device unless otherwise
agreed, as this requires knowledge of good
sitting positions. For example, these features
and accessories include armrest width
adjustment.
Daily functions such as seat height, seat
tilt, brake and, if relevant, armrest height,
can be adjusted by the user himself/herself
wherever appropriate and if this can be done
safely.
15
Instructions for use for medical standing support and chest support chairs Configurations and settings
21-08907-UK-01

5.2. Basic design
All models in the series REAL 9500 PLUS and REAL 9600 PLUS EL 24V come with a seat,
backrest, armrests, base with four castors (standard: 100mm), manual brake with brake lever
(standard: 450mm) and a fixed angle seat frame that does not permit seat tilting. Depending
on the model, the device has either electric or manual height adjustment.
The standard REAL 2015 model comes with seat, back, base with four castors (75mm),
manual brake with brake lever (standard: 450mm) and manual height adjustment.
The standard REAL 2624 model comes with seat, chest support, base with four castors
(75mm), manual brake with foot brake and manual height adjustment.
PLEASE NOTE! The basic design of the device may vary between regions and contracting entities.
REAL 9500 PLUS
Adult model with manual
heightadjustment.
REAL 9600 PLUS EL 24V
Adult model with electric
height adjustment.
REAL 2015
Adult model with back support
and manual height adjustment.
REAL 2624
Adult model with chest
support and manual height
adjustment
5.3. Electrical functions
The REAL 9600 PLUS EL 24V model can be equipped with up to three electrical functions:
electric height adjustment, electric brake (optional) and electric seat tilt (optional). These can
be adjusted in two ways; either using the control button located under the armrest or with the
hand-held controller.
The functions of electric height adjustment and electric seat tilt can be used at the same
time1and will then act as an aid to getting up. This is made easier by allowing the user to raise
the seat and keep their feet on the floor for the whole movement up. It also provides more
controlled support when the user sits down.
1 Only applies to electric models supplied from 2021-05-26.
16
Instructions for use for medical standing support and chest support chairs Configurations and settings
21-08907-UK-01

Control button
The control button is an electric control with three positions (off, up and down), which can
be used to adjust seat height, seat tilt or back recliner. With the option of several electrical
functions, the device is equipped with several control buttons. If the device is equipped with
an electric brake, there is a special control button with two positions (sleep mode and switch
between activated and deactivated) for this.
Seat height
The seat height control button is located under the
frontedge of the right armrest, see Figure 5.1.
Adjustment:
1. Press up for upward movement.
2. Press down for downward movement. Figure 5.1. Control button for adjusting seat
height.
Brake
The brake control button is located on the outside
underthe right armrest, see Figure 5.2.
Activation and deactivation of brake:
1. A short press activates the brake.
2. A short press on the same button deactivates the
brake. Figure 5.2. Control button for activation and
deactivation of brake.
Seat tilt
The seat tilt control button is located under the front
edgeof the left armrest, see Figure 5.3.
Adjustment:
1. Press up for backward seat tilt.
2. Press down for forward seat tilt. Figure 5.3. Control button for adjusting seat tilt.
Hand-held controller
The hand-held controller (optional) is available in two versions, wired controller and wireless
remote control. These are available in models with 1 function or 4 functions. The 1-function
is intended to only control raising and lowering. The 4-function model can control all four
functions. The hand control also has a button lock function (see Figure 5.7).
PLEASE NOTE! Only three electric functions are available for the REAL 9600 PLUS EL 24V
model. The fourth, an electric backrest mechanism, is not compatible with this device.
17
Instructions for use for medical standing support and chest support chairs Configurations and settings
21-08907-UK-01

Seat height
Buttons on the upper left-hand keypad (see Figure 5.4).
Adjustment:
1. Press up for upward movement.
2. Press down for downward movement. Figure 5.4. Button for adjusting seat height.
Brake
Button in the centre at the bottom (see Figure 5.5).
Activation and deactivation of brake:
1. A short press activates the brake.
2. A short press on the same button deactivates the
brake. Figure 5.5. Button for activation and
deactivation of brake.
Seat tilt
Buttons on the upper right-hand keypad (see Figure 5.6).
Adjustment:
1. Press up for forward seat tilt.
2. Press down for backward seat tilt. Figure 5.6. Button for adjusting seat tilt.
Button lock
Activating and deactivating the button lock:
1. To activate the button lock, press and hold both of the
directional buttons of the relevant function for at least
three seconds.
2. To deactivate the button lock, press and hold both of
the directional buttons of the relevant function again
for at least three seconds.
PLEASE NOTE! The button lock only locks and unlocks
the function that has locked buttons. To lock multiple
functions, each function must be locked separately. Figure 5.7. Examples of activation or
deactivation of button locks for seat height.
18
Instructions for use for medical standing support and chest support chairs Configurations and settings
21-08907-UK-01
3s

5.4. Seat
The seats for the REAL 9500 PLUS and REAL 9600 PLUS EL 24V models come in two versions:
Saddle and ErgoMedic. Saddle seats are available for the following models: Classic (standard:
360 x 360mm), Medic (optional), ErgoMedic (optional), Coccyx Cut Out (optional), Round
(optional), Round Comfort (optional) and Round Extra (optional). Saddle ErgoMedic is also
available with memory foam padding. Compatible seats from the ErgoMedic seat system
(optional) are square. These are also available in memory foam.
The REAL 2015 and REAL 2624 models have Saddle seats.
Seat upholstery is available in four materials: plush, synthetic leather (optional), patterned
fabric (optional) and hygiene fabric (optional). Upholstery in hygiene fabric is used to protect
the seat from moisture. Plush and hygiene fabric covers (optional) are also available for all
seat designs and sizes. Hygienic fabric covers have a plush exterior and a plasticised interior.
For more information about upholstery, covers and available colours, please visit our website
www.mercado.se. For an overview of available upholstery and covers, read the document
'Seatsystems'.
Saddle Classic
The Saddle Classic seat is flat with 50mm of foam
padding (see Figure 5.8). The seat comes in sizes
360x360mm and 410x410mm.
Figure 5.8. The Saddle Classic seat.
Saddle Medic
The Saddle Medic seat is more of a positioning flat seat
with a raised nose and rear edge (see Figure 5.9).
The seat comes in one size: 400x360mm.
Figure 5.9. The Saddle Medic seat.
Saddle ErgoMedic
The Saddle ErgoMedic seat is flat with a raised nose and
raised outer corners on the rear edge (see Figure 5.10).
The seat comes in one size: 400x360mm.
Figure 5.10. The Saddle ErgoMedic seat.
19
Instructions for use for medical standing support and chest support chairs Configurations and settings
21-08907-UK-01

Saddle Coccyx Low Cut seat
The Saddle Coccyx Low Cut seat is flat with a lowered rear
edge to relieve the pressure on the coccyx and vertebral
column (see Figure 5.11). The seat comes in one size:
400x360mm.
Figure 5.11. The Saddle Coccyx Low Cut seat.
Saddle Coccyx Cut Out
The Saddle Coccyx Cut Out seat is flat and cut out in the
load zone to relieve pressure on the coccyx and vertebral
column (see Figure 5.12). The seat comes in one size:
400x360mm.
Figure 5.12. The Saddle Coccyx Cut Out seat.
Round Saddle
The Round Saddle seat is flat with 50mm of foam padding
that is used if a wider support surface is needed (see
Figure 5.13). The seat comes in sizes Ø350mm and
Ø400mm. Figure 5.13. The Round Saddle seat.
Round Saddle Comfort
The Round Saddle Comfort seat is flat with 80mm of foam
padding (see Figure 5.14). The seat has additional padding
for users who need to be seated for extended periods of
time and/or if a wider support surface is needed. The seat
comes in one size: Ø350mm. Figure 5.14. The Round Saddle Comfort seat.
Saddle Round extra
The Saddle Round extra seat has foam shaped like a
hemisphere (see Figure 5.15). The seat is primarily used
for pain patients who need to find a specific load area or
change the load area while seated. The seat comes in one
size: Ø350mm.
Figure 5.15. The Saddle Round extra seat.
ErgoMedic
The ErgoMedic seat is square with a tilted front edge (see
Figure 5.16). The tilted front edge makes it possible to
have a raised seat position and still reach the floor with
your feet. The seat comes in sizes 400x320mm and
440x350mm.
Figure 5.16. ErgoMedic seat.
20
Instructions for use for medical standing support and chest support chairs Configurations and settings
21-08907-UK-01
Other manuals for REAL 2000 Series
1
This manual suits for next models
1
Table of contents
Other Mercado Medic Indoor Furnishing manuals
Mercado Medic
Mercado Medic SCRIBA User manual

Mercado Medic
Mercado Medic REAL 9000 PLUS Series Assembly instructions

Mercado Medic
Mercado Medic REAL 9500 EL Assembly instructions

Mercado Medic
Mercado Medic REAL 9800 Coxit EL Assembly instructions

Mercado Medic
Mercado Medic REAL 9000 PLUS Series Assembly instructions

Mercado Medic
Mercado Medic REAL 8100 PLUS EL Assembly instructions

Mercado Medic
Mercado Medic REAL 9700 Coxit Assembly instructions

Mercado Medic
Mercado Medic REAL 2000 Series Specification sheet

Mercado Medic
Mercado Medic REAL 9000 PLUS Series User manual
Mercado Medic
Mercado Medic SCRIBA User manual