Optional Extras
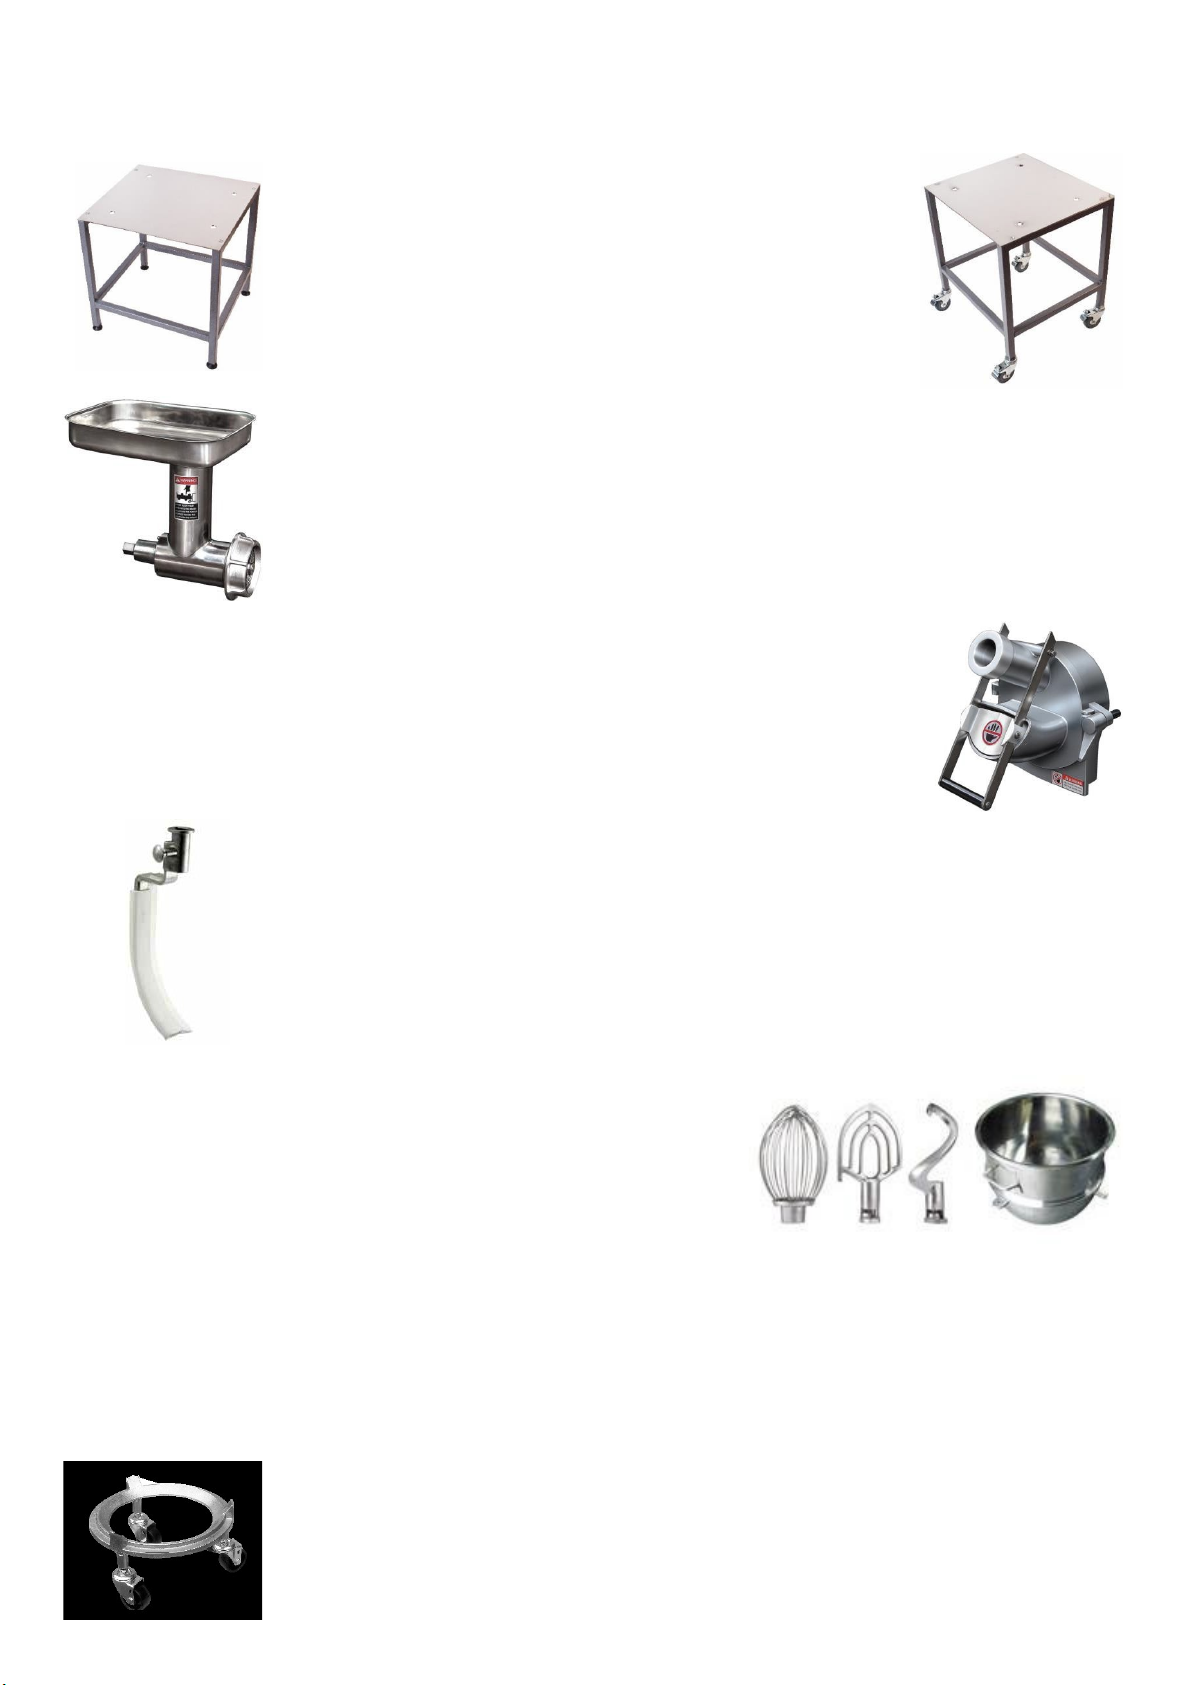
Floor Stand or Mobile Trolley
The Metcalfe floor stand / mobile trolley are designed for use
with both the SP100 & SP200 and features a robust stainless-
steel top with a mild steel frame and legs. The mobile trolley is
fitted with lockable castors.
•
(Stand) D x W x H (mm) 510 x 460 x 490
•
(Trolley) D x W x H (mm) 510 x 460 x 590
VH-12 (Mincer)
The VH-12 mincer attachment is ideal for meat, fish and other foods (without bone).
Supplied with stainless steel feed pan, sausage filler, pusher and 6mm extrusion plate.
V99S (Veg Prep Attachment)
The V99S veg prep attachment, come complete with 8 plates to grate or shred all types
of vegetable and fruit.
•
Grating: 2mm, 3mm, 4mm, 7mm & 12mm
•
Slicing: 2mm, 3mm & 8mm
Bowl Scraper
The bowl scraper eliminates the task of stopping mid batch to scrape product from
inside of bowl. It reduces recipe time by no more stopping during mix time. Most
recipes can have multiple steps reduced by use of the Bowl Scraper. In most cases,
reduces time required for initial incorporation of ingredients. Provides product
consistency by continuous scraping providing more consistent product results, batch
after batch.
Conversion Kit (SP-200, SP-30Hi, SP-40Hi, SP-60Hi & SP-80Hi)
The Metcalfe half-size conversion kit will convert your for example
SP200 20 litre mixer to a 10 litre . With the conversion kit, your mixer
can mix smaller batches just as effectively as you can with the larger
bowl. The kit includes a flat beater, whisk, dough hook and a bowl
with adapter.
SP-200 = 20 litre to 10 litre
SP-30Hi = 30 litre to 20 litre
SP-40Hi = 40 litre to 20 litre
SP-60Hi = 50 litre to 30 litre
SP-80Hi = 80 litre to 40 litre
Bowl Trolley (SP-30Hi & SP-40Hi)
The bowl trolley make it easy to transport the bowl when loaded with product.
Supplied as standard with SP-60Hi and SP-80Hi