manuals.online logo
Brands
  1. Home
  2. •
  3. Brands
  4. •
  5. Metra Electronics
  6. •
  7. Car Receiver
  8. •
  9. Metra Electronics 95-9310B User manual

Metra Electronics 95-9310B User manual

Other Metra Electronics Car Receiver manuals
Metra Electronics 99-7809B User manual

Metra Electronics

Metra Electronics 99-7809B User manual

Metra Electronics 99-5722 User manual

Metra Electronics

Metra Electronics 99-5722 User manual

Metra Electronics 99-8209 User manual

Metra Electronics

Metra Electronics 99-8209 User manual

Metra Electronics Nissan Pathfinder 2013-up User manual

Metra Electronics

Metra Electronics Nissan Pathfinder 2013-up User manual

Metra Electronics 99-7313 User manual

Metra Electronics

Metra Electronics 99-7313 User manual

Metra Electronics 95-7882B User manual

Metra Electronics

Metra Electronics 95-7882B User manual

Metra Electronics 99-2020 User manual

Metra Electronics

Metra Electronics 99-2020 User manual

Metra Electronics 99-8163 User manual

Metra Electronics

Metra Electronics 99-8163 User manual

Metra Electronics 99-5025 User manual

Metra Electronics

Metra Electronics 99-5025 User manual

Metra Electronics 99-7519B User manual

Metra Electronics

Metra Electronics 99-7519B User manual

Metra Electronics Hyundai Santa Fe 2007 95-7325 User manual

Metra Electronics

Metra Electronics Hyundai Santa Fe 2007 95-7325 User manual

Metra Electronics 99-7397B User manual

Metra Electronics

Metra Electronics 99-7397B User manual

Metra Electronics 99-8712 User manual

Metra Electronics

Metra Electronics 99-8712 User manual

Metra Electronics 95-7510 User manual

Metra Electronics

Metra Electronics 95-7510 User manual

Metra Electronics 99-7607B User manual

Metra Electronics

Metra Electronics 99-7607B User manual

Metra Electronics 99-6504 User manual

Metra Electronics

Metra Electronics 99-6504 User manual
Metra Electronics 99-5825S User manual

Metra Electronics

Metra Electronics 99-5825S User manual

Metra Electronics 99-6544B User manual

Metra Electronics

Metra Electronics 99-6544B User manual

Metra Electronics AT-807HD User manual

Metra Electronics

Metra Electronics AT-807HD User manual

Metra Electronics DP-3021B User manual

Metra Electronics

Metra Electronics DP-3021B User manual

Metra Electronics 99-9013HG User manual

Metra Electronics

Metra Electronics 99-9013HG User manual

Metra Electronics 99-7888 User manual

Metra Electronics

Metra Electronics 99-7888 User manual

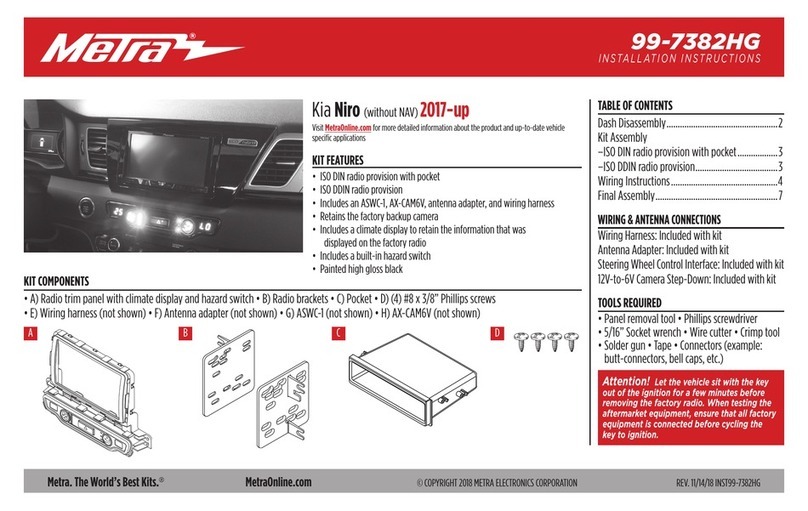
Metra Electronics 99-7382HG User manual

Metra Electronics

Metra Electronics 99-7382HG User manual

Metra Electronics 99-5600 User manual

Metra Electronics

Metra Electronics 99-5600 User manual

Popular Car Receiver manuals by other brands

Linear Series LS5050 Operation and installation manual

Linear Series

Linear Series LS5050 Operation and installation manual

Kenwood KRC-160 instruction manual

Kenwood

Kenwood KRC-160 instruction manual

Sony XR-CA430X Service manual

Sony

Sony XR-CA430X Service manual

T+A Elektroakustik K1 CD-RECEIVER operating instructions

T+A Elektroakustik

T+A Elektroakustik K1 CD-RECEIVER operating instructions

SoundMax SM-CDM1052 instruction manual

SoundMax

SoundMax SM-CDM1052 instruction manual

Xtrons HD107HD user manual

Xtrons

Xtrons HD107HD user manual

Mopar RB3 manual

Mopar

Mopar RB3 manual

Clarion ADDZEST DMZ615 owner's manual

Clarion

Clarion ADDZEST DMZ615 owner's manual

Sony XAV-601BT Specifications

Sony

Sony XAV-601BT Specifications

PIE GM12-POD/S Operation manual

PIE

PIE GM12-POD/S Operation manual

Hyundai H-910H instruction manual

Hyundai

Hyundai H-910H instruction manual

Sony XR-C6100 Service manual

Sony

Sony XR-C6100 Service manual

Sony CDX-L600X - Fm/am Compact Disc Player Installation/connections

Sony

Sony CDX-L600X - Fm/am Compact Disc Player Installation/connections

Motorola VWA63 Service manual

Motorola

Motorola VWA63 Service manual

Sound Storm STM93R user manual

Sound Storm

Sound Storm STM93R user manual

Nextar D3201 instruction manual

Nextar

Nextar D3201 instruction manual

Alpine CDE-163BT owner's manual

Alpine

Alpine CDE-163BT owner's manual

Kenwood KDC-X303 quick start guide

Kenwood

Kenwood KDC-X303 quick start guide

manuals.online logo
manuals.online logoBrands
  • About & Mission
  • Contact us
  • Privacy Policy
  • Terms and Conditions

Copyright 2025 Manuals.Online. All Rights Reserved.

METRA. The World’s best kits.™metraonline.com © COPYRIGHT 2016 METRA ELECTRONICS CORPORATION
REV. 1/21/2016 INST95-9310B
CAUTION: Metra recommends disconnecting the negative battery
terminal before beginning any installation, unless the vehicle
manufacturer recommends against so. Please check with your
local Dealership for more information. All accessories, switches,
climate controls panels, and especially air bag indicator lights
must be connected before reconnecting the battery or cycling
the ignition. Also, do not remove the factory radio with the key
in the on position, or the vehicle running. It would be best to
remove the key from the ignition and then wait a few seconds
before removing the factory radio.
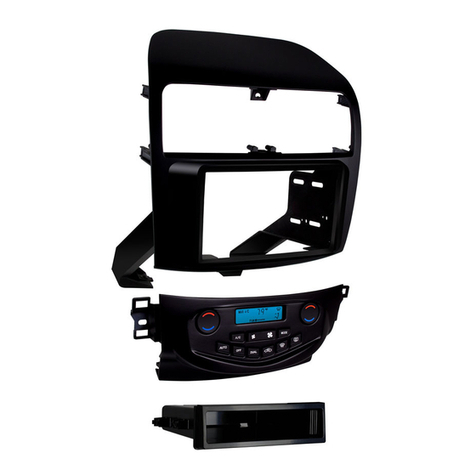
Installation instructions for part 95-9310B
• ISO DDIN radio provision
• Painted matte black
• Relocates the factory climate control and switches
• A) Radio trim panel • B) Back up housing • C) Radio brackets • D) Climate and switch panel housing
• E) Climate bracket • F) (4) #8 x 1/2” Phillips screws • G) (2) #8 x 3/8” Phillips screws • H) (2) panel clips
KIT FEATURES
KIT COMPONENTS
WIRING & ANTENNA CONNECTIONS (sold separately)
Wiring Harness: • 70-8590 • 70-9003 (nav models 02-06) Antenna Adapter: • 40-VW10 40-EU10 (nav models 02-06)
• Panel removal tool • Phillips screwdriver • Pick tool
TOOLS REQUIRED
BMW 3-Series 1999-2005,
3-Series (coupe, convertible) 2006, M3 2001-2006
(for factory switch panel with five separate openings)
95-9310B
AC ED
F
G H
B
Dash Disassembly ..............................................2-4
Kit Assembly
–ISO DDIN radio provision...................................... 5
Climate and Switch Panel Assembly .................... 6
Table of Contents
95-9310B
2
Dash Disassembly
1. Unclip and remove the trim panel
above the glove box. (Figure A)
2. Unclip and remove the trim panel
above the factory radio. (Figure B)
3. Remove (2) Phillips screws
securing the radio and then unplug
and remove the radio. (Figure C)
Continued on the next page
(Figure A) (Figure C)(Figure B)
95-9310B
(Figure D)
4. Unsnap and remove the climate
control panel. (Figure D)
5. Pull straight up on the shift knob to
remove. (Figure E)
6. Unclip and remove the boot around
the shift selector. (Figure F)
Continued on the next page
3
Dash Disassembly
(Figure E) (Figure F)
95-9310B
4
(Figure I)
(Figure J)
10. Remove (2) Phillips screws, and
then unclip and move aside the
vent assembly above the radio
opening. It is not necessary to
remove the assembly. But if
desired, there will be a cable
attached to the assembly that will
need to be removed. (Figure J)
11. For non-NAV equipped cars,
remove (2) Phillips screws
securing the plastic radio/climate
housing from radio/climate cavity,
and then remove.
Continue to kit assembly
Dash Disassembly
(Figure G)
(Figure H)
7. Remove (2) Phillips screws
securing the shift selector trim
panel, and then unclip and remove
the panel. (Figure G)
8. Open the upper door on the lower
switch panel. Using a pick tool, or
something suitable, disengage (2)
clips in the upper corners of the
tray to remove the tray and door.
(Figure H)
9. Remove (4) Phillips screws now
exposed securing the lower switch
panel, and then unplug and remove
the panel. (Figure I)
Note: All of the switches
will need to be removed and
installed into the new switch
panel provided. (Figure I)
95-9310B
5
(Figure B)
(Figure C)(Figure A)
1. Attach the radio brackets to the
radio using the screws supplied
with the radio. (Figure A)
2. Attach the back-up housing to the
radio/bracket assembly with the (4)
#8 x 1/2” Phillips screws supplied.
(Figure B)
3. Locate the factory wiring harness
and antenna connector in the
dash, and complete all necessary
connections to the radio and
climate control panel. Metra
recommends using the proper
mating adapter from Metra and/or
AXXESS. Re-connect the negative
battery terminal and test the radio
for proper operation.
Note: After all testing has been
performed, disconnect the
climate control panel, relocate
the harness to the lower switch
panel area, and then proceed to
the next step.
Kit Assembly
4. Secure the completed assembly
into the radio/climate cavity using
the (2) #8 x 3/8 inch screws
supplied.
5. Secure the vent assembly to the
vehicle using the (2) factory Phillips
screws removed in step 10 of dash
disassembly.
6. Attach (2) panel clips provided
with the kit onto the radio trim
panel (Figure C), and then attach
the panel to the radio assembly.
Secure the assembly to the vehicle
using the (2) factory Phillips
screws removed in step 3 of dash
disassembly.
Continue to climate and switch
panel assembly
95-9310B
6
1. Secure the climate bracket onto
the top of the climate and switch
panel housing. (Figure A)
2. Snap the climate control panel and
all switches into the climate and
switch panel housing. Connect all
electrical connectors, and then
secure the assembly into the lower
dash opening with the (4) factory
screws removed in step 9 of dash
disassembly. (Figure B)
3. Reassemble the dash in reverse
order of disassembly.
Climate and switch panel assembly
(Figure A) (Figure B)
95-9310B
7
REV. 1/21/2016 INST95-9310B
KNOWLEDGE IS POWER
Enhance your installation and fabrication skills by
enrolling in the most recognized and respected
mobile electronics school in our industry.
Log onto www.installerinstitute.com or call
800-354-6782 for more information and take steps
toward a better tomorrow.
Metra recommends MECP
certified technicians
Installation instructions for part 95-9310B
METRA. The World’s best kits.™metraonline.com © COPYRIGHT 2016 METRA ELECTRONICS CORPORATION
IMPORTANT
If you are having difficulties with the installation
of this product, please call our Tech Support line
at 1-800-253-TECH. Before doing so, look over
the instructions a second time, and make sure
the installation was performed exactly as the
instructions are stated. Please have the vehicle
apart and ready to perform troubleshooting
steps before calling.