Michel's CROP CATCHER User manual

Patent Pending
Approximate time to complete installation is 1-1/2”hours for two people
Recommended tools required for installing the Crop Catcher:
-9/16”socket
-7/16”socket
-Ratchet
-Extension
-Hammer
-Center Punch
-11/32”Drill Bit
-3/8”Drill
Industries, Ltd.
P.O. Box 119
St. Gregor, Sas
katchew
an
S0K 3X0 Canada
Ph#(306)366-2184 or Fax#(
306)366
-
2145

Unpack and check that all of the parts are with your Crop Catcher:
3
1
4
3
11
4
14
12 15
11
13
16 13
3
2 5
8
9 Note: If AGCO Mounting
3
7
Brackets are required
5 the kit will come in
10 Black.
11
STEP 1
11
1
6
12 Figure 1.
Bolt the Upright Support Brackets to the Mounting Brackets using two 3/8”carriage bolts. The
Upright Brackets are mounted on the flange side of the Mounting Bracket and the carriage
head is also on the bent flange side. Refer to the Figure 2 exploded view. Clamp the bracket
to a work bench with the bent flange to the outside. Remove the
protective covering on the plastic and wash with soapy water. Do not
use Glass Cleaner to clean the plastic, use the optional “Dust Away”
Plastic Cleaner supplied by Michel’s. This will create unwanted
static build up and cause dust to stick to the plastic.
Upright
Support
Bracket
Outside Plastic
Support Bracket
Bent
Flange
STEP 2
Figure 2.
Inside Plastic
Support Bracket
Figure 3.
Install the Outside Plastic Support
Brackets onto the Plastic using only
the top and bottom holes using ¼”
carriage bolts and locking nuts. Do
not tighten at this time. Next install
the outside plastic panel and the
Inside Plastic Support Brackets onto
two Upright Support Brackets as see
in Figure 3. Note: Nuts are installed
on the back side.
STEP 3
Insert the Plastic Center
Panel and install the
remaining Outside Plastic
Support Brackets and the
third Upright Support
Bracket as seen in Figure 4.
Making sure that the offset
brackets overlap and bolt
together properly. Install
the last plastic panel.
Outside Plastic
Support Bracket
Overlap
Figure 4.
Tighten Outside
Support Brackets
Do Not Tighten
Upright Support
Brackets
Figure 5.
STEP 4
Once the Crop Catcher is all
together the top and bottom
carriage bolts can be
tightened. Do not over
tighten as it may cause
damage to the plastic. It is
easier to tighten them if the
Crop Catcher is laying on it’s
face. Refer to Figure 5. Leave
the Upright Support Brackets
loose so the complete
assembly can slide up and
down.
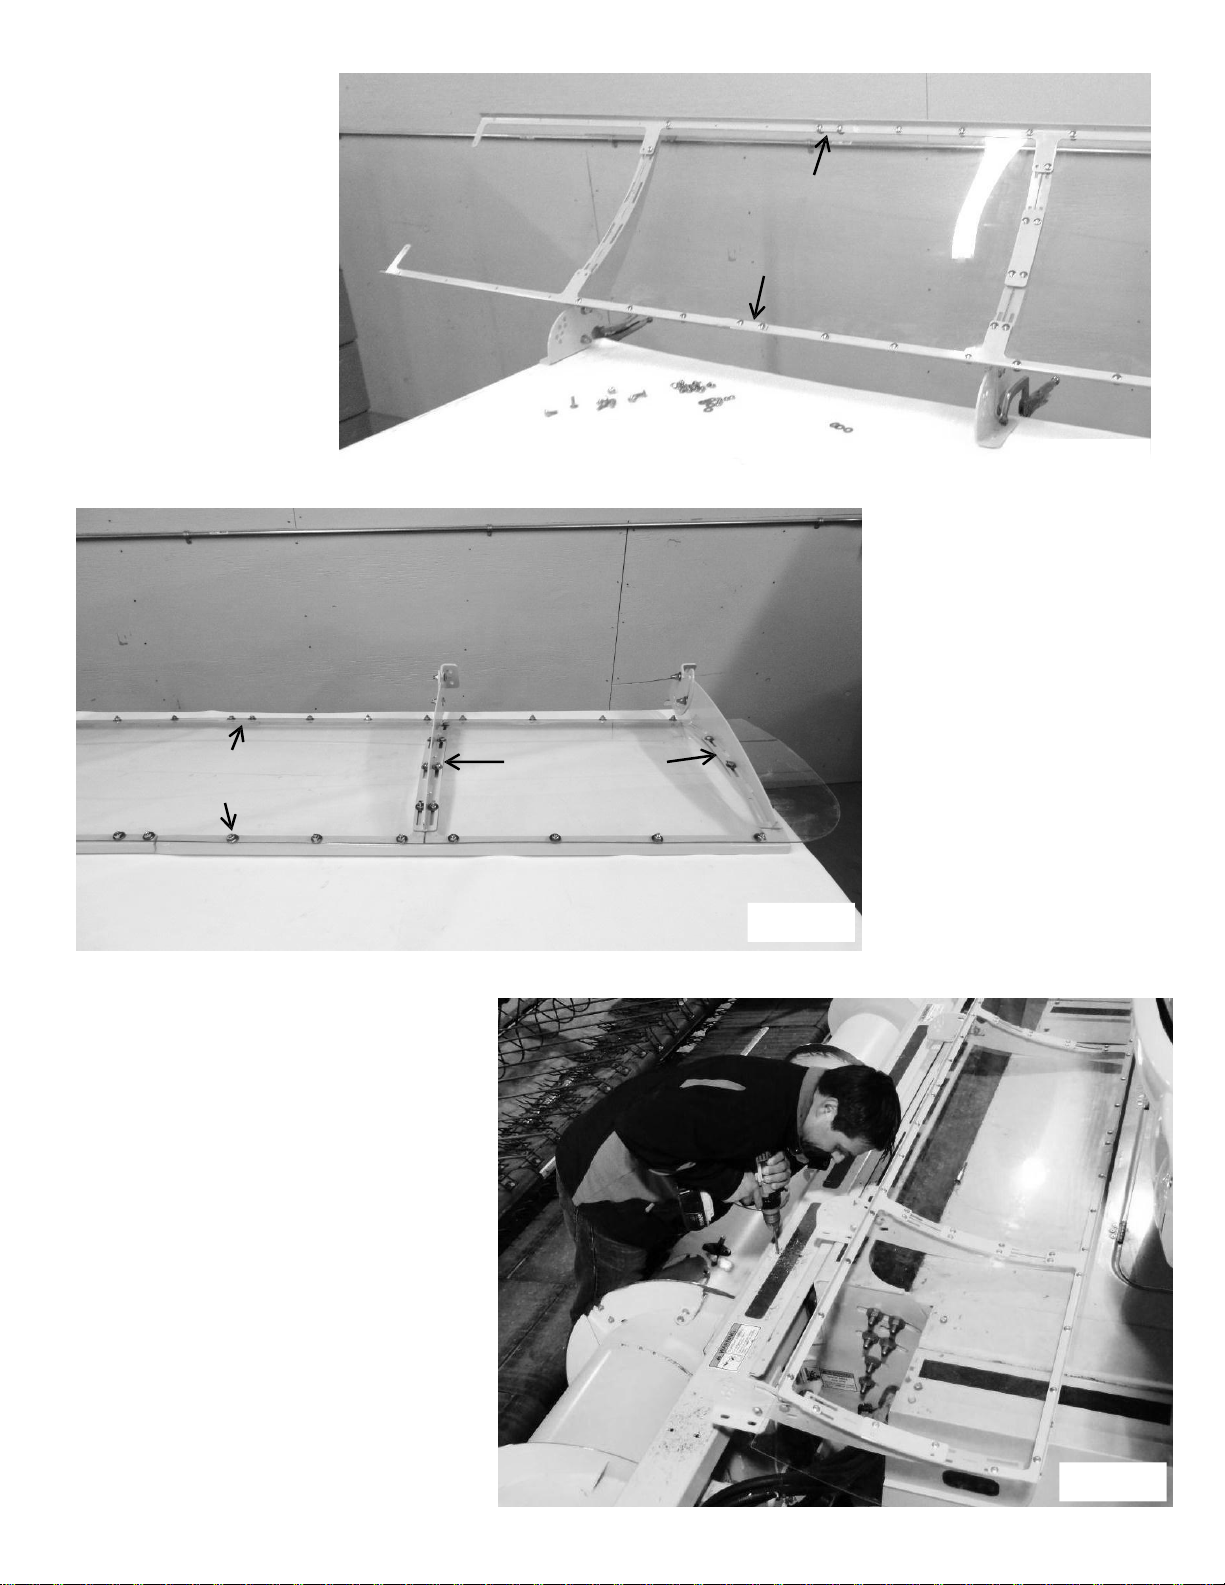
STEP 5
Center the Crop Catcher on the combine
header and Install the mounting brackets
flush with the front of the header tubing.
Mark the mounting locations with a center
punch and drill an 11/32”hole for the 3/8”
self-tapping bolts. Note: If installing onto a
straight cut header make sure that the hole
locations do not drill into the hydraulic
reservoir or lines. It is recommended to use
a drill or impact when installing the 3/8”self-
tapping bolts.
Figure 6.

STEP 6
To adjust the Crop Catcher it is recommended to have the
top 1”-2”past the center line of the auger. Refer to
Figure 7. This will allow maximum coverage while
maintaining enough angle to help keep the dust from
collecting on the back of the Crop Catcher. Once the
uprights are bolted in the desired position, push the glass
assembly down so as to have as little space as possible
between the header and the plastic. The carriage head
bolts on the Upright Support Brackets can now be
tightened. Do not over tighten as damage may occur to
the glass.
1”-2”
Small Gap
Figure 7.
Note:
Any time that the position of the Crop Catcher
is adjusted, ensure that it has sufficient
clearance. This includes, but is not limited to,
the cab and the reel on straight cut headers.
As seen in Figure 8.
Figure 8.
To Care for your new Crop Catcher use a plastic cleaner such as the optional
“Dust
Away” Plastic Cleaner supplied by Michel’s. Do not use Glass
Cleaner.
For assistance on your Crop Catcher, please contact Michel’s Industries Ltd.
Industries, Ltd.
P.O. Box 119
St. Gregor, Sas
katchew
an
S0K 3X0 Canada
Ph#(306)366-2184 or Fax#(
306)366
-
2145
Other Michel's Farm Equipment manuals


Popular Farm Equipment manuals by other brands


METAL PLESS
METAL PLESS MAXXPRO owner's manual

POWERHANDLING
POWERHANDLING PowerHandler A Series ASSEMBLY, OPERATION, SAFETY AND MAINTENANCE MANUAL

Topcon
Topcon ISOBUS Artemis Calibration and Operation Manual

PRONAR
PRONAR PWP900 Operator's manual

Woods
Woods TSG50 Operator's manual

Prevue Hendryx
Prevue Hendryx 4701 manual


