manuals.online logo
Brands
  1. Home
  2. •
  3. Brands
  4. •
  5. MICRO-EPSILON
  6. •
  7. Measuring Instrument
  8. •
  9. MICRO-EPSILON gapCONTROL 2711 User manual

MICRO-EPSILON gapCONTROL 2711 User manual

5. Laser Class
The gapCONTROL 2711 sensors operate with a semiconductor laser having a wavelength
of 658 nm (visible/red). The laser operation is indicated visually by the LED on the sensor.
Laser Class 2M
The gapCONTROL 2711 sensors with a maximum laser power up to 10 mW are classified
in Laser Class 2M (IIM). The following information labels are fitted to the sensor housing
(front and rear side).
iIf both information labels are hidden in the installed state, the user must ensure that
additional labels are fitted at the point of installation.
2
65W
IEC 60825-1: 2008-05
Hazard to the eye via laser radiation! Consciously close your eyes
or turn away if the laser radiation impinges on the eye.
Lasers of Class 2M are not subject to notification and a laser protection officer is not
required. Mark the laser area recognizable and everlasting.
Laser Class 3B
The gapCONTROL 2711 sensors with a maximum laser power up to 20 mW are classified
in Laser Class 3B (IIIB).
Injury to the eye or the skin via laser radiation! Consciously close
your eyes or turn away if the laser radiation impinges on the eye or
the skin.
Class 3B (IIIB) laser sensors are notifiable and a laser protection officer is required either.
During operation the laser area has to be restricted and marked. The following information
label should be fitted to the sensor housing (front and rear side):
Laser radiation
Avoid exposure to the beam
Class 3B Laser Product
IEC 60825-1: 2008-05
P50 mW; =658 nm iSensors of Laser Class 3B (IIIB)
need an external key switch
to switch off the laser, see
Chap. “Laser switching“.
Beam attenuator
The beam attenuator prevents access to all
laser and collateral radiation. The figures show
the sensor with closed and open beam attenu-
ator. The beam attenuator must be open during
measurement.
6. Connections, LED Displays
1394/
Ethernet
24 VDC
RS 422
laser on state
1394/Ethernet
24 VDC
RS 422
gapCONTROL 2711-x, top side gapCONTROL 2711-x(001), rear
side
The sensors are available in two versions: Sockets on the top side or on the rear side.
LED displays
LED “laser on“ Green: Laser on Note: The “status” LED flashes
green; long during active data
transmission and short for
controller accesses.
LED “state“:
Two-color LED
(red / green)
Green: Measurement
Green flashing: Data transmission
Red flashing: Error code
The state LED indicates different error conditions by flashing. If no flashing occurs for
several seconds, no error has occurred.
Power supply (Power)
Pin
no. Assignment connector “24 VDC“ Range: 11 V – 30 V
(Rated value 24 V)
DC;
maximum current
500 mA
1 6
2 5
3 4
View on solder pin
side, male cable
connector, counting
direction
anticlockwise
Standard
Color PC2700;
old version in ( )
Options 002, 003, 004, 005
Color PC2700(002)
1 24 V+ white (red) 24 V+ pink
2 Laser help
n.c.
n.c. LH+ gray
3Laser on/off n.c. Laser off+ yellow
4Laser on/off
n.c.
n.c. Laser off- green
5 Laser help n.c. LH- brown
6 24 V GND brown (black
or blue) 24 V GND white
The power supply is also possible using the FireWire connection cable, if the power sup-
ply needed is present in the PC with sufficient current intensity. When both voltages (1394
and power) are present, the higher voltage always takes over the supply of the sensor.
External laser switching
Series gapCONTROL 2711-x(002), gapCONTROL 2711-x(003), gapCONTROL 2711-
x(004) and gapCONTROL 2711-x(005) offer this function.
iSensors of Laser Class 3B (IIIB) need an external key switch to switch off the laser.
Use a serial key switch inside the control circuit to switch off the laser. You will find
details for the wiring in the instruction manual, Chap. 5.2.4.
RS422, Synchronization
Pin no. Assignment connector “RS422“ 1 6
2 5
3 4
View on solder
pin side, male
cable connector
The Pin numbers refer to
the gapCONTROL 2711
unit.
Micro-Epsilon recom-
mends the use of the
interface cable SC2700-
4.5 RS422 from the
optional accessories.
RS422 General 9-pin Sub-D 1
1 RX1 CH1 2
2 /RX1 /CH1 3
5 GND1 5
3 TX2 CH2 9
4 /TX2 /CH2 1
6 GND2 5
The RS422 port can be used with either of the following configurations:
- RS422: Loading of programs and transmitting of measurement results (ASCII format).
- Synchronization/Triggering: Synchronization resp. triggering using switching signals.
1) Optional RS422 interface cable (SC2700-4,5RS422) from Micro-Epsilon, compatible to
the RS422 to USB converter. All outputs or inputs are designed symmetrically. Internal
terminating resistors 120 Ohm.
FireWire connection (1394), standard link to the PC
8-pin connector, ODU 6-pin connector, Connector “1394“
The Pin numbers refer to the
gapCONTROL 2711 unit.
Micro-Epsilon recommends
using the FireWire con-
nection cable SC2700-4.5
FireWire from the recom-
mended accessories.
Pin no. Assignment Pin no. Assignment
1 GND_FireWire 2 GND_FireWire
2 TPA+ 4 TPB+
3 TPA- 3 TPB-
4 Screen 2 GND_FireWire
5 TPB- 5 TPA-
6 TPB+ 6 TPA+
7 Screen 2 GND_FireWire
8 +24 V_FireWire 1 +24 V_FireWire
2
8
3
7
6
5
4
1
View on solder pin side ODU
6
4
2
5
3
1
View on solder pin side
FireWire
The gapCONTROL 2711 sensor can also be supplied with operating voltage from the PC
on the 1394 connection socket. If its capacity is not sufficient, an appropriate voltage must
be connected to the 24 VDC socket.
Use the recommended FireWire connection cable.
A power supply via free cores in the FireWire connection cable is possible if these wires
are connected in the PC (Pin 1 to +8 … 30 VDC, typically 12 VDC; Pin 2 to ground on the
FireWire connector).
7. gapCONTROL 2711 with gapCONTROL Output Unit for Connection to an SPS
933-057
PHY
ISO
ASYN
IEEE 1394
I/O
01 02 03 04
24V 0V
+ +
--
PE PE
01 02
C
D
B
A
++
-
13 14
C
D
B
A
750-626
+
+ Ñ
-
-
Power jumper contacts
Supply via power
jumper contacts
24V
Status voltage supply
- Power jumper contacts
- System
Data contacts
System supply (OUT)
24 V
0 V
0 V
System supply (In)
24 V
0 V
C
D
B
A
750-600
OU Fieldbus Coupler OU-Filter BusterminationAnalog output module
Power jumper contacts
Digital output module
A1 A2
13 14
750-536
A3 A4
A5 A6
A7 A8
DO 2
Data contacts
DO 2
Status
D0 4
D0 6
DO8
DO 8
DO 1
Status
DO 7
DO 7
DO 1
DO 5
DO 3
A1 A2
13 14
C
D
B
A
MM
A3 A4
M M
750-555
AO 2
AO 1
AO 4
AO 3
V0V0
V0V0
Power jumper
contacts
Data contacts
Function
Error
Please insert the gapCONTROL Setup Soft-
ware CD in the CD-ROM device. Follow the
dialog through the installation process.
A. Reading of installation help
B. Installation of software
C. Further informations in the online docu-
mentation
Mount the sensor according to the installation instructions.
Connect the sensor and the PC to the FireWire cable.
Connect the sensor to display or monitoring units.
Connect the sensor to the power supply.
The connectors for the operating voltage, switching signals and FireWire are fitted with
push-pull locking. Pull apart at the grip to release the connection.
Connect the shield of the power supply cable to the PE protective earth conductor
of the main power supply. Close plug-in connections not needed with the supplied
protective caps for ODU sockets. Switch on the power supply (24 VDC).
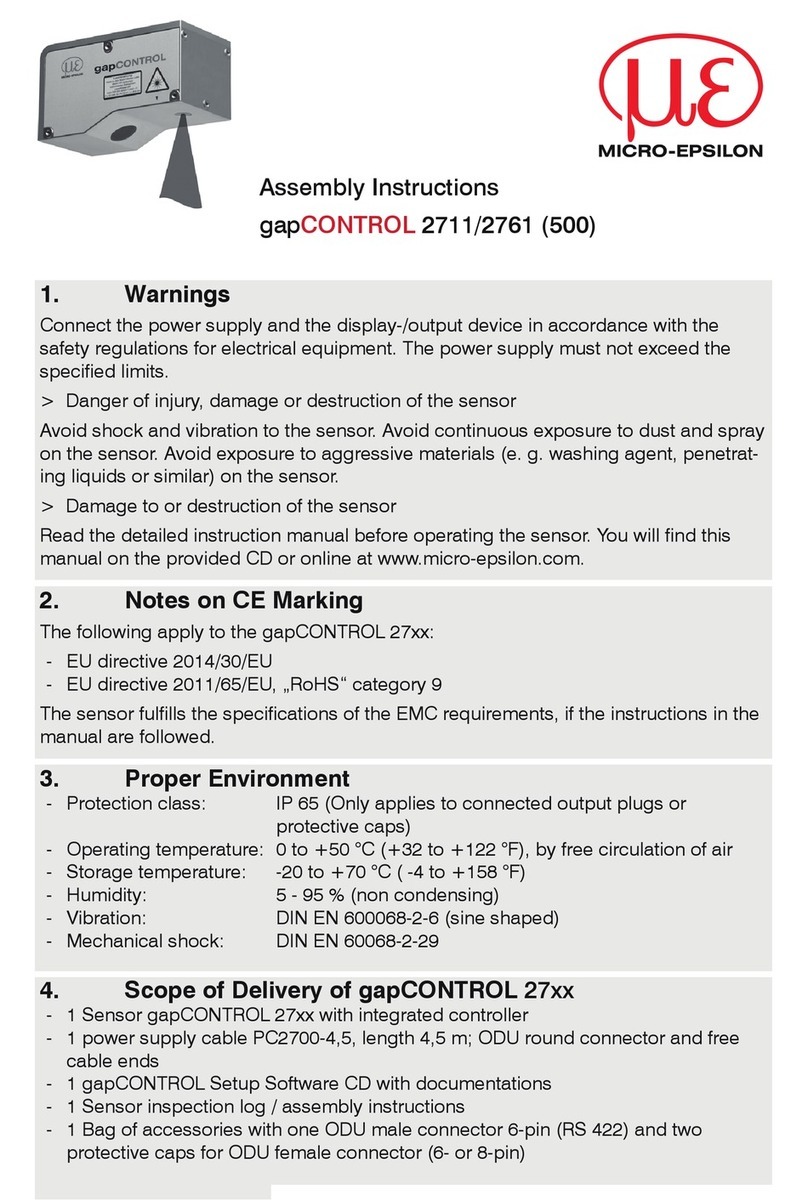
Assembly Instructions
gapCONTROL 2711 FireWire
www.micro-epsilon.com
MICRO-EPSILON Messtechnik GmbH & Co. KG
Königbacher Str. 15
94496 Ortenburg / Germany, Tel. +49 (0) 8542 / 168-0
*X9771247.001-A05* X9771247.001-A051105GBR
1. Warnings
Connect the power supply and the display-/output device in accordance with the safety
regulations for electrical equipment. The power supply may not exceed the specified
limits.
> Danger of injury, damage or destruction of the sensor
Avoid shock and vibration to the sensor. Avoid continuous exposure to dust and spray
on the sensor. Avoid exposure to aggressive materials (e. g. washing agent, penetrating
liquids or similar) on the sensor.
> Damage to or destruction of the sensor
Read the detailed instruction manual before operation of the sensor. You will find this
online or on the provided CD.
2. Notes on CE Identification
The following applies to the gapCONTROL 2711:
EU directive 2004/108/EC and EU directive 2011/65/EC, “RoHS” category 9
Products which carry the CE mark satisfy the requirements of the quoted EU directives
and the European standards (EN) listed therein. The EC declaration of conformity is kept
available according to EC regulation, article 10 by the authorities responsible at
MICRO-EPSILON MESSTECHNIK GmbH & Co. KG
Königbacher Straße 15 94496 Ortenburg /Germany
The measuring system is designed for use in industry and satisfies the requirements.
3. Proper Environment
- Protection class: IP 65
- Operating temperature: 0 to +50 °C (+32 to +122 °F), by free circulation of air
- Storage temperature: -20 to +70 °C ( -4 to +158 °F)
- Humidity: 5 - 95 % (non-condensing)
4. Standard Equipment gapCONTROL 2711
- 1 Sensor gapCONTROL 2711 with integrated controller
- 1 Power supply cable PC2700-4.5, length 4.5 m; ODU round connector and free cable
ends
- 1 CD with drivers, programs and documentation
- 1 Sensor inspection log / assembly instructions
- 1 Bag of accessories with one ODU male connector 6-pin (RS422), S31BQC-P06M-
FG0-6000, and two protective caps for ODU female connector (6- or 8-pin)
L1
L2
L3
N
PE
Supply
- System
Supply
- Field
933-057
PHY
ISO
ASYN
IEEE 1394
I/O
01 02 03 04
24V 0V
+ +
--
PE PE
01 02
C
D
B
A
++
-
13 14
C
D
B
A
750-626
+
+ Ñ
-
-
230 V
24 V
230 V
24 V
OU-Filter module
OU Fieldbus Coupler
Connect the supply voltage
Digital output modules need a field supply of 5 VDC or 24 VDC depending on the module
type.
After mounting of the modules install the required wiring.
Connect the “System supply (out)“ terminals of the OU-Filter module to the “System
supply (in)“ terminals of the OU-Fieldbus Coupler (0 V and 24 V).
Connect the system supply (in) of the OU-Filter module to the power supply (0 V and
24 V).
Connect the field supply (in) of the OU-Filter module to the power supply (0 V and
24 V resp. 0 V and 5 V).
iThe system supply and field supply should be separated to ensure the bus opera-
tion and electrical isolation in case of a short-circuit of an actor.
8. System Requirements gapCONTROL Setup Software
- Windows 7 (32 bit and 64 bit, Windows 8 or 8.1 (32 bit and 64 bit)
- 1 GHz or faster (32 bit and 64 bit) processor / 1 GB RAM
- Screen resolution: 1024 x 768
9. Quick Start: Commissioning, Software
Install the software. iOnly connect the sensor to the peripheral equipment, if it is disconnected from
the power supply, i.e. only when the operating voltage is switched off. The sensor
needs a warm-up time of typically 20 minutes for high precision measurements.
Install the drivers for the measuring system according to the instructions on the sup-
plied CD-ROM ([CD]:\\Documentation\english\Installation\index.html).
10. Transmitting Measurement Results
gapCONTROL 2711 Firewire offers the following options for transmitting measurement
results:
- Firewire Interface
Analog output of measurement values (via optional Output Unit)
Digital output of switching signals (via optional Output Unit)
- RS422 Interface
Modbus RTU protocol
Measurement value transmission in ASCII format
11. Driver Installation for Windows XP
Connect the sensor to the PC with the IEEE
1394 FireWire cable. If the driver installation
does not start automatically, look in the device
manager for the measurement system (Start >
Control Panel > System > Hardware > Device
Manager). You will find gapCONTROL either un-
der „Imaging Devices“ or under “Other devices“.
Click with the right mouse button on the device
and select “Update Driver...“.
Select “No, not this time” and click “Next”.
Select „Install the software automatically (recommended)“ and click “Next“.
The driver is now installed, followed by
the dialog “Hardware Installation “.
Confirm this dialog with “Con-
tinue Installation“.
Click „Finish“, to complete the
driver installation.
If you want to install the driver later, or
if the driver installation is completed
successfully, you can install the driver
for gapCONTROL manually.
12. First Profile
Now start the gapCONTROL Setup Software. Click on „Display Profiles“ in the main
window.
If the software shows the error mes-
sage “No gapCONTROL found” in the
status line, please check the installed
driver in the device manager (Start >
Control Panel > System > Hardware
> Device Manager).
On the left side you can adjust the
settings for your measurement task,
the right side shows the profile data
and information about the measure-
ment.
13. Further Information
Please refer to the enclosed online manual. You will find details to the separate programs
in the respective instruction manuals or in the instruction manual of this sensor, Chap. 6.2.
You will find the instruction manuals online or on the provided CD.
Other MICRO-EPSILON Measuring Instrument manuals

MICRO-EPSILON colorCONTROL ACS7000 User manual

MICRO-EPSILON

MICRO-EPSILON colorCONTROL ACS7000 User manual

MICRO-EPSILON capaNCDT 6222 User manual

MICRO-EPSILON

MICRO-EPSILON capaNCDT 6222 User manual

MICRO-EPSILON CS02 User manual

MICRO-EPSILON

MICRO-EPSILON CS02 User manual

MICRO-EPSILON scanCONTROL 2910 User manual

MICRO-EPSILON

MICRO-EPSILON scanCONTROL 2910 User manual

MICRO-EPSILON eddyNCDT SGS 4701 User manual

MICRO-EPSILON

MICRO-EPSILON eddyNCDT SGS 4701 User manual

MICRO-EPSILON thicknessCONTROL MTS 8201.LLT User manual

MICRO-EPSILON

MICRO-EPSILON thicknessCONTROL MTS 8201.LLT User manual

MICRO-EPSILON capaNCDT 6630 User manual

MICRO-EPSILON

MICRO-EPSILON capaNCDT 6630 User manual

MICRO-EPSILON combiSENSOR 64x0 User manual

MICRO-EPSILON

MICRO-EPSILON combiSENSOR 64x0 User manual

MICRO-EPSILON eddyNCDT 3060 Installation guide

MICRO-EPSILON

MICRO-EPSILON eddyNCDT 3060 Installation guide

MICRO-EPSILON NLS3181 User manual

MICRO-EPSILON

MICRO-EPSILON NLS3181 User manual

MICRO-EPSILON optoControl 1200 User manual

MICRO-EPSILON

MICRO-EPSILON optoControl 1200 User manual

MICRO-EPSILON capaNCDT 6200 Installation guide

MICRO-EPSILON

MICRO-EPSILON capaNCDT 6200 Installation guide

MICRO-EPSILON eddyNCDT 3060 User manual

MICRO-EPSILON

MICRO-EPSILON eddyNCDT 3060 User manual

MICRO-EPSILON confocalDT IFD2410 Series User manual

MICRO-EPSILON

MICRO-EPSILON confocalDT IFD2410 Series User manual

MICRO-EPSILON optoCONTROL 2520 User manual

MICRO-EPSILON

MICRO-EPSILON optoCONTROL 2520 User manual

MICRO-EPSILON combiSensor KSH5 User manual

MICRO-EPSILON

MICRO-EPSILON combiSensor KSH5 User manual

MICRO-EPSILON colorCONTROL MFA-1 User manual

MICRO-EPSILON

MICRO-EPSILON colorCONTROL MFA-1 User manual

MICRO-EPSILON optoCONTROL 1202 User manual

MICRO-EPSILON

MICRO-EPSILON optoCONTROL 1202 User manual

MICRO-EPSILON optoCONTROL CLS1000 User manual

MICRO-EPSILON

MICRO-EPSILON optoCONTROL CLS1000 User manual

MICRO-EPSILON interferoMETER IMS5400-DS19 Installation guide

MICRO-EPSILON

MICRO-EPSILON interferoMETER IMS5400-DS19 Installation guide

MICRO-EPSILON interferoMETER IMS5400-DS Installation guide

MICRO-EPSILON

MICRO-EPSILON interferoMETER IMS5400-DS Installation guide

MICRO-EPSILON eddyNCDT 3010 User manual

MICRO-EPSILON

MICRO-EPSILON eddyNCDT 3010 User manual

MICRO-EPSILON scanCONTROL 25 BL Series User manual

MICRO-EPSILON

MICRO-EPSILON scanCONTROL 25 BL Series User manual

MICRO-EPSILON optoNCDT ILR 1183 User manual

MICRO-EPSILON

MICRO-EPSILON optoNCDT ILR 1183 User manual

Popular Measuring Instrument manuals by other brands

Owon PC321-TY quick start guide

Owon

Owon PC321-TY quick start guide

R&S FSW Series user manual

R&S

R&S FSW Series user manual

LAISAI LS686 user guide

LAISAI

LAISAI LS686 user guide

GeoMax ZIPP10 pro series quick guide

GeoMax

GeoMax ZIPP10 pro series quick guide

Omron K3MA-J Series user manual

Omron

Omron K3MA-J Series user manual

ST DELTA SOLAR user manual

ST

ST DELTA SOLAR user manual

Bender ISOMETER iso1685DP-425 manual

Bender

Bender ISOMETER iso1685DP-425 manual

Trotec TA 300 operating manual

Trotec

Trotec TA 300 operating manual

SICK MARSIC280 operating instructions

SICK

SICK MARSIC280 operating instructions

Ralston Instruments LC20-TA quick start guide

Ralston Instruments

Ralston Instruments LC20-TA quick start guide

Laser Green Laser user manual

Laser

Laser Green Laser user manual

S+S Regeltechnik AERASGARD AFTM- LQ-CO2 -Modbus operating instructions

S+S Regeltechnik

S+S Regeltechnik AERASGARD AFTM- LQ-CO2 -Modbus operating instructions

Air Liquide OP 110 operating manual

Air Liquide

Air Liquide OP 110 operating manual

Topcon RL-H3C instruction manual

Topcon

Topcon RL-H3C instruction manual

SIGLENT TECHNOLOGIES SNA5000A Series Service manual

SIGLENT TECHNOLOGIES

SIGLENT TECHNOLOGIES SNA5000A Series Service manual

SATO SK-670PH instruction manual

SATO

SATO SK-670PH instruction manual

Fluidwell F011-P manual

Fluidwell

Fluidwell F011-P manual

Hioki 3169-20 instruction manual

Hioki

Hioki 3169-20 instruction manual

manuals.online logo
manuals.online logoBrands
  • About & Mission
  • Contact us
  • Privacy Policy
  • Terms and Conditions

Copyright 2025 Manuals.Online. All Rights Reserved.