Microgem PDQeX User manual

PDQeX Nucleic Acid Extractor
Instructions for use
Applicable models:forensicGEM, phytoGEM, prepGEM
IMPORTANT: Read the instructions before operating this device

2PDQeX Instruction Manual
20190513
Purpose of the PDQeX
MicroGEM's PDQeX Nucleic Acid Extractor extracts DNA from a wide range of
biological substances. It should only be used by trained personnel or under
supervision.
The PDQeX is designed to extract DNA from the following types of samples. If your
target material is not covered in this document, please contact us at
•Forensic evidence or Human Identification (HID) samples containing:
oSaliva
oBlood
oHair follicles
oSpermatozoa
oHuman or animal cell tissue
oTouch / trace samples
•Plant material
oLeaves and stems
oPlant pathogens
•Animal tissue
oMuscle and Fat
oHair follicles
•Bacteria
•DNA Viruses
•Insects
The PDQeX family of devices is intended to assist scientists and technicians to
simplify their workflow by reducing DNA extraction to hands-off, automated
processes. This is achieved inside a disposable, sealed cartridge and thereby protects
the integrity of the sample and isolates staff from potential pathogens.
The PDQeX uses different cartridges for different substrates. Each cartridge is designed
to perform a single extraction and the reagents within the cartridges are formulated
differently for different substrates (tissue, saliva, semen, blood, plant).
The elegance and simplicity of this system removes the need for robotic extraction or
time-consuming manipulation by a laboratory technician.
WARNING: Do not modify this equipment without authorisation
from the manufacturer.

3PDQeX Instruction Manual
20190513
Specifications
Sample Capacity
24 samples, standard 96 well spacing
For use with
PDQeX Cartridges (200 µL)
Interface
5” Touch Screen (colour)
Voltage (24 V DC adapter included)
100-240 VAC, 2A, 50/60Hz
Power
96 Watts at peak draw
Thermal Profiles
Pre-installed & User Programmable
Programmable Thermal Range
34-120 C
Dimensions
22 x 18 x 18.5 cm (L x W x H)
(8.5”x 7” x 7.25”)
Weight
10.6 Lbs (4.8 kg)
Process Overview
Step 1. Sample preparation.
Sample preparation prior to extraction will vary from sample to sample.
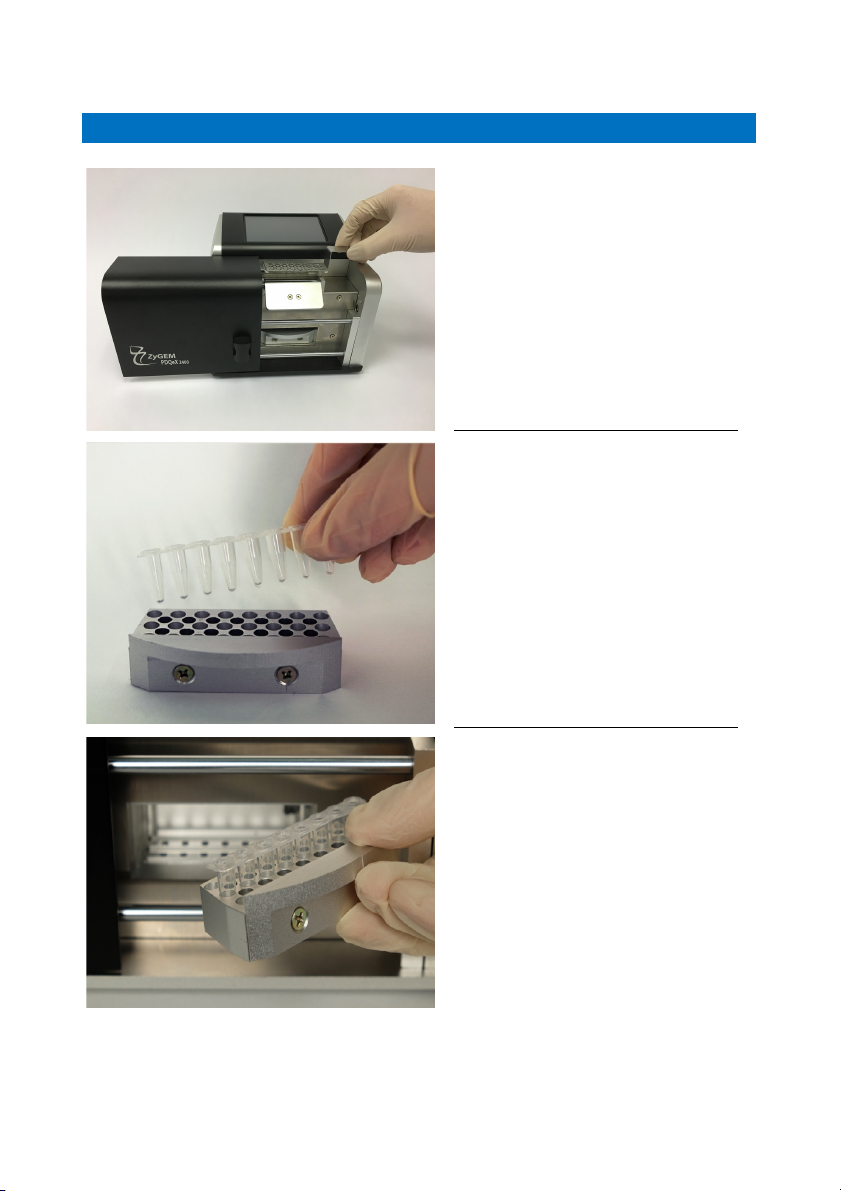
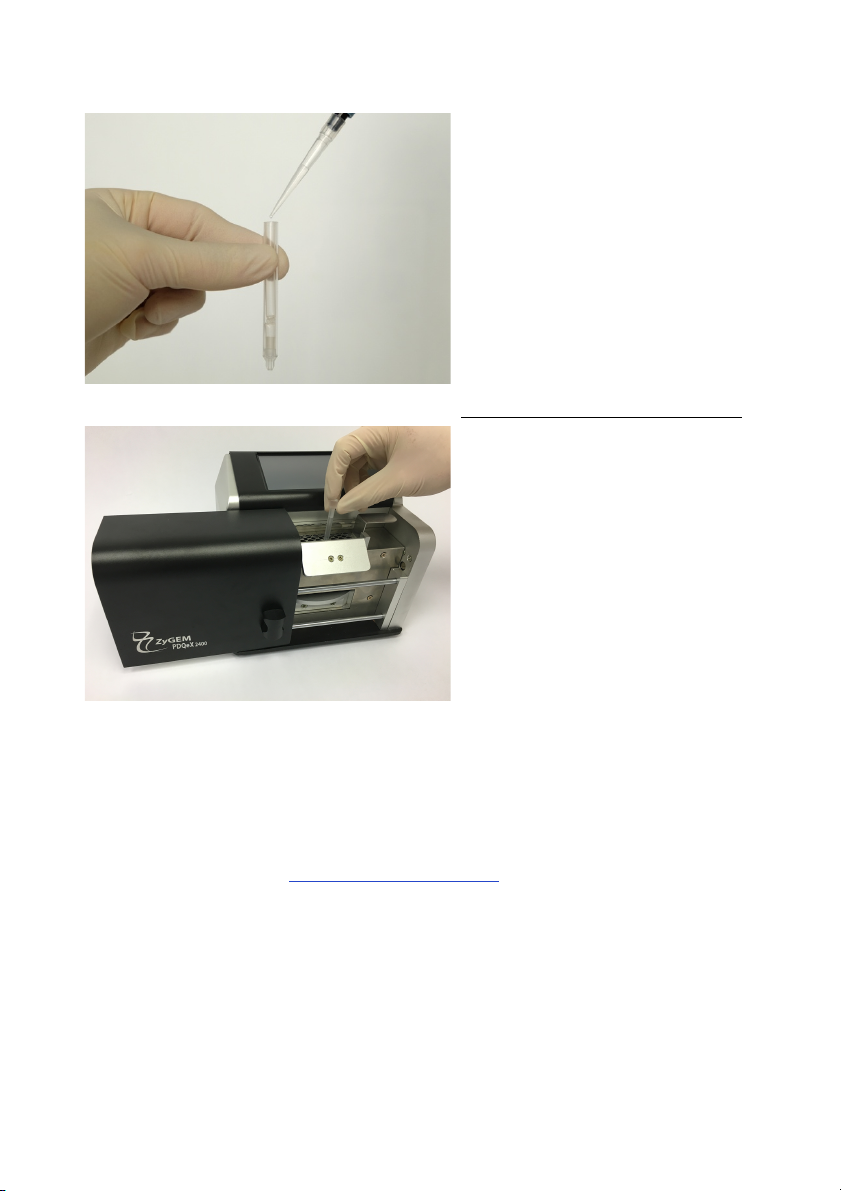
Step 2. Cell Lysis, DNA liberation and purification.
This multi-stage process all takes place inside the disposable cartridge.
1. The cells are lysed by a cocktail of enzymes. This cocktail varies for different
substrates. For example, the lysis of leaf tissue requires a complex mixture of
hydrolases and a program on the PDQeX to activate them.
2. A temperature regimen is carried out by the hardware. This brings into play
the different enzymes at different temperatures. The final temperature
inactivates the enzyme leaving a lysate containing DNA, cell debris and
denatured protein.
3. On completion of the extraction, the tube forces the extract through a
special column. The columns are tailored to each sample type and designed
to remove anything that may inhibit Taq DNA polymerase or enzymes used
in most other downstream processes.
4. The samples are finally ejected into PCR tubes in a standard format (8 strips
or 3x8 strips).
The whole process takes between 7 and 20 minutes to produce a batch of DNA
extracts.
Step 3. Quantification.
The DNA is now ready for quantification. Because the heat step denatures the DNA,
we do not advise using OD or fluorescent dye methods. The best method for
quantification is qPCR. With normalised samples, quantification is not always
required and the DNA can be used directly.

4PDQeX Instruction Manual
20190513
Operating Instructions
WARNING: Only to be operated by a trained scientist or laboratory technician.
Machine Set-up.
Connect the PDQeX to the power supply and switch on.
WARNING: The PDQeX should be installed in such a way that affords easy
access for disconnection from the main supply.
Back of the PDQeX
Only use the power supply
provided with the PDQeX
Do not place the PDQeX close to
any RF transmitter. A low power
transmitter such as a cordless or
mobile phone should be at least 2M
from the PDQeX, and a powerful
transmitter such as a commercial TV
or radio broadcast antenna should
be at least 25M distant.
The USB port is for software
upgrades only and is not to be used
for other purposes.
Front of the PDQeX

5PDQeX Instruction Manual
20190513
Loading and unloading the PDQeX.
The door of the PDQeX slides
horizontally left and right.
The door will lock during operation
or UV decontamination.
Before inserting any cartridges into
the block, make sure the cartridge
lifting tool is in place. This will
make it easier for you to remove the
spent cartridges after the run has
finished.
Pull out the collection tube rack
(see the picture on the previous
page if you are unsure where this is)
and place 0.2 ml PCR tubes firmly
into the rack.
The rack will accommodate up to
three 8-strip PCR tubes.
Make a mental note where you have
put the collection tubes. You will
need to make sure that you insert
the cartridges in the correct holes
Replace the rack into its slot in the
PDQeX machine. And firmly push
into place

6PDQeX Instruction Manual
20190513
Load your sample into the
PDQeX extractor cartridge.
This part of the procedure will
differ depending on the sample
type. In some cases, it will be in
a suspension; in others it may be
a solid sample or a disk of
storage card.
Insert the cap into the cartridge.
Load the cartridges into the holes
of the heating block. When all
are loaded, lower the hinged flap
onto the caps of the cartridges
and close the sliding door.
MAKE SURE THE CARTRIDGE
POSITIONS IN THE BLOCK
CORRESPOND TO THE
COLLECTION TUBES BELOW –
OTHERWISE YOU WILL
CONTAMINATE THE MACHINE.
WARNING; THE LOWER END OF THE PDQEX CARTRIDGE IS DESIGNED TO FIT INSIDE
THE COLLECTOR TUBE. IF IT IS ABOVE THE UPPER LIP OF THE TUBE, THERE IS A RISK
OF CROSS CONTAMINATION. THIS PROBLEM MAY OCCUR WHEN LOWER PROFILE
COLLECTION PLATES OR TUBES ARE USED.
DRAWER TAILORED FOR THE PROFILE FOR YOUR TUBES

7PDQeX Instruction Manual
20190513
After running the machine (see
the programming instructions
below), your DNA will be in the
collection tubes.
First remove the PDQeX
extractor cartridges and dispose
of them. You will then be able to
slide out the drawer.
Cap your tubes and store at -
20°C
Notes
•The door of the machine will lock while the block is hot.
•If you wish to carry out sequential runs, make sure the block temperature
has fallen below the first temperature used in your program.
•Take care when removing tubes to prevent contamination of the block.
•If you abort a run, the tubes cannot be re-used.

8PDQeX Instruction Manual
20190513
Running your program
The PDQeX is very easy to use and is controlled by a touch-screen. The following
section provides an overview to help you navigate through the controls.
1. The!Home!Screen
The Home Screen is self-explanatory.
Three options are provided:
1. System settings
2. UV treatment (sterilisation)
3. Extraction
To the left of the screen is a map to
help you navigate the program.
2. System!Settings
The System Settings window allows
you to:
1. Set Date and Time
2. Reset to Factory Defaults
3. Provide links so that you can
obtain more information.
Future releases will allow you to pick
your preferred language.
2.1!Factory!Reset!
The machine arrives with a number
of pre-installed programs. If you lose
these, a Factory Reset will restore
them.
However, if you choose to do this, all
of your custom programs will be
removed and the Date and Time will
need to be reset.

9PDQeX Instruction Manual
20190513
2.2!Date!and!Time!
Set the Date and Time using the
keypad and press Save.
The last System option gives you a
QR-code so that you can access
more information from the
MicroGEM webpage.

10 PDQeX Instruction Manual
20190513
3. UV!treatment
The PDQeX is fitted with four UV strip lights to reduce DNA contamination. Three
lights are situated below the collection tube drawer. The drawer should be removed
before treatment to allow the light to access the lower side of the heating block. The
other is above the heating block. During UV treatment, the sliding door will be
locked.
Press “UV Treatment” on the Home
screen.
The procedure takes 30 minutes and
can be interrupted at any time.
You can press Interrupt to stop the UV
treatment.
After the treatment is complete, press
Return to go back to the Home screen.
NOTE: The UV treatment will only
remove superficial contamination. For
more serious spills, clean the inside of
the device using a cotton bud soaked
in 1% bleach. Follow this by swabbing
with 80% ethanol.

11 PDQeX Instruction Manual
20190513
4. Running!pre-defined!programs!on!the!PDQeX
From the Home Screen, press
Extract.
Select the program you wish to run.
The temperature regimen will be
shown.
Press Start.
The PDQeX will switch to a display
that shows the progress of your
program.
At any time, you can terminate the
program but be aware that your
tubes and samples cannot be re-run.
Once the run is complete, you will
be prompted to return to the
“extraction screen”.

12 PDQeX Instruction Manual
20190513
5. Writing!a!custom!program!on!the!PDQeX
From the Home Screen, press
Extract.
Instead of choosing one of the pre-
defined programs, you can write
your own. This can be useful for
optimising the PDQeX for your
specific sample type.
Press the +Button.
Click on the dashed line at the top of
the screen ( *- - - - - - - - * ) to give
your program a name. You cannot
save your program without a name.
Press on the temperature/time place-
holders ( - - ) to add your values
…and enter the temperature (°C) or
the time (min).
Press Save.
NOTE: You must add a final cool
step before the program can be
saved.
When you have completed all the
entries you need, press “Save” and
follow the steps in Section 4.

13 PDQeX Instruction Manual
20190513
6. Error!messages
Running the PDQeX is easy, so it is unlikely that anything serious will go wrong. A
few common mistakes are detected by the machine.
The PDQeX has a sensor at the back
of the collection tube drawer. If the
drawer is not in place or is crooked,
the machine will not run. This
prevents the DNA from being
seriously contaminated.
The block is hot and we don’t want
you to burn your fingers.
Make sure the sliding door is fully
closed before running the PDQeX.
This is not an error but a reminder
that you cannot run the same tubes
twice if you abort a run.

14 PDQeX Instruction Manual
20190513
Cleaning and Sterilisation.
•Collection trays and cartridge holders should be cleaned and sterilised in
accordance with laboratory procedure.
•The UV treatment option on the control screen gives a 30 minute UV light
exposure (see page 9).
•In the event of gross contamination of the heating block or machine, clean
with a cotton swab and wipe with 0.5% bleach followed by a thorough
removal of the bleach with water-dampened swabs and wipes.
•Aluminium parts of this machine should not be soaked in Virkon or Bleach.
Extended use of chemical agents such as these will corrode the parts.
WARNING DO NOT GET LIQUIDS INSIDE THE MACHINE
If you are forced to use bleach, make sure that ALL of it is removed.
Inspection and Maintenance
The PDQeX has been designed to require no operator maintenance.
Disposal of Waste
Used PDQeX tubes are to be disposed of as hazardous waste in accordance to
laboratory protocols.
Contact Information
MicroGEM
The Innovation Centre
2 Venture Road
Southampton
S016 7NP UK
Tel: +1 434 529 8212 EST
Web: www.microgembio.com
Email: info@microgembio.com
Other manuals for PDQeX
1
This manual suits for next models
3
Table of contents
Other Microgem Laboratory Equipment manuals