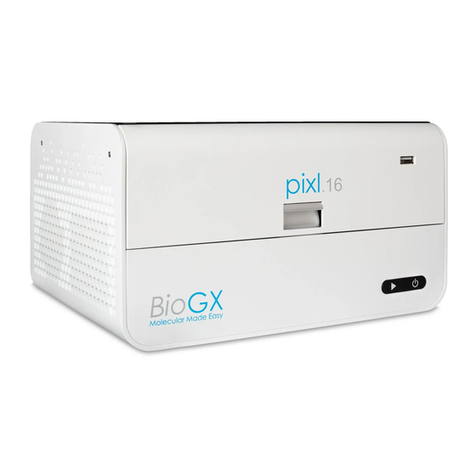
BioGX pixl Manual

pixlTM Real-Time PCR Platform
Instructions for Use Manual
Page 1 of 37
pixlTM Real-Time PCR Platform
Instructions for Use Manual
Revision 01-1.81
The instruction manual must be properly placed in the product box during shipment.
The user is required to keep this manual in a safe place so that it can be consulted when needed.
All rights reserved. All information contained in this manual is subject to change without notice.
Manufactured exclusively for BioGX by:
Anitoa Biotechnology (Hangzhou) Co., Ltd.
Room 210, 2F, Building 2, No. 558 Bin An Road,
Changhe Street, Binjiang District, Hangzhou City,
Zhejiang Pro Hangzhou Zheilang, CN 310000
Phone: +86-571-87067761
Riomavix S.L.
ES-AR-000001202
Calle de Almansa 55,
ID Madrid 28039
Spain

pixlTM Real-Time PCR Platform
Instructions for Use Manual
Page 2 of 37
Warranty
BioGX warrants the pixlTM Real-Time PCR Platform you are using has been fully tested and performs as
described in the manual. The instructions and safety warnings given in this instruction manual must be
followed to use the instrument, otherwise the warranty does not apply.
Software description
The software is a necessary tool for the operation of the instrument. For improving its performance and
reliability, the manufacturer has the right to modify its functions or design, etc., in advance or
subsequently without informing the clients, and the manufacturer has all the intellectual property rights of
the modified version.
Responsibility statement
BioGX is not responsible for direct or indirect incidental damages arising from non-compliance with the
operating instructions or incorrect use of the pixlTM Real-Time PCR Platform. Only BioGX technicians may
inspect or provide parts for the instrument in question, and we are not responsible for direct or indirect
collateral damage resulting from the user's disassembly and replacement of parts. The responsibility of
BioGX is limited to the repair of the machine and the replacement of the parts, but not for the results of
the experiments.
Intellectual property statement
The manufacturer owns the copyright for this manual and other proprietary information provided. The
information in this instruction manual may only be used for installation, training, and service. Any copying,
reproduction, or translation of this information, in whole or in part, into other languages, or other
processes not mentioned herein, without the prior written consent of the manufacturer, is prohibited. The
manufacturer holds the copyright to the software mentioned in this instruction manual and has the right to
grant the customer the right to use the software.

pixlTM Real-Time PCR Platform
Instructions for Use Manual
Page 3 of 37
Contents
1. Important Notes 5
Intended Use 5
Assumptions 5
Instrument grounding 5
Placement of the Instrument 6
Precautions 7
After-sales service 7
Packaging, storage, and transportation marking 8
Instrument Identification Information 9
2. Product overview 10
Features 11
Key parameters 12
Applications 13
Instrument models 13
3. Hardware set-up guide 14
Environmental conditions 14
Instrument packing list 14
Instrument unpacking procedure 15
Instrument Power Requirements 15
Light indicator states 16
Power cord connection 16
Instrument Use 16
pixlTM Real-Time PCR Platform tube/plasticware requirement 18
4. Software Operation Guide (Android Software) 19
Launch software 19
Experimental settings 20
Saved Test Parameters 22
Run the experiment 23
Experimental analysis 24
Data export 28
5. Instrument Maintenance 30

pixlTM Real-Time PCR Platform
Instructions for Use Manual
Page 4 of 37
Instrument cleaning 30
Instrument protection 30
Waste disposal 31
Overheat protection 31
Operation requirements 31
Preventative maintenance requirements 31
Chemical Hazard Warning 32
6. Troubleshooting guide 34
Issue with connecting the power 34
The test tube does not fit or the lid does not close with PCR tubes loaded 34
Touchscreen blank on power up 35
Temperature Profile Abnormal 35
Additional troubleshooting guide 36
Revision History 37

pixlTM Real-Time PCR Platform
Instructions for Use Manual
Page 5 of 37
1. Important Notes
The following safety measures must be observed during all phases of operation,
maintenance, and servicing of this instrument. Failure to observe these measures or the
warnings and precautions indicated in this manual will likely undermine the safety
standards for which the instrument was designed and manufactured and the intended
scope of use of the instrument.
Intended Use
The pixlTM Real-Time PCR Platform is an in vitro diagnostic device intended to perform
fluorescence-based PCR to provide detection of nucleic acid sequences in various
specimens derived from human, animals, or environmental samples. The pixlTM Real-Time
PCR Platform is intended to be used by trained professionals in combination with in vitro
diagnostic assays. The following safety measures must be observed during all phases of
operation, maintenance, and servicing of this instrument. Failure to observe these
measures or the warnings and precautions indicated in this manual will likely undermine
the safety standards for which the instrument was designed and manufactured and the
intended scope of use of the instrument.
Assumptions
This manual assumes that end users possess the following:
• Molecular biology knowledge necessary for nucleic acid sample preparation/analysis.
• Reagent manufacturer documentation for appropriate use of assay(s).
• Knowledge of Microsoft® Windows® 10 operating system (if applicable).
• Knowledge necessary for computer data storage and computer file transfers.
Instrument grounding
To ensure the personal safety of the operator, please use the power adapter provided by
the manufacturer, which has a 10A three-prong grounding plug at the input end. When
using the adapter, please use a grounding socket that matches the plug to ensure that the
input power line of the instrument is reliably grounded.

pixlTM Real-Time PCR Platform
Instructions for Use Manual
Page 6 of 37
Use of power supply
Before the instrument adapter is connected to the power cord, it must be ensured that
the AC power supply voltage (100 to 240 VAC) and frequency (50/60Hz) are consistent
with those required by the instrument adapter. When making the power cord connection,
make sure that the instrument power switch is off. Do not touch the power switch and
power cord with wet hands. Do not disconnect the power cord when the instrument is not
powered. Keep power cord away from hot surfaces. Do not clean the instrument when it is
not disconnected. Please turn off the power when the instrument is no longer in use.
Power cord
The instrument should normally use the power cord supplied with it. If the power cord is
broken, it must be replaced without repair. When replacing the power cord, it must be
replaced with the same type of power cord of the same specifications. When this
instrument is in use, do not place anything on the power cord, and do not place the power
cord in a place where people move around.
Connect the power cord and ensure that the plug is secured into the socket. Disconnect
power cord at the adapter connection point.
Placement of the Instrument
1) The instrument should not be placed in a location where it is difficult to disconnect the
power supply.
2) The instrument uses semiconductor cooling and fan-assisted heat dissipation, so when
placing the instrument, ensure that there is no obstacle within 15 cm around the
instrument, and when multiple instruments are used at the same time, the distance
between each instrument should be not less than 30 cm.
3) The instrument should be placed in a location with the following parameters: low
humidity, dust-free, no running water, well ventilated, no corrosive gases, no magnetic
field interference, away from direct sunlight or strong light sources. Place the
instrument on a horizontal and stable surface.
4) High ambient temperature will affect the testing performance of the instrument or
cause malfunction. Do not use this instrument in the place of direct sunlight and strong
light source to avoid affecting the fluorescence detection of the instrument, and it
should be far away from heating, stove, and all other heat sources.
5) Turn off the power when the instrument is not in use. When the instrument is not used
for an extended period, unplug and store to prevent dust accumulation.

pixlTM Real-Time PCR Platform
Instructions for Use Manual
Page 7 of 37
Precautions
1) During the test operation, protect instrument electronic exposure to liquids.
2) The consumables and reagents used in the test should be disposed of according to the
relevant standards and should not be discarded or dumped at will.
3) If there are hazardous substances in the test, related training must be conducted before
using them.
4) After use, the hazardous substances should be handled and stored properly in strict
accordance with the relevant regulations.
5) The test personnel who operate the instrument need to be trained and have relevant
qualifications.
6) When handling toxic, corrosive, or infectious substances, safety goggles and gloves
must be worn.
7) To avoid burns, do not touch the metal module when the instrument is running or
immediately after the operation.
8) Do not open the instrument during operation, doing so will cause abnormal
experimental results.
After-sales service
1) After receiving the instrument, please confirm the warranty card. Contact the BioGX or
authorized distributor if you have any questions.
2) After unpacking the instrument, please keep the packing box and packing materials
should the instrument require after-sales service.
3) The instrument must be disinfected before shipping for after-sales service.

pixlTM Real-Time PCR Platform
Instructions for Use Manual
Page 8 of 37
Packaging, storage, and transportation marking
Table 1.1. Package, storage and transportation identification.
Symbol
Title
Description
Position
Fragile
This symbol is used to indicate that
the product is a precision instrument
and should be handled carefully and
gently.
On the packing
carton
This Way
Up
This symbol is used to indicate the
instrument orientation must be kept
upward during handling, storage and
use, and must not be placed sideways
or upside down to avoid damage to the
instrument.
On the packing
carton
Keep Dry
This symbol is used to indicate that
the instrument must not be stored in a
humid environment or in a place
where it can be splashed with liquid.
On the packing
carton
Stacking
Height
This symbol is used to indicate that a
maximum of 5 boxes can be safely
vertically stacked.
On the packing
carton
Handle
With Care
This symbol is used to indicate that
the instrument should be handled,
stored, and used with care to avoid
any impact on the performance of the
instrument.
On the packing
carton

pixlTM Real-Time PCR Platform
Instructions for Use Manual
Page 9 of 37
Instrument Identification Information
Table 1.2. Instrument identification information.
Symbol
Description
The location on the instrument where
the symbol will appear
Caution, Hot surface
On the equipment
Date of Manufacture
On the equipment nameplate
CE marking
On the equipment nameplate
Caution
On the equipment nameplate
In vitro diagnostic medical
instrument
On the equipment nameplate
Waste stream disposal
status
On the equipment nameplate
Catalog number
On the equipment nameplate
Serial number
On the equipment nameplate
Consult instructions for use
On the equipment nameplate
FCC marking
On the equipment nameplate

pixlTM Real-Time PCR Platform
Instructions for Use Manual
Page 10 of 37
2. Product overview
The pixlTM Real-Time PCR Platform is a portable, high performance real-time quantitative
PCR system with an optional large 10-inch touch screen for integrated operation. The pixlTM
Real-Time PCR Platform is equipped with a multi-channel fluorescence optical system
powered by an ultra-low-light CMOS bio-imaging sensor. The pixlTM Real-Time PCR Platform
is optimally suited for applications where portability, minimal space, and fast time-to-result
is required. The applications of the pixlTM Real-Time PCR Platform include: point-of-care
molecular diagnostics test (POCT), food safety and environment testing, agriculture,
veterinary and research laboratories where bench space is limited.
Figure 2.1. pixlTM Real-Time PCR Platform.

pixlTM Real-Time PCR Platform
Instructions for Use Manual
Page 11 of 37
Features
●Compact and rugged design. No internal moving parts, and no need for
calibration.
●Multi-wavelengths up to 4-channels fluorescence sensing capability
1
.
●Cross platform software for Android® OS, with cloud-ready connectivity.
●Low power requirement. External supply with ~90W active peak power for
both 4 well and 8 well devices. External supply with ~140W active peak power
for 16 well devices.
●Battery-backup option for outdoor use and power loss protection.
●Efficient and fast: with ultra-fast temperature rise and fall system and unique
fluorescence collection chip technology, fast detection can be achieved
without specific consumables.
●Touch operation: available 10-inch LCD touch screen, integrated touch
operation, no external computer, simple and convenient.
●Lightweight and portable: compact and portable body (247 x 188 x133 mm
for 16 well devices), light weight (2.6 kg for 16 well devices), easy to move,
strong environmental adaptability.
●Stable and reliable: the whole machine has no moving parts, and the
structure is sturdy and durable without regular calibration even after a long
time of use.
●Intelligent management: optional 4G module allows remote management or
cloud management of experimental data as needed.
●Multiple options: Support 2 or 4 fluorescence channels (more channels can
be customized), suitable for most of current dyes, no cross interference
between channels, no need for regular calibration maintenance.
●Stable light source: independent LED light source for each fluorescence
channel, stable and non-decaying LED light source, no need for regular
replacement.
●High sensitivity chip: the unique "Ultra-Low-Light CMOS Image Sensor (CIS)
Chips", millisecond-level extremely fast shooting, stable and reliable data.
1
Support Intercalating dyes, hydrolysis probes and FRET probes

pixlTM Real-Time PCR Platform
Instructions for Use Manual
Page 12 of 37
Key parameters
Table 2.1. Instrument key features and specifications.
Capacity (# of wells)
pixl.4: 4 wells
pixl.8: 8 wells
pixl.16: 16 wells
Channels (# of Fluorophores per well)
1. FAM/SYBR Green
2. JOE/HEX/VIC/TET
3. ROX/Texas Red
4. CY5/LIZ/Cy5.5)
Multiplex capability
Up to 4 targets per well
Minimum detection threshold
4 copies
Dynamic range
>1.0E9
Signal Interface
USB 2.0, Bluetooth® 2.0
Excitation source
High endurance LED
Detector
Ultra-low-light CMOS Bio-imaging chip
Thermal system
Solid-state, Peltier-based
Tube/plate formats
0.2 mL, 4 or 8-tube strip
Reaction volume
10 µL –60 µL
Excitation Range:
460 nm –670 nm
Emission Range
510 nm –720 nm
DNA probes supported:
DNA binding dyes, hydrolysis probes and
hybridization probes.
Temperature Uniformity
<= ±0.25°C
Temperature control resolution
<= ±0.1 °C
Temperature Ramp Rate
6°C/s heating; 4°C/s cooling
Detection accuracy
Ct value Cv <= 3%
Size
pixl.4: 198 mm (L) x 134 mm (W) x 98 mm (H)
pixl.8: 147 mm (L) x 182 mm (W) x 99 mm (H)
pixl.16: 247 mm (L) x 188 mm (W) x 133 mm (H)
Weight
pixl.4: 1.2 kg
pixl.8: 1.45 kg
pixl.16: 2.6 kg
Power supply
(Adapter provided that accepts 110 V/240 V AC)
pixl.4 and pixl.8: DC 10 V, 90 W
pixl.16: DC 15 V, 9.6 A, 144 W

pixlTM Real-Time PCR Platform
Instructions for Use Manual
Page 13 of 37
Applications
●Point-of-care molecular diagnostics
2
●Food safety test
●Environmental microbial-threat monitoring
●Agriculture DNA testing
●Forensic testing
●Research and educational lab use
●Drug quality assurance testing
Instrument external dimensions
Figure 2.2. pixlTM Real-Time PCR Platform product dimension.
Instrument models
Table 2.2 Instrument models.
Model (Cat. No.)
Channel
Sample throughput
FQ1044 or
pixl.4 (650-004-PXL)
4 channels
4 wells
MQ1084 or
pixl.8 (650-008-PXL)
4 channels
8 wells
MQ4164 or
pixl.16 (650-016-PXL)
4 channels
16 wells
2
Clinical clearance required.

pixlTM Real-Time PCR Platform
Instructions for Use Manual
Page 14 of 37
3. Hardware set-up guide
This chapter describes the use and storage conditions of the pixlTM Real-Time PCR
Platform, its structural components, unpacking from shipping box,
installation/uninstallation of the software, and preparation for power-up.
Environmental conditions
1) Transportation and storage conditions of the instrument
a. Environmental temperature:-5℃to 40℃
b. Relative humidity:≤75%
2) Working conditions requirements
a. Environmental temperature:15℃to 35℃
b. Environmental humidity:35% to 75%
c. Input voltage:DC 15 V 9.6 A
Instrument packing list
After opening the box, please check the contents of the box according to the packing
list. If the items are found to be damaged or missing, please contact the BioGX
immediately.
Table 3.1 Packing list within each pixlTM Real-Time PCR Platform.
Accessory
Quantity
pixlTM Real-Time PCR Platform
1
Power Adapter
1
Power Cable
1
USB Cable
1
USB Drive
1
Product QA Certification
1
Factory Inspection Report
1
Warranty Card
1
Certificate of Conformity
1

pixlTM Real-Time PCR Platform
Instructions for Use Manual
Page 15 of 37
Instrument unpacking procedure
1) The outer packaging of the product is a cardboard box, filled with shock-absorbing foam
inside. After unpacking, first check whether the items you receive are missing or
damaged.
2) If the outer packaging of the product is obviously damaged during transportation,
please do not use it and contact BioGX.
3) Check the completeness of the provided accessories against the packing list (Table 3.1).
4) If the instrument or accessories have been damaged or lost in transit, please inform the
shipping company and authorized distributor or BioGX.
Instrument Power Requirements
The instrument is powered through an external AC/DC power adapter. The power adapter
accepts AC input ranging 110 V to 240 V and produces DC output of 15 V
3
.
The DC power input connector port is located at the back of the instrument. Once the
power is provided, the green power indicator light will turn on.
Figure 3.1. Rear image of pixlTM Real-Time PCR Platform identifying ports and power
switch.
3
10.5 V for pixl.4 and pix.8 models

pixlTM Real-Time PCR Platform
Instructions for Use Manual
Page 16 of 37
Light indicator states
There are two LED indicator lights. The green light is used to indicate power supply. The
green LED indicator is illuminated as long as the instrument is powered.
Power cord connection
1) Adapter connection: the adapter supplied with the instrument should be used to
connect the adapter to the instrument.
2) Power cord connection: use the power cord provided with the instrument. When
connecting, the instrument power switch should be in the "off" state, and then turn
on the instrument switch after connecting.
Instrument Use
1) Insert the DC connector into the power jack of the instrument until it clicks, indicating
it is properly connected (Figures 3.2.1 –3.2.3)
2) Turn on the instrument power switch (power switch) and the instrument power
indicator illuminates (green).
3) Open the flap of the instrument and put the collected sample tubes into the sample
table position shown in the figure.
4) Close the flap, run the test, the instrument starts normally and then the operation
indicator lights on (blue).
Figure 3.2.1 Rear image of the pixlTM Real-Time PCR Platform power jack and power switch
locations.
Power Jack
Power Switch

pixlTM Real-Time PCR Platform
Instructions for Use Manual
Page 17 of 37
Figure 3.2.2. Rear image of the pixlTM Real-Time PCR Platform with power cord adapter
connected.
Figure 3.2.3 Front image of pixlTM Real-Time PCR Platform with lid open.
When the adapter DC
interface is inserted, the
flat surface should face up
and the curved surface
should face down and
should not be installed
backwards.
Flip Cover Control
Switch
Sample Well Location
Instrument Running Indicator
Light

pixlTM Real-Time PCR Platform
Instructions for Use Manual
Page 18 of 37
pixlTM Real-Time PCR Platform tube/plasticware requirement
The pixlTM Real-Time PCR Platform requires the use of full transparent PCR tubes with flat
optical caps (Figure 3.3 and 3.4).
Figure 3.3. pixlTM Real-Time PCR Platform compatible 8-tube PCR strip.
Figure 3.4. pixlTM Real-Time PCR Platform compatible PCR tube dimensions in English (left)
and Metric (right) units.
List of PCR tubes compatible with pixlTM Real-Time PCR Platform
UltraFlux® i PCR Tubes with Caps. SSIBio Part Number: 3247-00
(https://www.ssibio.com/search-results/?display=search&newSearch=true&keywords=3247-00)
EasyStrip™Plus Tube Strip with Attached Ultra Clear Caps. Thermo Fisher Part Number: AB2005
(https://www.thermofisher.com/order/catalog/product/AB2005)
Axygen® 0.2 mL Polypropylene PCR Tube Strips and attached Flat Cap Strips, 8 Tubes/Strip, 8 Flat
Caps/Strip, Clear. Corning Product Number: PCR-0208-AF-C
(https://ecatalog.corning.com/life-sciences/b2b/US/en/Genomics-%26-Molecular-Biology/PCR-Consumables/PCR-
Tubes-and-Strip-Tubes/Axygen%C2%AE-PCR-Strip-Tubes/p/PCR-0208-AF-C)

pixlTM Real-Time PCR Platform
Instructions for Use Manual
Page 19 of 37
4. Software Operation Guide (Android Software)
pixlTM Real-Time PCR Platform software can be used to set up experiments, run
experiments, and collect, analyze and manage experimental data. The software
contains three main functional modules, namely "Test", "Data”and "Setup".
1) "Test" module: It mainly includes creating new experiments, setting experimental
parameters, importing experimental templates and running experiments.
2) "Data" module: mainly contains experimental data analysis, upload, import data,
export data, export PDF, standard curve.
3) "Setup" module: mainly contains upload configuration, user management, user
switching, WLAN, Bluetooth, language, virtual keyboard, date and time, display,
application information, version update, software version check, instrument number.
Launch software
1) After the instrument is turned on, it automatically enters the main interface of the
software - Test.
Figure 4.1. pixlTM Real-Time PCR Platform software interface page.

pixlTM Real-Time PCR Platform
Instructions for Use Manual
Page 20 of 37
Experimental settings
1) In the Test interface, click “New Experiment” (Figure 4.2) the right panel is the
Experiment Information parameter that allows for editing Experiment Name, Sample
Name (well position) and Channel Selection (fluorophore selection). Click "Next" to
proceed to Cycling Parameters.
Figure 4.2 pixlTM Real-Time PCR Platform New Experiment interface.
2) Cycling Program Interface (Figure 4.3) allows for thermocycling parameters to be
programed (parameters such as reaction temperature, reaction time, number of
cycles, photo stage, etc.).
Figure 4.3. pixlTM Real-Time PCR Platform Cycling Program interface.
Other manuals for pixl
1
Table of contents
Other BioGX Laboratory Equipment manuals
Popular Laboratory Equipment manuals by other brands

Forma Scientific
Forma Scientific 1184 manual

Thermoline Scientific Equipment
Thermoline Scientific Equipment TGO-80W operating instructions
Steinberg Systems
Steinberg Systems SBS-LI-8-12V user manual
MMR Technologies
MMR Technologies elan2 digital user manual

Ken A Vision
Ken A Vision Video Flex 5400 installation manual
REPLIGEN
REPLIGEN TangenX PRO PD LHV user guide
