Midea P5 Series User manual

INSTRUCTION MANUAL
Vacuum Cleaner
PLEASE READ THE
MANUAL CAREFULLY
BEFORE USING AND
KEEP IT PROPERLY
FOR FUTURE USE
Warning notices: Before
using this product, please
read this manual carefullly
and keep it for future
reference.
The design and
specifications are subject to
change without prior notice
for product improvement.
Consult with your dealer or
manufacturer for details.
P5
MCS2021WB
EN, PL, CZ, SK, HU, RU, UK, ET, LT, LV, RO, SL

2
English..................................................................
Polish....................................................................
Czech................................................................
Slovakian..........................................................
Hungarian........................................................
Russian..............................................................
Ukrainian..........................................................
Estonian..........................................................
Lithuanian......................................................
Latvian..............................................................
Romanian......................................................
Slovenian.......................................................
3-14
15-27
28-40
41-53
54-65
66-77
78-89
90-101
102-113
114-125
126-137
138-149

Important Safety Instructions
• Read this manual thoroughly
before first use, even if you
are familiar with this type of
prod¬uct.
• The safety precautions
enclosed reduce the risk of fire,
electric shock and injury when
correctly adhered to.
• Keep the manual in a safe
place for future reference,
along with the completed
warranty card, purchase
receipt and carton.
• Always follow basic safety
precautions and accident
prevention measures when
using an electrical appliance,
including the following:
• Before turning on, ensure the
electrical voltage and frequen-
cy of the charging adaptor
corresponds to those indicated
on the rating label.
• Do not leave the vacuum
cleaner when plugged in.
• Unplug from outlet when not
in use and before cleaning or
servicing.
• Do not use outdoors or on wet
surfaces.
• Young children should be
supervised to ensure they do
not play with the appliance.
• Do not insert any objects into
the appliance.
• Use only as described
in this manual, use only
manufacturers recommended
attachments.
• Do not operate any appliance
with a damaged charging
adaptor or after the appliance
malfunctions, or has been
damaged in any manner.
• Keep the charging adaptor
and cords away from heated
surfaces.
• Do not unplug by pulling on
cord. To unplug, grasp the
charging adaptor, not the
cord.
• To reduce the risk of electrocu-
tion never operate the product
with wet hands, submerge in
water or spill liquids into the
product.
• Do not use with any opening
blocked; keep free of dust, lint,
hair, and anything that may
reduce airflow.
• Turn off all controls before
unplugging.
• Do not use to vacuum flamma-
ble or combustible liquids, such
as gasoline, matches, or use
in areas where they may be
present.
• Do not vacuum anything that
is burning or smoking, such as
cigarettes, matches, or hot
ashes.
3

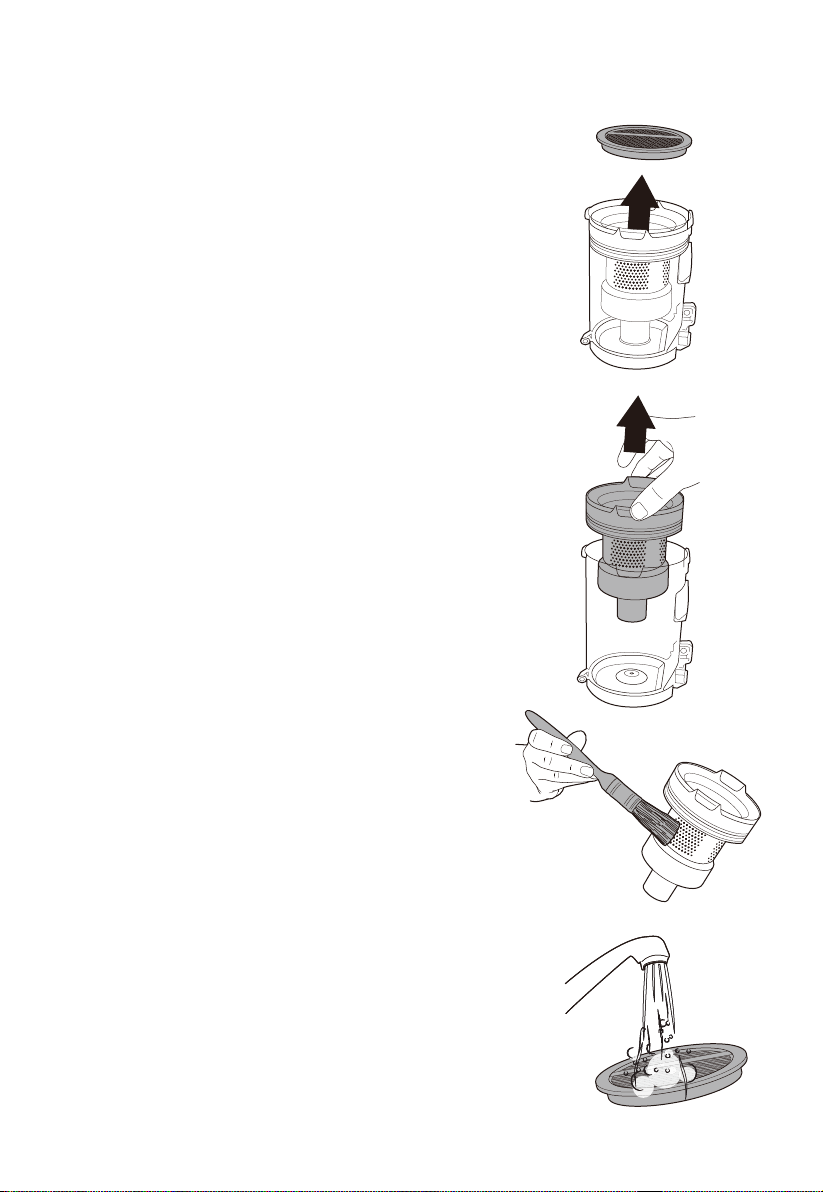
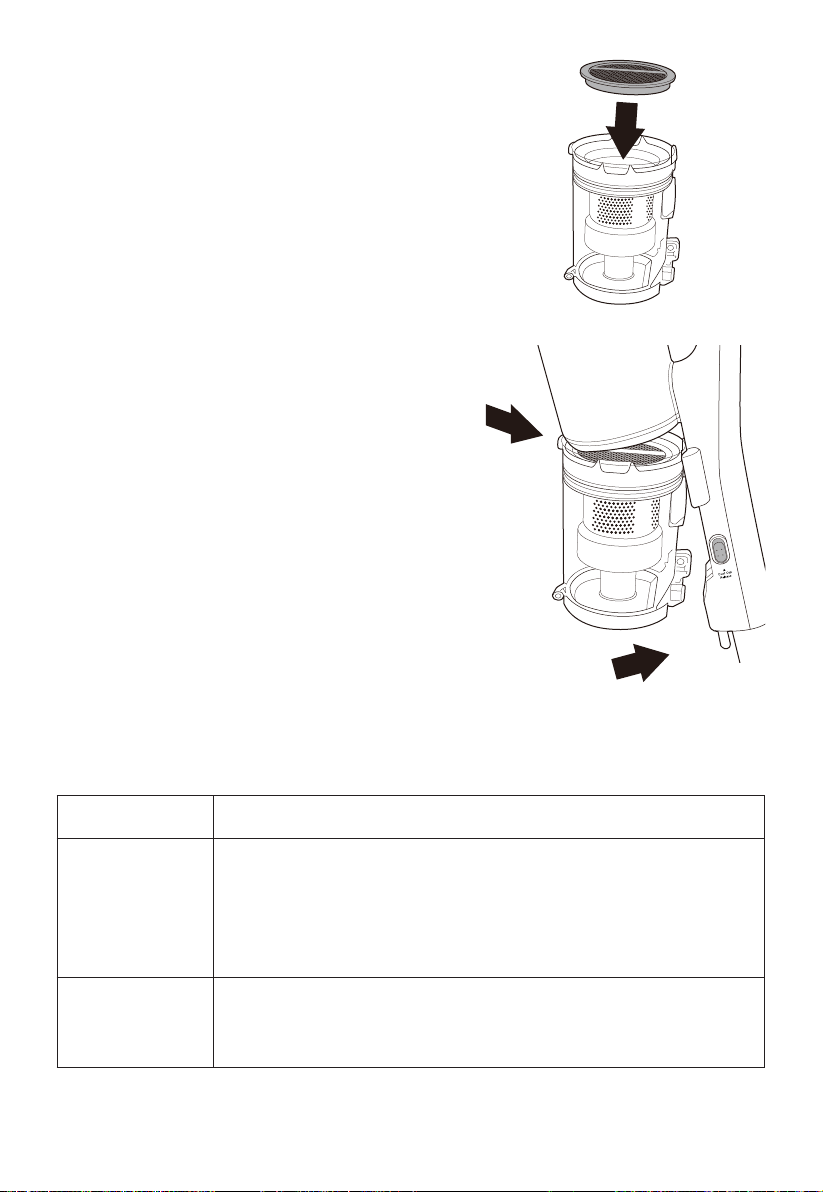
• Do not use without the filter in
place.
• This appliance is intended for
normal household use only.
• If the charging adaptor is
damaged, it must be replaced
by the same type.
• This appliance is not intended
for use by persons (including
children) with reduced physical,
sensory or mental capabilities,
or lack of experience and
knowledge, unless they have
been given supervision or
instruction concerning use of
the appliance by a person
responsible for their safety.
• Children should be supervised
to ensure that they do not play
with the appliance.
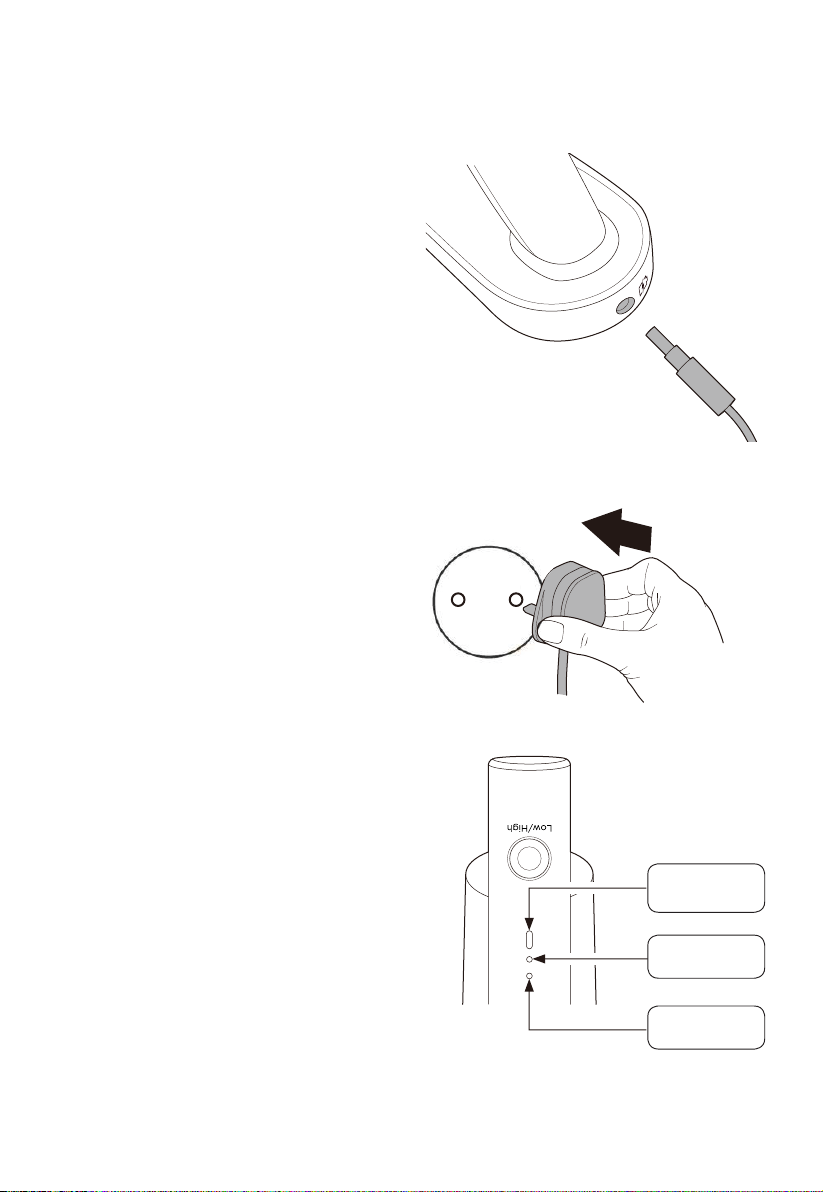
• When charging the appliance,
the power switch must be off.
• This Appliance should not be
used by children or people who
are physically challenged.
• This appliance is not a toy,
and if not used in the correct
manner, can lead to unneces-
sary damage or failure to
perform.
Caution
• Do not use your appliance out
doors or on any wet surface or
for wet pick up. Never use the
product to suck up water.
• Do not pick up hard or sharp
objects, matches, hot ashes,
cigarette ends or other similar
items.
• Do not spray with or pick up
flammable liquids, cleaning
fluids, aerosols or their vapours.
• Do not run over the power
charging cord when using your
appliance or remove the plug
by pulling on the power cord.
• Do not continue to use your
appliance or charger if it
appears faulty.
• Do not replace the batteries
with non-rechargeable
batteries.
• The battery must be removed
from the appliance before it is
scrapped
• The appliance must be
disconnected from the supply
mains when removing the
battery
• The battery is to be disposed of
safely
• Do not recharge non-
rechargeable batteries, the
battery is not replaceable
Motor Power: 150W
Adaptor Model:MC2805B-V
Input: 100-240V~50-60Hz 0.5A
Output:
Battery Type:
21.6V, 2000mAh, Li-ion
Charging Time: 3-5 hours
Dust Bin Volume: 0.45L
Running Time:
Max Power Mode: ≥12mins
Min Power Mode: ≥45mins
25.0V 0.5A 12.5W
29.0V 0.5A 14.5W
4

Names of Main Parts
Carry handle
Dust release
latch
Power on/off
button
Mode button
Charge
indicator lights
Charger
connection point
Mount hook
Filter
assembly
Main body
Dust cup
Extension pole
Dust cup
release button
Lights
Floor head
Charger Wall mount
bracket
Brush
multi-tool
Crevice
tool
Release clip
Wall mount
bracket fixings
5

Operation instructions
How to use your vacuum cleaner
Ensure the vacuum cleaner is fully charged and assembled before using.
Always take care when vacuuming stairs.
1. There are two power settings on the stick vac: max mode (this has a
higher suction power but a shorter running time, approx 15 mins) and
eco mode (lower suction power with a
longer running time, approx 45 mins).
The stick vac will always start in max
mode. The run time may vary depending
on the surface being cleaned.
2. For the 'max' mode simply press the
power button (1), while for 'eco' mode
press the power button (1) followed by
the mode button (2). The max operation
light will illuminate when in 'max' mode
and go out when switched to 'eco'
mode.
When required, press the power button
again to turn off the stick vac.
3. Move the floor head back and forth over the surface. Use even
strokes. Don't press hard; allow the stick vac to suck away the debris.
There are lights on the floor head which will illuminate automatically
when the stick vac is in operation to help with visibility in dark corners/
areas.
4. The stick vac has charge indicator lights, these are the two small lights
on the handle.
Whilst charging - the lower light will flash and the top light is off
Half charged - the lower light is on and the top light will flash
Fully charged - both lights are on, will turn off after 10mins
When in use and the battery is almost gone, the bottom light will be
off and the top light will flash. After approximately 10 seconds the
stick vac will automatically switch off.
5. It is advisable to empty the dust cup after each use. For best
performance, check the filters are clean (see the 'Removing and
cleaning the dust cup and filters' section of this manual).
2
6

Operation instructions
Charging vacuum cleaner
Before use we recommend that
the stick vac is charged fully for
between 3 and 4 hours. When
first purchased there will be some
charge so it may not take the full
amount of time to fully charge.
1. Plug the end of the charger
into the charger connection
point located on the top of
the stick vac main body. It is
recommended that the stick
vac is charged without any
attachments connected and
the appliance is laid on a flat
surface.
2. Plug the charger into the
mains.
3. The lower charge indicator
light will flash on and off
to show the appliance is
charging. Leave to charge.
4. Once fully charged, the
charge indicator light will stop
flashing and both lights will be
lit.
5. Turn off from the mains power
and remove the charger.
Note: Do not leave the stick
vac unattended or leave
overnight when charging. The
appliance will not work whilst
charging.
Max operation
light
Top light
lower light
7

Maintenance guide
Emptying the dust cup
Ensure the stick vac is switched off and
any attachments are removed before
emptying the dust cup.
1. Hold the cup assembly over a
household bin and push the dust
release latch on the side of the dust
cup. The debris will fall out into the
bin. Please note: Do not allow the
dust cup to overfill. Don't exceed the
MAX level marker. Empty regularly.
Every time you empty the dust cup,
check the filter assembly and tap
gently over the household bin to
remove any excess dust.
2. Once empty close the lid until it clicks
shut.
Removing and cleaning the dust cup
and filters
Before starting any cleaning, ensure the
stick vac is not charging and is switched
off. It is easier to remove the dust cup
without any attachments on the stick
vac.
1. Empty the dust cup as shown in the
'Emptying the dust cup' section of this
manual.
2. Press the dust cup release button
located on the side of the main body
near the bottom of the dust cup (1).
Then pull the dust cup away from the
main body, keeping the cup fairly
upright (2).
1
2
8

Maintenance guide
3. The dust cup houses the circular sponge
filter and filter assembly. Firstly remove
the circular sponge filter by pinching the
ribbon material at the top of the filter and
pulling upwards, then set aside.
4. Pinch either side of the filter assembly
and pull upwards away from the dust
cup. Tap the filter assembly gently over
the household bin to remove any large
amounts of dust.
Note: Do not allow the dust cup to overfill.
Don't exceed the MAX level marker.
Empty regularly.
5. Remove any more excess dust from the
filter assembly using a soft brush or a clean
paint brush. The filter can be broken down
into three parts. Hold the top section and
twist the lower section in the direction of
the arrow and the unlock padlock icon.
6. Rinse the dust cup, filter assembly parts
and circular sponge filter under warm
water until the water runs clear and leave
to dry for 24 hours.
9

Maintenance guide
7. Once all the parts are thoroughly dry,
reassemble the filter assembly parts
following the arrow and the icon for
the locked padlock and place it back
into the dust cup. Don't forget to put
the circular sponge filter back in the
top of the filter assembly.
8. Replace the dust cup to the main
body by hooking the channel on the
top of the dust cup with the lug on
the main body (1). Push the dust cup
back towards the main body until you
hear it click into place (2).
Note: It is important to regularly
maintain and clean the filters. A
clogged filter reduces suction power
and can shorten the life of your stick
vac.
Below is a recommended guide for how often you should clean the
filters:
Filter type Recommended cleaning times
Filter
assembly
• Shake out debris when you empty the dust cup.
Use the soft dusting brush to gently remove any
dust build-up.
• Rinse under warm water once a month or more
often if required.
Circular
sponge filter
• ccasionally remove any dust/debris as necessary.
The filter can also be rinsed under warm water
once a month.
1
2
10

Maintenance guide
Removing and cleaning the floor head and roller brush
Before starting any cleaning, ensure the
stick vac is not charging and is switched
off and remove the floor nozzle from the
rest of the stick vac.
If the roller brush becomes tangled
during use, the self-protect system will
shut off the stick vac. If that happens,
please follow below steps.
1. Turn the floor brush head (I) upside
down. To access the roller brush, slide
the tab, marked with arrows, to the
right.
2. Pull the roller brush at a slight angle
up and out of the floor brush head.
Any build up of hair etc. can now
be removed from the roller brush.
Scissors can be used to cut any hair
away from the roller if necessary,
taking care not to cut any of the
brush bristles.
3. Once the roller brush is cleaned,
replace the roller brush by aligning
the left, open side of the roller with
the star cog shape on the floor
brush head. You may need to twist
the roller head a little to lock this in
place.
4. Push the other end of the roller down
as far as it will go. Slide the tab back
to the left to lock in place.
1
4
2
3
I
11

Maintenance guide
Clearing a blockage
Ensure the stick vac is not plugged into the mains supply and is switched
off before dismantling the vac.
The stick vac would only become blocked if the dust cup has exceeded
the 'Max' level, the filters are clogged up or a large object has been
sucked up.
1. Check the dust cup and empty if necessary.
2. Check the 2 filters in the unit, remove any debris/dust and wash if
necessary.
3. If the floor head, crevice or brush multi-tool were in use, detach them
from the main body or extension pole and check for blockages.
Remove any blockages.
4. Detach the extension pole and look down it to see if there are any
blockages. If there are, use the handle of a broom to clear the
obstruction. Take care not to damage the pole in the process.
5. Check the roller brush for any hair or thread which may have
become wrapped around the roller. Cut away with a pair of scissors.
To do this safely, remove as shown in the 'Removing and cleaning the
floor head roller brush' section of this manual.
Storing the cordless stick vac
Your stick vac can be stored safely and securely by hanging from
the wall mount supplied with your product or by removing all the
attachments and stowing together in a cupboard. Either way will help
avoid the product falling over and causing damage.
Always turn off and unplug from the mains supply before storing.
1. Remove any attachments if the stick vac was last used with them on.
2. Store the stick vac and accessories away safely in a dry place.
12

Storing the cordless stick vac with the wall mount
1. Find a suitable spot in your household where you'd
like to secure your stick vac.
2. Mark the desired screw hole positions on the wall
using a pencil. We recommend that the stick vac
hangs slightly lifted off the floor.
3. Use the wall mount bracket fixings supplied only if
suitable for your wall type.
4. Screw the wall mount bracket fixings and mount to
the wall (see illustration for which way the mount
should hang on the wall).
5. The stick vac can then be mounted on the wall
mount. The mount hook can be found on the back
on the main body near the handle.
13

Troubleshooting
Problem Solution
The stick vac is not
cleaning well.
1. Empty the dust cup
2. Remove excess dust from the filters
3. Wash the filters
4. Check for blockages
The stick vac has
stopped or won’t
work.
1. Charge the vac (check the mains socket
works and the switch is turned on)
2. It might be blocked
- check items 1 to 4 above
3. Product self-protection activated. Switch off
the vac and leave the motor to cool for an
hour then try using again.
The lights on the
floor head turn off
and/or the motor
overheat light
illuminates red.
1. The floor head is blocked, refer to the
‘Removing and cleaning the floor head and
roller brush’ section of this manual.
2. The roller brush motor has become
overheated due to heavy loading. This
might be due to extended use on a long pile
carpet or loose rug. Leave the vac to cool
for an hour then use the eco mode rather
than the max mode.
14

INSTRUKCJA OBSŁUGI
Odkurzacz
P5
MCS2021WB

Ważne wskazówki bezpieczeństwa
• Przed pierwszym użyciem należy
dokładnie przeczytać niniejszą
instrukcję, nawet jeśli są Państwo
zaznajomieni z tym typem
produktu.
• Załączone środki bezpieczeństwa
zmniejszają ryzyko pożaru,
porażenia prądem elektrycznym i
obrażeń ciała, jeśli są prawidłowo
przestrzegane.
• Instrukcję należy przechowywać w
bezpiecznym miejscu do wglądu w
przyszłości, wraz z wypełnioną kartą
gwarancyjną, paragonem zakupu i
pudełkiem.
• Podczas korzystania z urządzenia
elektrycznego należy zawsze
przestrzegać podstawowych zasad
bezpieczeństwa i środków
zapobiegania wypadkom, w tym
poniższych wskazówek:
• Przed włączeniem należy upewnić
się, że napięcie elektryczne i
częstotliwość ładowania adaptera
odpowiada wartościom podanym
na etykiecie znamionowej.
• Nie należy opuszczać odkurzacza
po jego podłączeniu.
• Odłączyć wtyczkę od gniazdka,
gdy nie jest używana i przed
czyszczeniem lub serwisowaniem.
• Nie używać na zewnątrz lub na
mokrych powierzchniach.
• Małe dzieci powinny być
nadzorowane, aby upewnić się, że
nie bawią się urządzeniem.
• Nie należy wkładać żadnych
przedmiotów do urządzenia.
• Stosować wyłącznie w sposób
opisany w niniejszej instrukcji,
stosować wyłącznie przystawki
zalecane przez producentów.
• Nie należy obsługiwać urządzenia z
uszkodzonym adapterem do
ładowania lub po awarii
urządzenia, ani po jego
uszkodzeniu w jakikolwiek sposób.
• Adapter ładujący i przewody
należy trzymać z dala od
rozgrzanych powierzchni.
• Nie rozłączać wtyczki, ciągnąc za
przewód. Aby odłączyć wtyczkę,
należy chwytać za adapter
ładujący, a nie za przewód.
• Aby zmniejszyć ryzyko porażenia
prądem elektrycznym, nigdy nie
należy obsługiwać produktu
mokrymi rękoma, zanurzać go w
wodzie lub wlewać do niego
płynów.
• Nie używać z jakimkolwiek
zatkanym otworem; należy unikać
kurzu, kłaczków, włosów i
wszystkiego, co może ograniczać
przepływ powietrza.
• Wyłączyć wszystkie elementy
sterujące przed odłączeniem
zasilania.
• Nie należy używać do odkurzania
cieczy palnych lub wybuchowych,
takich jak benzyna, zapałki, ani
stosować w miejscach, w których
mogą one występować.
• Nie należy odkurzać niczego, co
się pali lub dymi, np. papierosów,
zapałek lub gorących popiołów.
16

• Nie należy używać bez założonego
filtra.
• To urządzenie jest przeznaczone
wyłącznie do normalnego użytku
domowego.
• Jeśli adapter ładujący jest
uszkodzony, należy go wymienić na
ten sam typ.
• Niniejsze urządzenie nie jest
przeznaczone do użytkowania
przez osoby (w tym dzieci) o
ograniczonych zdolnościach
fizycznych, sensorycznych lub
umysłowych, lub o braku
doświadczenia i wiedzy, chyba że
zostały one poddane nadzorowi
lub instruktażowi dotyczącemu
użytkowania urządzenia przez
osobę odpowiedzialną za ich
bezpieczeństwo.
• Dzieci powinny być nadzorowane,
aby upewnić się, że nie bawią się
urządzeniem.
• Podczas ładowania urządzenia,
wyłącznik zasilania musi być
wyłączony.
• Urządzenie nie powinno być
używane przez dzieci lub osoby
niepełnosprawne fizycznie.
• Urządzenie nie jest zabawką, a jeśli
nie jest używane w prawidłowy
sposób, może prowadzić do
niepotrzebnych uszkodzeń lub
awarii.
Przestroga
• Nie należy używać urządzenia na
zewnątrz, na mokrej powierzchni
lub do podnoszenia na mokro.
Nigdy nie używać produktu do
zasysania wody.
• Nie należy podnosić twardych lub
ostrych przedmiotów, zapałek,
gorących popiołów, końcówek
papierosów lub innych podobnych
przedmiotów.
• Nie należy spryskiwać ani zbierać
łatwopalnych cieczy, płynów
czyszczących, aerozoli ani ich
oparów.
• Podczas korzystania z urządzenia
nie należy deptać po przewodzie
zasilającym, ani wyciągać wtyczki,
ciągnąc za przewód zasilający.
• Nie używać dalej urządzenia lub
ładowarki, jeśli wydaje się ono
uszkodzone.
• Nie należy wymieniać baterii na
baterie nie nadające się do
ponownego ładowania.
•Bateria musi być wyjęta z
urządzenia przed złomowaniem.
•Podczas wyjmowania akumulatora
urządzenie musi być odłączone od
sieci zasilającej.
• Bateria musi być utylizowana w
bezpieczny sposób
• Nie należy ładować akumulatorów,
które nie nadają się do
ponownego ładowania,
akumulator nie jest wymienialny
Moc silnika: 150W
Model adaptera:MC2805B-V
Wejście: 100-240V~50-60Hz 0,5A
Wyjście: 25,0V 0,5A 12,5W
29,0V 0,5A 14,5W
Rodzaj akumulatora:
21,6V, 2000mAh, Li-ion
Czas ładowania: 3-5 godzin
Pojemność pojemnika na kurz:
0,45L
Czas działania:
Tryb maks. mocy: ≥12min
Tryb min. mocy: ≥45min
17

Nazwy głównych części
Mocowanie uchwytów
do montażu ściennego
Uchwyt do montażu
ściennego
Ładowarka
Główka do podłogi
Światła
Multinarzędzie
szczotkowe
Narzędzie
szczelinowe
Przycisk zwalniający
kubek na kurz
Zespół filtracyjny
Drążek przedłużający
Kubek na kurz
Klips zwalniający
Główny korpus
Zatrzask uwalniający
kurz
Hak montażowy
Lampki sygnalizacyjne
ładowania
Punkt podłączenia
ładowarki
Uchwyt nośny
Przycisk
włączania/wyłączani
a zasilania
Przycisk trybu pracy
18

Instrukcje obsługi
Jak korzystać z odkurzacza
Przed użyciem należy upewnić się, że odkurzacz jest w pełni naładowany i
zmontowany. Zawsze należy zachować ostrożność podczas odkurzania schodów.
1. Dostępne są dwa ustawienia mocy na wakuometrze drążkowym: tryb maks.
(większa moc ssania, ale krótszy czas pracy, ok. 15 min) i tryb eko (mniejsza
moc ssania przy dłuższym czasie pracy, ok. 45 min).
Wakuometr zawsze uruchamia się w trybie
maksymalnym. Czas pracy może się różnić w
zależności od czyszczonej powierzchni.
2. Dla trybu "maks" wystarczy nacisnąć przycisk
zasilania (1), a dla trybu "eko" nacisnąć
przycisk zasilania (1), a następnie przycisk
trybu (2). Światło pracy maksymalnej będzie
się świecić w trybie "maks" i zgaśnie po
przełączeniu do trybu "eko".
W razie potrzeby należy ponownie nacisnąć
przycisk zasilania, aby wyłączyć wakuometr.
3. Przesunąć główkę do podłogi w tył i w przód
po powierzchni. Należy dokonywać
regularnych ruchów. Nie naciskać mocno. Należy pozwolić, aby kij odessał
brud. Na głowicy podłogowej znajdują się światła, które zapalają się
automatycznie po uruchomieniu wakuometru, aby ułatwić widoczność w
ciemnych narożnikach/obszarach.
4. Wakuometr posiada lampki sygnalizacyjne ładowania, są to dwie małe
lampki na uchwycie.
Podczas ładowania - dolne światło będzie migać, a górne będzie zgaszone
Naładowany w połowie - dolne światło jest włączone i górne światło będzie
migać
W pełni naładowany - oba światła są włączone, zgasną po 10 minutach.
Gdy bateria jest już prawie zużyta, dolna lampka zgaśnie, a górna będzie
migać. Po około 10 sekundach wakuometr automatycznie się wyłączy.
5. Zaleca się opróżnianie kubka na kurz po każdym użyciu. Aby uzyskać
najlepsze wyniki, należy sprawdzić, czy filtry są czyste (patrz rozdział
"Demontaż i czyszczenie kubka na kurz i filtrów" w niniejszej instrukcji).
19

Instrukcje obsługi
Ładowanie odkurzacza
Przed użyciem zalecamy całkowite
naładowanie wakuometru przez 3 do
4 godzin. Po zakupie odkurzacz będzie
nieco naładowany, więc pełne
naładowanie może nie zająć tyle
czasu.
1. Podłączyć końcówkę ładowarki
do punktu podłączenia ładowarki
znajdującego się w górnej części
korpusu głównego wakuometru.
Zaleca się, aby wakuometr był
ładowany bez podłączonych
przystawek i urządzenie było
ułożone na płaskiej powierzchni.
2. Podłączyć ładowarkę do sieci
elektrycznej.
3. Lampka kontrolna dolnego
poziomu naładowania będzie
migać i wyłączać się, aby
pokazać, że urządzenie się ładuje.
Zostawić do naładowania.
4. Po pełnym naładowaniu wskaźnik
naładowania przestanie migać i
zapalą się oba światła.
5. Wyłączyć zasilanie sieciowe i
wyjąć ładowarkę.
Uwaga: Nie zostawiać
wakuometru bez nadzoru i nie
zostawiać na noc podczas
ładowania. Urządzenie nie będzie
działało podczas ładowania.
Dolne światło
Górne światło
Maks. światło
robocze
20
This manual suits for next models
1
Table of contents
Languages:
Other Midea Vacuum Cleaner manuals

Midea
Midea P7 MAX Wiring diagram

Midea
Midea CH835 User manual

Midea
Midea C7 User manual

Midea
Midea Eureka I5C User manual

Midea
Midea VCW40 User manual

Midea
Midea MVC-V18P User manual

Midea
Midea VCM43B16H User manual

Midea
Midea C600 Administrator Guide

Midea
Midea VC-15C189 User manual

Midea
Midea V20U01ADS2NA User manual

Midea
Midea VCS38A13L Administrator Guide

Midea
Midea MVC-V18K-BG User manual

Midea
Midea VSC02A861 User manual

Midea
Midea MVC-RTB2-R User manual

Midea
Midea VTW21A15T-140 User manual

Midea
Midea MVC-13M-B User manual

Midea
Midea P7 FLEX Wiring diagram

Midea
Midea S8+ User manual

Midea
Midea SC861 User manual

Midea
Midea M7 User manual