Midea Eureka I5C User manual

i5C
USER MANUAL
Warning notices: Before using this product, please read this manual carefully and keep it for future reference.
The design and specifications are subject to change without prior notice for product improvement.
Consult with your dealer or manufacturer for details.
The diagram above is just for reference. Please take the appearance of the actual product as the standard.
Robot Vacuum Cleaner
Download the app
& activate product

SAFETY INSTRUCTIONS
02
THANK YOU LETTER
Thank you for choosing Midea! Before using your new Midea product, please read
this manual thoroughly to ensure that you know how to operate the features and
functions that your new appliance oers in a safe way.
Warning for the machine
This appliance can be used by children aged from 8 years and above and persons
with reduced physical, sensory or mental capabilities or lack of experience and
knowledge if they have been given supervision or instruction concerning use of the
appliance in a safe way and understand the hazards involved.
Children shall not play with the appliance.
Cleaning and user maintenance shall not be made by children without supervision.
Plug must be removed from the socket-outlet before cleaning or maintaining the
appliance. Switch o before cleaning or maintaining the appliance.
If the supply cord is damaged, it must be replaced by a special cord or assembly
available from the manufacturer or its service agent.
WARNING: For the purposes of recharging the battery, only use the detachable
docking station provided with this appliance.
Use only with i5-DS docking station.
This appliance contains batteries that are only replaceable by skilled persons.
Do not bring the smart robot close to heatsource, radiation or burning cigarette
butts. It is strictly forbidden to vacuum the following objects:
1) All liquids such as water and solvents;
2) Lime, cement dust and other construction dust and garbage;
3) Heat generating objects, such as unextinguished carbon butts, cigarette butts;
4) Sharp fragments, such as glass, etc.;
5)Flammable and explosive items, such as gasoline and alcohol products.
Before using, please remove all fragile items from the ground (such as glasses,
lamps, etc.), and items that may be tangled with the side brush, Roller brush and
drive wheels(such as wires, curtains and other easily-entangled materials).
Please pay attention to your hair and avoid entanglement on wheels or roller
brushes when using, cleaning and maintaining the robot.
Do not use this product at an altitude of more than 2000m.
Correct Disposal of this product.
This marking indicates that this product should not be disposed with other house-
hold wastes throughout the EU. To prevent possible harm to the
environment or human health from uncontrolled waste disposal, recycle
it responsibly to promote the sustainable reuse of material resources.
To return your used device, please use the return and collection systems
or contact the retailer where the product was purchased. They can take
this product for environmental safe recycling.
Warranty Information
The manufacturer provides warranty in accordance with the legislation of the
customer's own country of residence, with a minimum of 1 year (Germany: 2 years),
starting from the date on which the appliance is sold to the end user.
The warranty only covers defects in material or workmanship.
1.
2.
3.
4.
5.
6.
7.
8.
9.
10.
11.
CONTENTS
0
02
1
31
21
81
91
32
62
62
06
07
09
27
82
THANK YOU LETTER
SAFETY INSTRUCTIONS
SPECIFICATIONS
PRODUCT OVERVIEW
QUICK START GUIDE
PRODUCT INSTALLATION
OPERATION INSTRUCTIONS
APP SETUP AND OPERATION
CLEANING AND MAINTENANCE
TROUBLESHOOTING
TRADEMARKS, COPYRIGHTS AND LEGAL STATEMENT
DISPOSAL AND RECYCLING
DATA PROTECTION NOTICE
DOC AND CERIFICATIONS
DECLARATION OF CONFORMITY
CE
28
29

03 04
The repairs under warranty may only be carried out by an authorized service centre.
When making a claim under the warranty, the original bill of purchase (with
purchase date) must be submitted.
The warranty will not apply in cases of:
- Normal wear and tear
- Incorrect use, e.g. overloading of the appliance, use of non-approved accessories
- Use of force, damage caused by external influences
- Damage caused by non-observance of the user manual, e.g. connection to an
unsuitable mains supply or non-compliance with the installation instructions
- Partially or completely dismantled appliances
Wireless network: 2400-2483.5MHz, MAX POWER: 20dBm,
BLUETOOTH MAX POWER: 10dBm
To satisfy RF exposure requirements, a separation distance of 20 cm or more
should be maintained between the antenna of this device and persons during
device operation. To ensure compliance, operations at closer than this distance
is not recommended.
12.
Warning for docking station
“IMPORTANT SAFETY INSTRUCTIONS – SAVE THESE INSTRUCTIONS" and
"DANGER – TO REDUCE THE RISK OF FIRE OR ELECTRIC SHOCK, CAREFULLY
FOLLOW THESE INSTRUCTIONS".
This appliance can be used by children aged from 8 years and above and persons
with reduced physical, sensory or mental capabilities or lack of experience and
knowledge if they have been given supervision or instruction concerning use of the
appliance in a safe way and understand the hazards involved.
Children shall not play with the appliance.
Cleaning and user maintenance shall not be made by children without supervision.
Plug must be removed from the socket-outlet before cleaning or maintaining the
appliance. Switch o before cleaning or maintaining the appliance.
If the supply cord is damaged, it must be replaced by a special cord or assembly
available from the manufacturer or its service agent.
Docking base is only applicable to the product i5C. (Battery pack type : Li-ion, DC
14.4 V, 2600 mAh)
The Docking base will automatically start charging after Robot Vacuum Cleaner
returned to the base.
Warning: The battery charger(Docking station) is not intended to charge non-re-
chargeable batteries.
1.
2.
3.
4.
5.
6.
Warning for battery
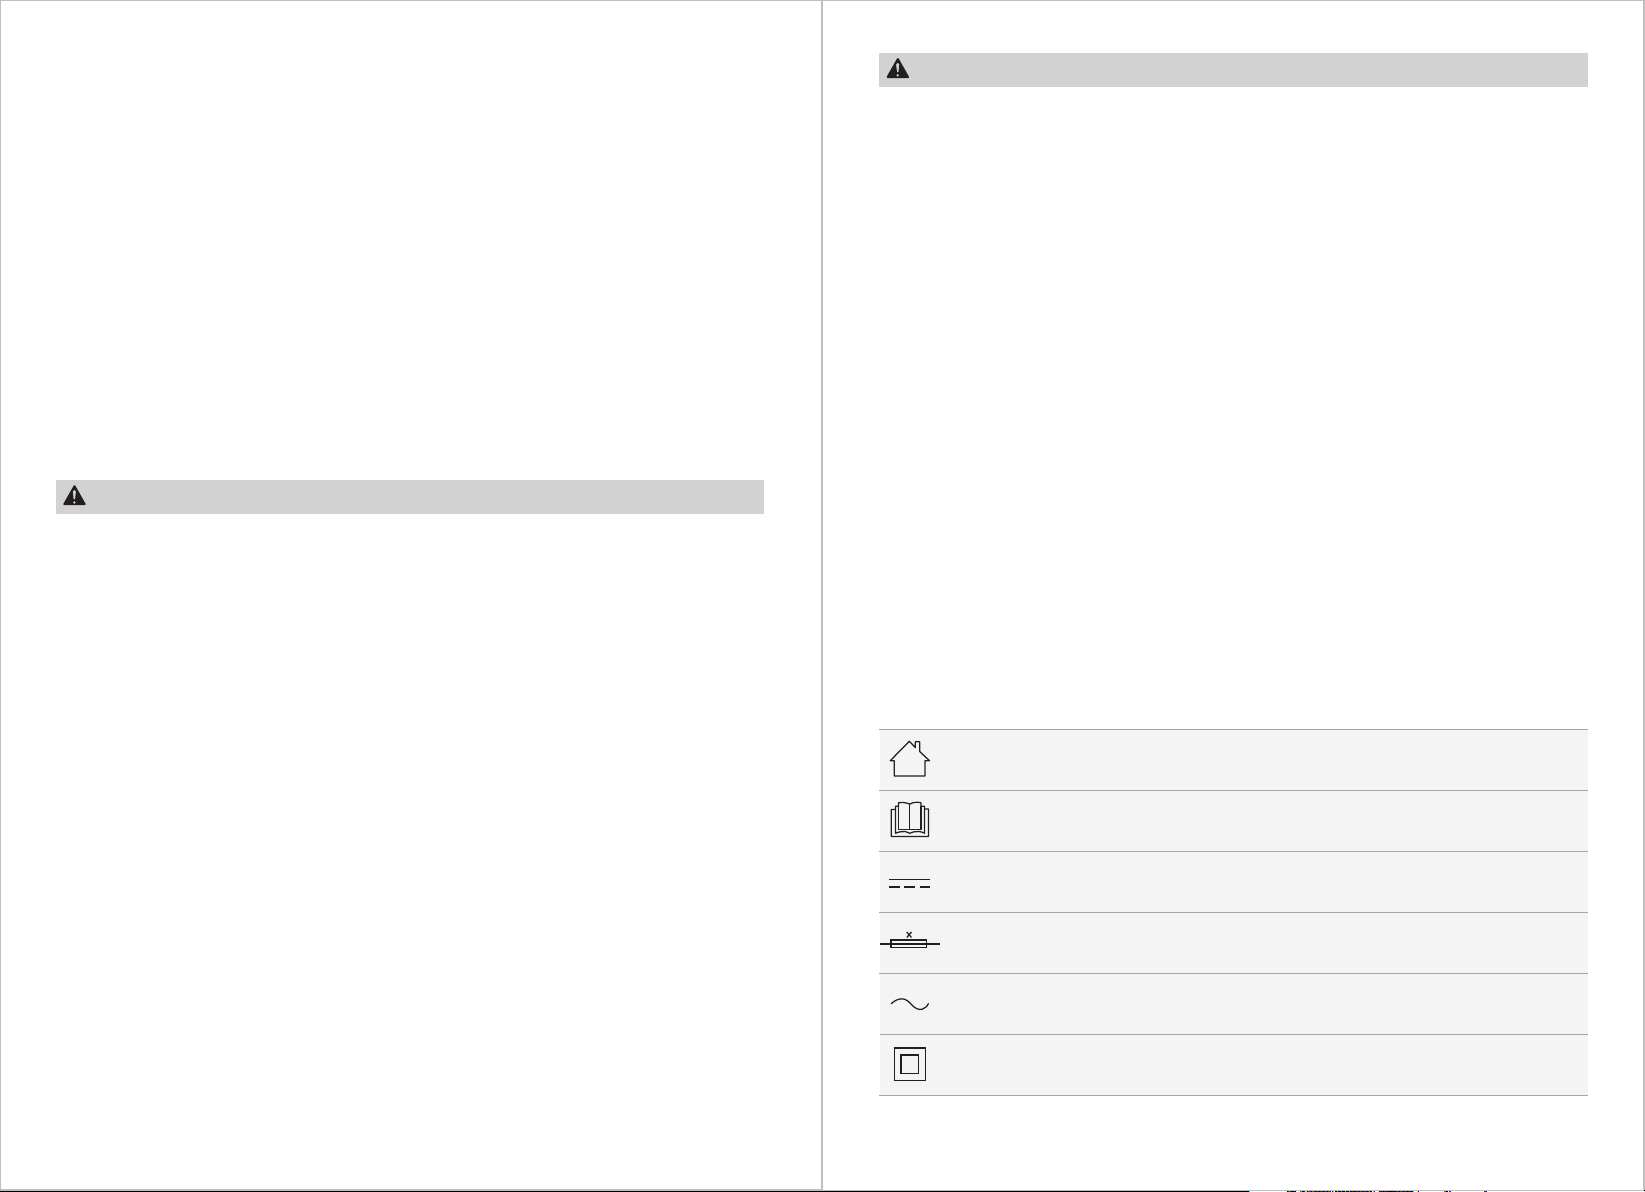
[symbol IEC 60417-5957
( 2004-12 )]
[symbol ISO 7000-0790
( 2004-01 )]
[symbol IEC 60417-5031
( 2002-10 )]
time-lag miniature fuse-link where X is the symbol for the time/current
characteristic as given in IEC 60127
[symbol IEC 60417-5032
( 2002-10 )]
[symbol IEC 60417-5172
( 2003-02 )]
for indoor use only
read operator's manual
direct current
alternating current
class II equipment
1.
2.
3.
4.
5.
6.
7.
8.
9.
10.
11.
12.
13.
14.
15.
16.
17.
18.
19.
20.
21.
The product must be powered o before removing the battery.
Please note that do not disassemble the battery by yourself.
If you need to replace it, please contact the after-sales service center.
Please dispose of used battery according to local laws and regulations
Do not dismantle, open or shred the battery.
Do not expose batteries to heat or fire. Avoid storage in direct sunlight.
Do not short-circuit a battery.
Do not store batteries haphazardly in a box or drawer where they may short-circuit
each other or be short-circuited by other metal objects.
Do not subject batteries to mechanical shock.
In the event of a leaking, do not allow the liquid to come in contact with the skin or
eyes. If contact has been made, wash the aected area with copious amounts of
water and seek medical advice.
Do not use any charger other than that specifically provided for use with the
equipment.
Do not use any battery which is not designed for use with the equipment.
Do not mix dierent manufacture, capacity, size or type within a device.
Keep batteries out of the reach of children.
Seek medical advice immediately if the battery has been swallowed.
Keep batteries clean and dry.
Do not leave a battery on prolonged charge when not in use.
After extended periods of storage, it may be necessary to charge and discharge the
batteries several times to obtain maximum performance.
The batteries give their best performance when they are operated at normal room
temperature (20 °C ± 5 °C).
Retain the original product literature for future reference.
The battery may be irreversibly damaged if the battery is in low power for a long
time. It is recommended that the battery retain sucient power before storage.

Danger
This symbol indicates that there are dangers to the life and health of
persons due to extremely flammable gas.
Warning of electrical voltage
This symbol indicates that there is a danger to life and health of
persons due to voltage.
Warning
The signal word indicates a hazard with a medium level of risk which, if
not avoided, may result in death or serious injury.
Caution
The signal word indicates a hazard with a low degree of risk which, if
not avoided, may result in minor or moderate injury.
Attention
The signal word indicates important information (e.g. damage to
property), but not danger.
Observe instructions
This symbol indicates that a service technician should only operate and
maintain this appliance in accordance with the operating instructions.
The following safety guidelines are intended to prevent unforeseen risks or damage from
unsafe or incorrect operation of the appliance. Please check the packaging and appliance
on arrival to make sure everything is intact to ensure safe operation. If you find any
damage, please contact the retailer or dealer. Please note modifications or alterations to
the appliance are not allowed for your safety concern. Unintended use may cause
hazards and loss of warranty claims.
Read these operating instructions carefully and attentively before using/commissioning the
unit and keep them in the immediate vicinity of the installation site or unit for later use!
Intended Use
Explanation of Symbols
05 06
SPECIFICATIONS
i5CProduct Model
Host Charging Voltage
Host Rated Voltage
Host Rated Power
Docking Station Model
Docking Station Input
Docking Station Output
Battery Model
Battery Rated Voltage
Battery Capacity
Charging Limit Voltage
17.2V
14.4V
55W
i5-DS
100-240V~, 50/60Hz, 24W
17.2V , 1A
BP14426E
14.4V
2600mAh 37.44Wh
16.8V
Midea Robozone Technology Co.,Ltd.
Add.: No.39 Caohu Avenue, Xiangcheng Economic
Development Zone, Suzhou, Jiangsu, China
Company: KD EUROPE
Add.: Stara Debszczyzna 4, 16-424, Filipow, Poland
Mail: Kdeurope.o[email protected]om

Product
Accessories
PRODUCT OVERVIEW
Charging Base x1
Filter x1
Mop Cloth Holder x1
Mop Cloth x2
Side Brush x4
Power Cable x1
Cleaning Brush x1
07 08
Bumper
Cover
Water Tank
Start/Pause
Water Tank
Release Button
Power Switch
Dustbin
Remote Controller x1
Omni-directional
Wheel
Side Brush
Main Wheel
Cover Plate of
Main Brush
Main Brush
Manual x1
Battery x2

QUICK START GUIDE
09 10
Step 1 Step 2
Step 3
Open the cover and slide power switch to
turn on the robot.
Step 4
Before first use, we recommend you
charge the robot for at least 6 hours.
Press and hold for App connection.
Short press or use APP or use
remote controller to start cleaning.
Step 5
Fill with the water and attach mop cloth
to start mopping function.
Step 6
Recharging for next cleaning.
First Use
APP & Voice Control
SmartHome*
iOS 13.0 or later Android 8.0 or later
Wireless
network

1211
Applicable to Google Assistant & Amazon Alexa:
For using Google Assistant and Amazon Alexa, please make sure SmartHome APP has
been downloaded and matched with your robot successfully.
NOTE
Skill Name for Google Assistant
“SmartHome”
Skill Name for Amazon Alexa
“SmartHome”
Step1. Download SmartHome APP and link your robot successfully.
Step2. Get your Amazon Alexa or Google Assistant device ready.
Step3. By searching skill name above to link voice device and your robot.
(SmartHome account need to be registered in the process)
Step4. Voice-control your robot by using voice commands in the description.
start stop charge
Google
start <robot name>
turn on <robot name>
switch on <robot
name>
stop <robot name>
turn o <robot name>
switch o <robot
name>
dock <robot name>
<robot name> go home
<robot name> go
charge
Alexa turn on <robot name> turn o <robot name> set charge mode on
Installation of Charging Base
PRODUCT INSTALLATION
Make sure the power cable is connected into the charging base.
Place the charging base flat against a wall and make sure there leaves enough space
to the base, as shown in the figure below.
Ensure the charging base is connected to a power supply.
1.
2.
3.
Installing the Side Brushes
Turn the unit over.
Attach the side brush to the matching post and press down until they fit into place.
Ensure side brushes can rotate freely.
1.
2.
3.

13 14
Function of Buttons
OPERATION INSTRUCTIONS
Power switch
(under the cover)
Start/Pause
ON / OFF
ON: Open the cover and slide power switch to “I” position to turn on the robot.
OFF: Slide power switch to “O” position to turn o the robot.
Start / Pause
Start: Short press button or use App or remote controller to start cleaning.
Pause: Short press to pause the cleaning. To resume cleaning, briefly press again.
Networking
Press and hold the network pairing button for network configuration. Robot is in pairing
status if the light is flashing.
Remote Controller
Remote controller will work when within 16 feet of the robot.
NOTE
Direction
Manually control the direction of the robot (forward, left, and right). Note that the robot does not
vacuum when in manual mode.
Edge cleaning
The robot will clean edges of the room and furniture.
Zig-zag cleaning
The robot will clean in a zig-zag route.
Suction increase
Increase the suction power.
Suction decrease
Decrease the suction power.
Spot cleaning
The robot will clean a special area in a spiral pattern.
Start/Pause
Start or pause cleaning. The robot will automatically begin Smart Path cleaning.
Recharging
The robot will return to the charging base for charging.
Direction
Edge cleaning
Zig-zag cleaning
Suction increase
Suction decrease
Spot cleaning
Start/Pause
Recharging
1.
2.
Before using the remote control, insert the 2 included AAA batteries. Remove back battery cover
and insert in correct orientation.
To prevent the robot from accidentally falling down, the backwards direction button doesn’t work.
NOTE

15 16
Cleaning
Please clean up the wires and sundries scattered on the ground and remove precious,
fragile and dangerous items that are easy to fall before cleaning.
During its first cleaning job, it is recommended to follow the robot to find some possible
problems. The robot can clean much more smoothly after that. If certain area do not
need to be cleaned, you can add No-Go Zones or Virtual Walls on the map via the app
to prevent the robot from entering the specified area.
Do not use your robot on wet surfaces or surfaces with standing water. Before using the product on
a rug with tasseled edges, please fold the rug edges under.
NOTE
Charging Robot Vacuum
Open the cover and slide power switch to “I” position to turn on the robot.1.
Place the robot on the charging base to start charging. We recommend that you
charge the robot for at least 6 hours before using it for the first time.
2.
1.
2.
3.
4.
5.
Please do not place the charging base on carpets or soft floors and keep the area dry.
Remove the mopping cloth holder when the robot is under the charging state.
To make sure the robot is always ready for use, we suggest that you keep the robot charged on
the charging base. For long-term storage, remove the robot from the base and store it in a cool &
dry place.
If the robot is not used for more than 3 months, allow it to get charged for at least 12 hours
before using.
To preserve the battery lifespan, we suggest you fully charge the battery at least once every
six months.
NOTE

17 18
Mopping
Check and ensure the mop cloth is
attached to the mop cloth holder.
1. Press the release button on the
water tank and pull to remove.
2.
Fill the water tank. Open the lid, fill the
tank with water, and securely close the lid.
3. Attach the mopping cloth holder
to the water tank.
4.
Re-insert the water tank assembly into
the robot. You hear a click sound when
the water tank is installed properly.
5. Press “ ” to start mopping. If you
don’t want the robot to go on your
carpet when mopping, set a No-go
zone/virtual wall via App or roll up
the carpet.
6.
Water Tank
Water Inlet/Outlet
a)
b)
c)
d)
e)
Please do not exceed the “Max” water level.
It is recommended to use clean water in the water tank. Do not add any detergent in the water to
prevent clogs. Do not use hot water.
Please clean the mopping cloth after cleaning.
Remove the mopping cloth holder when the robot is under the charging state.
You can adjust water flow via APP according to your requirement.
NOTE
If your home wireless network name or password is changed, you will need to re-established
connection with your robot vacuum.
NOTE
APP SETUP AND OPERATION
1.
2.
3.
4.
5.
6.
7.
8.
App supports iOS 13.0 and above, Android 8.0 and above phone system versions, but Pad device
is not accepted; generally the phone system version may be checked by clicking “Setting- About
Mobile Phone”.
This model does not support WEP encrypted router.
The network accessing configuration of the cleaner requires wireless network of 2.4GHz frequency
range, 5GHz frequency range is currently incompatible.
Wireless network is mandatory for network accessing configuration of the cleaner; once the
network accessing is configured successfully, App may be operated in wireless network/2G/3G/
4G/5G network environment and the cleaner may be controlled remotely.
If your home wireless network password is changed, the cleaner will be displayed as o-line on
App; Without any changes of App account number, one just needs to configure network accessing
for the cleaner once again.
If others want to use App to operate same cleaner, they need to be invited on App by the device
owner by sharing the device to the new user’s account (on the condition that the invitee has
downloaded App and has registered an account).
The device will be removed from the former device owner’s device list if a new account owner
connect the device successfully.
Once the cleaner is configured successfully network accessing, the following operations will result
in clearance of wireless network settings and secondary network accessing configuration is
required; Long press the network accessing configuration key on the device for over 3 seconds,
and after a tick sound is heard, all wireless network information will be cleared.
Ensure the mobile phone is connected to your home wireless network. Also please
turn on the Bluetooth on your phone. If not, go to Settings and turn it on.
Download the SmartHome app and register your robot:
a. Scan the QR code or search for the SmartHome app in
the Apple or Google Play Store. Download the app.
b. Open the app and create your personal account. Follow
instructions on the screen.
Add your robot vacuum to your app.
Press the “ + ” button on the main screen of the app and
select i5C from the available list of products.
Connect your robot to your wireless network.
After assembling and powering on the robot, press and
hold the “ ” button until a beep sound is heard.
The network indicator light should start flashing.
Follow instructions on app for next steps.
1.
2.
3.
4.
Mop Cloth Holder

19 20
CLEANING AND MAINTENANCE
Cleaning the Main Brush
With the vacuum turned upside down, place your thumb in the open slot between the
two tabs and lift o to remove brushroll cover.
Use the cleaning brush or scissors to clean the tangled hair or threads.
1.
Press brush lock and lift up to access main brush.
It is recommended to clean the main brush every week and replace it
every 6-12 months.
2.
Remove hair
from the brush
Cleaning the Side Brush
Pull to remove the side brushes. Remove any tangled hair, debris, and then
reinstall them.
It is recommended to clean the side brushes every week and replace them
every 6-12 months.
1.
2.
Cleaning the Dustbin and Filter Element
Empty the dustbin after each use.
NOTE
Press dustbin release button to remove
dustbin from robot.
1. Press release button to empty the
dustbin.
2.
If side brushes are curled, you can remove them and place in warm water (Suggested 30 - 50°C ) for
30 seconds and then let it thoroughly dry.
NOTE

22
21
Cleaning the Water Tank
The filter is on the side of the dustbin.
Remove debris by tapping the filter
against your garbage bin.
You can clean the filter with water,
but remember to dry it
THOROUGHLY before reinserting
it back into the dustbin.
3. Reinsert the dustbin back in
the robot.
It is recommended to clean the
filter element every week and
replace it every 1-3 months.
4.
Once finished mopping, press the water tank release button and pull to remove the
water tank. Detach the mop cloth holder by pulling them apart.
1.
Wash the mopping cloth and dry THOROUGHLY.2.
Open the cover and pour out the remaining water in the water tank.3.
Wipe dry the water tank. Exposure to sunlight is not recommended.4.
Cleaning the Sensor and Wheel
Wipe the sensors and wheels gently with a dry, soft cloth, as shown in the figure.
Cleaning the Charging Contacts
Wipe the charging contacts on both the robot and the charging base with a dry,
soft cloth, as shown in the figure.

24
23
TROUBLESHOOTING
Possible reason SolutionProblem
The appliance will
not be charged.
Operation of your appliance can lead to errors and malfunctions. The following tables
contain possible causes and notes for resolving an error message or malfunction. It is
recommended to read the tables carefully below in order to save your time and money
that may cost for calling to the service center.
If you have after-sales problems, it is recommended to go to SmartHome-Help-Contact
us/Feedback for help.
The power switch is not
turned on while charging.
Power on the appliance.
The appliance and charging
terminals are not in full
contact.
Make sure the appliance is
fully in contact with the
charging terminal.
After the mop
holder is installed,
the appliance is
impermeable.
There’s no water in water
tank.
Add water.
The appliance base outlet
hole is blocked.
Clear water outlet and tank
filter.
The appliance gets
stuck.
The appliance is covered by
wires on the ground,
dropping curtain fabric or
blankets are twined.
The appliance will automati-
cally start the escape mode. If
it is not out of trouble, it
needs manual help.
Side brush and main brush,
etc. get stuck, and the
appliance cannot run
normally.
Clean the windings on the
side brush and restart it. If
not, contact the post-sales
department.
No cleaning
according to the
present time.
The power switch is not on. Turn on the power switch of
appliance.
Scheduled appointment is
cancelled.
Reset and make appointment.
The mop holder magnet falls
o.
Contact the aftersales service
center.
●
●
●
●
●
●
●
●
●
Not cleaned
completely, and
recharge it.
The appliance does not have
enough battery power.
Charge the appliance.
●
Possible reason SolutionProblem
The appliance has
missed sweeps,
there is no plan for
cleaning, and the
map in the app
shows irregularly.
The ground is slippery. If the floor is waxed, dry it
before use.
Wires, shoes and other
objects placed on the ground,
aecting the normal opera-
tion of the appliance.
Minimize ground items as
much as possible.
Appliance does not
work.
Cleaning is interrupted
halfway.
Do not move or block the
appliance during work.
The power switch is not
turned on.
Turn on the power switch.
Low battery. Charge the appliance.
Wheels are dropped and the
three groups of drop sensors
are in a falling state.
Place the appliance close to
the ground.
If necessary, contact
post-sales service center.
There is an obstacle ahead. Clear the front obstacles.
Bumper rail is clamped. Tap the bumper rail to check
for if there is foreign matter
stuck.
●
●
●
●
●
●
●
●
Appliance retreats.

25
Troubleshooting SolutionProblem/Cause
Problem:
App displays
disconnection.
Cause:
Disconnection
between the mobile
phone and the
appliance.
Check if the mobile phone is
accessed to network.
The mobile phone shall be
accessed to network once
again.
Check if the router works
normally.
Re-start the router.
Problem:
The QR code of the
mobile phone itself
cannot be scanned
by App.
Cause:
The hardware
configurations of
the mobile phone
are very low, the
camera has no
focus function.
Change mobile phones for
confirmation.
Change mobile phones and
scan;
Add appliance by product
category.
The cleaner is required to be
powered.
Power on the cleaner once
again.
The wireless network
configurations of the
equipment are cleared.
Add new appliances into App.
The wireless network
password or network is
changed.
After system start-up, long
press network pairing button
and release it after a tick sound
is heard; clear all wireless
network configurations of the
cleaner and add household
electrical appliances once again
for operation.
Problem:
Slow App operation.
Cause:
Network connection
is not so smooth.
Network busy. Re-start the router and
reduce the number of access
users.
Poor wireless network signal
reception of the mobile
phone.
Check the settings of the
mobile phone itself.
The network bandwidth is not
so adequate.
Broaden network bandwidth.
●
●
●
●
●
●
●
●
●
26
DISPOSAL AND RECYCLING
Important instructions for environment
Compliance with the WEEE Directive and Disposing of the Waster Product:
This product complies with EU WEEE Directive (2012/19/EU). This product bears a
classification symbol for waster electrical and electronic equipment (WEEE).
This symbol indicates that this product shall not be disposed
with other household wastes at the end of its service life. Used
device must be returned to ocial collection point for
recycling of electrical electronic devices. To find these
collection systems please contact to your local authorities or
retailer where the product was purchased. Each household
performs important role in recovering and recycling of old
appliance. Appropriate disposal of used appliance helps
prevent potential negative consequences for the environment
and human health.
logo, word marks, trade name, trade dress and all versions thereof are
valuable assets of Midea Group and/or its aliates (“Midea”), to which Midea owns
trademarks, copyrights and other intellectual property rights, and all goodwill derived
from using any part of an Midea trademark. Use of Midea trademark for commercial
purposes without the prior written consent of Midea may constitute trademark
infringement or unfair competition in violation of relevant laws.
This manual is created by Midea and Midea reserves all copyrights thereof. No entity or
individual may use, duplicate, modify, distribute in whole or in part this manual, or
bundle or sell with other products without the prior written consent of Midea.
All the described functions and instructions were up to date at the time of printing this
manual. However, the actual product may vary due to improved functions and designs.
TRADEMARKS, COPYRIGHTS
AND LEGAL STATEMENT

27 28
Compliance with RoHS Directive
The product you have purchased complies with EU RoHS Directive (2011/65/EU). It does
not contain harmful and prohibited materials specified in the Directive.
Package information
Packaging materials of the product are manufactured from
recyclable materials in accordance with our National Environ-
ment Regulations. Do not dispose of the packaging materials
together with the domestic or other wastes. Take them to the
packaging material collection points designated by the local
authorities.
DATA PROTECTION NOTICE
For the provision of the services agreed with the customer,
we agree to comply without restriction with all stipulations of applicable data protection
law, in line with agreed countries within which services to the customer will be delivered,
as well as, where applicable, the EU General Data Protection Regulation (GDPR).
Generally, our data processing is to fulfil our obligation under contract with you and for
product safety reasons, to safeguard your rights in connection with warranty and
product registration questions. In some cases, but only if appropriate data protection is
ensured, personal data might be transferred to recipients located outside of the
European Economic Area.
Further information are provided on request. You can contact our Data Protection
personal date being processed for direct marketing purposes, please contact us via
[email protected]. To find further information, please follow the QR Code.
Declaration of Conformity
DOC AND CERTIFICATIONS
U
nique identification of this DoC:i5-001
W
e Midea Robozone Technology Co.,Ltd.
N
o.39 Caohu Avenue, Xiangcheng Economic Development Zone, Suzhou,
Jiangsu
,
C
hina
responsibility that the product:
p
roduct name:Robot Vacuum Cleaner
t
rade name:Midea/eureka/Comfee
t
ype or model:i5E, i5 Extra, i5 Extra FR, MR08, VCR08, MR09, MR07, i5 Lite,
V
CR09W, VCR09B, i5 SR, i5 Extra CR, i5 Advance, I5C, I5C-BR
t
o which this declaration relates is in conformity with the essential requirements and
o
ther relevant requirements of the Directive:
2
014/53/EU 2011/65/EU (EC)No 1907/2006
T
he product is in conformity with the following standards and/or other normative
d
ocuments:
2
014/53/EU : EN 60335-2-2:2010 +A11:2012 + A1:2013
E
N 60335-1:2012+A11:2014+AC:2014+A13:2017
E
N 62311: 2008 EN 62233: 2008
E
N 301 489 -1 V2.2.3 EN 301 489 -17 V3.2.4 EN 55014 -1:2017+A11:2020 E
N
5
5014-2: 2015
E
N IEC 61000-3-2: 2019 EN 61000-3-3:2013+A1: 2019 EN 300 328 V2.2.2
2
011/65/EU : EN 62321-1:2013 EN 62321-2:2014 EN 62321-3-1:2014
E
N 62321-4:2014 EN 62321-5:2014 EN 62321-6:2015 EN 62321-7-1:2015
E
N 62321-7-2:2017 EN 62321-8:2017
S
upplementary information:
T
echnical file held by: Midea Robozone Technology Co.,Ltd.
P
lace and date of issue (of this DoC): CHINA 2021-8-1
Signed by or for the manufacturer
(Signature of authopised person)
Name (in print):Shawn.Yan
Title:Certified engineer

29
CE
Midea hereby declares that the appliance with MSmartHome
functionality meets the essential requirements and other
relevant provisions of the Directive 2014/53/EU. A detailed
RED Declaration of Conformity can be found online at
www.midea.com among the additional documents on the
product page for your appliance.
2.4 GHz band:100mW max.
Other manuals for Eureka I5C
3
This manual suits for next models
1
Table of contents
Other Midea Vacuum Cleaner manuals

Midea
Midea VCM43B16H User manual

Midea
Midea M7 User manual

Midea
Midea MVC-B500VM Administrator Guide

Midea
Midea B1 User manual

Midea
Midea P7 MAX Wiring diagram

Midea
Midea VTW21A15T-140 User manual

Midea
Midea VCS38A13L Administrator Guide

Midea
Midea S8+ User manual

Midea
Midea VCS35B15KC User manual

Midea
Midea M7 User manual

Midea
Midea VCS861B User manual

Midea
Midea VC-02A14S User manual

Midea
Midea P12 FLEX User manual

Midea
Midea V19P13A20Q0C User manual

Midea
Midea VSS5800 User manual

Midea
Midea KH19P User manual

Midea
Midea MVC-SC861R User manual

Midea
Midea 386600-i5C User manual

Midea
Midea MVC-16T-B User manual

Midea
Midea U1 User manual