manuals.online logo
Brands
  1. Home
  2. •
  3. Brands
  4. •
  5. Midland
  6. •
  7. Transceiver
  8. •
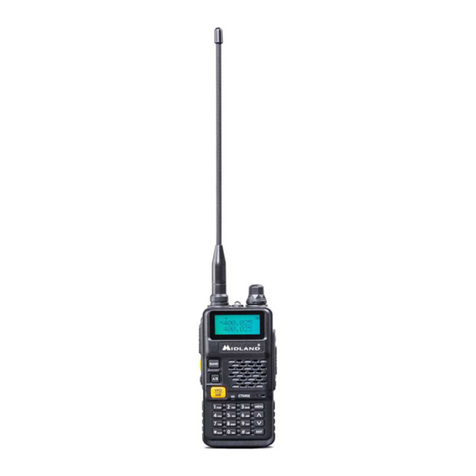
  9. Midland 73-005 User manual

Midland 73-005 User manual

Other Midland Transceiver manuals

Midland M Zero Plus Manual

Midland

Midland M Zero Plus Manual

Midland Alan 48 Pro Manual

Midland

Midland Alan 48 Pro Manual

Midland CT 890 User manual

Midland

Midland CT 890 User manual

Midland G18 PRO Manual

Midland

Midland G18 PRO Manual

Midland PACIFIC User manual

Midland

Midland PACIFIC User manual

Midland CT 890 Manual

Midland

Midland CT 890 Manual

Midland G7 Pro User manual

Midland

Midland G7 Pro User manual

Midland C1107 Manual

Midland

Midland C1107 Manual

Midland G5 XT User manual

Midland

Midland G5 XT User manual

Midland ALAN 121 User manual

Midland

Midland ALAN 121 User manual

Midland 7001 User manual

Midland

Midland 7001 User manual

Midland 445 BT Manual

Midland

Midland 445 BT Manual

Midland 77-250 User manual

Midland

Midland 77-250 User manual

Midland 7001 User manual

Midland

Midland 7001 User manual

Midland ALAN 42 MULTI User manual

Midland

Midland ALAN 42 MULTI User manual

Midland 75-440 User manual

Midland

Midland 75-440 User manual

Midland M24-S User manual

Midland

Midland M24-S User manual

Midland G15 Manual

Midland

Midland G15 Manual

Midland G9 PRO User manual

Midland

Midland G9 PRO User manual

Midland G477 XT Manual

Midland

Midland G477 XT Manual

Midland G5 User manual

Midland

Midland G5 User manual

Midland M-5 User manual

Midland

Midland M-5 User manual

Midland G11 PRO Manual

Midland

Midland G11 PRO Manual

Midland ALAN 42 MULTI User manual

Midland

Midland ALAN 42 MULTI User manual

Popular Transceiver manuals by other brands

Kenwood ProTalk TK-3201 instruction manual

Kenwood

Kenwood ProTalk TK-3201 instruction manual

City Theatrical SHoW DMX SHoW Baby user manual

City Theatrical

City Theatrical SHoW DMX SHoW Baby user manual

Standart Horizont HX407 owner's manual

Standart Horizont

Standart Horizont HX407 owner's manual

B&G V90S quick start guide

B&G

B&G V90S quick start guide

VictelGlobal ALK300 series Operation manual

VictelGlobal

VictelGlobal ALK300 series Operation manual

Cactus Wireless Flash Transceiver V6 user manual

Cactus

Cactus Wireless Flash Transceiver V6 user manual

Yaesu FT-11R user guide

Yaesu

Yaesu FT-11R user guide

Skanti TRP 5000 instruction manual

Skanti

Skanti TRP 5000 instruction manual

ELECRAFT KX3 Installation and operation guide

ELECRAFT

ELECRAFT KX3 Installation and operation guide

American Lighting DMX512 quick start guide

American Lighting

American Lighting DMX512 quick start guide

Furuno FM-77 Operator's handbook

Furuno

Furuno FM-77 Operator's handbook

Yaesu FT-7B manual

Yaesu

Yaesu FT-7B manual

Mizuho MX-2 Operating & assembly instruction

Mizuho

Mizuho MX-2 Operating & assembly instruction

Kenwood TK-3180 Manuale di istruzioni

Kenwood

Kenwood TK-3180 Manuale di istruzioni

Blitz MJ-398U instruction manual

Blitz

Blitz MJ-398U instruction manual

Utilicom LongRanger 2050 Operator's manual

Utilicom

Utilicom LongRanger 2050 Operator's manual

Standart HX290UKA Service manual

Standart

Standart HX290UKA Service manual

Altronix Pace1PTM installation guide

Altronix

Altronix Pace1PTM installation guide

manuals.online logo
manuals.online logoBrands
  • About & Mission
  • Contact us
  • Privacy Policy
  • Terms and Conditions

Copyright 2025 Manuals.Online. All Rights Reserved.

~,.\
~ID.LAN[:>
~
~
~
~
Controls and Connections 4
Gening Ready 8
Operation 11
Operating Controls 11
(1) Setting an Operating Frequency 12
(2) Recalling the CALL Frequency 14
(3) Programming frequencies in Memory 15
(4) Recalling a Memory Frequency 17
(5) Shifting a Memory Frequency 18
(6) Changing a Memory Frequency 18
(7) Deleting a Memory Frequency 19
(8) Scanning 20
(9) Switching the Transmit Power 28
(10) Dual.Watch Operation 29
(11) Duplex Qperation 31
(12) Changing a Channel Step 32
(13) Banery-Save Function 33
(14) Frequency Lock 33
(15) PTT Lock 34
(16) Switching Pause Scan and Busy Scan 34
(17) Tone Squelch Control 35
(18) Special Functions with the 0/SET Bunon 36
(19) Pager and Code Squelch 44
(20) Repeater Operation (How to calllhe Repeater) 52
(21) Sening a Shift Frequency 54
(22) lithium Banery 55
Troubleshooting 56
Specifications 57
Accessories 58...
2
!. EQUIPMENT SUPPLIEP .
~
~
@
~~
-
-
y
This Transceiver is supplied with the items listed below. When
unpacking the unit carton, check the all items are included. If items
are missing, please notify your dealer immediately.
<DONner's Manual G) Belt Clip
(3)Antenna (D Hand Strap
(i)Jack Cover (Installed) 0 Rechargeable 7.2V 700mA Banery
G) U.L. Wall Banery Charger
~~
~ Duplex fealure ~rmls a sem-duplex ~raton using two ~roory
frequenciesalk)ws 10unique repealer oftse1S.
, Eltber Pauseor Busy scan functons can be selected.Scanning ofthe
dial-frequencyprovidesa 1MHzscan, all band scan and programmed
scan. Scanningof a merooryfrequency provides M ~roory group scan.
M merrory group scan. all memory scan and MS.Mscan-
, A Squeld1lMonItorbutlon opens the squelch so you can easily chedllhe
v~ume settingor roonilor for traftK:.
, A Battery-Savefundion all~s you to reduce the current drain during
receiverS1andby.
, An Aulo-PowerOff funCIbn redu~ the current drain if you forget to turn
the TransC$iveroff.
, Frequenciescan be entered directly from the keyboard or via a rotary
channelselector.
~ A Fundion button allows yoUto change the frequency wIth a 100KHz or
1MHzstep when you turn the rotary channel selector.
~ Selectedfrequenciesand ~rating mode maybe kJckedto prevent
inadvenentkeyoperalion.
, PTT button rmy be kJckedto prevent inadvenent transmission.
~
This Transceiv« Is a highly versatile. yet ~ct VHF hand.held 1Iansc..v«
that Is built and tested to stringent specIfications. The following features are
built into youI TranSC9"'er.
, Paging function Is avall~e. This feature allows yoUto page one speclfK:
station a all group statQns via 3-figured DTMF signals. When a paging
signal is r~e"'ed. a beep sound and the display will in10rmyou that
someone has you paged. The paging slation can be identniedby means of
its Individual code.
, DTMF Code Squelch operation is available. The Transcsiver will hear
csrtain slallons usingIhe identK:aJcOOeoniy.
, Sub-audible Tone Squek:h operation Is available when an ~tQnallone
squelch unil is installed. The Transcsiver will hear certain stations using
the specifK:tone frequency only. Tone frequencies can be 6819c1edvia Ihe
rotarychannel selector.
, The Tone Squelch unhcan be usedtogelherwhh lhe DTMFfunctionalk)wing
yoUthe simuhan90usoperation0! DTMFCode Squek:handsub-audble Tone
Squelch.
, An ~tional High P~r RechargeK>leBanery Padl or an external power
supply of 13.8Venable powertullransmissQn lover 5W}.
, A wide range of acceptable eX\emalpower supply voltages (510 16V DC)
aIiows you to power II from an aUto~ile banery speclf~ for 12V only).
, Up 1020 memory channels are available. 10 in each M and M memory
groUp.
, Two independent sub-audi~e tone frequel\ties can be programmed in
M1(or ~1) and M2(or ~2) with ~tional Tone squeich unil.
, Int«nal Dual-Watch allowsthIs Transcsiver to watch;
.Ihe selected dial-frequency and Ihe stored frequency in me~ry address
1.11.
.the selected dial-frequency and any other memory frequency.
.the selected dial-lrequency and each memory frequency under scanning
In sequencs. (up 1020 channels).
4
~
"'v I ., II"" '-""' 1"'1/. u "" "" A- ""' ..""" ..-
¥'\
"J?";i,c~tp",(,c\ c.,', \
"C""c",,"-, ' ~ .". .: ;": ,.,
~ .
PIInInIE
D~I
~~
~
~~~~
(~
~~~~~
II "1I ..
I ..1
..'
l "J
~~
GDQ) (
0)@R
-J ~J
(14) ~.
\2)E:.Alernal\MI\;rU~IIVII~ """',,.
An external miCl~hone call be oonneded.
@Antenna Jack: ANT
This is a BNC oonn9dor to oonnoct tho su~lied helK:a1 antenna or any
50(2 2 meter external antenna.
(!)Transmission/Battery Indicator
This red indK:atOllights red when transmitting. With weakened
batterios, It b9cOIT19Sdim indicating the battery n99ds charging.
@Function Button
Special functions are available by pressing each blltton on the front
panel with the Funct.'n button held depressed.
@PTT Button
For transmission, press this blltton and speak into the micr~hone.
Release the pn button to roceivo.
@Lock Button
This is to Icx:k the battery case. Push up this button to remove the
battery case.
(DExternal Power Connector:
This alk)ws you to oonned an opt.'nal power cord to power your
transC8iver from a 12Vvehcle battery.
When connocted. power
is not su~lied from the
internal banery.
)Power On-OFF SwitchNolume Control
This is t~ turn the ~ on and c(f and 10 control the volume. Raate the
~ntrol dodlwise to turn the power on, and rotate h c~wise further to
increase the volume. The SquelCh OH button ShoUld be hek! depressed or
the SquelCh Control rotated fully ~unterck>ckwise while ~ntrolling the
volume. Turning the power on whh the Function button hek! depressed
init~ljzes the m~ro-processor and deletes all data programmed in the
meroofy.
)Squelch Control
This is to ~ntrolthe white no~e. Raate the ~ntro' ~unter-clcx:kwise and
the white no~e will be heard. Rotate it then dodlw~e slowiy and set the
~ntrol where the n"se just Sl~.
IOTE
I) Do not rolale the controJ CloCkwise too far.
2) The control should be placed wihere the while noise is not heard
during following operlliona; ScaMing. DuaI-Walch, Batlery-Seve,
Paging and Code Squelch.
3) Adjuatlhe controJ on a channel which ia not receiving a .ign..
~Rotary Channel Selector
This is to select the transn"iVreceive frequency. h ~ also used to Change
the tone frequency, Channel step and mennory address nurTt>er. Rotate the
selector clockwise to increase the frequency and ~unterck>ckwise to k>wer
it The interval by whiCh the frequency changes is referred to as "Channel
Step". The Channel Step which ~ init~11y sello IOKH2 can be Changed 10
12.5, 20, 25, 50, or 5KH2. (Refer to Changing Ihe Channel Slep, contenls
II).
~External Speaker Jack: ,
Any olher external speaker whh 8 ohm k)ad or an earphone can be
~nnected. The buih-in speaker ~ d~abled when an external speaker ~
~nnected 10 th~ jaCk.
A pin .I the center is negative
fl;\
6
~
~
<WSpeak..
.This is a bullt.in speaker. whid1ls disabied when the eX1ernal speaker ~
(X)nnec1ed.
@Micropho~
This is a built.in (X)ndenser microphone.
(f) Key buttona for varioul operatlona
4>1.35.:8 c~
<63.8
~~~
t'~-L
rn rn mil
rnrnrnlL .-@
~
"
Note:
Please 1188I po-. IUpply
cord plug with outer diame...
3.8nvn. Ir\eerting I plug whole
ou... dilmeter il lesa thin
3.8mm wiD not IC~V.1e the
lwitch Nil in the DC IN
COlV)ector. Thil could rel~t In
ooit damage.
cAunoN:
Turn the po-. awitch off before colV1ecting the c.ble.. Nominal
Input voltage for thil tr.nsceiver I. from SV to 16V DC. Do not lupply
voltage beyond the r.'ge.
@Front Panel
@SqueIcl\'Monltor Button: SOL
This bUnon functK>ns as the squek:h control rotated fully counter.clodlwise.
While this bUnon is hekj depressed. the squelch operation is turned off and
the sound is heard from the speaker regardless of the position 01 the
squeldl contrd. .
~
@Lamp Button: LIGHT
While the bunon is held derxessed. the I~ht at the display is turned on.
Press bunon with functK>n bunon held depressed to ieave the light on and
press it again to turn it off.
@CllI Button: CALL
Press this bunon whiie the PTT bunon is heid depressed to generate a
17SOHz repeater access code.
;1~\, 7.. .~
,
~--,~..
~
~ Display @ Battery
This transceiveris suppliedwith a rechargeable7.2V 700mA
This display indicates followings: banery. This batteryis shipped uncharged. You must charge
i. Frequency it for 10-14hoursbefore use.
ii. Channel Step
iii. Special Functions @ Jack Cover
PAG, DUAL. APO, DUP, F.L., T, sa, P.L.,C.sa, S, B, +, -, Covers thejadls when the external microphoneand external
iv. Memory Address Number speaker are not in use.
v. Memory Mode
vi. Scanning
vii. Shift Frequency
viii. Busy Scanning
ix. S-meter and RF Output Indicator
It functions as a S-meter when receiving the signal and
indicates the RFoutput power while transmitting.
~~~
,,0
¥
1 .Install the Included antenna. N;'d<ei Cadmium batt8fM16 can devel~ a me=ry which can be destrudive
10 Ihe battery. This OCX:UI$when, for ex~le, you use your transceiv8f for
an hour or so, and 1hM r~harge k withoUl fil$l "CYCLING" Ihe banery.
Eventually, with ron1inued shor1.1erm use and recharging. the capacIty of
the battery decays -giving you on~ a shorl period of usage.
IMPORTANT: Remember to I~d.lly cycle your b~. I
Most nid<ei cadmium battery ped<s can be recharged from 4-800 times. A
single charge shouk! suWly you with a full-day use under normal operating
condi1K1ns.
Nid<ei cadmium batteries generally do not hok! a charge over a k>ng period
of time. If you haven'1 used your 1ransc..iver in several weeks, always charge
lI1he night before you intend 10 use II. Cok! temperatures (below 30
Fahrenheit) a~o reduc..the capadty of these batteries.
NOTE: Do not store where lemperatl.-e f.1I below 32 f8hrenhell
BATTERY
This transceiver banery pad\ shouk1 provKJe you with excellent long-ter1fl
service when pr~rly cycled, charged, and stored. It will, OOwever,
eventually need replacement. " you charge your unit fully and it fails to
provKJe you with norma! time usage, it probably needs replacement. Contad
your supplier for a replacement.
2. BATTERY PRE-OPERATION
This 1rans~lver is powered by a rechargea,le NICKEL CADMIUM banery
padt. 11is extre~1y i~rtant to 'CYCLE" this banery pack. Failure 10
cycle the banery padt will greatly reduce banery Ufe and cause poor
per1orman~.
When you first re~ive your transceiver the baneries rrust be charged
before use. To do 1his, sl~y plug the suWlied AC adaptor in a 110-115
Vol1 AC (standard, or 22OV In so~ countries) wall socket. ConneG1 the
plug 10 the jadt on the transceiver. Charge the unh 10-14 hours before use.
Make sure Ihe unh is OFF.
When a new set of baneries is charged the first 1i~, 1hey only co~ up
to 60.65"!. of capacity. After you charge ~ur 1rans~iver the firs11i~,
use the unh un111the banery is exhausled. Recharge the baneries another
10-14 hours. Repeat this procedure three or four 1i~s 10 bring the
baneries 10 100-/0 efficiency. This is called 'CYCLING" the banery.
Once you have cycled the banery. you can charge It at any tl~ for any
period up 10 ten hours.
NOTE: Do notlelve the chlrger on for more than fourleen hours, II it
could reduce the Jlle cepacily of the bal1enel.
~
9
4. AfI~ you charge the banery .turn the ~r swilch 00 and set
the volu~ control 10 a comtOOable listening levlM.
3. BA1TERY LOCK
ThIs controllcds and unlodls the battery paOC
To reroovethe bal1ery pack, HOLD the unh In your left hand, push the iever
up. Hokj the top 0' the unIt and slkJe the battery pad\ to the 1811.
To Instan the baIIery padlslnnply reverie the pr()(ms. The bal1ery padI
has groov85 that malch the unit. l.Ia1ch up the groov85 and slKjethe battery
padI onto the unit.
BA1TERY PACK INFORMATION
~~
5. Rolale the squelchconlrol ck>ckwlseskJw1yunlillhe noise
from the s~er just slops.
NOTE:
Do no1rotale IN control dockwlae loo far. Exceasive squelch
reOJce. IN reQo aenaili.;ly .1d may prevent reception.
,.