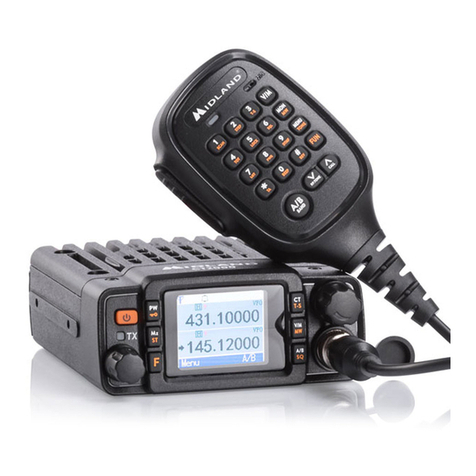
Midland PACIFIC User manual

Statie radio maritima
Midland Pacific
Manual de utilizare in Limba Engleza

1
ENGLISH
Table of contents
1. Introduction .........................................................................................................2
2. Above all… safety! ..............................................................................................3
2.1 Symbols used .................................................................................................3
2.2 Warnings .........................................................................................................3
2.3Service............................................................................................................4
3. Identifying the parts ............................................................................................5
3.1 Display ............................................................................................................5
3.2 Radio ...............................................................................................................6
4. Preparingthetransceiver......................................................................................7
4.1Installingandremovingthebeltclip................................................................7
4.2 Installing and removing batteries ....................................................................7
4.2.a Installation ...........................................................................................7
4.2.b Removal ..............................................................................................8
4.3Rechargingbatteries.......................................................................................8
4.4Memoryeffectofrechargeablebatteries ........................................................8
5. Basic operations ...............................................................................................10
5.1 Turning on/off ................................................................................................10
5.2Selectionoftheoperationalchannel.............................................................10
5.3Volumecontrol ..............................................................................................10
5.4Transmissionandreception..........................................................................10
5.5ButtonMON(Monitor)...................................................................................10
5.6Choosinghighorlowtransmissionpower .................................................... 11
5.7LCDbacklight................................................................................................ 11
5.8InstantselectionofChannel16..................................................................... 11
5.9 Power saving feature .................................................................................... 11
6. Advanced functions ..........................................................................................12
6.1Scanningallchannels...................................................................................12
6.2VOXFunction................................................................................................12
6.3Keypadlock ..................................................................................................12
6.4RogerBeep(End-of-messagetone):............................................................13
6.5DualWatch....................................................................................................13
6.6Activeband ...................................................................................................13
6.7Privatechannels:programmingandselection...............................................13
7. Troubleshooting ................................................................................................14
7.1 Solution table ................................................................................................14
8. Technical specications ...................................................................................15
8.1 Transmitter ....................................................................................................15
8.2Receiver........................................................................................................15

2
ENGLISH
1. Introduction
ThenewhandheldmarinetransceiverPACIFICisabletosatisfycommunicationrequirementsfor
alltypesofnavigationwhetherprofessionalorhobbyist.PACIFICisrobust,electronicallyadvanced
and enables clear and reliable communications on the VHF nautical band for all international
channelsassignedbyITU.
It offers security for all navigational requirements thanks also to a dedicated button that gives
instantaccesstheemergencychannelN.16.
PACIFIC,whichboasts57channelsandoutputs5Wtransmissionpower,ismadeupofcomponents
specicallydesignedforthistypeofequipment.
PACIFICisparticularlystraightforwardtouseandguaranteesbestperformanceinallsituations,
thanks also to the keypad lock that prevents accidental pushing of buttons while handling the
device.ALCDbacklitdisplayenablesitsuseindarknessorpoorvisibility.
Inshort:PACIFICiseasytouseanditofferstotalsecurity!
Main features:
• PLL(PhaseLockedLoop)synthesizercircuit-forpreciseandstablechannelselection.
• Back-lit LCD display - constantly displays radio’s parameters and settings.The backlighting
enablesyoutoviewthescreenwhenthereislittleenvironmentallight.
• Automatic squelch - while in standby, this function automatically eliminates bothersome
backgroundnoiseandreducesthebatterydrain.
• RecallbuttonforChannel16-forinstantaccesstochannel16(themostusedmarinechannel
mainlyusedforemergencycontact).
• High/low power selection - reduces transmission power in short-distance communication,
allowingtheradiotosaveenergyandreducingtheriskofinterference.
• Keypad lock - locks the transceiver keypad to avoid the accidental activation of buttons or
settings.
• Batterydischargedicon-alertsyouwhenthebatteriesarelow.
• Sockets for speaker and microphone - these sockets enable the use of various external
microphoneoptionalaccessories(headphone,microphone/speaker,etc),foramorecomfortable
use,particularlyinnoisyenvironments.
• You can use your marine transceiver either with Ni-MH rechargeable batteries or with non
rechargeablealkalineones.
• Channelscanning-automaticallysearchesformarinebandchannelsignals.
NOTE: The manufacturer, with its effort to constantly improve product quality, reserve the
right to change characteristics and features without prior notice.

3
ENGLISH
2. Above all… safety!
2.1 Symbols used
Foreaseandconvenienceofuse,thismanualusessymbolstohighlighturgentsituations,practical
advice,andgeneralinformation.
! Exclamation marks such as this one indicate a crucial description regarding technical
repairs, dangerous conditions, safety warnings, advice, and/or other important infor-
mation. Ignoring these symbols may result in serious problems and/or damage and/or
personal injury.
Notes such as this one indicate practical advice that we suggest be followed for the optimal
performance of the equipment
2.2 Warnings
! DO NOT TRANSMIT WITH THE DAMAGED ANTENNA OR WITHOUT THE ANTENNA
CONNECTED - although the radio is protected, this may seriously damage its R.F. power
stages. Do not use your transceiver if the antenna is damaged.
! Do not keep the antenna too close to your head and body during transmission.
! Do not hold the transceiver by the antenna! This is a delicate part of the device and is
vital for the proper functioning of the radio.
! Pay attention to environmental conditions - although the radio was designed to operate
under the most severe conditions it is important to avoid exposure to environments that
are excessively humid or dusty, or to temperatures outside the -15° to +55°C° range. Also
avoid exposure to direct sunlight.
! Avoid strong mechanical shocks and excessive vibrations, the radio is designed to bear
mechanical shocks and vibrations, provided that they’re the normal ones borne by any
electrical equipment.
! Do not use the radio, its accessories, and/or substitute the batteries in potentially
explosive environments. A single spark may cause an explosion.
! BATTERIES - Strictly follow all the directions and warnings on the batteries stated at
chapters 4.3 and 4.4
! Do not open the radio for any reason! The radio’s precision mechanics and electronics
require experience and specialized equipment; for the same reason, the radio should
under no circumstances be realigned as it has already been calibrated for maximum
performance. Unauthorized opening of the transceiver will void the warranty.
! Do not use detergents, alcohol, solvents, or abrasives to clean the equipment. Just use
a soft, clean cloth. If the radio is very dirty, slightly dampen the cloth with a mixture of
water and a neutral soap.
! Your VHF marine handheld transceiver has a built-in VHF radio transmitter. Be aware
that, when you press the PTT button, the radio emits radio frequency (R.F.) energy.
! Before using the radio, ensure that all protective covers and parts are in perfect operating
condition, in order to ensure maximum protection against humidity and atmospheric
agents.

4
ENGLISH
2.3 Service
Weadviseyoutowritetheserialnumberofyourtransceiverinthespaceprovidedbelow.This
number is found on the rear panel of the transceiver and will be useful in the event of repair/
assistanceand/orlossand/ortheft.
Serial Number _______________________

5
ENGLISH
3. Identifying the parts
3.1 Display
Your marine transceiver keeps you constantly updated about its operational status through a
LiquidCrystalDisplay(LCD).Thesymbolsandtheircorrespondingparametersthatmayappear,
accordingtotheoperationalstatusofthedevice,aredescribedasfollows:
a. VOX-ActivationofVOXfunction;
b. TX-Duringtransmission(whenyoupressPTT button)
c. :warnsyouofbatterylowcharge;
d. Channel-Thesetwolargedigitsshowtheselectedmarinechannel;
e. INT/USA/CANandtherstofthe2smalldigits-Specifythefrequencybandinuse(USA
andCAN:canbeactivatedbymeansoftheoptionalprogrammingsoftwarePRG PACIFIC,
but they are for American version only).
e-1 Second small digit-Givesfurtherinformationwithregardstothechannelbeingused(“d”
duplex).
f. -Appearswhenthekeypadlockisactivated.
g. - This symbol marks activation of weather information channels (only for American
version - bands USA and CAN).
h. LO (Low) / Hi (High) –indicatestheselectedpowerlevel.
i. RX-(busychannel):appearswhenthetransmitterisreceivingasignal.
a
b
c
d
e
f
i
g
e
h
e1
1
2
3
8
9
10
4
6
7
5

6
ENGLISH
3.2 Radio
Refertothefollowingimagestoidentifythevariouspartsofthedevice:
1. VOLUME control-On/offswitchforthedeviceandadjustsVOLUMEofreception.
2. PTT (press to talk) -Pressthisbuttontoswitchtotransmission
3. Button ‘16’-Pressthisbuttontoinstantlyrecallchannel16.
4. Built-in MICROPHONE-Hereiswheresoundispickedupbythemicrophone.
5. Built-in SPEAKER -Hereiswherethespeakerishoused.
6. ANTENNA -Receivesandtransmitsradiosignals.
7. MIC/CHG Socket (under protective cover) - To connect to external audio devices
(headphones,microphoneetc.)andtothebatterycharger.
8. MENU button-Pressthisbuttontodisplaythedevice’sMENU.
9. MONITOR/SCAN button-PressthisbuttononcetoactivateSCAN(scanningofchannels).
Keepthesamebuttonpressedforabout2secondstoactivateMONfunction.Thisfunction
temporarilycutsoffSquelch(forweaksignals)
10. / buttons -Pressthesebuttonstoselectchannelnumberandtochangesettingwithin
theMENU.
a
b
c
d
e
f
i
g
e
h
e1
1
2
3
8
9
10
4
6
7
5
a
b
c
d
e
f
i
g
e
h
e1
1
2
3
8
9
10
4
6
7
5

7
ENGLISH
4. Preparing the transceiver
Makesurethefollowingitemsaresuppliedinthepackagebefore
youstartusingyourtransceiver:
Transceiver;•
Desk/wallsupport•
NiMHbatterypack•
Beltclip;•
Desktopchargeralongwithadaptor;•
2-waycarlightercharger;•
Usermanual;•
If any of the above is missing or damaged contact your supplier
immediately.
4.1 Installing and removing the belt clip
Withthebeltclipyoucaneasilyattachthetransceivertoyourbelt.
Thecliphowever,mustberemovedinordertoinstallorchangethe
batteries.Toremovethebeltclipfollowtheinstructionsofpicture1.
Toxtheclipbacktothedeviceslotitintheguidesatthebackofthe
transceiveruntilitclicksintoplace.
4.2 Installing and removing batteries
ThetransceiverisoperatedbythesuppliedNiMHbatterypackorby
4optionalAAbattery.Thesecanbeeitheroneoftwotypes:
• RechargeableNiMH(1,2V)- available indifferentcapacity (in
mA/h).Batterieswithhighercapacitywillsupplylongercharger
butwillrequirelongertimestorecharge.
• Non-rechargeablealkaline(1,5V)
! Do not install rechargeable and alkaline batteries at the same
time in your transceiver. Always use the same batteries as a
set (type and make) so that you can be sure their level of
charge is the same.
! If you do not use the transceiver for a long time remove the
batteries/ battery pack.
4.2.a Installation
1) Removethebeltclipasexplainedinparagraph4.1;
2) Openthebatteriescompartmentasshowninpicture2;
3) Insertthebatterypackintothebatterycompartmentasshownin
picture2.
4)Replacethecoveronthebatteriescompartment.
5) Replacethebeltclip.
! If you use the batteries, be careful to insert them with the
correct polarity as illustrated inside the compartment.
! Be careful to snap close the battery cover.
a
b
c
d
e
f
i
g
e
h
e1
1
2
3
8
9
10
4
6
7
5
a
b
c
d
e
f
i
g
e
h
e1
1
2
3
8
9
10
4
6
7
5
Picture1
Picture2

8
ENGLISH
4.2.b Removal
1) Followsteps1and2ofpar4.2.a;
2) Removethebatterypackfromthedevice;
3) Follow steps 4 and 5 of par 4.2.a.
4.3 Recharging batteries
Batteriescan be recharged without takingthem outof thetransceiver (butthe devicemust be
turnedoff);batteriestake8-10hourstofullyrecharge(batterypack800mAh).
To recharge batteries by means of the 2-way car lighter charger:
1. CarefullylifttherubberprotectionofthesocketMIC/CHG.
2. InsertthejackofthebatterychargerintothesocketMIC/CHGoftheradio,thenconnectthe
batterychargertothecarlightercharger.Chargingwillbegin
3. Whenchargingiscompletepulloutthecharger’sjackfromtheradioanddetachitfromthe
mains.Replacetherubberprotectionmentionedinstep1.
! Do not overcharge the batteries! When these are fully charged the charging process
does not stop automatically. Do not forget therefore, to remove the charger from the
transceiver as soon as the batteries are charged.
! Do not try to charge alkaline batteries or non rechargeable batteries. Make sure that
when you connect the charger only rechargeable batteries NI-MH should be contained
in the batteries compartment! It is very dangerous attempting to recharge other types of
batteries (for example alkaline batteries). Batteries which are not suitable to be recharged
may leak, explode or even burn and cause damage!
! Usingadifferentbatterychargerotherthantheonespeciedcancausedamagetoyour
device or may even cause explosions and personal injuries.
! Donotthrowbatteriesintoreorplacethemnearheatasthismaycauseexplosions
or personal injuries. Dispose of the batteries according to procedures set out by local
regulations.
! Do not mix old and new batteries or batteries of different types or batteries which have
been used in different manners. Every battery set which is being used must always be
composed of the same elements.
Recharge of the battery pack by means of the desktop charger and wall adaptor:
Connectthesocketofthewalladaptortoamainspowersocketandinsertthejackofthewall
adaptorintothedesktopchargerplug.
Placeyourtransceiverintothecradleofthedesktopcharger.
Whenchargingiscompletetakethetransceiveroutofthecradleanddetachthesocketofthewall
adaptorfromthemains.
4.4 Memory effect of rechargeable batteries
Rechargeable NiMH (Nickel-Metal-Hydrate) batteries are affected by what is known as the
“memory effect”.This phenomenon is associated with a drastic reduction of battery autonomy
andistriggeredifthebatteriesareregularlychargedbeforebeingfullydischargedand/orarenot
completelyrecharged.Toavoidthememoryeffect:
• When possible, recharge the batteries only when they are completely discharged (until the
deviceturnsitselfoffduringnormaluse)
• Donotdisconnectthebatterychargerbeforethetimeindicatedforafullbatterycharge.
• Dischargeandrechargeyourbatteriescompletelyatleasttwiceamonth.Inanycase,thebest

9
ENGLISH
solutionforavoidingthememoryeffectistouseinturntwobatterysets:oneinuse,andthe
otherasaspareset.
Thememoryeffectcanbeeasilyeliminatedbycompletelydischarging/chargingthebatteries3or
4 times.
Thememory effectshouldnot beconfused withthenormal batterylife, whichis 400cycles of
charge/discharge on average. It is completely normal for operating duty to decrease when the
batterieshavereachedtheendoftheirlife;atthispoint,youwillneedtosubstitutethebatteryset.

10
ENGLISH
5. Basic operations
5.1 Turning on/off
Toturnonthetransceiver,turntheON/OFF/VOLUMEknobclockwiseuntilyouhearitclicks:the
LCDdisplaywilllightupanddoanAuto-Test.Subsequentlyyouwillhear1beep.Toturnoffthe
transceiver,turntheknobcounter-clockwiseuntilyouhearanotherclick.
5.2 Selection of the operational channel
1) PressoncetheMENUbutton.Thenumberofthechannelwillstartashingonthedisplay.
2) Pressthe /buttonstoscrollupordownthechannellisttillyouselectthedesiredchannel.
3) PressthePTTbuttontoconrm,orwaitfor10seconds.
Refer to the table of frequencies. Moreover, the reception frequency could be different (duplex
channels) from the transmission frequency or it could be the same (simplex channels). Normally
communications among vessels can only take place on simplex channels.
5.3 Volume control
Turnthe knob VOLUMEtoabout half wayandadjust ittoacomfortable levelassoonas you
receiveasignal.IfyoudonotreceiveasignalyoucanusethebuttonMON/SCANdescribedat
par. 5.5.
Ensurethechannelyou’veselectedisnotareception-onlychannel(otherwisethetransmissionwill
bedisabled)andthatnooneelseistalking(thiswillappearonyourdisplayastheBUSYicon).
5.4 Transmission and reception
ThebuttonPTTislocatedonthetopleftsideofthedevice.Totransmit:
1) Makesurethattheselectedchannelisnotreception-only,(otherwisethetransmissionwillbe
disabled)andthatnooneelseiscurrentlytalking;
2) KeepbuttonPTTrmlypressed:TXwillappearonthedisplay;
3) Beforeyoustarttalkingwaitforafractionofasecondthenspeaknormally,inthedirectionofthe
microphone,andholdthedeviceatadistanceofabout5cm.
4) WhenyouhavenishedreleasethebuttonPTT:TX willdisappearfromthedisplay;
5) When thebutton isinreception mode(PTT notpressed) youwill automatically receiveany
communication;
Duringtransmissionandreceptiontry,asfaraspossible,tokeeptheantennainverticalposition
andtoavoidobstaclestowardsthedirectionoftheotherparty.
5.5 Button MON (Monitor)
TheMonitorbuttonisfortemporarilyexcluding(opening)thesquelch,inordertolistentosignals
thataretooweaktokeepthesquelchpermanentlyopened.Byexcludingthesquelchyouwillavoid
listeningthecommunication“chopped”bythesquelch.InordertoactivatetheMonitorfunction,so
astolistentoalltrafcontheselectedchannel,keeppressedtheMON/SCAN button for about 2
seconds.KeeppressedthebuttonMON/SCANforabout2secondstodisablethisfunction.

11
ENGLISH
5.6 Choosing high or low transmission power
Batteriesaredrainedmorequicklyduringtransmission.Inordertoextendthebatterylifeyoucan
selectthelowpowerwhentransmittingovershortdistances:
1) PresstheMENUbuttontwiceandthewriting‘Pr’ will display.
2) SelectLOusingthescrollbuttons /
3) Press PTTtoconrm,orwaitfor10seconds.
Ifyouwanttotransmitalongerdistancerepeattheaboveproceduretoselectthehighpower.At
step2usethe /tomakethewritingLOdisappear.Whenthebatteriesareingoodconditions,
highpowerisabout5watt,whereaslowpowerisabout1watt.
A low battery level during transmission will have a negative effect on the performance of your
device.
5.7 LCD backlight
IfthereisinsufcientlighttoreadthedisplayyoucanpresstheMENUbuttontoswitchthedisplay
backlightonforabout5seconds.
Switching the back light on the display adds an additional drain on the batteries. Try to make a
moderate use of this.
5.8 Instant selection of Channel 16
Channel 16 is the marine channel most frequently used for emergency. Your transceiver is
equippedwithabuttonthatprovidesinstantaccesstothischannel.Torecallrapidlychannel16
pressthebuttonCH 16.Nomatterwhatmodethedeviceisoperating,channel16willbeselected
immediately.TogobacktothepreviouslyselectedchannelpressagainthebuttonCH 16.
5.9 Power saving feature
Thebatterypowersavingfeatureenables a reduction in the consumption of up to 50%;power
savingcomesonautomaticallywhenthetransceiverdoesnotreceiveanysignalformorethan
sevenseconds.
Whenthebatterypackisalmostdischarged,theradiowillswitchto‘Lo’power;then,thisiconwill
appear toindicatethatthebatterypackisdischarged.Replacethealkalinebatteriesorrecharge
thebatterypack/rechargeablebatteries.

12
ENGLISH
6. Advanced functions
6.1 Scanning all channels
PACIFICcanautomaticallysearchforsignalsthroughoutthemarinebandbyscanning,i.e.selecting
thechannelsinrapidsequence.Whenasignalisdetected,thescanningpausesonthatchannel
andremainsblockedforvesecondsbeforeautomaticallybeginsscanningagaintogiveyouthe
chancetondothercommunication.
PressbrieythebuttonMON/SCANtostartscanning:
Press again MON/SCANtostopscanning.Yourtransceiverwillgobacktothechannelfromwhich
thescanningoriginallystarted.
Onceyouaretunedinthecommunicationyouwerelookingfor,pressPTTtotalkontheselected
channel.PACIFICwillhoweverremaininscanningmode(whichisindicatedbytheashingofthe
channelonthedisplay)anditispossibletostartscanningagainbypressingthe / buttons. If you
press PTTduringscanningyoucantransmitonthechannelfromwhichthescanningstarted.The
/keysallowyoutochangethedirectionofscanning(fromlowerchannelstohigheronesorvice
versa)andthereforetoskipcommunicationswhichareofnointerest.
6.2 VOX Function
PACIFIC enables hands free conversations through VOX function. The degree of sensitivity of
VOXfunctioncanbeadjustedtothreedifferentlevels.YoucanenableVOXfunctionwithorwithout
accessories.
1) ToactivateVOXfunctionpresstheMENUbuttonfourtimes(exceptforCH75-76)andVOX will
appearonthedisplay
2) Usethe /keystoselect:
A. Highsensitivity
B. Middlesensitivity
C. Lowsensitivity
3) Press PTTtoconrmorwaitfor10seconds
To disable VOXfunctionfollowtheinstructionsaboveandselectoption‘oF’.
VOXhasabetterperformancewhenusedinconjunctionwiththeoptionalaccessorieswhichplug
intheappropriateoutlet.Thiswillenableyoutokeepthemicrophoneatconstantdistancefrom
yourmouthandbyholdingthetransceiveronthebeltyoucancarryonworkingwithyourhandsin
total freedom.
6.3 Keypad lock
Youcanlockthekeypadofyourtransceiverandavoidpressingbuttonsaccidentally.Allbuttonsare
disabledwiththeexceptionofMON(openingsquelch),PTT,16,MENU(removalofkeypadlock).
Toinsertkeypadlock:
1) PressthreetimestheMENUbutton(exceptforCH75-76);‘Lc of’willappearonthedisplayand
thesymbol willblink.
2) Usingthe /buttonsselect‘on’.
3) Press PTTtoconrmorwaitfor5seconds.
Todisablethekeypadlock,pressoncetheMENUbuttonandselect‘on’.

13
ENGLISH
6.4 Roger Beep (End-of-message tone):
WhenyoureleasethePTT,thatiseverytimeyouendtransmission,PACIFIC gives out a sound
indicatingtotheotherpartythats/hecanstarttalking.Thisfunctionisfactoryset.Todisablethe
function:
1) PresssixtimestheMENUbutton(exceptforCH75-76);‘rb on’willappearonthedisplay
2) Usingthe /buttonsselect‘oF’.
3) Press PTTbuttontoconrmorwaitfor10seconds.
Toreactivatethis function repeattheaboveprocedure.Alstep2usethe /buttonstoselect
‘on’.
6.5 DUAL WATCH
Thisfunctionallowsthemonitoringof2channelsofyourchoicebyselectingthechannelsinrapid
sequence.
Procedure:
1) Selectthechannelyouwanttomonitor.
2) PressseventimestheMENUbutton.‘of d’blinksonthedisplay.
3) Selectthesecondchanneltomonitor,bypushingthe /keys.
4) PushPTTtoactivatethefunction.
WhentheDualWatchisenabled,thedisplayshowsonlythetwomonitoredchannels.
Asforthe Scanfunction,ifyou transmit whentheDualWatchisactivated,thecommunication
remainsblockedonthatchannelforfurther10secondstoletyoulisteningtotheotherparty.Then,
itwillbeginscanningthetwochannelsagain.
Press MON/SCANtodisabletheDualWatch.
Theunitreturnstothechannelpreviouslyused.
6.6 Active band
ThePACIFICchannelselectioncanbechangedtofollowtherulesofUSA,CanadaorInternational
regulations.
INT(international)–usedinItalyandmostcountriesoftheworld
USA–usedintheUnitedStates
CAN – used in Canada
! USA and CAN Bands: for American area only.
! It is your own responsibility to choose the correct band (by means of the optional
programming kit PRG-PACIFIC), otherwise you may cause interferences with other
services or you may not be able to communicate.
6.7 Private channels: programming and selection
Onlyauthorizedcustomersareallowedtouseprivatechannels.Fordetailedinformationcontact
yourlocal radiocommunication authorities.To programthe privatechannels, itis necessaryto
connecttheoptionalprogrammingkitPRG-PACIFICoraskforinformationtoyourdealer.
Tosettheprogrammingmode,switchontheradiowhilekeepingpressedtheMENUbutton:the
displaywillshow‘Prog’.

14
ENGLISH
7. Troubleshooting
YourPACIFICisdesignedtoprovideyouwithyearsofoptimalperformance.Ifforsomereason
problemsarise,refertothischapterbeforecontactingaservicecentreinyourregion.
7.1 Solution table
Problem Possible Cause Solution Ref.
The radio does not
turn on
Thebatteriesarenotcharged
and/orarenotcorrectlyinserted
Ensurethebatteriesare
chargedandcorrectlyinsertedin
theradio
4.2
4.3
The radio turns on,
but does not receive
signals
Thevolumeistoolow Thevolumeistoolow 5.3
You are unsuccessful
in establishing
contact with your
party
Incorrectselectionofmarine
channelorlocalband
Checkyourchannelandband 5.2
Reception is broken
and/or with noise
Signalisextremelyweak Temporarilydeactivatesquelch
usingtheMonitorfunction
5.5
Yourpartyistoofarawayand/or
transceiverantennaisshielded
byobstaclesinthedirectionof
your party
Moveclosertoyourpartyand/
ormovethetransceivertoaless
shieldedarea
-
Otherusersareusingthesame
radiochannel
Checktheradiotrafconthe
selectedchannelandchange
channelsifnecessary
5.2
Theradioispositionedtoo
closetootherinterference
devices(televisions,computers,
transmitters,etc.)
Movetheradioawayfromthe
interferencedevices
-
Battery life is short Excessiveuseofdisplay
backlighting
Uselessdisplaybacklighting 5.7
Excessiveuseoftransmission Trytoreducetransmissiontimes
and/or use low transmission
power
5.6
Memoryeffectisoccurringwith
thebatteries
Eliminatememoryeffect 4.4

15
ENGLISH
8. Technical specications
Channels .................................................................................................................. 57 International
Frequencygeneration..............................................................................................PLLsynthesizer
Frequencyrange(Internationalband) ..................................................TX156,025-157,425MHz
................................................................................................................RX156,300-162,000MHz
AntennaImpedance ............................................................................................................ 50Ohm
Power Supply. .......................................................................................................... 6VDC+/-10%
Operating Temperature Range. ......................................................................... from-15°to+55°C
Size ..........................................................................................................108x62x35mm(HxWxD)
Weight(withoutbatteries)....................................................................................................... 183 g
Dutycycle.........................................................................................TX5%,RX5%,Stand-by90%
8.1 Transmitter
Output power ............................................................................................. 1or5Watt(Selectable)
Modulation type ...........................................................................................................................FM
Residual noise attenuation. .....................................................................................................40dB
Audio distortion ............................................................................................................................3%
8.2 Receiver
Sensitivity@12dBSINAD. ....................................................................................................0,3μV
Squelchsensitivity................................................................................................................. 12dBV
Adjacentchannelrejection. .....................................................................................................70dB
Audio Output Power .......................................................................................300mW@10%THD
Intermediatefrequencies........................................................................ 1°:21,4MHz;2°:450KHz
Spuriousrejection..................................................................................................................-40dB
Residual noise attenuation. ......................................................................................................43dB
Socketforexternalmicrophone/charger/programming ......................................2.5mmstereojack
Socketforexternalspeaker..................................................................................3,5mmmonojack
Specicationsaresubjecttomodicationwithoutforewarning.

INTERNATIONAL CHANNEL (INT)
Channel ID Ship Station
Tx
Frequency
Rx
Frequency
01 156,050MHz 160,650MHz
02 156,100MHz 160,700MHz
03 156,150MHz 160,750MHz
04 156,200MHz 160,800MHz
05 156,250MHz 160,850MHz
06 156,300MHz 156,300MHz
07 156,350MHz 160,950MHz
08 156,400MHz 156,400MHz
09 156,450MHz 156,450MHz
10 156,500MHz 156,500MHz
11 156,550MHz 156,550MHz
12 156,600MHz 156,600MHz
13 156,650MHz 156,650MHz
14 156,700MHz 156,700MHz
15 156,750MHz 156,750MHz
16 156,800MHz 156,800MHz
17 156,850MHz 156,850MHz
18 156,900MHz 161,500MHz
19 156,950MHz 161,550MHz
20 157,000MHz 161,600MHz
21 157,050MHz 161,650MHz
22 157,100MHz 161,700MHz
23 157,150MHz 161,750MHz
24 157,200MHz 161,800MHz
25 157,250MHz 161,850MHz
26 157,300MHz 161,900MHz
27 157,350MHz 161,950MHz
28 157,400MHz 162,000MHz
Channel ID Ship Station
Tx
Frequency
Rx
Frequency
60 156,025MHz 160,625MHz
61 156,075MHz 160,675MHz
62 156,125MHz 160,725MHz
63 156,175MHz 160,775MHz
64 156,225MHz 160,825MHz
65 156,275MHz 160,875MHz
66 156,325MHz 160,925MHz
67 156,375MHz 156,375MHz
68 156,425MHz 156,425MHz
69 156,475MHz 156,475MHz
70 156,525MHz
71 156,575MHz 156,575MHz
72 156,625MHz 156,625MHz
73 156,675MHz 156,675MHz
74 156,725MHz 156,725MHz
75 156,775MHz 156,775MHz
76 156,825MHz 156,825MHz
77 156,875MHz 156,875MHz
78 156,925MHz 161,525MHz
79 156,975MHz 161,575MHz
80 157,025MHz 161,625MHz
81 157,075MHz 161,675MHz
82 157,125MHz 161,725MHz
83 157,175MHz 161,775MHz
84 157,225MHz 161,825MHz
85 157,275MHz 161,875MHz
86 157,325MHz 161,925MHz
87 157,375MHz 157,375MHz
88 157,425MHz 157,425MHz
Other manuals for PACIFIC
1
Table of contents
Other Midland Transceiver manuals

Midland
Midland G8E-BT Manual

Midland
Midland BASE CAMP446 User manual

Midland
Midland G8E-BT Manual

Midland
Midland G14 Manual

Midland
Midland Olympian MO-1008 User manual

Midland
Midland M Zero Plus Manual

Midland
Midland G18 User manual

Midland
Midland 77-857 User manual

Midland
Midland G7 Pro User manual

Midland
Midland ALAN 48 PLUS MULTI B User manual

Midland
Midland G15 PRO Manual

Midland
Midland 13-513 User manual

Midland
Midland G10 PRO Manual

Midland
Midland REGATTA 2 User manual

Midland
Midland 70-066 User manual

Midland
Midland 248XL Manual

Midland
Midland G5 User manual

Midland
Midland BASE CAMP User manual

Midland
Midland 77-250CXL User manual

Midland
Midland CT 890 Manual