Miele HM 16-80 User manual

Operating instructions
Rotary ironer
HM 16-80
It is essential to read these
operating instructions before
installing or using the machine, to
avoid the risk of accident, or damage
to the machine.
G
M.-Nr. 06 014 430

Description of the appliance . . . . . . . . . . . . . . . . . . . . . . . . . . . . . . . . . . . . . . . . 3
Warning and safety instructions . . . . . . . . . . . . . . . . . . . . . . . . . . . . . . . . . . . . . 4
Caring for the environment . . . . . . . . . . . . . . . . . . . . . . . . . . . . . . . . . . . . . . . . . . 6
Transit fitting. . . . . . . . . . . . . . . . . . . . . . . . . . . . . . . . . . . . . . . . . . . . . . . . . . . . . . . 6
Moving the appliance . . . . . . . . . . . . . . . . . . . . . . . . . . . . . . . . . . . . . . . . . . . . . . 7
Before using for the first time . . . . . . . . . . . . . . . . . . . . . . . . . . . . . . . . . . . . . . . 8
Dust cover . . . . . . . . . . . . . . . . . . . . . . . . . . . . . . . . . . . . . . . . . . . . . . . . . . . . . . . . 8
Before ironing. . . . . . . . . . . . . . . . . . . . . . . . . . . . . . . . . . . . . . . . . . . . . . . . . . . . . 9
Preparation of the working area. . . . . . . . . . . . . . . . . . . . . . . . . . . . . . . . . . . . . . . . 9
Preparing the laundry . . . . . . . . . . . . . . . . . . . . . . . . . . . . . . . . . . . . . . . . . . . . . . . 9
More advice on correct dampness . . . . . . . . . . . . . . . . . . . . . . . . . . . . . . . . . . 9
Pulling into shape and smoothing out . . . . . . . . . . . . . . . . . . . . . . . . . . . . . . . 10
Sorting . . . . . . . . . . . . . . . . . . . . . . . . . . . . . . . . . . . . . . . . . . . . . . . . . . . . . . . 10
Checking the effectiveness of the finger guard. . . . . . . . . . . . . . . . . . . . . . . . . . . 10
Steam . . . . . . . . . . . . . . . . . . . . . . . . . . . . . . . . . . . . . . . . . . . . . . . . . . . . . . . . . . 11
Filling the water reservoir. . . . . . . . . . . . . . . . . . . . . . . . . . . . . . . . . . . . . . . . . . . . 11
Emptying the water reservoir . . . . . . . . . . . . . . . . . . . . . . . . . . . . . . . . . . . . . . . . . 12
Ironing . . . . . . . . . . . . . . . . . . . . . . . . . . . . . . . . . . . . . . . . . . . . . . . . . . . . . . . . . 13
Switching on and off . . . . . . . . . . . . . . . . . . . . . . . . . . . . . . . . . . . . . . . . . . . . . 13
Selecting the ironing temperature (when ironing without steam) . . . . . . . . . . . 13
Selecting the ironing temperature (when ironing with steam) . . . . . . . . . . . . . 14
To switch the steam function on or off . . . . . . . . . . . . . . . . . . . . . . . . . . . . . . . 14
Selecting the roller speed . . . . . . . . . . . . . . . . . . . . . . . . . . . . . . . . . . . . . . . . 15
Positioning the laundry . . . . . . . . . . . . . . . . . . . . . . . . . . . . . . . . . . . . . . . . . . . . . 16
Removing the feed board . . . . . . . . . . . . . . . . . . . . . . . . . . . . . . . . . . . . . . . . . . . 16
Laundry bar . . . . . . . . . . . . . . . . . . . . . . . . . . . . . . . . . . . . . . . . . . . . . . . . . . . 16
After ironing . . . . . . . . . . . . . . . . . . . . . . . . . . . . . . . . . . . . . . . . . . . . . . . . . . . . . . 17
Power cut . . . . . . . . . . . . . . . . . . . . . . . . . . . . . . . . . . . . . . . . . . . . . . . . . . . . . . . . 18
Points on ironing . . . . . . . . . . . . . . . . . . . . . . . . . . . . . . . . . . . . . . . . . . . . . . . . . 19
Maintenance and care . . . . . . . . . . . . . . . . . . . . . . . . . . . . . . . . . . . . . . . . . . . . . 24
After sales service . . . . . . . . . . . . . . . . . . . . . . . . . . . . . . . . . . . . . . . . . . . . . . . . 28
Electrical connection. . . . . . . . . . . . . . . . . . . . . . . . . . . . . . . . . . . . . . . . . . . . . . 29
Electrical connection U.K. . . . . . . . . . . . . . . . . . . . . . . . . . . . . . . . . . . . . . . . . . . . 29
Technical data . . . . . . . . . . . . . . . . . . . . . . . . . . . . . . . . . . . . . . . . . . . . . . . . . . . 31
Contents
2

Water reservoir cap
Finger guard plate
Heater plate
Roller
Feed board
Bar for hanging
ironed laundry
Ironing table
Foot pedal switch
Control panel
I-On-Off button
QSteam switch
Temperature selector
Emergency release
Control panel
Release catch
Mains connection cable
Indicator light "oC Temperature"
Roller speed selector
Description of the appliance
3

Read the operating instructions care-
fully before using this appliance for
the first time. They contain important
information about the safety, use and
maintenance of the appliance. This
way you will avoid the risk of acci-
dents, and damage to the appliance.
Keep these instructions in a safe
place for reference, and pass them
on to any future user.
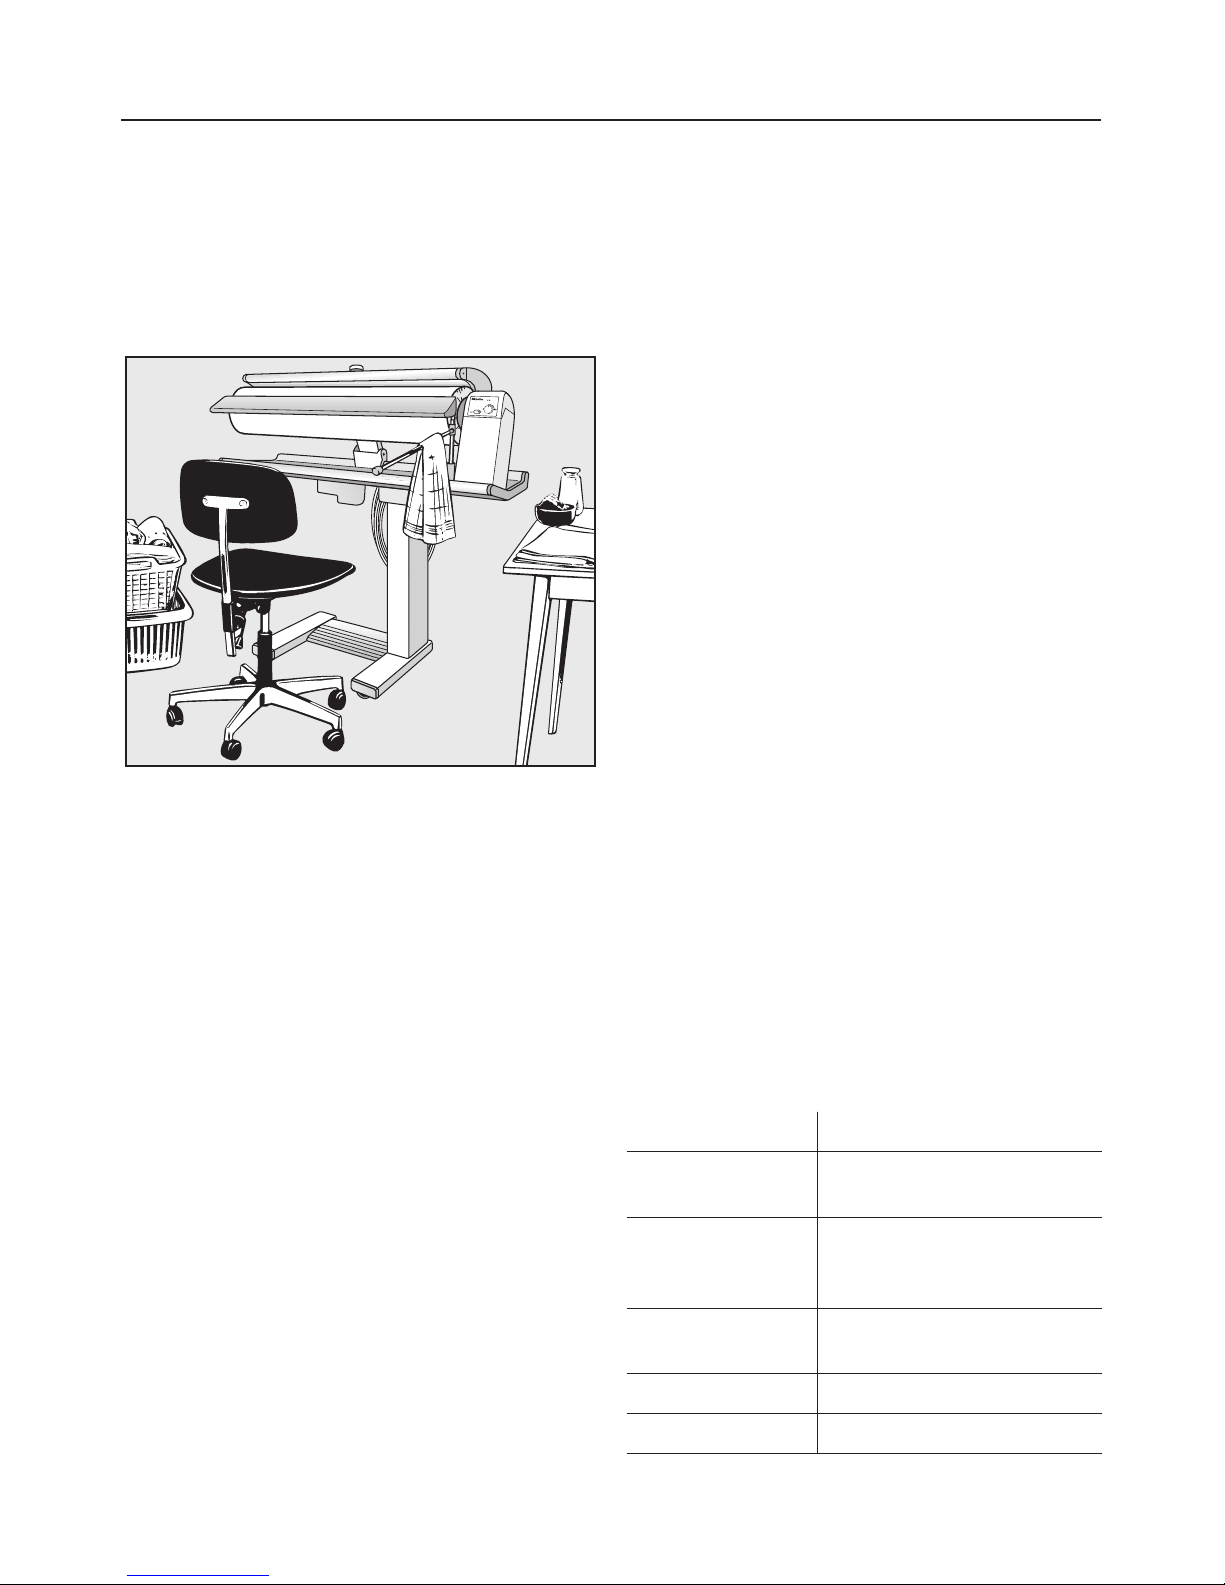
Appropriate use
This rotary ironer is intended exclu-
sively for ironing textiles which are
suitable for machine ironing and which
have been washed in water.
Technical and electrical safety
Before setting up the appliance,
check it for any externally visible
damage. Do not install and use a dam-
aged appliance.
A damaged appliance is danger-
ous. Switch off at the mains and call
the Service Department for assistance.
Before connecting the appliance,
ensure that the connection data on
the data plate (fusing, voltage and fre-
quency) match the mains electricity
supply. If in any doubt, consult a quali-
fied electrician.
The electrical safety of this appli-
ance can only be guaranteed when
continuity is complete between the ap-
pliance and an effective earthing sys-
tem which complies with local and na-
tional safety regulations. It is most im-
portant that this basic safety
requirement is regularly tested by a
qualified electrician. The manufacturer
cannot be held responsible for the con-
sequences of an inadequate earthing
system.
The appliance is built in accor-
dance with current safety require-
ments. Unauthorised repairs could re-
sult in unforeseen dangers for the user,
for which the manufacturer cannot ac-
cept responsibility. Repairs should only
be undertaken by a Miele approved en-
gineer.
Ensure current is not supplied to the
appliance while maintenance or repair
work is being carried out.
Faulty components must only be
exchanged for Miele original spare
parts. Only when these parts are fitted
can the safety standards of the appli-
ance be guaranteed.
The appliance is only completely
isolated from the electricity supply
when:
–it is switched off at the wall socket
and the plug is withdrawn, or
–it is switched off at the mains, or
–the mains fuse is withdrawn.
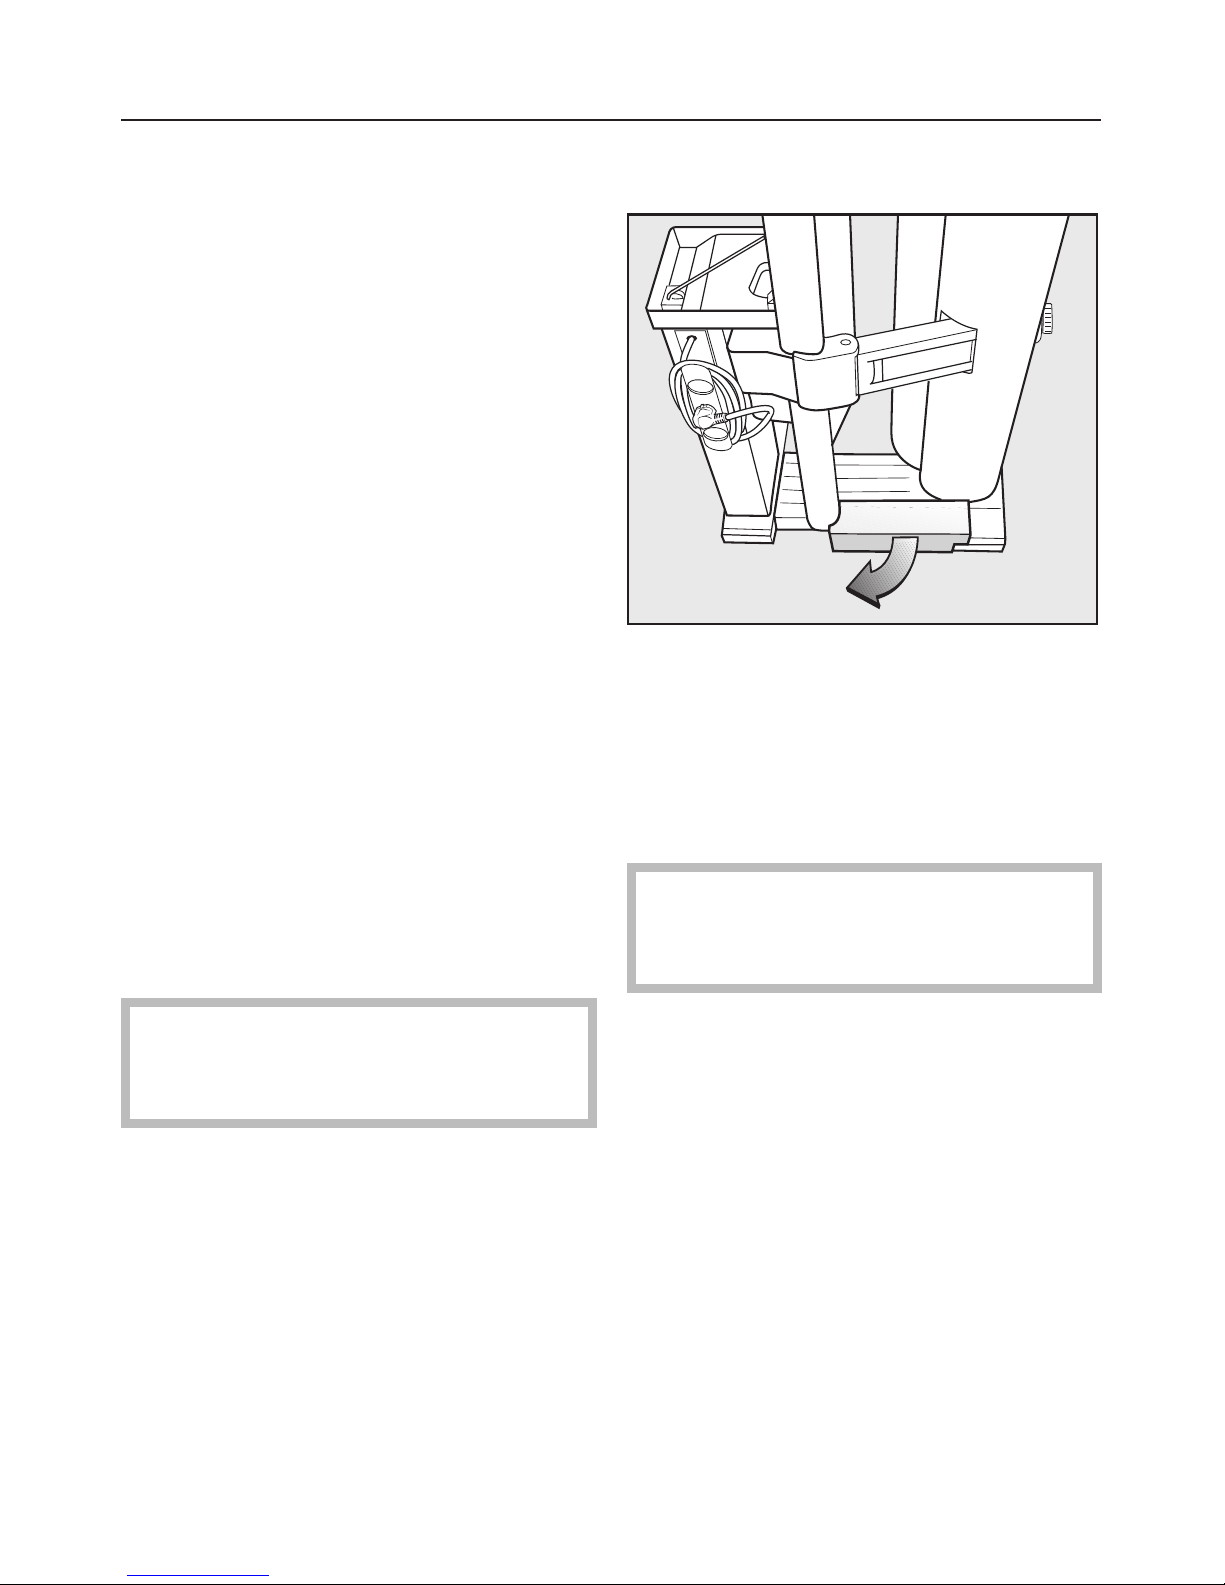
Only operate the rotary ironer when
all removable outer casings are fit-
ted so that it is not possible to touch any
electrical component or moving part.
This equipment is not designed for
maritime use or for use in mobile
-installations such as caravans, aircraft
etc. However it may be suitable for
such usage subject to a risk assess-
ment of the installation being carried
out be a suitably qualified engineer.
Warning and safety instructions
4

Do not damage, remove or bypass
the safety components or control
elements on the appliance.
Use
When the ironer is heated up there
is an acute danger of burning:
–if the heater plate is touched
–if the foot pedal is pressed down
while fingers or hands are positioned
between the raised roller and the
heater plate to smooth an article.
Do not unscrew the cap to the wa-
ter reservoir when ironing with
steam. The water in the reservoir is very
hot and there would be a severe dan-
ger of scalding if it was opened.
Never drape items over the heater
plate when it is heated up.
This is a fire hazard
Hang laundry on the swing out bar.
The swing out bar is only to be
used for hanging laundry. Swing it back
immediately after use. Take care not to
press down on the bar when it is swung
out. There is a danger that this could tip
the ironer over.
Switch the appliance off before re-
moving the plug from the electricity
socket.
Pull only on the plug and not on the
cable.
Do not lay the connection cable
over the heater plate when it is
heated up. This could damage the ca-
ble - danger of electric shock.
Use the cable holders attached to the
appliance to wind the cable away.
Do not install the ironer in a room
where the temperature may drop
down to or below freezing. The very low
temperatures could cause the water in
the reservoir or in the steam connection
hoses to freeze causing damage to the
appliance.
Never allow children to play on or
near the rotary ironer or to operate
it themselves.
In countries where there are areas
which may be subject to infestation
by cockroaches or other vermin, pay
particular attention to keeping the appli-
ance and its surroundings in a clean
condition at all times. Any damage
which may be caused by cockroaches
or other vermin will not be covered by
the appliance guarantee.
Accessories
Accessory parts may only be fitted
when expressly approved by Miele.
If other parts are used, guarantee, per-
formance and product liability claims
may be invalidated.
Disposal of your old appliance
Switch off and disconnect the appli-
ance from the power supply. Cut off
and render any plug useless. Cut off
the cable directly behind the appliance
to prevent misuse. This should be done
by a competent person.
Ensure that the appliance presents
no danger to children while being
stored for disposal.
Warning and safety instructions
5

Disposal of the packing
material
The transport and protective packing
has been selected from materials which
are environmentally friendly for disposal
and can normally be recycled. Rather
than just throwing these materials away,
please ensure they are offered for recy-
cling.
Disposal of your old appliance
Old appliances contain materials which
can be recycled. Please contact your
dealer, your local waste collection cen-
tre or scrap merchant about potential
recycling schemes before disposing of
the appliance.
Switch off and disconnect the appli-
ance from the power supply. Cut off
and render any plug useless. Cut off
the cable directly behind the appliance
to prevent misuse. This should be done
by a competent person.
,Ensure that the appliance pres-
ents no danger to children while be-
ing stored for disposal.
Transit fitting
^Pull the transit fitting out (see illustra-
tion).
Keep the transit fitting in a safe place. It
must be re-fitted if the appliance ever
has to be moved again (e.g. when mov-
ing house).
The rotary ironer may only be trans-
ported in a folded up position if the
transit fitting is in place.
Caring for the environment
6

Moving the appliance
The rotary ironer is fitted with four roll-
ers.
^Hold the ironer by the ironing table
and push or pull to move it.
To overcome obstacles such as carpet
edges and doorways but also to steer:
^Tilt the appliance slightly.
The rotary ironer can be moved either
when assembled or folded up.
^Hold the ironing table and pull up on
the release catch situated on the
right hand side at the back under-
neath it.
^Swing the top section of the rotary
ironer up into position horizontally to
assemble it in the working position or
swing it down to the vertical position
to fold it up. Then let go of the re-
lease catch.
^Before folding the ironer away or
moving it, make sure that the cap to
the water reservoir is securely tight-
ened so that no water can escape.
Moving the appliance
7

Connection cable
The mains connection cable is wound
round a hook underneath the ironing ta-
ble.
^Unwind the cable.
Do not insert the plug into the electri-
cal socket yet.
N.B. The plug shown is for illustration
only.
Dust cover
The dust cover which protects the roller
during transit has to be removed.
^First remove the feed board by lifting
it out of the right hand holder, then
pull it out to the left of the roller.
Then plug the appliance in and
switch it on. The heater plate will
then rise automatically.
^The protective dust cover can now
be pulled out and off.
Before using for the first time
8

Preparation of the working
area
To ensure an even distrubution of steam
make sure the ironer is level and secure
and that it cannot roll sideways.
A height-adjustable chair is useful and
also a flat surface, e.g. a table, to lay
the ironed laundry on.
Place close at hand:
–a basket with the laundry ready for
ironing to the left of the rotary ironer,
–a surface for the ironed laundry to
the right of the rotary ironer.
Shirts, overalls and blouses etc., should
be hung on coathangers immediately
after ironing.
Small items can be hung over the swing
out bar.
Have some water ready for redamping
the laundry if necessary.
Preparing the laundry
Correct preparation of the laundry is es-
sential for successful ironing.
Before ironing, the laundry should be:
–damped down if you are ironing with-
out steam
–pulled into shape and smoothed out
–sorted
Damping down when ironing without
steam
The laundry needs to be sufficiently
damp, so that when it is passed just
once through the rotary ironer at the
correct temperature, it will come out
smooth and dry. Dampen the laundry
as you would for hand ironing, prefera-
bly several hours beforehand so that
the articles achieve a uniform degree of
dampness throughout.
If a tumble dryer is being used, select a
"Machine iron" programme.
Use warm water if preparation time is
short and also to redampen.
More advice on correct dampness
Material Dampness for ironing
Silk wrap in a damp cloth to
avoid water marks
Synthetics e.g.
Dralon, Nylon,
Polyester etc.
slightly damp to dry
Wool
(e.g. trousers)
press under a damp cloth
Cotton slightly damp
Linen quite damp
Before ironing
9

Pulling into shape and smoothing
out
Pull the dampened laundry into shape
as usual.
Smooth out ribbons, straps, seams and
hems.
Large items such as table cloths, bed
linen etc should be folded lengthways
into a number of pleats so that they can
be ironed as easily as possible.
Sorting
Sort the laundry according to how
much heat is required for ironing. This
way you can start by ironing at a lower
temperature and then gradually in-
crease the temperature according to
the fabric being ironed.
First iron synthetic fibres such as nylon,
polyester and artificial silk which only
require a low temperature. Then iron
silk, wool, cotton and linen at increasing
temperatures.
Iron starched items last of all to avoid
any starch deposits from affecting the
finish of other items.
Checking the effectiveness of
the finger guard
The finger guard is a safety feature and
should be checked each time before
the ironer is used.
^With the ironer switched on, press the
foot pedal right down.
– the heater plate comes down onto
the rotating roller.
^If you now lift the finger guard, the
roller stops rotating and the heater
plate rises up.
This shows that the finger guard is
working.
^Let go of the finger guard and re-
move your foot from the foot pedal.
^Press the foot pedal right down agan.
– the heater plate lowers and the
roller rotates.
Before using the ironer for the first
time:
You may be able to see or feel a 2-3
mm high ridge along the roller.
This will even itself out after about 3
hours of ironing enabling the under
cloth to settle. It has no effect on the
ironing.
Before ironing
10

This ironer can also be used with steam
for ironing dry or slightly damp laundry.
Drying with and without steam
If your laundry is sufficiently damp for
ironing you can iron without using the
steam function. Use steam for ironing
dry laundry, or laundry that is only very
slightly damp.
Filling the water reservoir
Before filling the reservoir with water
switch the appliance off at the
mains.
^Fill the water reservoir with tap water
with the ironer set up in the working
position. Do not use proprietary bot-
tled de-ionised water!
^To make it easier use the screw-on
funnel.
If the water hardness level in your area
exceeds 3 mmol/l (300 mg/l or 17º dH)
it is advisable to mix the tap water with
distilled water in a ratio of 1:1.
Fill the reservoir to the lower edge of
the neck with tap water. Do not fill it
any higher.
^Replace the cap making sure it is se-
curely tightened. If it is not secure
there is a danger of water leaking out
of the reservoir when the ironer is
folded up again.
If the reservoir empties during ironing
the indicator lamp in the steam switch
will go out to remind you that it needs to
be filled.
,Danger of burning! To prevent
the risk of scalding yourself with hot
steam do not open the cap fully. It
can be opened very slightly to re-
lease the steam.
^Wait until all the steam has escaped
before opening the cap and filling the
reservoir with water.
There may still be residual water in the
tank. The amount will depend on the
water hardness level and the amount of
limescale present.
One tank is sufficient for approx. 40
minutes of ironing with steam. It takes
approx. 4 minutes for the water to heat
up to the correct temperature for steam
ironing. The heating-up time may
change as a result of limescale building
up in the tank.
^It is advisable to switch off the steam
function during an interruption to iron-
ing and at the end of ironing.
Steam
11

Emptying the water reservoir
,Before emptying the reservoir
make sure that the water in it has
cooled down and that the roller has
cooled down.
The reservoir does not have to emptied
after each use. However it is advisable
to empty it if the ironer is not going to to
be used for a longer period of time
(several weeks).
^Unscrew the water reservoir cap.
^To make it easier use the screw-on
funnel.
^Slowly fold the iron up and at the
same time hold a suitable container
(e.g. measuring jug) underneath the
reservoir opening to catch the water.
^When all the water has run out re-
place the cap.
^The screw on funnel can be stored on
the cable holder when not in use.
Steam
12

Switching on and off
The rotary ironer is switched on and off
with the "I-0" On-Off button.
To switch on
^Press the "I - 0" button in
– the indicator light in the button co-
mes on.
To switch off
^Press and release the "I - 0" button
–the indicator light in the button goes
out
Selecting the ironing temperature
(when ironing without steam)
The temperature selector is used to set
the ironing temperature
The individual temperature ranges are
marked by dots on the dial around the
temperature selector. These corre-
spond to the international clothing care
symbols for ironing.
Material Dot
symbol
Temperature
range
Polyester /
artificial silk ßcool iron
(low temperature)
Silk /
Wool ßß medium hot iron
(medium temperature)
Cotton /
Linen ßßß hot iron
(high temperature)
^Turn the temperature selector to the
temperature you require.
–The "oC temperature" indicator light
will come on whilst the heater plate is
heating up.
The light will go out when the temper-
ature selected is reached.
Where there is a combination of fibres,
e.g poly-cottons, the more delicate fibre
determines the ironing temperature.
However if there is more cotton than
polyester, the item can be ironed on the
ßß Silk / Wool setting. Do not use the
the cotton setting.
After ironing
^Turn the temperature selector to " g"
cold.
Ironing
13

Selecting the ironing temperature
(when ironing with steam)
^Turn the temperture selector to the
Cotton /Linen ßßß hot iron (high tem-
perature) setting.
Temperature settings ßand ßß are not
hot enough for ironing with steam.
After ironing
^Turn the temperature selector to " g"
cold.
To switch the steam function on or
off
Use the temperature selector select the
ßßß temperature setting before you
switch on the steam function.
The "Q" switch is used to switch the
steam function on or off.
To switch the steam function on
^Press the "Q" switch in
– the light in the switch will come on
when the required temperature has
been reached in the roller.
If the light in the steam switch goes
out whilst ironing with steam the wa-
ter reservoir is empty. See section
"Filling the water reservoir".
To switch the steam function off
^Press the "Q" in and then release it
- the indicator light in the switch will
go out.
Ironing
14

Selecting the roller speed
There are 5 roller speed settings, from
low (approx. 2 metres per minute) to
high (approx. 4.5 metres per minute).
A lower roller speed makes it easier to
iron complicated articles such as shirts
and blouses. It is also best to select a
lower roller speed when ironing folded
items, which may require more than one
pass through the ironer to get them
smooth and dry.
Thinner, single thickness items, e.g.
handkerchiefs and tea towels can be
ironed at a higher roller speed.
^Set the roller speed selector to the
speed you require.
Ironing
The ironing process is controlled by the
foot pedal which has three operating
positions:
– raising the heater plate (rest)
– pressing
– ironing
To iron:
^Press the foot pedal right down to the
floor.
,Do not put your fingers between
the heater plate and the roller.
Danger of burning and squashing
your fingers.
To press:
^First press the foot pedal down to the
floor and then lift your foot up a little
so that the heater plate remains in
position but the roller does not rotate.
To raise the heater plate:
^Take your foot off the pedal.
Ironing
15
°C

Positioning the laundry
^Arrange the items of laundry on the
feed board so that they are straight
and then smooth out.
^Then turn the roller by hand,always
keeping your hands away from the
heater plate, so that the edge of the
article to be ironed can be held fast
by the heater plate.
Then:
^Press down the foot pedal.
Removing the feed board
The feed board can be removed when
shaped garments are being ironed, e.g.
skirts (round).
^First lift the feed board out of the right
hand holder and then pull it out to the
left of the roller.
Laundry bar
The ironed laundry can be hung over
the swing out bar to avoid creasing.
,Take care not to press down on
the bar when it is swung out, as this
could cause the rotary ironer to tip
over.
Ironing
16

Tips
If creases appear in the item you are
ironing:
Stop the roller, pull the item back
slightly and smooth out. If necessary,
dampen again with a wet cloth.
If possible, always use the whole length
of the roller, otherwise the roller will lose
its elasticity.
For small items such as handkerchiefs,
alternate between using the right and
left hand sides of the roller.
Items with raised buttons should be
ironed face down on to the roller so that
they are pressed into the cushioned
surface.
To protect the heater plate from dam-
age a cloth should be placed over zip
fasten-ers, metal and buttons and
hooks when ironing.
To protect the heater plate, do not iron
items with non-heat resistant or very
large buttons, e.g. knobbly buttons.
When you have nearly finished ironing
you can turn the temperature selector
to " g" cold and continue ironing small
items with residual heat.
After ironing
^Switch the appliance off.
^Turn the QSteam button off.
^Turn the temperature to " g" cold.
^Switch off at the mains and then re-
move the plug from the socket.
If the ironer is to be put away:
^Allow the heater plate to cool down.
^Before folding the ironer away make
sure that the water reservoir cap is
securely tightened.
^When the heater plate has cooled
down, fold up the rotary ironer.
^Wind up the mains cable.
^Pull the cover on.
Do not install the ironer in a room
where the temperature may drop
down to or below freezing. The very
low temperatures could cause the
water in the reservoir or in the steam
connection hoses to freeze causing
damage to the appliance.
Ironing
17

Power cut
In the event of a power cut, pull up
the emergency release lever.
If there is a power cut when the rotary
ironer is in use, the heater plate will stay
on the roller. The item being ironed will
then be held there with the risk of it be-
coming scorched. To free the trapped
item:
^Pull up the emergency release lever.
–the pressure is reduced and the item
can then be removed, by pulling it
out towards you or downwards, de-
pending on how far into the ironer it
is.
When the current has been restored
(the indicator light in the main switch
comes on) push the emergency release
lever back down. You can now continue
ironing in the usual way.
Ironing
18

The following notes are intended as
helpful suggestions. You will probably
find several alternative routines which
suit your own method of working.
Tea towels, hand towels, handker-
chiefs and serviettes etc.
Lay the item with the straight grain of
the fabric to the feed board. This will
prevent it going out of shape and it will
be easier to fold. Pass handkerchiefs
and serviettes diagonally through the
ironer and, if necessary, fold them and
then iron again.
Please use the whole length of the
roller.
Table cloths
You can avoid folds by ironing the mid-
dle first.
^Place the table cloth crossways so
that the ends hang over to the left
and right.
^Iron the middle section.
^Fold in half with un-ironed edges to-
gether and place over the left end of
the roller with the ironed middle sec-
tion hanging over the edge to prevent
creasing. Then pass both sides of the
the un-ironed sections through the
ironer.
Sheets and bedspreads
Sheets may be ironed like tablecloths,
or if a lengthwise fold is acceptable,
fold the sheet together lengthwise and
iron it on both sides.
To accentuate embroidery and raised
patterns on bedspreads to best advan-
tage, iron first in one direction and then
in the other.
Points on ironing
19

Duvet covers
^First do up the poppers/buttons. Start
the first run by carefully feeding this
end in first on left side of the roller,
taking care not to damage any but-
tons.
Note: Only pass this end through the
ironer if the poppers or buttons are
heat-resistant.
To iron without a fold:
^It is best to iron the cover in two runs
lengthwise.
If folds are acceptable:
^Fold the duvet cover lengthwise and
iron both sides.
Pillow cases
^Lay the pillowcase on the feeder
plate, position under the hot plate
and iron in one procedure.
If the open end has poppers or but-
tons only pass it through the ironer if
they are heat resistant.
Shirts
Remove the feed board before ironing
shirts.
Proceed as follows:
^cuffs then sleeves
^back
^front sections
^collar
Points on ironing
20
Other manuals for HM 16-80
1
Table of contents
Other Miele Iron manuals

Miele
Miele B 3847 FashionMaster Troubleshooting guide

Miele
Miele MM 50-205 User manual

Miele
Miele HM 5316 User manual

Miele
Miele B 890 User manual

Miele
Miele HM 16-83 User manual

Miele
Miele FashionMaster User manual

Miele
Miele B 3312 User manual

Miele
Miele B 890 Parts list manual

Miele
Miele B 3847 FashionMaster User manual

Miele
Miele B 890 User manual

Miele
Miele HM 21-140 User manual

Miele
Miele B 895 D User manual

Miele
Miele PM 1210 User manual

Miele
Miele B 890 User manual

Miele
Miele HM 21-100 User manual

Miele
Miele PIB 100 User manual

Miele
Miele HM 21-140 User manual

Miele
Miele HM 16-80 D User manual

Miele
Miele FashionMaster User manual

Miele
Miele PRI 210 User manual