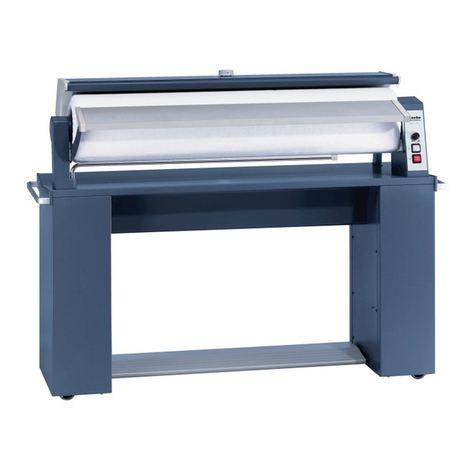
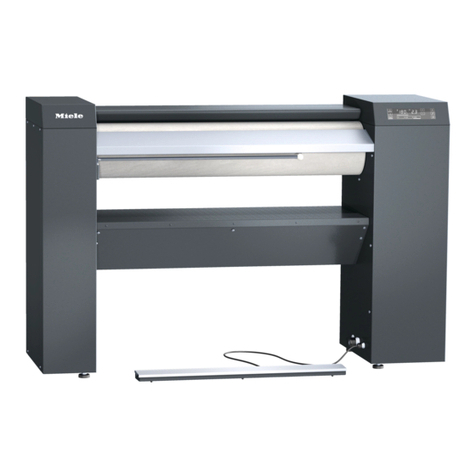
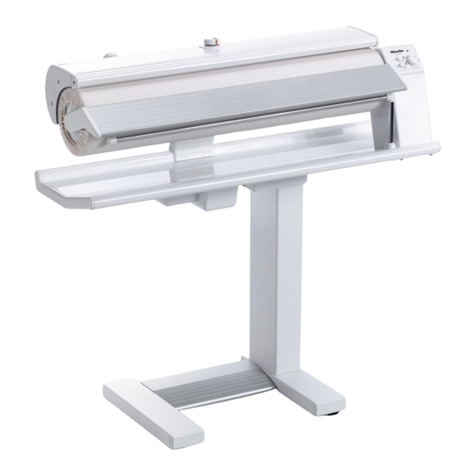
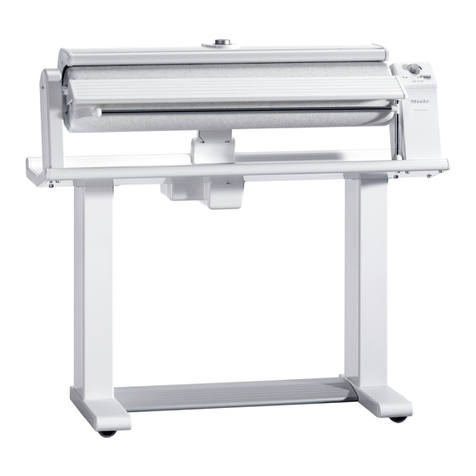
Miele HM 21-100 User manual

Operating instructions
Rotary ironer
HM 21-100
To avoid the risk of accidents or damage to the machine it is en - GB
essential to read these instructions before installing,
commissioning and using it for the first time. M.-Nr. 07 799 370


Warning and Safety instructions ...............................................4
Caring for the environment ....................................................6
Description of the machine ....................................................7
Operation ..................................................................8
Switching on and off. . . . . . . . . . . . . . . . . . . . . . . . . . . . . . . . . . . . . . . . . . . . . . . . . . . . . . . . . . . 8
Check that the finger guard is functioning properly. . . . . . . . . . . . . . . . . . . . . . . . . . . . . . . . . . . 8
Temperature selection . . . . . . . . . . . . . . . . . . . . . . . . . . . . . . . . . . . . . . . . . . . . . . . . . . . . . . . . . 9
Foot control bar . . . . . . . . . . . . . . . . . . . . . . . . . . . . . . . . . . . . . . . . . . . . . . . . . . . . . . . . . . . . . . 9
Feed-in table . . . . . . . . . . . . . . . . . . . . . . . . . . . . . . . . . . . . . . . . . . . . . . . . . . . . . . . . . . . . . . . 10
Roller speed . . . . . . . . . . . . . . . . . . . . . . . . . . . . . . . . . . . . . . . . . . . . . . . . . . . . . . . . . . . . . . . . 10
Ironing . . . . . . . . . . . . . . . . . . . . . . . . . . . . . . . . . . . . . . . . . . . . . . . . . . . . . . . . . . . . . . . . . . . . 10
Hanging bar . . . . . . . . . . . . . . . . . . . . . . . . . . . . . . . . . . . . . . . . . . . . . . . . . . . . . . . . . . . . . . . . 11
Notes .....................................................................12
Moving the ironer . . . . . . . . . . . . . . . . . . . . . . . . . . . . . . . . . . . . . . . . . . . . . . . . . . . . . . . . . . . . 12
Preparation of the working area . . . . . . . . . . . . . . . . . . . . . . . . . . . . . . . . . . . . . . . . . . . . . . . . .12
Preparing the laundry. . . . . . . . . . . . . . . . . . . . . . . . . . . . . . . . . . . . . . . . . . . . . . . . . . . . . . . . . 12
Safety mechanism during a power cut . . . . . . . . . . . . . . . . . . . . . . . . . . . . . . . . . . . . . . . . . . . 13
Cleaning and care ..........................................................14
Cleaning the heater plate. . . . . . . . . . . . . . . . . . . . . . . . . . . . . . . . . . . . . . . . . . . . . . . . . . . . . . 14
After Sales Service . . . . . . . . . . . . . . . . . . . . . . . . . . . . . . . . . . . . . . . . . . . . . . . . . . . . . . . . . . . 14
Explanation of symbols on the data plate .......................................15
Notes for the installer........................................................16
When the machine is delivered . . . . . . . . . . . . . . . . . . . . . . . . . . . . . . . . . . . . . . . . . . . . . . . . . 16
Setting up the machine . . . . . . . . . . . . . . . . . . . . . . . . . . . . . . . . . . . . . . . . . . . . . . . . . . . . . . . 16
Electrical connection ........................................................17
Contents
M.-Nr. 07 799 370 3

To avoid the risk of accidents and
damage to the ironer please read these
instructions carefully before using it for the
first time. They contain important
information on its safety, use and
maintenance.
Keep these instructions in a safe place
and ensure that new users are familiar
with the content. Pass them on to any
future owner.
Correct application
This ironer must only be used for ironing
articles which were washed in water and
which have a care label stating that the
article is suitable for machine ironing.
This ironer is not intended for use by
persons (including children) with
reduced physical, sensory or mental
capabilities, or lack of experience or
knowledge, unless they are supervised
whilst using it or have been shown how to
use it correctly by a person responsible for
their safety.
If the ironer is used in a publically
accessible room, it is the supervisor's
responsibility to ensure that operators are
able to use it safely.
Technical and electrical safety
Before setting up the ironer, check it for
any externally visible damage. Under no
circumstances should you use it if it has
been damaged. A damaged ironer could be
dangerous.
If the connection cable is damaged, it
must be replaced by a Miele approved
service technician.
Before connecting the ironer, ensure that
the connection data on the data plate
(fuse rating, voltage and frequency) match
the mains electricity supply.
If in any doubt, consult a qualified
electrician.
The electrical safety of this ironer can
only be guaranteed when continuity is
complete between it and an effective
earthing system which complies with current
local and national safety regulations. It is
most important that this basic safety
requirement is present and regularly tested,
and where there is any doubt the on-site
wiring system should be inspected by a
qualified electrician. The manufacturer
cannot be held liable for damage or injury
caused by an inadequate earthing system
(e.g. electric shock).
This ironer complies with all relevant
local and national safety requirements.
Unauthorised repairs could result in
unforeseen dangers for the user, for which
Miele cannot accept liability. Repairs should
only be undertaken by a Miele approved
service technician. Ensure current is not
supplied to the ironer until after maintenance
or repair work has been carried out.
Faulty components must only be
replaced by genuine Miele original parts.
The manufacturer can only guarantee the
safety of the appliance when Miele
replacement parts are used.
Warning and Safety instructions
4 M.-Nr. 07 799 370

The ironer is only completely isolated
from the electricity supply when:
–it is switched off at the wall socket and the
plug is withdrawn, or
–the mains fuse is disconnected, or it is
switched off at the mains, or
–the screw-out fuse is removed (in
countries where this is applicable).
Do not damage, remove or bypass the
safety features, fixtures and control
elements of this appliance.
Any removable outer panels must be
back in place, and all moving or
electrical parts shielded before it is switched
on.
This ironer may only be used in mobile
installations such as ships if a risk
assessment of the installation has been
carried out by a suitably qualified engineer.
Correct use
When working with the ironer always
wear close fitting clothes. Wide sleeves,
apron straps, scarves and ties etc. could be
taken in by the roller.
Remove any rings, bracelets, or other
jewellery before starting to work. Tie
back long hair.
When heated up there is an acute risk of
burning:
–if the heater plate is touched,
–if the foot pedal is pressed down while
fingers or hands are positioned between
the raised heater plate and the roller.
This ironer is not a toy! To avoid the risk
of injury do not let children play on or
near it, or with the controls. Supervise
children whilst you are using it.
Do not drape laundry over the heater
plate when it is heated up. Fire hazard.
Use the swing out bar.
It is designed for hanging laundry on.
After use it should be swung back out of the
way. Take care not to press down on the bar
when it is swung out. There is a danger that
this could tip the ironer over.
Switch the ironer off before removing the
plug from the socket.
Do not pull it by the cable.
Do not lay the connection cable over the
heater plate when it is heated up. This
could damage the cable - danger of electric
shock.
Use the cable holders on the ironer to wind
the cable away.
Using accessories
Accessory parts may only be fitted when
expressly approved by Miele. If spare
parts or accessories from other
manufacturers are used, this will invalidate
the guarantee, and Miele cannot accept
liability.
Warning and Safety instructions
M.-Nr. 07 799 370 5

Disposing of the packing material
The packaging is designed to protect the
machine during transportation. The transport
and protective packing has been selected
from materials which are environmentally
friendly for disposal and can normally be
recycled.
Rather than just throwing these materials
away, please ensure that they are recycled.
Ensure that any plastic wrappings, bags, etc
are disposed of safely and kept out of the
reach of babies and young children. Danger
of suffocation.
Disposing of your old machine
Electrical and electronic machines often
contain materials which, if handled or
disposed of incorrectly could be potentially
hazardous to human health and to the
environment. They are, however, essential
for the correct functioning of your machine.
Please do not therefore dispose of it with
your general waste.
Please dispose of it at your local community
waste collection / recycling centre, or
contact Miele for advice.
Please ensure that it presents no danger to
children whilst awaiting disposal.
Caring for the environment
6 M.-Nr. 07 799 370

aElectronic roller speed selector
bON Rocker switch with indicator light
cOFF Rocker switch with indicator light
1Control panel
2Handles
3Heater plate
4Temperature regulator
5Finger guard
6Roller
7Laundry feed board
8Swing out bar for hanging laundry on
9Ironing table
10 Foot control
11 Heater plate release mechanism (in
case of power cut)
12 Castors
Description of the machine
M.-Nr. 07 799 370 7
a
b
c
2
1
3
4
5
6
7
8
9
11
10
12

Switching on and off
^To switch on
Press rocker switch" I". The indicator light
in the switch comes on.
^To switch off
Press rocker switch" 0". The indicator light
in switch " I" goes out.
Check that the finger guard is
functioning properly.
The finger guard is a safety feature and
should always be checked before using the
ironer.
,Warning!
Do not reach between the heater plate
and the rotating roller.
Danger of injury and burning.
^With the ironer switched on, press the foot
pedal right down. The heater plate will
lower itself onto the rotating roller.
^If you now lift the finger guard up and hold
it, the roller will stop rotating and the heater
plate will rise up. This indicates that the
finger guard is working correctly.
^Take your foot off the foot pedal and then
let go of the finger guard. The heater plate
remains off the roller.
^Switch on the ironer on again with rocker
switch I.
Operation
8 M.-Nr. 07 799 370

Temperature selection
Choose the temperature according to fabric
type and care label. Iron items that a require
a low temperature first.
^Turn the temperature selector to the
temperature you wish to use.
The temperature settings are indicated by
dots around the selector. These dots
correspond to the international symbols for
ironing.
Material Dot
symbol Temperature
range
e40 - 60°C
Polyester /
artificial silk ßLow
temperature
Silk / wool ßß Medium
temperature
Cottons /
linen ßßß High
temperature
It takes about 5-8 minutes to reach the
correct temperature for ironing linen. Once
the required temperature has been reached
the roller should be rotated a few times to
warm it up before starting to iron.
Foot control bar
The ironing process is controlled by the foot
pedal which has three positions:
1 - raised
2 - press
3 - iron
To iron:
^Press the foot pedal right down.
To press:
^Press the foot pedal right down; then raise
your foot slightly. The roller will stop turning
and the heater plate will remain in contact
with the laundry.
To raise the heater plate:
^Take your foot off the pedal.
Operation
M.-Nr. 07 799 370 9

Feed-in table
The feed-in table enables large flat items to
be fed into the ironer smoothly without
creasing.
It can be removed for ironing shaped
garments, e.g. skirts.
To take it off pull it out of the plastic guides
at either end of the ironer.
To replace it push it back into the plastic
guides at either end of the ironer.
Roller speed
^The roller speed is regulated manually by
turning the roller speed selector dial. The
speed required will depend on the type of
fabric and its resudual moisture level. It
can be adjusted to iron between
1.3 - 3.5 m of material a minute.
Ironing
^Arrange the item to be ironed along the
feed-in table so that it is straight and
smooth.
^Then carefully turn the roller by hand until
the laundry is in line with the heater plate
(keep your fingers away from the heater
plate).
Then:
^Press the foot pedal down.
Smooth the laundry out during ironing from
the middle outwards.
Any folds in the fabric should be sorted out
as far away from the heater plate as possible
to avoid any risk of injury.
Feed pillow cases and duvet covers into the
ironer with the open end first. Do not take
hold of the corners from the inside.
Do not hold onto ties or straps on garments.
The ironed laundry can be very hot when
it comes off the ironer. Wear gloves to
protect your hands.
Allow the ironed laundry to cool down
before packing or stacking it. Hot laundry
could self-ignite and cause a fire.
Protection of the motor and the roller
cover
In pauses between ironing and when you
have finished ironing, disengage the heater
plate. This helps prolong the life of the roller
cover and protects the motor.
It also helps to prolong the life of the
machine.
It is very important to avoid running the
ironer without passing laundry through it.
Operation
10 M.-Nr. 07 799 370

Useful tips
If creases appear on items being ironed:
Stop the roller and pull the item back slightly.
Smooth it out and if necessary dampen it
with a wet cloth.
Try to use the full width of the roller to help
the roller cover maintain its shape.
For small items, e.g. handkerchiefs, alternate
between using the right and left hand sides
of the roller.
Items with raised buttons should be ironed
face down on to the roller so that they are
pressed into the cushioned surface.
To protect the heater plate do not iron very
bulky or heat-sensitive buttons.
Hanging bar
Ironed laundry can be hung over the swing
out bar to avoid creasing.
Switching off
After ironing:
After ironing switch off the heater and let the
roller run for approx. 5 minutes to let the
roller covering dry out.
After switching the ironer off with the " 0"
rocker switch the heater plate will
automatically disengage itself from the roller.
Operation
M.-Nr. 07 799 370 11

Moving the ironer
The ironer is fitted with four rollers.
^Hold the ironer by the handle to push it or
to pull it towards you.
To overcome obstacles such as carpet
edges and doorways, but also to steer it:
^Tilt is slightly.
Preparation of the working area
Setting up your working area in as practical
and convenient way as possible will ensure
greater efficiency when ironing.
A height adjustable chair will ensure a
comfortable ironing position for all users.
The machine should be installed to give
maximum light to the feed-in table.
Make sure the ironer is level and secure to
prevent it rolling away from you.
Place close at hand:
– The laundry basket with pre-sorted
laundry.
– A suitable table for placing ironed laundry
on. Small items can be hung over the
swing out bar.
–Keep a spray bottle of water handy for
redamping laundry if necessary.
Preparing the laundry
Correct preparation of the laundry is
essential for successful ironing.
Before ironing the laundry should be:
–Damped down
–Pulled into shape and smoothed out
–Sorted
Damping down
The laundry needs to be sufficiently damp
so that when it is passed through the rotary
ironer at the correct temperature it comes
out smooth and dry. Dampen the laundry as
you would for hand ironing, preferably
several hours beforehand so that it achieves
a uniform degree of dampness throughout.
More advice on correct dampness
Material Dampness
Silk Wrap in a damp cloth to
avoid water marks
Synthetic
fabrics e.g.
dralon, nylon,
polyester etc.
Slightly damp to dry
Wool
(e.g. trousers) Press under a damp cloth
Cottons Slightly damp
Linen Quite damp
Useful tips
If a tumble dryer is being used, select a
"Machine iron" programme.
Use warm water if preparation time is short
and also to redampen.
Sorting
Sort the laundry according to size and to
how much heat is required for ironing.
First iron synthetic fibres such as nylon,
polyester and artificial silk which only require
a low temperature. Then iron silk, wool,
cotton and linen at increasing temperatures.
Iron starched items last of all to avoid any
starch deposits from affecting the finish of
other items.
Notes
12 M.-Nr. 07 799 370

Safety mechanism during a power
cut
If there is a power cut during ironing the
heater plate must be disengaged from the
roller to prevent articles singeing.
The ironer has a built-in safety mechanism to
do this:
^Press down heavily at the back of the foot
control bar.
The heater plate disengages from the roller.
The ironer is immediately ready for use again
once power has been restored. If the heater
plate does not move after power has been
restored press down on the back of the foot
control bar again. In the event of a lengthy
power cut turn the ironer off with the rocker
switch and turn the temperature regulator to
"0".
Notes
M.-Nr. 07 799 370 13

The ironer generally requires very little
attention.
Cleaning the heater plate
Limescale and starch deposits can stick to
the heater plate. It should therefore be
cleaned 1-3 times a week, depending on the
degree of soiling.
For light soiling, clean with Cleanpaste on a
wax cloth.
For heavier soiling, use a cleaning cloth
together with a cleaning mat.
The heater plate should always be waxed
after it has been cleaned.
The special ironer cleaning cloth and wax
should only be ordered from the Miele Spare
Parts Department.
Do not use abrasive cleaning agents or
abrasive cleaning cloths.
See the Miele Ironing Handbook for more
details.
Roller cover
Before removing the roller cover (for
cleaning or replacement) switch the ironer
off and disconnect it from the mains. Allow
the heater plate to cool down and then
remove the laundry feed board and use the
safety mechanism to raise the heater plate
away from the roller.
Wash the roller cover at 60 °C with a
universal detergent and spin it. Heat the
ironer up ( ßsetting) and feed the cover
back onto the rotating roller whilst still damp.
If the steel wool padding needs replacing
this must be done by a Miele service
engineer.
When re-covering the roller the cover should
be between 656 mm and 664 mm wide to
ensure that the whole cylindrical width of the
roller is covered.
The ironing cover cords at either end of the
cover must meet exactly. Tighten them, then
tie them together and tuck them in at the
sides under the roller cover. The cover must
be carefully smoothed out without creases.
Any folds in the cover will imprint on laundry
being ironed. The roller is correctly covered
when it makes snug contact along the width
of the heater plate. Replace the laundry
feed-in board.
It is a good idea to keep a spare ironing
cloth.
After Sales Service
In the event of any faults please contact your
Miele Dealer or the Miele Service
Department.
When contacting Miele, please quote the
Model, Serial number (Fabr.Nr) and Material
number (M.Nr) of your ironer. These are
given on the data plate.
Should you require spare parts ensure
that you only use genuine original Miele
Spare Parts (and remember to let the Spare
Parts Department know the model number
and serial number of your ironer).
Cleaning and care
14 M.-Nr. 07 799 370
1 Model
2 Serial number
3 Article number
4 Material number
5 Voltage/Frequency
6 Mains fuse rating
7 Drive motor
8 Drum data*
9 Drum diameter/Drum depth*
10 Spin speed*
11 Drum volume/laundry dry weight*
12 Kinetic energy*
13 Run-up time*
14 Braking time*
15 Heating
16 Description/Year of manufacture
17 Commissioning date
18 Electric heating
19 Fuse rating (on-site)
20 Steam heating, indirect*
21 Steam heating, direct*
22 Gas heating*
23 Field for Test marks/symbols
*) does not apply to this ironer
Noise emission
Registered on the A scale
67.6 Measured in Germany in accordance
with DIN (IEC) 45 635. Machine noise
regulations, 3. GSGV § 1. 1.a
Explanation of symbols on the data plate
M.-Nr. 07 799 370 15
a
b opq
c
drs
e
ft
g
u
i
hj v
k
lw
m
n

When the machine is delivered
Unpack the ironer carefully and make sure it
has not suffered any damage during
transportation. It is has, details must be
documented and the supplier notified.
Setting up the machine
The machine must be transported on its
wooden base to its installation site.
,Ensure that it is stable during
transportation.
Take it off the wooden base at the installation
site.
It must not be transported without this
wooden base (e.g. when moving it to a new
location).
Notes for the installer
16 M.-Nr. 07 799 370

Electrical connection
This machine conforms to IEC 335-1 and
IEC 335-2-44.
The electrical connection may only be
carried out by a suitably qualified technician
in accordance with local and national safety
regulations (BS 7671 in the UK).
WARNING
THIS APPLIANCE MUST BE EARTHED
Connection to the electrical supply must be
carried out in accordance with the data
plate, wiring diagram, installation diagram
and, where applicable, the conversion
instructions.
The wiring diagram can be found on the
inner side of the left hand column on the
machine.
The machine is supplied 3N~ ex works.
Please ensure that the voltage and
frequency of the machine as quoted on the
data plate comply with the on-site supply.
If it is converted to another voltage, the data
place should be marked with a D.
,The heater plate is disengaged as
soon as current is supplied.
Connection should be made via a suitable
isolator which complies with local and
national safety regulations and which is
easily accesible for disconnecting the
machine from the electricity supply.
Provision must be made on site to switch off
all poles. Switches with a minimum all-pole
contact gap greater than 3 mm are suitable
for isolating the machine. These include
circuit breakers, fuses and relays (IEC/EN
60947).
The isolator switch should be easily
accessible for servicing work.
If the machine is disconnected from the
electricity supply ensure adequate measures
are taken to ensure that the machine cannot
be reconnected to the electricity supply until
all work has been carried out.
The ironer must be disconnected from the
electricity supply before it is moved or
dismantled.
,After setting up and connecting the
machine successfully ensure that the
machine is earthed and that all removable
outer panels are correctly fitted back into
position.
Electrical connection
M.-Nr. 07 799 370 17
18 M.-Nr. 07 799 370

M.-Nr. 07 799 370 19

Alteration rights reserved/5009 M.-Nr. 07 799 370 / 00
Other manuals for HM 21-100
1
Table of contents
Other Miele Iron manuals

Miele
Miele FM3 User manual

Miele
Miele B 890 Parts list manual

Miele
Miele B 3312 User manual

Miele
Miele HM 21-140 User manual

Miele
Miele B 890 User manual

Miele
Miele B 990 User manual

Miele
Miele B 995 D User manual

Miele
Miele FashionMaster B 4847 User manual

Miele
Miele HM 21-100 User manual

Miele
Miele HM 16-83 User manual

Miele
Miele FashionMaster User manual

Miele
Miele PM 1210 User manual

Miele
Miele HM 21-140 User manual

Miele
Miele HM 16-83 User manual

Miele
Miele HM 21-140 User manual

Miele
Miele PRI 210 User manual

Miele
Miele HM 16-80 User manual

Miele
Miele B 890 Manual

Miele
Miele B 2312 User manual

Miele
Miele FashionMaster User manual