Miele W 4449 WPS LiquidWash User manual

Operating instructions
for Washing machine
W 4449 WPS LiquidWash
To avoid the risk of accidents or
damage to the machine it is
essential to read these instructions
before it is installed and used for the
first time.
G
M.-Nr. 06 732 380

Disposal of the packing
material
The transport and protective packing
has been selected from materials which
are environmentally friendly for disposal
and can normally be recycled.
Ensure that any plastic wrappings,
bags etc. are disposed of safely and
kept out of the reach of babies and
young children. Danger of suffocation!
Rather than just throwing these
materials away, please ensure they are
offered for recycling.
Disposal of your old appliance
or machine
Electrical and electronic appliances /
machines often contain materials
which, if handled or disposed of
incorrectly, could be potentially
hazardous to human health and to the
environment. They are, however,
essential for the correct functioning of
your appliance or machine. Please do
not therefore dispose of your old
machine or appliance with your
household waste.
Please dispose of it at your local
community waste collection / recycling
centre and ensure that it presents no
danger to children while being stored
for disposal.
It should be unplugged or disconnected
from the mains electricity supply by a
competent person. The plug must be
rendered useless and the cable cut off
directly behind it to prevent misuse.
See the "Warning and Safety" section of
this booklet for further details.
Caring for our environment
2

Caring for our environment. . . . . . . . . . . . . . . . . . . . . . . . . . . . . . . . . . . . . . . . . . 2
Disposal of the packing material . . . . . . . . . . . . . . . . . . . . . . . . . . . . . . . . . . . . . . . 2
Disposal of your old appliance or machine . . . . . . . . . . . . . . . . . . . . . . . . . . . . . . . 2
Warning and Safety instructions . . . . . . . . . . . . . . . . . . . . . . . . . . . . . . . . . . . . . 6
Operating the washing machine. . . . . . . . . . . . . . . . . . . . . . . . . . . . . . . . . . . . . 10
Control panel . . . . . . . . . . . . . . . . . . . . . . . . . . . . . . . . . . . . . . . . . . . . . . . . . . . . . 10
Display . . . . . . . . . . . . . . . . . . . . . . . . . . . . . . . . . . . . . . . . . . . . . . . . . . . . . . . . . . 11
Before using for the first time. . . . . . . . . . . . . . . . . . . . . . . . . . . . . . . . . . . . . . . 13
Preparing the washing machine . . . . . . . . . . . . . . . . . . . . . . . . . . . . . . . . . . . . . . 13
Priming the liquid detergent dispensing system . . . . . . . . . . . . . . . . . . . . . . . . . . 14
Liquid detergent dispensing. . . . . . . . . . . . . . . . . . . . . . . . . . . . . . . . . . . . . . . . 16
How automatic liquid detergent dispensing works . . . . . . . . . . . . . . . . . . . . . . . . 16
Dosage level . . . . . . . . . . . . . . . . . . . . . . . . . . . . . . . . . . . . . . . . . . . . . . . . . . . . . 16
Useful tips . . . . . . . . . . . . . . . . . . . . . . . . . . . . . . . . . . . . . . . . . . . . . . . . . . . . . . . 17
Washing environmentally and economically. . . . . . . . . . . . . . . . . . . . . . . . . . . 18
Energy and water consumption . . . . . . . . . . . . . . . . . . . . . . . . . . . . . . . . . . . . 18
Detergent . . . . . . . . . . . . . . . . . . . . . . . . . . . . . . . . . . . . . . . . . . . . . . . . . . . . . 18
How to wash correctly. . . . . . . . . . . . . . . . . . . . . . . . . . . . . . . . . . . . . . . . . . . . . 19
Extra options . . . . . . . . . . . . . . . . . . . . . . . . . . . . . . . . . . . . . . . . . . . . . . . . . . . . 25
Short. . . . . . . . . . . . . . . . . . . . . . . . . . . . . . . . . . . . . . . . . . . . . . . . . . . . . . . . . . . . 25
Water plus . . . . . . . . . . . . . . . . . . . . . . . . . . . . . . . . . . . . . . . . . . . . . . . . . . . . . . . 25
Pre-wash . . . . . . . . . . . . . . . . . . . . . . . . . . . . . . . . . . . . . . . . . . . . . . . . . . . . . . . . 25
Further extras. . . . . . . . . . . . . . . . . . . . . . . . . . . . . . . . . . . . . . . . . . . . . . . . . . . . . 25
Soak . . . . . . . . . . . . . . . . . . . . . . . . . . . . . . . . . . . . . . . . . . . . . . . . . . . . . . . . . 25
Rinse hold. . . . . . . . . . . . . . . . . . . . . . . . . . . . . . . . . . . . . . . . . . . . . . . . . . . . . 25
Extra rinse. . . . . . . . . . . . . . . . . . . . . . . . . . . . . . . . . . . . . . . . . . . . . . . . . . . . . 25
Buzzer . . . . . . . . . . . . . . . . . . . . . . . . . . . . . . . . . . . . . . . . . . . . . . . . . . . . . . . . . . 25
Spinning . . . . . . . . . . . . . . . . . . . . . . . . . . . . . . . . . . . . . . . . . . . . . . . . . . . . . . . . 26
Final spin speed . . . . . . . . . . . . . . . . . . . . . . . . . . . . . . . . . . . . . . . . . . . . . . . . . . 26
Rinse and interim spin . . . . . . . . . . . . . . . . . . . . . . . . . . . . . . . . . . . . . . . . . . . 26
To omit the final spin (Rinse hold). . . . . . . . . . . . . . . . . . . . . . . . . . . . . . . . . . . 26
To omit rinse and interim spin and the final spin (No spin). . . . . . . . . . . . . . . . 26
Delay start. . . . . . . . . . . . . . . . . . . . . . . . . . . . . . . . . . . . . . . . . . . . . . . . . . . . . . . 27
Programme chart . . . . . . . . . . . . . . . . . . . . . . . . . . . . . . . . . . . . . . . . . . . . . . . . . 29
Programme sequence . . . . . . . . . . . . . . . . . . . . . . . . . . . . . . . . . . . . . . . . . . . . . 33
Garment care label symbols . . . . . . . . . . . . . . . . . . . . . . . . . . . . . . . . . . . . . . . . 35
Contents
3

Changing the programme sequence . . . . . . . . . . . . . . . . . . . . . . . . . . . . . . . . . 36
Cancelling a programme . . . . . . . . . . . . . . . . . . . . . . . . . . . . . . . . . . . . . . . . . . . . 36
Interrupting a programme . . . . . . . . . . . . . . . . . . . . . . . . . . . . . . . . . . . . . . . . . . . 36
Changing a programme. . . . . . . . . . . . . . . . . . . . . . . . . . . . . . . . . . . . . . . . . . . . . 36
Adding or removing laundry after a programme has started . . . . . . . . . . . . . . . . 37
Safety lock . . . . . . . . . . . . . . . . . . . . . . . . . . . . . . . . . . . . . . . . . . . . . . . . . . . . . . . 37
Detergent . . . . . . . . . . . . . . . . . . . . . . . . . . . . . . . . . . . . . . . . . . . . . . . . . . . . . . . 38
The correct detergent . . . . . . . . . . . . . . . . . . . . . . . . . . . . . . . . . . . . . . . . . . . . . . 38
Water softeners. . . . . . . . . . . . . . . . . . . . . . . . . . . . . . . . . . . . . . . . . . . . . . . . . 39
Washing with several components . . . . . . . . . . . . . . . . . . . . . . . . . . . . . . . . . . 39
Fabric conditioners and liquid starch. . . . . . . . . . . . . . . . . . . . . . . . . . . . . . . . 40
Colour run and dye removers/dyes . . . . . . . . . . . . . . . . . . . . . . . . . . . . . . . . . 40
Cleaning and care . . . . . . . . . . . . . . . . . . . . . . . . . . . . . . . . . . . . . . . . . . . . . . . . 41
External casing and fascia panel . . . . . . . . . . . . . . . . . . . . . . . . . . . . . . . . . . . . . 41
E-Cloth . . . . . . . . . . . . . . . . . . . . . . . . . . . . . . . . . . . . . . . . . . . . . . . . . . . . . . . 41
Extra cleaning. . . . . . . . . . . . . . . . . . . . . . . . . . . . . . . . . . . . . . . . . . . . . . . . . . 41
Cleaning the detergent dispenser drawer. . . . . . . . . . . . . . . . . . . . . . . . . . . . . . . 41
Cleaning the siphon and conditioner channel . . . . . . . . . . . . . . . . . . . . . . . . . 42
Cleaning the dispensing unit . . . . . . . . . . . . . . . . . . . . . . . . . . . . . . . . . . . . . . . . . 43
Cleaning the container and lid . . . . . . . . . . . . . . . . . . . . . . . . . . . . . . . . . . . . . 43
Cleaning the dispensing tube. . . . . . . . . . . . . . . . . . . . . . . . . . . . . . . . . . . . . . 43
Cleaning the filter in the water inlet . . . . . . . . . . . . . . . . . . . . . . . . . . . . . . . . . . . . 44
Problem solving guide. . . . . . . . . . . . . . . . . . . . . . . . . . . . . . . . . . . . . . . . . . . . . 45
The programme does not start . . . . . . . . . . . . . . . . . . . . . . . . . . . . . . . . . . . . . . . 45
Fault messages in the display . . . . . . . . . . . . . . . . . . . . . . . . . . . . . . . . . . . . . . . . 46
Problems with the automatic liquid detergent dispensing system . . . . . . . . . . . . 47
General problems . . . . . . . . . . . . . . . . . . . . . . . . . . . . . . . . . . . . . . . . . . . . . . . . . 49
An unsatisfactory wash result . . . . . . . . . . . . . . . . . . . . . . . . . . . . . . . . . . . . . . . . 50
The door will not open . . . . . . . . . . . . . . . . . . . . . . . . . . . . . . . . . . . . . . . . . . . . . . 51
Opening the drum door in the event of a blocked drain outlet and/or
power failure . . . . . . . . . . . . . . . . . . . . . . . . . . . . . . . . . . . . . . . . . . . . . . . . . . . . . 52
Blocked drain outlet . . . . . . . . . . . . . . . . . . . . . . . . . . . . . . . . . . . . . . . . . . . . . 52
After sales service . . . . . . . . . . . . . . . . . . . . . . . . . . . . . . . . . . . . . . . . . . . . . . . . 54
Repairs . . . . . . . . . . . . . . . . . . . . . . . . . . . . . . . . . . . . . . . . . . . . . . . . . . . . . . . 54
Future updates (PC) . . . . . . . . . . . . . . . . . . . . . . . . . . . . . . . . . . . . . . . . . . . . . 54
Appliance guarantee . . . . . . . . . . . . . . . . . . . . . . . . . . . . . . . . . . . . . . . . . . . . 54
Optional accessories . . . . . . . . . . . . . . . . . . . . . . . . . . . . . . . . . . . . . . . . . . . . 54
Contents
4

Installation and connection . . . . . . . . . . . . . . . . . . . . . . . . . . . . . . . . . . . . . . . . 55
Front view. . . . . . . . . . . . . . . . . . . . . . . . . . . . . . . . . . . . . . . . . . . . . . . . . . . . . . . . 55
Rear view . . . . . . . . . . . . . . . . . . . . . . . . . . . . . . . . . . . . . . . . . . . . . . . . . . . . . . . . 56
Installation surface. . . . . . . . . . . . . . . . . . . . . . . . . . . . . . . . . . . . . . . . . . . . . . . . . 57
Transporting the machine to its installation site . . . . . . . . . . . . . . . . . . . . . . . . 57
Removing the transit fittings . . . . . . . . . . . . . . . . . . . . . . . . . . . . . . . . . . . . . . . . . 57
Re-fitting the transit bars . . . . . . . . . . . . . . . . . . . . . . . . . . . . . . . . . . . . . . . . . . . . 59
Levelling the machine . . . . . . . . . . . . . . . . . . . . . . . . . . . . . . . . . . . . . . . . . . . . . . 60
Dispensing unit . . . . . . . . . . . . . . . . . . . . . . . . . . . . . . . . . . . . . . . . . . . . . . . . . . . 61
The Miele Waterproof system . . . . . . . . . . . . . . . . . . . . . . . . . . . . . . . . . . . . . . . . 64
Connection to the water supply . . . . . . . . . . . . . . . . . . . . . . . . . . . . . . . . . . . . . . . 65
Connection to the drainage system. . . . . . . . . . . . . . . . . . . . . . . . . . . . . . . . . . . . 67
Electrical connection U.K. . . . . . . . . . . . . . . . . . . . . . . . . . . . . . . . . . . . . . . . . . . . 68
Consumption data . . . . . . . . . . . . . . . . . . . . . . . . . . . . . . . . . . . . . . . . . . . . . . . . 69
Notes for test institutes: . . . . . . . . . . . . . . . . . . . . . . . . . . . . . . . . . . . . . . . . . . 69
Technical data . . . . . . . . . . . . . . . . . . . . . . . . . . . . . . . . . . . . . . . . . . . . . . . . . . . 70
Settings menu . . . . . . . . . . . . . . . . . . . . . . . . . . . . . . . . . . . . . . . . . . . . . . . . . . . 72
To open the Settings menu . . . . . . . . . . . . . . . . . . . . . . . . . . . . . . . . . . . . . . . . 72
Language F. . . . . . . . . . . . . . . . . . . . . . . . . . . . . . . . . . . . . . . . . . . . . . . . . . . . . . 72
Time (of day) . . . . . . . . . . . . . . . . . . . . . . . . . . . . . . . . . . . . . . . . . . . . . . . . . . . . . 72
Detergent dosage . . . . . . . . . . . . . . . . . . . . . . . . . . . . . . . . . . . . . . . . . . . . . . . . . 73
Gentle action . . . . . . . . . . . . . . . . . . . . . . . . . . . . . . . . . . . . . . . . . . . . . . . . . . . . . 73
Longer pre-wash . . . . . . . . . . . . . . . . . . . . . . . . . . . . . . . . . . . . . . . . . . . . . . . . . . 73
Suds cooling . . . . . . . . . . . . . . . . . . . . . . . . . . . . . . . . . . . . . . . . . . . . . . . . . . . . . 73
Lock code . . . . . . . . . . . . . . . . . . . . . . . . . . . . . . . . . . . . . . . . . . . . . . . . . . . . . . . 74
Temperature unit . . . . . . . . . . . . . . . . . . . . . . . . . . . . . . . . . . . . . . . . . . . . . . . . . . 75
Buzzer . . . . . . . . . . . . . . . . . . . . . . . . . . . . . . . . . . . . . . . . . . . . . . . . . . . . . . . . . . 75
Keypad tone . . . . . . . . . . . . . . . . . . . . . . . . . . . . . . . . . . . . . . . . . . . . . . . . . . . . . 75
Brightness . . . . . . . . . . . . . . . . . . . . . . . . . . . . . . . . . . . . . . . . . . . . . . . . . . . . . . . 75
Contrast . . . . . . . . . . . . . . . . . . . . . . . . . . . . . . . . . . . . . . . . . . . . . . . . . . . . . . . . . 75
Standby . . . . . . . . . . . . . . . . . . . . . . . . . . . . . . . . . . . . . . . . . . . . . . . . . . . . . . . . . 76
Memory . . . . . . . . . . . . . . . . . . . . . . . . . . . . . . . . . . . . . . . . . . . . . . . . . . . . . . . . . 76
Contents
5

To avoid the risk of accidents and
damage to the machine please read
these instructions carefully before
using it for the first time. They
contain important information on its
safety, use and maintenance.
Keep these instructions in a safe
place and ensure that new users are
familiar with the content. Pass them
on to any future owner of the
machine.
Correct usage
Only use the washing machine to
wash items which are specified by
the manufacturer to be
machine-washable on the wash-care
label, and textiles composed of
hand-washable wool or wool blend
fabrics as well as satin, lace, silk and
other hand-washable garments. Any
other applications may be dangerous.
The manufacturer is not liable for
damage resulting from improper use or
operation.
Technical safety
Before setting up the machine,
check it for any externally visible
damage.
Do not install or use a damaged
machine.
Before connecting the machine,
ensure that the connection data on
the data plate match the mains
electricity supply. If in any doubt,
consult a qualified electrician.
The electrical safety of this
machine can only be guaranteed
when continuity is complete between
the machine and an effective earthing
system which complies with local and
national safety regulations. It is most
important that this basic safety
requirement is present and regularly
tested, and where there is any doubt
the household wiring system should be
inspected by a qualified electrician.
The manufacturer cannot be held liable
for the consequences of an inadequate
earthing system (e.g. electric shock).
Do not connect the machine to the
mains electricity supply by an
extension lead. Extension leads do not
guarantee the required safety of the
machine (e.g. danger of overheating).
The machine is built in accordance
with current safety requirements.
Unauthorised repairs could result in
unforeseen dangers for the user, for
which the manufacturer cannot accept
liability. Repairs should only be
undertaken by a Miele approved
technician.
Ensure current is not supplied to the
machine until after maintenance or
repair work has been carried out.
Warning and Safety instructions
6

The machine is only completely
isolated from the electricity supply
when:
–it is switched off at the wall socket
and the plug is withdrawn, or
–it is switched off at the mains, or
–the mains fuse is disconnected, or
–the screw-out fuse is removed (in
countries where this is applicable).
The Miele "Water protection
system" protects from water
damage provided the following
conditions have been met:
– the machine is correctly plumbed in
and connected to the electricity
supply.
– if a fault has been identified, the
machine must be examined by a
competent person before further use,
and repaired if necessary.
Faulty components must only be
replaced by genuine Miele original
spare parts. Only when these parts are
fitted can the safety standards of the
machine be guaranteed.
If the connection cable is faulty it
must only be replaced by a Miele
approved service technician to protect
the user from danger.
In countries where there are areas
which may be subject to infestation
by cockroaches and other vermin, pay
particular attention to keeping the
machine and its surroundings in a
clean condition at all times. Any
damage which may be caused by
cockroaches or other vermin will not be
covered by the guarantee.
Use
This equipment may only be used
in mobile installations such as
ships, caravans, aircraft etc. if a risk
assessment of the installation has been
carried out by a suitably qualified
engineer.
Do not install your washing
machine in rooms where
temperatures below freezing may
occur. Frozen hoses may burst or split.
The reliability of the electronic control
unit may be impaired at temperatures
below freezing point.
Before using the machine for the
first time, check that the transit
fittings at the rear of the machine have
been removed (see section on
"Installation"). During spinning, a transit
fitting which is still in place may result in
damage to both the machine and
adjacent furniture or appliances.
Warning and Safety instructions
7

Turn off the stopcock if the
machine is to be left for any length
of time (e.g. holiday), especially if there
is no floor drain (gully) in the immediate
vicinity.
Flooding danger.
If hooking the drain hose into a
wash basin, check that the water can
drain off quickly enough to prevent the
sink from overflowing. Make sure the
drain hose is secure, so that the force
of the water flowing out of the hose
does not dislodge it.
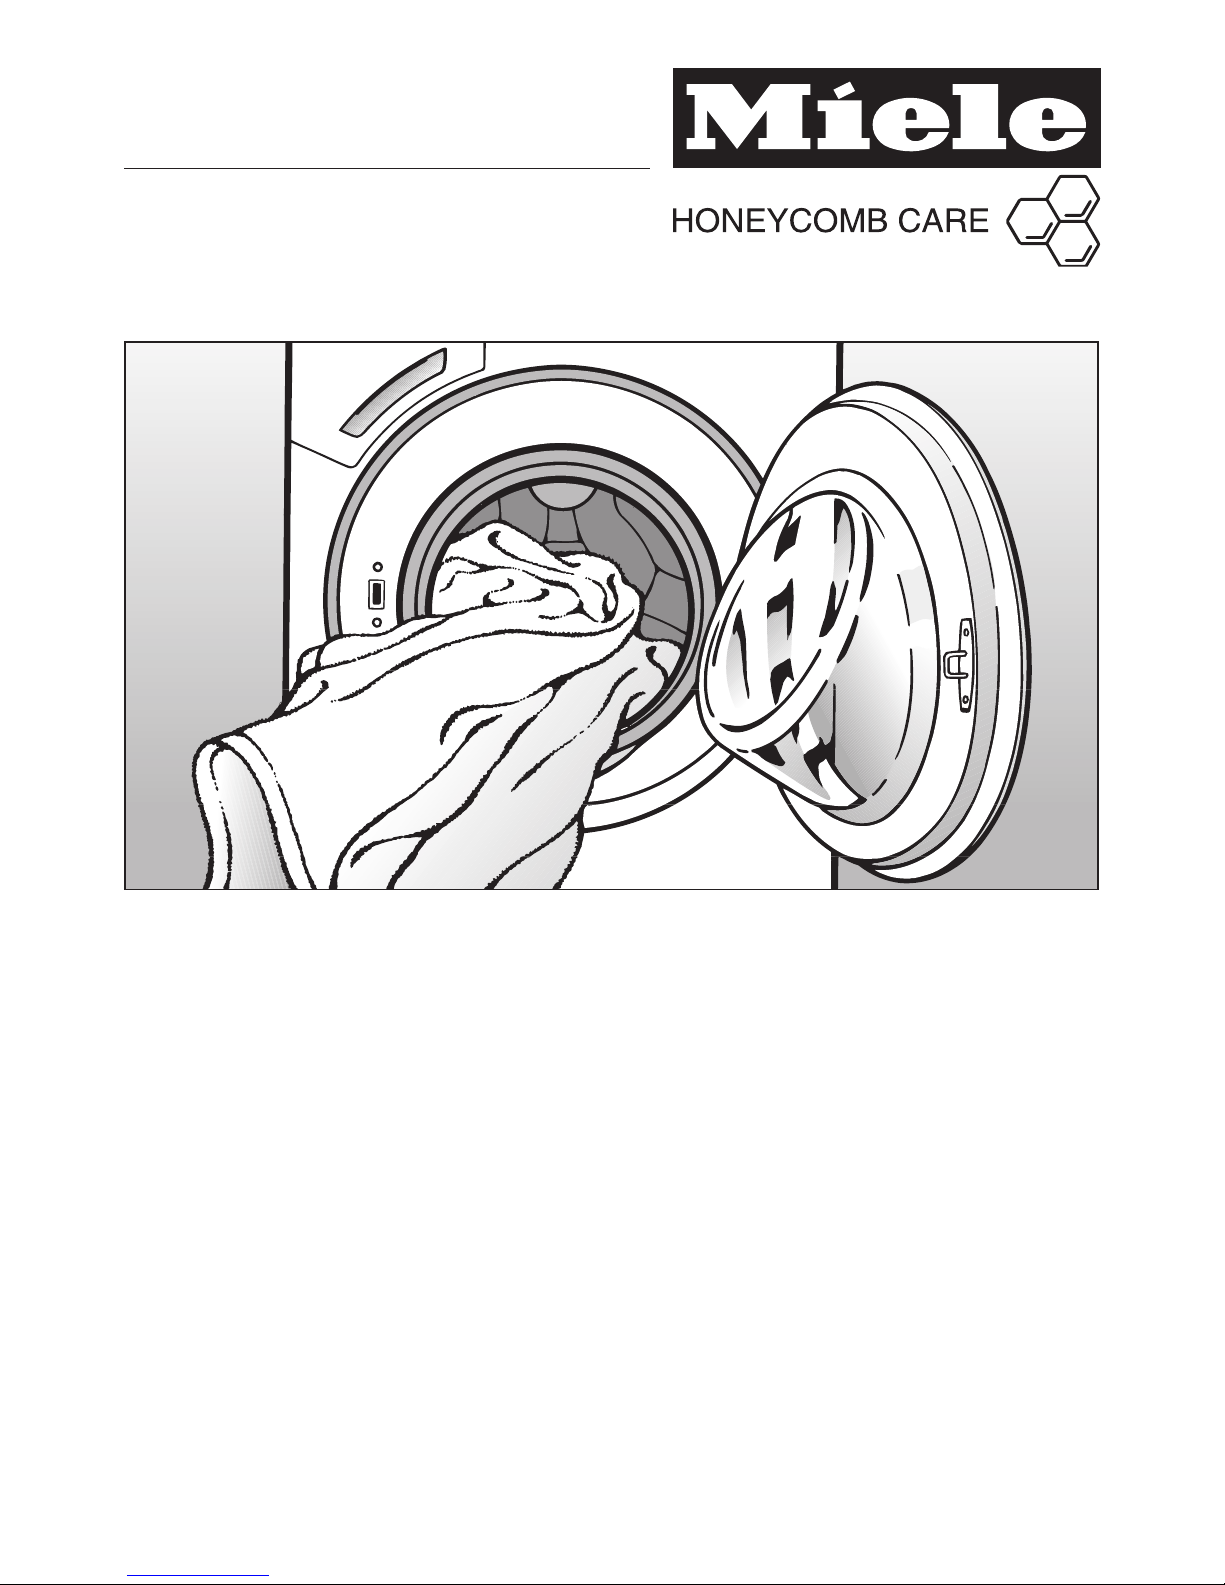
Take care to ensure that foreign
objects (e.g. nails, pins, coins,
paper clips) do not find their way into
the machine with the laundry. These
may damage components of the
machine (e.g. suds container, drum),
which in turn can result in damage to
the laundry.
If the correct amount of detergent
is dispensed, the machine should
not need to be descaled. If, however,
you do wish to descale the machine
only use proprietary non-corrosive
descaling agents and strictly observe
the instructions on the packaging. If in
doubt contact the Miele Customer
Service Dept. or your Miele Dealer.
Textiles which have been
pre-treated in solvent based
cleaning agents must be thoroughly
rinsed in clean water before being
washed in the machine.
Never use solvent based cleaning
agents, e.g. those containing
benzene, in this machine, as this may
result in damage to component parts
and create toxic fumes. Such agents
also pose a fire and explosion hazard.
Never use solvent based cleaning
agents, e.g. those containing
benzene, to clean the outside surfaces
of this machine. They can cause
damage to plastic surfaces.
Only use dyes specified by the
manufacturer as being suitable for
use in a domestic washing machine.
Always observe the manufacturer's
instructions carefully.
Colour run and dye removers
contain sulphur compounds which
can cause damage such as corrosion.
Do not use these products in this
machine.
If liquid detergent comes into
contact with the eyes, rinse them
thoroughly with lukewarm water imme-
diately. If swallowed, seek medical
assistance immediately and retain the
packaging or label for reference. Those
with skin problems or sensitive skin
should avoid their skin coming into
contact with liquid detergent.
Warning and Safety instructions
8

Safety with children
This machine is not a toy! To avoid
the risk of injury do not allow
children to play on or near it or to play
with the controls. Supervise its use by
the elderly or infirm, and supervise
children whilst you are operating the
machine.
For machines with a 'porthole'
door, remember that the porthole
glass will be hot when washing at very
high temperatures.
Do not let children touch it.
Accessories
Accessory parts may only be fitted
when expressly approved by Miele.
If other parts are used, guarantee,
performance and product liability
claims will be invalidated.
Disposal of your old machine
Before discarding an old machine,
switch it off at the wall socket and
unplug it. Render the plug useless. Cut
off the cable directly behind the
machine to prevent misuse. This should
be done by a competent person.
The manufacturer cannot be held
liable for damage caused by
non-compliance with these Warning
and Safety instructions.
Warning and Safety instructions
9

Control panel
aProgramme buttons
For selecting a washing programme.
bDisplay with Menu buttons
See the next pages for more
information.
cPC / Optical interface
This is used by service technicians
to run diagnostic checks on your
machine and can also be used to
update programming data in the
future.
dExtra option buttons
Various extra options can be added
to the washing programmes.
eDelay start button
For delaying the start time of a
programme.
fStart/Stop button
For starting the programme once it is
selected or calling up the
Stopped:
menu to cancel a programme.
gBuzzer button
An audible tone sounds at the end of
the programme.
hAutomatic dispensing button
Activates the automatic dispensing
of liquid detergent.
iI-On/0-Off button
For switching the machine on or off.
jDoor button
Opens the machine door.
Operating the washing machine
10

Display
The display is used for the following:
Selecting and displaying settings
–Temperature
–Spin speed
–Soak duration
–Delay start
–Cancelling a programme
–Safety lock
–Estimated programme duration
Selecting programmes via the
display
By pressing the
Further programmes
button, you can select one of the
following programmes:
–Denim
–Hygiene
–Dark garments
–Curtains
–Pillows
–Silks /
– Sportswear
– Outerwear
– Proofing
– Drain / Spin
– Separate rinse
– Starch
Selecting extra options via the
display
By pressing the
Further extras
button,
you can select (depending on the
programme) the following extra options:
–Soak
–Rinse hold
–Extra rinse
Operating the washing machine
11

Menu buttons
Various settings are made via the
Menu
buttons.
They are used to alter or confirm the
value displayed above the vertical line.
To alter a setting:
Cottons
Duration: 1:49 h
60°C 1600 rpm
Pressing the left hand
Menu
button
under 60°C alters the temperature and
pressing the right hand
Menu
button
under 1600 rpm alters the spin speed.
To confirm a setting:
Further programmes
Denim
Continue OK
Pressing the left hand
Menu
button
under Continue calls up further
programmes, and you can then confirm
your selection of the highlighted
programme by pressing the right hand
Menu
button under OK.
Operating the washing machine
12

Preparing the washing
machine
Before using the machine for the first
time ensure that it is correctly
installed and connected. See
"Installation and connection". Also
check that the drain filter is securely
tightened to prevent the risk of water
leaks during use.
^Press the
I-On/0-Off
button in.
If the washing machine is being
switched on for the first time, the
welcome screen will appear.
The welcome screen will appear in the
display every time the machine is
switched on until a programme lasting
longer than 1 hour has been
completed.
The display for setting the language will
then appear.
Setting the language
You will be asked to select the
language you require for the display. It
is possible to change the language at
any time via the
Settings
menu.
Sprache
deutsch
)OK
^If the language shown is not the one
you want, select the language you do
want by pressing the left hand
Menu
button under ). Confirm your
selection by pressing the right hand
Menu
button under OK.
Setting the time of day
The display for setting the time will then
appear.
12:00
Change OK
^Select the hours you want by
pressing the left hand
Menu
button
under Change, and confirm this with
the right hand
Menu
button under
OK.
^Then set and confirm the minutes.
Reminder to remove transport struts
To avoid the risk of damage, the
transport struts must be removed
before the machine is used for the
first time. See "Installation and
connection" for instructions on how
to do this.
^After removing the transport struts (if
this has not already been done by
your fitter) press the right hand
Menu
button under OK.
Reminder to remove the dispensing
unit
^Open the door and remove the
dispensing unit (liquid detergent
container).
^Confirm that you have removed the
dispensing unit by pressing the right
hand
Menu
button under OK.
Before using for the first time
13

For safety reasons, spinning is not
possible until the machine has been
set up for using for the first time. To
activate the spinning function you
must run a wash programme without
laundry.
This will also fill the dispensing
system tube with liquid detergent.
Priming the liquid detergent
dispensing system
See "Installation and connection -
Dispensing unit" for instructions on
how to install and connect the
dispensing unit.
,The container is designed for
liquid detergent only. Filling it with
other agents, e.g. bleaching agents
or powder detergent will damage
the washing machine and/or the
laundry.
Adding detergent
^Lift the container off its base, if
necessary.
The container has a valve in the bottom
which closes automatically when it is
removed from its base.
^Open the lid of the container.
^Add liquid detergent up to a
maximum of 1 cm below the top rim
(approx. 5 litres).
^Close the lid so that the liquid
detergent does not dry out and to
prevent any foreign objects getting
into the container.
^Place the container back on its base
and press it down firmly to open the
valve in the bottom.
Filling the dispensing tube with
detergent
^Press the
Delicates
programme
button.
Delicates
Duration: 0:59 h
40°C 600 rpm
^Press the left hand
Menu
button
under 40°C.
Delicates
Duration: 0:59 h
30°C x600 rpm
^Press the left hand
Menu
button
repeatedly until 60°C appears.
Delicates
Duration: 1:19 h
60°C 600 rpm
Before using for the first time
14

^Press the
Automatic dispensing
button.
Normal soiling
000ml
*OK
^Enter a dosage of 100 ml. Enter the
first number with the left hand
Menu
button under *. Confirm your
selection of this number by pressing
the right hand
Menu
button under
OK. Now enter the second number.
^Repeat this process until all three
numbers have been entered.
The display will change to show the
degree of soiling.
Degree of soiling
Normal s
Continue OK
^Use the left hand
Menu
button under
Continue to select
Very heavy
and
confirm this with the right hand
Menu
button under OK.
^Press the
Start/Stop
button.
The dosage you have set here only
applies to priming the liquid
detergent dispensing system. You
will need to set the dosage level to
that recommended by the
manufacturer of the detergent you
are using.
^At the end of the programme, the
washing machine and dispensing
system are ready for use.
There may still be air bubbles in the
dispensing tube. However these will
not affect the functioning of the
system.
^Switch off the washing machine.
After the washing machine and
liquid detergent dispensing system
have been prepared for use, you will
need to set the dosage level
recommended by the
manufacturer of the detergent you
are using, see the following page.
Before using for the first time
15

How automatic liquid detergent
dispensing works
If you start a programme using auto-
matic dispensing, the washing machine
will calculate how much detergent to
dispense according to the dosage level
set, the amount of laundry in the drum
and the degree of soiling specified.
This means that the correct amount of
detergent for the load will be dispensed
automatically.
If the Pre-wash extra option has been
selected, the washing machine will
automatically divide the amount of
detergent to be dispensed into the
correct proportions for the pre-wash
and the main wash. 1/3will be used for
the pre-wash and 2/3for the main wash.
Dosage level
Follow the manufacturer's
recommendation for normally soiled
laundry given on the packaging.
The water hardness level of the local
water supply must also be taken into
account.
Setting the dosage level
^Close the drum door.
^Switch on the washing machine.
^Press both menu buttons at the same
time until the following appears in the
display:
Settings
Language F
Continue OK
You are now in the
Settings
menu.
^Press the left hand
Menu
button
under Continue until the
Detergent
dosage
setting appears and confirm
your selection of this by pressing the
right hand
Menu
button under OK.
Normal soiling
100ml
*OK
^Now enter the dosage level required,
e.g. for 90 ml, enter the numbers 090.
^Enter the first number with the left
hand
Menu
button under *. Confirm
your selection of this number by
pressing the right hand
Menu
button
under OK. Now enter the other
numbers.
Your machine has now been set up for
automatic detergent dispensing.
Liquid detergent dispensing
16

Useful tips
The correct liquid detergent
You can fill the container with any brand
of liquid detergent. However, it is
advisable to fill it with the brand you
tend to use most frequently.
Make a note of the brand name of the
liquid detergent below to remind you of
the name when you need to buy some
more.
Brand name
Refilling
If you want to continue using the same
brand of liquid detergent, you can
simply refill the container, in which case
it is not necessary to clean it out.
Filling the container with a different
brand
Do not mix brands of liquid
detergent. This can give a poor
wash result and cause the detergent
to separate.
^Clean the container as described in
"Cleaning and care".
^Make sure you alter the dosage level
if a different dosage to the previous
one set is recommended by the
manufacturer.
Degrees of soiling
Light:
No visible dirt or stains. Possibly slight
body odour.
Normal:
Visibly dirty and/or just a few slight
stains.
Heavy:
Stains and soiling clearly visible.
Very heavy:
Stains and soiling clearly visible which
have been there for a while and dried
on.
Liquid detergent dispensing
17

Energy and water consumption
–Water consumption and energy
usage are determined by the size of
the load.
To make the most out of your
machine, load the maximum dry load
for the programme you are using.
–Use the
Automatic
and
Express
programmes for small loads.
–When smaller amounts of laundry are
washed using the
Cottons
programme, the automatic load
recognition system will reduce the
amount of water, time and energy
used. This may mean that the time
left shown in the display is adjusted
during the course of the wash
programme.
– Using the
Cottons 60°C
programme
instead of the
Cottons 95°C
programme will give energy savings
of between 35% and 45%. This is
sufficient for most levels of soiling.
For stubborn or old stains, use the
Soak
extra option.
Detergent
–Do not exceed the amounts of
detergent recommended by the
manufacturer on the packaging.
–Adjust the dosage to the degree of
soiling of the laundry.
–Use Automatic dispensing.
Choosing the correct Extra option
(Short, Soak, Pre-wash)
Select:
–A wash programme together with the
Short
extra option for light to normal
soiling where there are no obvious
marks.
– A wash programme without any extra
options for normal to heavy soiling
with visible staining.
– A wash programme together with the
Soak
extra option for heavily soiled
laundry.
–The
Pre-wash
extra option for laundry
with large amounts of dirt (e.g. dust,
sand).
When drying with a tumble dryer
–Selecting the highest possible spin
speed for the wash programme will
save energy when drying in a tumble
dryer afterwards.
Washing environmentally and economically
18

Brief instructions
The headings numbered A,B,C, . . .
show the operating sequence and can
be used as brief instructions.
ASort the laundry
^Empty all pockets.
,Foreign objects (e.g. nails,
coins, paper clips, etc.) can cause
damage to garments and
components in the machine.
^Badly soiled areas, stains etc. should
be cleaned as soon as possible,
preferably whilst still fresh. Spillages
should be carefully dabbed off using
a soft colourfast cloth. Do not rub!
Badly soiled areas can be pre-treated
with liquid detergent, stain removers
etc. first, following the manufacturer's
instructions. With particularly stubborn
stains ask your dry cleaner for advice.
,If you use a solvent-based clean-
ing agent (e.g. one containing ben-
zene) to pre-treat a stain, make sure
that any plastic parts (e.g. buttons)
are protected, and that the cleaning
agent is rinsed off before washing the
garment in the machine.
,Do not use solvent-based
cleaning agents in this machine.
^Sort the laundry by colour and by
care label. Most garments have a
textile care label in the collar or side
seam.
Dark textiles often contain excess dye
and should be washed separately
several times before being included in
a mixed load. Always wash whites and
coloureds separately.
– Curtains: Remove lead weights first
or place in a laundry bag.
–Underwiring and collar stiffeners:
Any loose wiring in bras, shirt collar
stiffeners, etc. should be removed or
sewn in.
–Knitted garments, trousers and
jeans, T-shirts and sweat shirts: Turn
inside out, if recommended by the
manufacturer.
–Close any zips, fasten hooks and
eyes etc before washing.
–Fasten duvet covers etc. to prevent
small items from being rolled up
inside them.
Do not wash any items in this machine
which are specified by the
manufacturer as not washable on the
care label. (hsymbol)
How to wash correctly
19

BSwitch on the washing machine
The interior drum lighting will come on.
CLoad the drum
^Press the
Door
button to open the
drum door.
^Unfold the laundry and load loosely
in the drum. Mixing both large and
small items gives better wash results
and also helps distribute the load
evenly during spinning.
The most efficient use of energy and
water is achieved when a full load is
washed. However, do not overload as
this causes creases and reduces
cleaning efficiency.
Make sure that no garments are
caught between the drum door and
seal.
^Shut the door with a gentle swing.
DSelect a programme
^The programmes are selected with
the programme buttons.
The relevant indicator light will come on
to show which programme has been
selected.
The programme selected will also
appear in the display.
Cottons
Duration: 1:49 h
60°C 1600 rpm
How to wash correctly
20
Table of contents
Other Miele Washer manuals

Miele
Miele WMV 960 WPS User manual

Miele
Miele Touchtronic W 3033 User manual

Miele
Miele TOUCHTRONIC W 4842 Specification sheet

Miele
Miele W 829 User manual

Miele
Miele W 4800 User manual

Miele
Miele WCG660 WCS User manual

Miele
Miele PWM 514 User manual

Miele
Miele W 6073 User manual

Miele
Miele PW 6207 User manual

Miele
Miele PW 5082 User manual

Miele
Miele PG 8591 User manual

Miele
Miele PWM 508 Mop Star 80 User manual

Miele
Miele Premier W500 User manual

Miele
Miele G 7893 User manual

Miele
Miele WS 5073 SLUICE User manual

Miele
Miele PWM 912 EL/RH User manual

Miele
Miele PWM909 User manual

Miele
Miele PWM 514 User manual

Miele
Miele WKG 120 User manual

Miele
Miele WCI 670 User manual