manuals.online logo
Brands
  1. Home
  2. •
  3. Brands
  4. •
  5. Milkcan
  6. •
  7. Outdoor Furnishing
  8. •
  9. Milkcan Camden 784 User manual

Milkcan Camden 784 User manual

Other Milkcan Outdoor Furnishing manuals

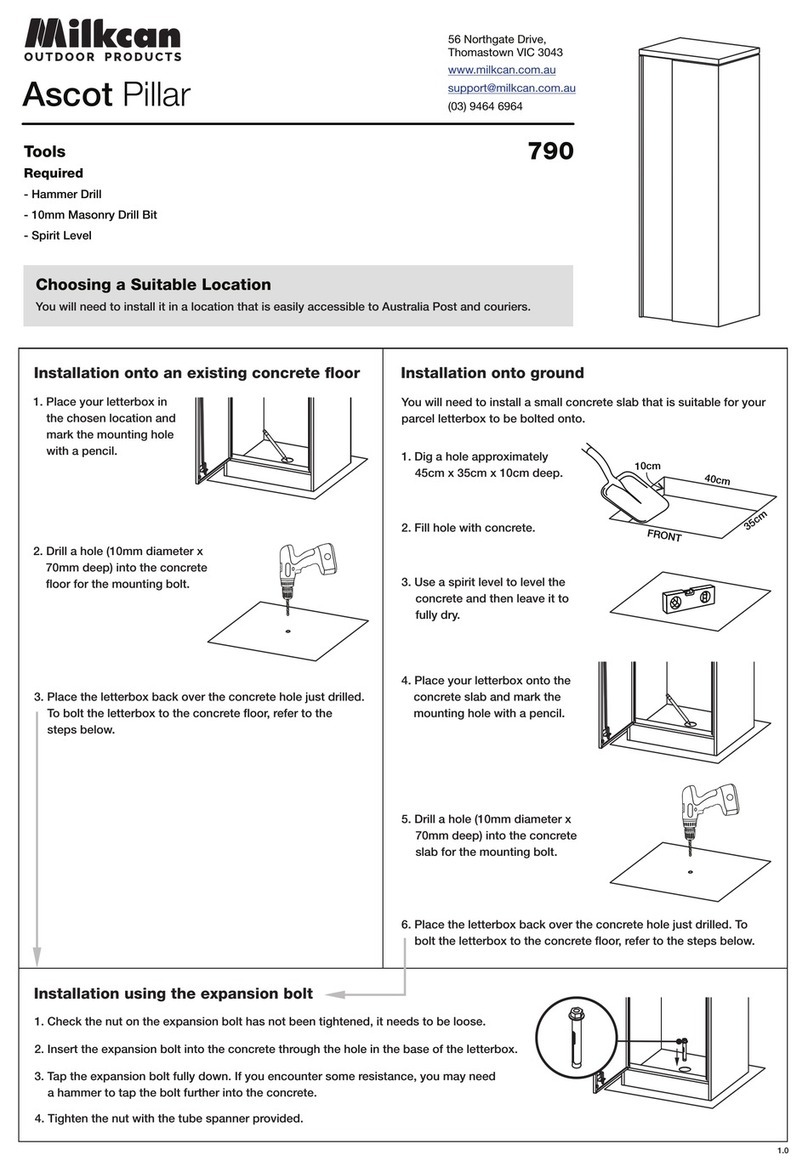
Milkcan Ascot Pillar 790 User manual

Milkcan

Milkcan Ascot Pillar 790 User manual

Milkcan Square Vertical Garden User manual

Milkcan

Milkcan Square Vertical Garden User manual

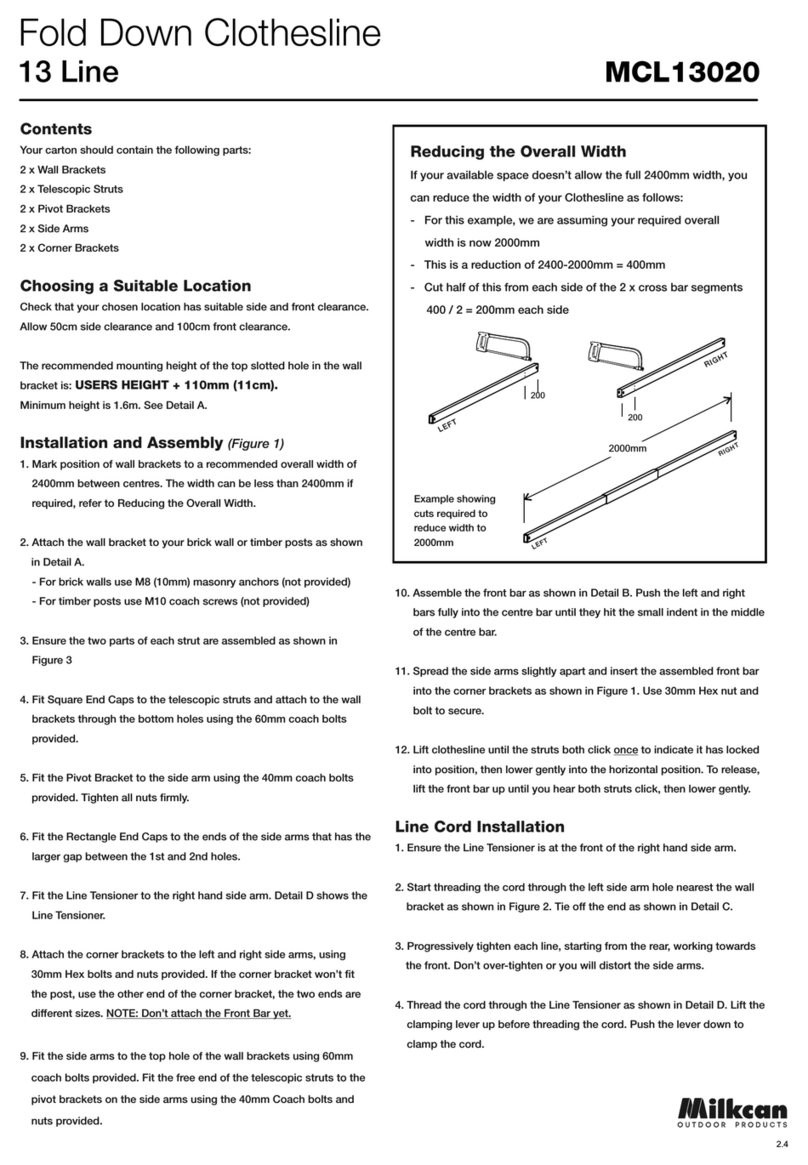
Milkcan MCL13020 User manual

Milkcan

Milkcan MCL13020 User manual

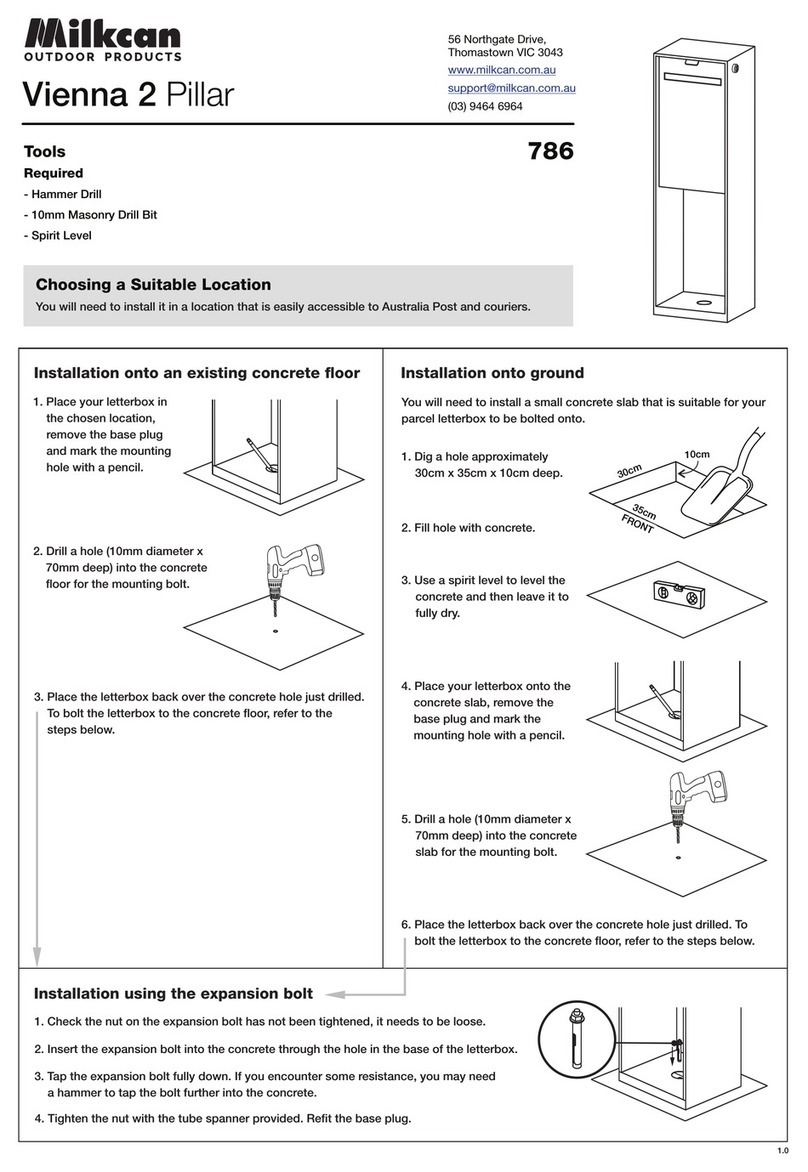
Milkcan Vienna 2 786 User manual

Milkcan

Milkcan Vienna 2 786 User manual

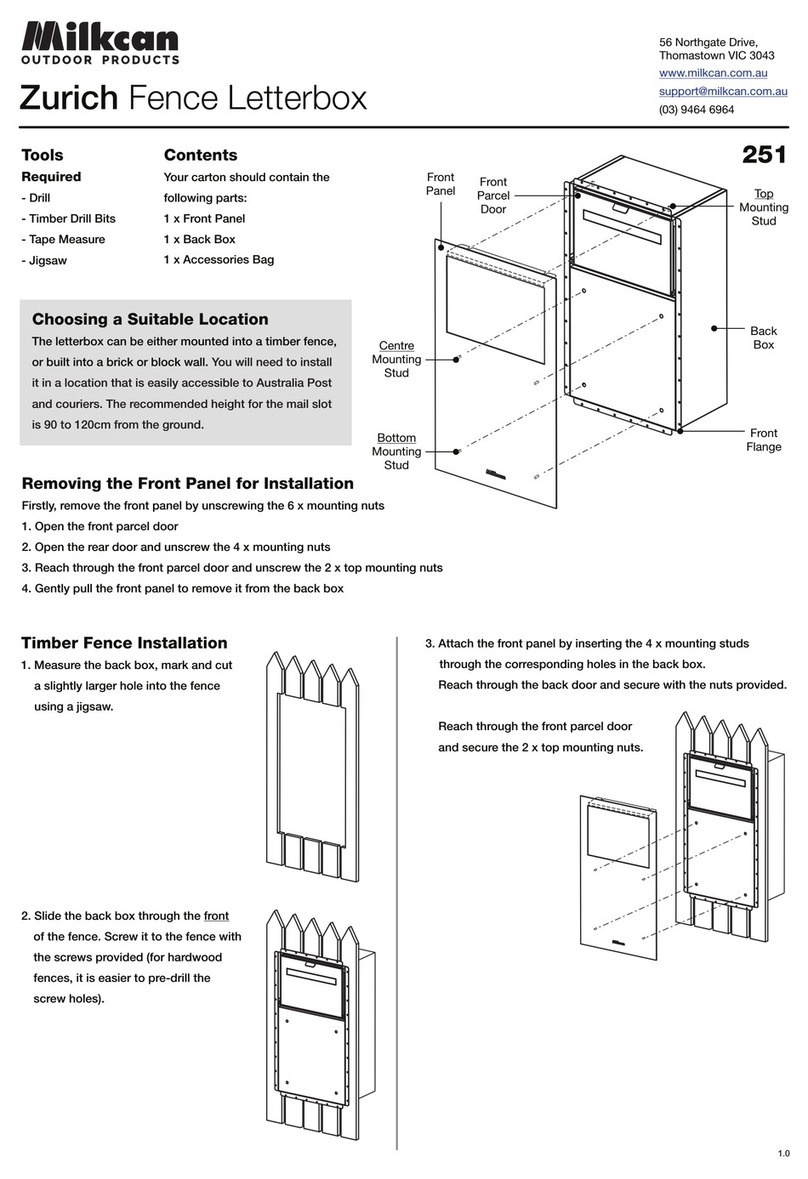
Milkcan Zurich 251 User manual

Milkcan

Milkcan Zurich 251 User manual

Popular Outdoor Furnishing manuals by other brands

felton industries FELEPG5T6 Assembly instruction

felton industries

felton industries FELEPG5T6 Assembly instruction

Dreamo OTF-503S quick start guide

Dreamo

Dreamo OTF-503S quick start guide

Garden Furniture Direct Borrowdale Assembly instructions

Garden Furniture Direct

Garden Furniture Direct Borrowdale Assembly instructions

Rowlinson Clarendon Assembly instructions

Rowlinson

Rowlinson Clarendon Assembly instructions

Garden Treasures 8201268 Assembly instructions

Garden Treasures

Garden Treasures 8201268 Assembly instructions

Safavieh Outdoor Marson PAT7062 quick start guide

Safavieh Outdoor

Safavieh Outdoor Marson PAT7062 quick start guide

SSC-LUXon 990070716 Assembly & operating instructions

SSC-LUXon

SSC-LUXon 990070716 Assembly & operating instructions

supremo LEISURE 2-Seat Stool 110*40cm Assembly instruction

supremo LEISURE

supremo LEISURE 2-Seat Stool 110*40cm Assembly instruction

Hatteras Hammocks DCA1-K-HH instructions

Hatteras Hammocks

Hatteras Hammocks DCA1-K-HH instructions

Lemeks Palmako PA120-5959 Assembly, installation and maintenance manual

Lemeks

Lemeks Palmako PA120-5959 Assembly, installation and maintenance manual

OLT 24 Assembly manual

OLT

OLT 24 Assembly manual

forest-style HACIENDA 2354 Building instructions

forest-style

forest-style HACIENDA 2354 Building instructions

Courtyard Creations RUS0188-WM Assembly instructions

Courtyard Creations

Courtyard Creations RUS0188-WM Assembly instructions

kingsley-bate MC-55 Assembly instructions

kingsley-bate

kingsley-bate MC-55 Assembly instructions

Weltevree Carrier product manual

Weltevree

Weltevree Carrier product manual

Grange Fencing Elite Arch Assembly instructions

Grange Fencing

Grange Fencing Elite Arch Assembly instructions

Grosfillex AUVENT YR14 Assembly instructions

Grosfillex

Grosfillex AUVENT YR14 Assembly instructions

X-METAL EAGLE 33511 Assembly instructions
X-METAL

X-METAL EAGLE 33511 Assembly instructions
manuals.online logo
manuals.online logoBrands
  • About & Mission
  • Contact us
  • Privacy Policy
  • Terms and Conditions

Copyright 2025 Manuals.Online. All Rights Reserved.

Installation onto an existing concrete oor Installation onto ground
1. Place your letterbox in
the chosen location and
mark the mounting hole
with a pencil.
3. Place the letterbox back over the concrete hole just drilled.
To bolt the letterbox to the concrete oor, refer to the
steps below.
1. Dig a hole approximately
40cm x 30cm x 10cm deep.
2. Fill hole with concrete.
You will need to install a small concrete slab that is suitable for your
parcel letterbox to be bolted onto.
3. Use a spirit level to level the
concrete and then leave it to
fully dry.
4. Place your letterbox onto the
concrete slab and mark the
mounting hole with a pencil.
5. Drill a hole (10mm diameter x
70mm deep) into the concrete
slab for the mounting bolt.
2. Drill a hole (10mm diameter x
70mm deep) into the concrete
oor for the mounting bolt.
Camden Pillar
784
Tools
Required
- Hammer Drill
- 10mm Masonry Drill Bit
- Spirit Level
www.milkcan.com.au
[email protected]
(03) 9464 6964
56 Northgate Drive,
Thomastown VIC 3043
Choosing a Suitable Location
You will need to install it in a location that is easily accessible to Australia Post and couriers.
6. Place the letterbox back over the concrete hole just drilled. To
bolt the letterbox to the concrete oor, refer to the steps below.
1. Check the nut on the expansion bolt has not been tightened, it needs to be loose.
2. Insert the expansion bolt into the concrete through the hole in the base of the letterbox.
3. Tap the expansion bolt fully down. If you encounter some resistance, you may need
a hammer to tap the bolt further into the concrete.
4. Tighten the nut with the tube spanner provided.
Installation using the expansion bolt
2.0
10cm10cm10cm
40cm
FRONT
30cm
Mail and parcels up to 24 x 19 x 22cm can be delivered via the top parcel chute. The mail and parcels will be placed on a
oating oor within the parcel chute and fall into the bottom retrieval area when the lid is closed. The oating oor folds back
up when the lid is opened to stop anyone from reaching into the bottom retrieval area.
This parcel letterbox is specially designed to allow mail and parcel delivery.
Using your Camden
2.0