Fold Down Clothesline
13 Line MCL13020
2.4
200
200
RIGHT
LEFT
2000mm2000mm2000mm
LEFT RIG HT
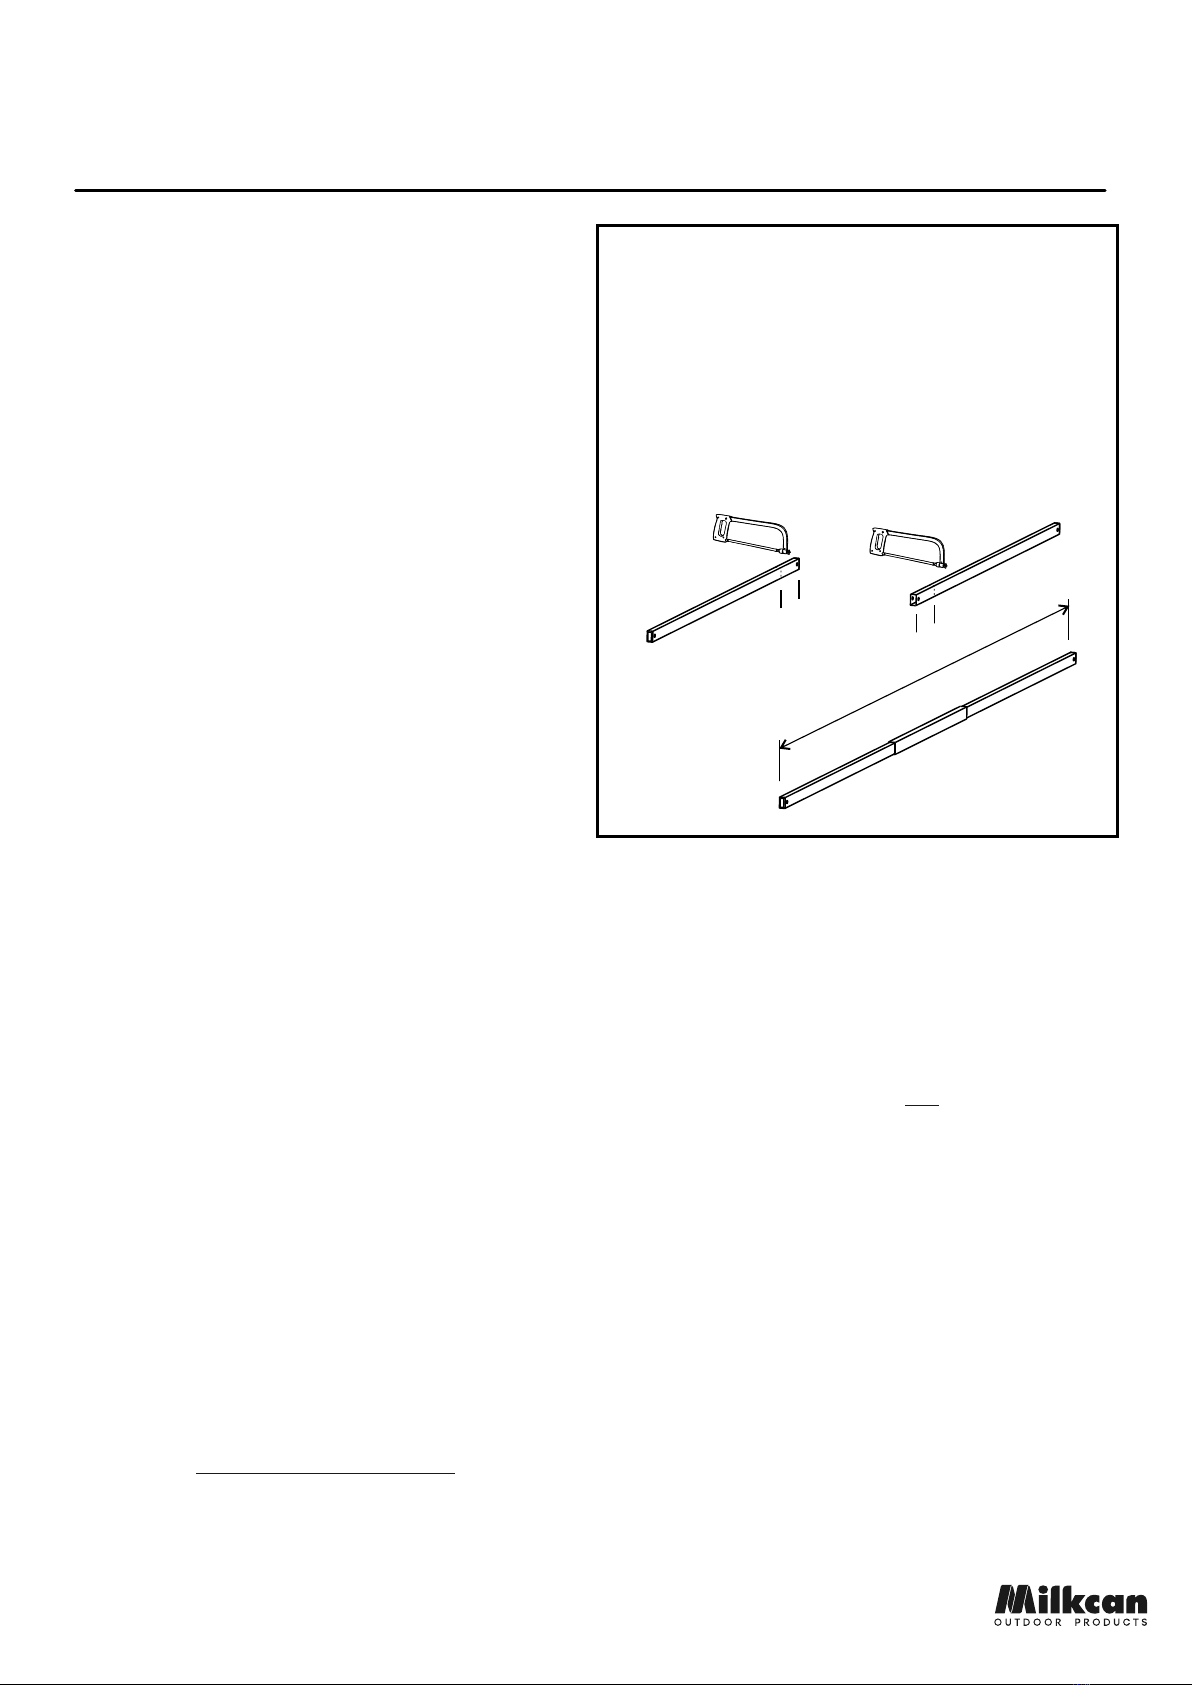
Reducing the Overall Width
If your available space doesn’t allow the full 2400mm width, you
can reduce the width of your Clothesline as follows:
- For this example, we are assuming your required overall
width is now 2000mm
- This is a reduction of 2400-2000mm = 400mm
- Cut half of this from each side of the 2 x cross bar segments
400 / 2 = 200mm each side
Example showing
cuts required to
reduce width to
2000mm
Contents
Your carton should contain the following parts:
2 x Wall Brackets
2 x Telescopic Struts
2 x Pivot Brackets
2 x Side Arms
2 x Corner Brackets
Choosing a Suitable Location
Check that your chosen location has suitable side and front clearance.
Allow 50cm side clearance and 100cm front clearance.
The recommended mounting height of the top slotted hole in the wall
bracket is: USERS HEIGHT + 110mm (11cm).
Minimum height is 1.6m. See Detail A.
Installation and Assembly (Figure 1)
1. Mark position of wall brackets to a recommended overall width of
2400mm between centres. The width can be less than 2400mm if
required, refer to Reducing the Overall Width.
2. Attach the wall bracket to your brick wall or timber posts as shown
in Detail A.
- For brick walls use M8 (10mm) masonry anchors (not provided)
- For timber posts use M10 coach screws (not provided)
3. Ensure the two parts of each strut are assembled as shown in
Figure 3
4. Fit Square End Caps to the telescopic struts and attach to the wall
brackets through the bottom holes using the 60mm coach bolts
provided.
5. Fit the Pivot Bracket to the side arm using the 40mm coach bolts
provided. Tighten all nuts firmly.
6. Fit the Rectangle End Caps to the ends of the side arms that has the
larger gap between the 1st and 2nd holes.
7. Fit the Line Tensioner to the right hand side arm. Detail D shows the
Line Tensioner.
8. Attach the corner brackets to the left and right side arms, using
30mm Hex bolts and nuts provided. If the corner bracket won’t fit
the post, use the other end of the corner bracket, the two ends are
different sizes. NOTE: Don’t attach the Front Bar yet.
9. Fit the side arms to the top hole of the wall brackets using 60mm
coach bolts provided. Fit the free end of the telescopic struts to the
pivot brackets on the side arms using the 40mm Coach bolts and
nuts provided.
10. Assemble the front bar as shown in Detail B. Push the left and right
bars fully into the centre bar until they hit the small indent in the middle
of the centre bar.
11. Spread the side arms slightly apart and insert the assembled front bar
into the corner brackets as shown in Figure 1. Use 30mm Hex nut and
bolt to secure.
12. Lift clothesline until the struts both click once to indicate it has locked
into position, then lower gently into the horizontal position. To release,
lift the front bar up until you hear both struts click, then lower gently.
Line Cord Installation
1. Ensure the Line Tensioner is at the front of the right hand side arm.
2. Start threading the cord through the left side arm hole nearest the wall
bracket as shown in Figure 2. Tie off the end as shown in Detail C.
3. Progressively tighten each line, starting from the rear, working towards
the front. Don’t over-tighten or you will distort the side arms.
4. Thread the cord through the Line Tensioner as shown in Detail D. Lift the
clamping lever up before threading the cord. Push the lever down to
clamp the cord.


