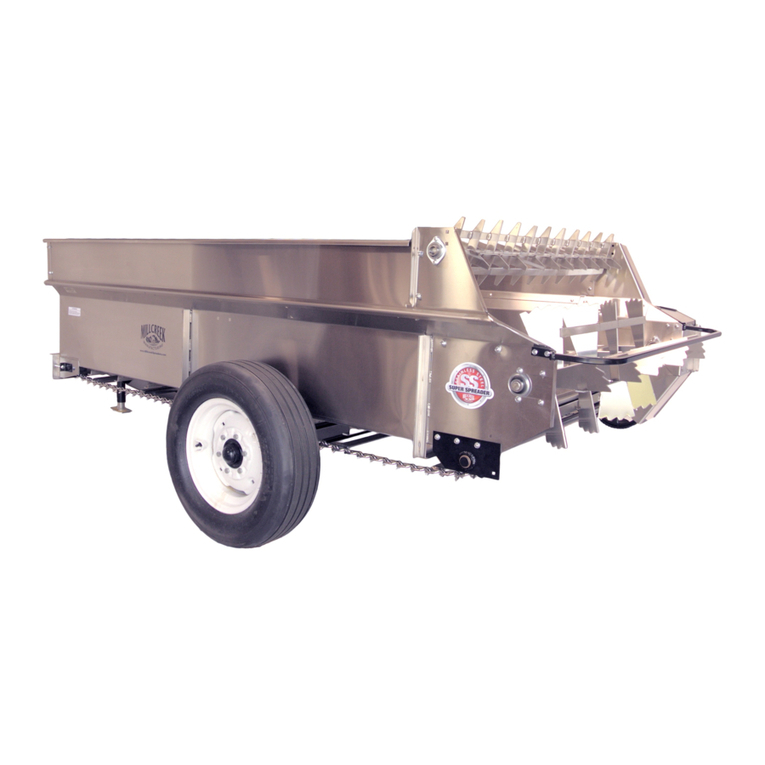
Millcreek 100P User manual

OPERATOR'S MANUAL
MILLCREEK MODELS:
100P and 125P
PTO
SPREADERS
PUBCATION DATE: 9/1/02, Rev. 3
WARNING:
DO NOT a emble, operate, or maintain this equipment without rst
reading and under tanding the information provided in this manual and the
ADMA
Safe Manual r Agricultural Implement Drivenes. Failure to foow
a safe precaution a tated in these manuals may result in serious personal inju
or death.
MILLCREEK PART# 43806
Micreek Manucturing Company
525 Reservoir Road
Honey Brook PA, 19344
Phone:
800-311-1323

WARNTY INFORMATION
Mcreek Manufacturing Company (hereinaer cae the Company) warrants to the original Purchaser, the
Equipment, manufactured by the Company, to be free om defects in material and workmanship under normal
use an seice. The Company obligation un er this Warran sha be limited to replacement or repair of any
pas thereof, free of charge, to e oginal Purchaser, at their place of business, pvided, however, that the
pa(s) to be replaced or repaired, sha, within one year aer deve to the original Purchaser, be demonstrated
to be efective; which determination sha be ma e by the Company. The said components or pas must be
retue thugh the Seng Dealer or Distributor irecy to the Company with a transpotion charges prepaid.
Noce of defect sha be fuished in wring to the Seer and to the agent through whom the machine was
purchased, disclosing in fu a known defects and failure in operation an use. Reasonable me sha be given to
the Seer to remedy any such defects and faures.
This Warran oes not cover, under any circumstances, any pas, components, or materials which, in the opinion
of the Seer an the Company, have en subjecte to nlect, misuse, alteration, acdent, or repaired with pas
other than those manufactured by and obtained om Micreek Manufacturing Company.
This Warran oes not cover components which are already vered by a separate warranty provided by the
supper of said pas or components.
This Warranty is made in eu of a other warranes, e pressed or imped, including any warranty of
merchantabty and ness r use and purpose and of a other obgaons or abes on the Company
pa and any imped warranty. The Company neither assumes nor authorizes any other person to assume
r it, any other abty in connecon with the sale of this equipmen This Warranty sha not apply to
this equipment or to any pa thereof which has been subjected to accident, neggence, alteration, abuse,
or misuse.
The Company makes no waan whatsoever in respect to accessories or pas not supplie by the Company.
The term "oginal Purchaser," as use in this Warranty, sha be eeme to mean that person for whom the
equipment is originay supped. This Warranty sha apply only within the boundaries of the continental United
States.
Under this Warran, the Company cannot guantee that conditions existing beyon its control w not aect the
Company's ability to obtain materials or manufacture necessa replacement pas.
The Company resees the right to make design changes, or changes in specations at any time, without any
contingent obligaon on the pa of the Company to purchasers of machines and pas previously sol .
The Company warrants the construcon of the equipment sold herein and wi
r
eplace at the
Co
m
p
a
n
y's e
xp
e
nse
for a period of one year
f
rom the date hereo
f
, any pas which prove defecve as determine un er the terms of
this
m
i
ted Wa
an
. Hi
gh dens
i
t
y
, po
l
yethelene f
l
oors are warranted for
20
years om cracking, ro
ng,
s
ptt
i
n
g
,
or pee
l
ing.
TRADEMARKS
The Micreek logo is a trademark of the Mcreek Manufacturing Company.
A
other bnd or product names
men
oned are the registered tra
d
emarks or trademarks of their respecve owners.
COPYR GHT
Copyrig
h
t
© 2 2 M
creek
M
anufacturing Company.
A
rights resee . No pa of this publicaon may be
rep
duce , or distributed without the prior wri
en permission of Mcree
k
Manufa
c
tur
i
ng Company,
34 Z
immerman Road,
L
eola,
PA 17540. Suect
to change with
o
ut
noc
e
.

TABLE OF CONTENTS
SECTION 1: INTRODUCTION.........s s.so.sos.sos.sos.so.oo.so..sos.so...o.....as........... 1-1
Guide to this Mual 1-1
For Yo Sa 1-1
spect on d Wa Registt on 1-3
SECTION 2: ATTACHING THE SPREADER TO THE TCTOR 2-1
Coect ng the Spreader Hitch to e Tractor H tch 2-1
Aching the Spreader to e Tctor PTO 2-2
Assembl ng the Sa Chain 2-2
SECTION 3: OPETION 3-1
Understand ng Spreader Opet on 3-1
The Spreader Opet ng Components 3-1
Guidel nes r Loading the Spreader 3-1
Opeting e Spreader 3-1
SECTION 4: MAINTENANCE
&
ADJUSTMENT 4-1
Guidenes r Regular Ma ntence 4-1
Pcedures r Spreader Adjustment 4-3
Adjusting the Apn Speed 4-3
APPENDIX A: PARTS REFERENCE A-1
Genel Spreader Specications A-1
Ordeng Ination A-2
Spreader Box Assembly and Saty Shields A-2
Hitch and Jack Assembl es A-4
eel d Hub Assembly A-6
PTO Drive Line Assembly A-8
PTO Sha Assembly A-10
Apron Chain and Sprocket Assembly A-12
Apn Drive Gup A-14
Beater Drive/Axle Gup A-16
Spreader Box Extension Sides (Model 125P Only) A-18
APPENDIX B: SPREADER OPTIONS PARTS REFERENCE B-1
Endgate Assembly
(M
ode
l 1 00
P
) B-
2
E
ndgate Assembly
(M
odel 125P
) B
-4
F
ine
s
Pa
n As
semb
l
y
B-
6
U
pper
B
eater Assembly
B
-8

Operator's Manual: Mcreek
l00P
&
125P
PTO Spreaders
SECTION 1: INTRODUCTION
Guide to this Manual
Ts mual conins a e ination necess to sely ope e d maintain the Mcreek
OP
or
125P PTO Spreader. Consult he Table of Con en s r a detailed list of opics covered. You' nd is
mu's s ep-by-s ep pcedures ey to ow d undersd. Should ques ions arise, plee contact
yo Mcreek dealer bere sting y of the pcedes in is mua
NOTE: Procedures provided in this manual pply to
both
spreader models odel 0P and
Model 5P) unless specay noted otheise.
Regding the ination presen ed in is manual:
• A safe, operating, d seicing inrmation reec s cuent production models at the time
of pubcation of this manual.
• Rerences made to le, righ , ont, and re are ose directions viewed when cing the
uni om the re.
Please read all sections in the manua carefully--including the important sa inrmation und in
th section--bere beginning any semblyperation procedures; doing so allows you to use your
Millcreek Spreader saly with optimal perrmanc
For Your Safety ...
For your safe, Milreek documenta ion contains the owing pes of sa statements isted here
in order of increing intensi):
• NOTE:
A arication of previous inrmation or additional peinent ination.
• ATTENTION:
A saty statement indicating hat po ential equipment damage may occ if
instctions are no owed.
A
CAUTION:
A saty statement hat reminds of sa pctices or directs a tention to unsa
practices which could result in personal inju if proper precautions are not taken.
A
WAING:
A
strong
sa statement indica ing a a hazard exists which c result in
inju or dea h if pper precautions are not en.
A
DANGER!
The utmost levels of safe must be observed;
an extreme hazard exis s which
would resu in high pbabili of dea or iepable serious personal inju
if p
per
pre
c
autions are not taken.
The best operator is a careful operator.
B
y using common sense
,
obsein
g
general sat
y
les
,
d
a
d
h
ering to the precau
ons specic to the spreader, you
,
the operator, c pmote s
e e
q
pmen
operation.
1-1

Operatos Manual: Millcreek 100P & 1 5P PTO Spreaders
For Your Safe.. (continued)
In
addition to observing the specic precau ions lis ed oughou e mual,
the owing general
precautions ap ly and
must be heeded
for proper, safe operation.
A
WAG:
Keep hands d e om under he spreader at a times. Ensure that you e
saly distced om y other persons bere ope ing the spreade
WAING:
DO NOT aempt to opera e the spreader in e wh steep inines, ditches,
lge rocks, stumps, or holes which may endanger the ope or by upseing the tc or or cause
dage to the spreade
A
WAING:
To prevent serious personal inju and to promo e sa spreader ope ion, keep a
shields in place during opetion. Ensure hat a mounting hdwe is ppey tightened.
A
WAING:
Never ean, adjust, or repair the spreader while the tctor is ing.
h
WAING:
Never get o the tractor whe it is in motion, while the spreader is in opetion,
4
d/or ile the PTO is enged.
A
WAING:
Never wear loose othing when operating the spreader as it may beco
m
e ca
ugh
t
in t
h
e
m
o
vi
n
g
p
s o
f
th
e
ma
c
hine
.
A
WARNING
N
ever aow
c
hildren or
y
one e
l
se to ride on the s
p
re
a
de
ATTENTION:
For
p
per a
n
d
safe
ope
t
i
on o
f
he spre
a
der
,
period
i
c
a
y
i
n
spect a pa
s
r
excessive wear. Replace worn components with cto-authorized pts.
The ow
in
g
sa
t
y
deca
l
s ha
v
e b
e
en placed on
y
our spreader to re
m
i
n
d you o
f
cr
i
tic
al
sa
t
y
precau
ti
ons whi
c
h m
ust
b
e
he
eded
r the personal sa
ty
o
f y
ou
,
the ope
t
or
,
an
d
a
ny
pe
r
sons
in the vicin
i
of
t
h
e e
qui
pme
n
t whi
le
it
i
s in ope
tion.
B
e s
e to keep the sa
fe
t
y decals cle and
readable. If the decals ever become daged or illegible, contact your Millcreek dealer r
replacements.
6
A
DANGER
A
FLOOR CHAINS AND BEATERS CAN
ACCIDENTL Y START MOV NG
NEVER ALLOW RIDERS ON THIS MACHINE
PEOPLE WHO FALL OR GET PULLED
INTO THE BEATERS WILL BE
SERIOUSLY INJURED OR KILLED
A
CTION
T0 HELP PREVENT BOLY INJURY, ENTANG EMEN OR AMPUTATION RD THE
OPETOR'S MANUAL AND ALL SAFE INSTRUCTIONS BEFORE AEMPTING YO
OPETE THIS MACHINE. IF YOU DO NOT HAV A MANUAL, COACT YOUR
ILCREEK DLER,
1 MAKE CERTAIN ERYO E IS CLR 4
OF MACHINE BEFORE STARTING
ENGINE OR OPETION,
2 STOP THE ENGINE. REMOVE THE Y
AND WT F OR ALL MOMENT TO
STOP BEFORE LNG OPETORS
KEEP RIDERS OFF THE MACHINE
pOSIION FOR Y RSON
USE SL0WMONG VICLE
3. KEEP L SHIELDS IN PC KEEP IDEN-IF1CATI
ON EMBLEM AND
ANDS, FEE CLOTHING, D I FSHING WNING LIGS EN
AWAY FROM OPENG PART OPETING ON HIGAYS CEPT
EN PROHIBITED 8Y W
FLURE TO HEED THESE WARNINGS CAN RESULT IN BODILY INJURY OR DTH.
1-2
NEVER JUST, LUBRICATE, CL
OR UNPG MACHINE WTH THE
ENGINE RUNNING. SEE 0ER'S
MUAL FOR L JUSTMENT
A
ND LUBRICATION PROCEDURES

Opetor's nual: Mcreek 0P
&
5P PTO Sprea ers
inspection and Warran Registratio
Most spreader models e shipped om your Mcree Dealer completely assembled d ready r
opetion. Inspect your new spreader thoroughly upon receipt to ensure at it has been shipped to you
in a satiscto maer. Iediately noti the eight compy d yo Mcree dealer in case of
shipping dage, shoage(s), anor eors.
NOTE:
the spreader has not been pre-assembled, please rer to the
Supplemental Dealer's
Instructions for Unpac ing and Assembly.
Please contact yo local Mcree Deer r assistce as
needed.
Foowing inspection of your new spreader, locate the Mcree Warran Cd in the terature pac et
shipped your spreader. For proper waan regisation, Micree requires at you out e
wanty registtion cd and retu it
within 30 days
to:
MILLCEK WANTY GISTTION
Micree Mucturing Compy
34 Zimmerman Road
Leola, PA 17540
For your sa, be sure to locate a safe decals nd review their content bere proceeding with
operating the spreader.
1-3

Operator's Manual: Mcreek 100P
&
12 O S readers
SECTION 2: ATTACHING THE SPREADER
TO THE T CTOR
Connecting the Spreader Hitch to the Tractor Hitch
The spreader hitch is designed to work with a standdized trac or hitch. To coect e spreader hitch
to e tractor hitch, rer to Figure 2A d aere to e owing ideles:
• Adjus e dwb so ha it is 13 to 20 inches above e gd sho in Fie 2
• Extend or shoen he actor ch o obtain he horintal dis ce om the end of e
tctor power take-o (PTO) sha to e cen er of e tch pin hole (as shown in Fige 2A
• Adjus he height of he spreader hi ch h the jack so he tractor drawbar matches e height
of the spreader hch.
• Back the tctor in o the hitch until the holes line up.
• Fasten the spreader hitch to the drawb with a hitch pin a ts securely (i.e. so that it w
not come out ding spreader operation).
• Remove the weight om the jack by lowering the spreader hitch on the dwbar.
• Swing the jack to its horizontal position d lock it in position to provide maximum gund
cleance.
WAING:
Damage to e spreader or oer vehicle, as we as inju to e operator,
may occu
r if a properlsized (3/4" diameter) it pin is not installed as recoende
AENTION:
An im
p
pe
y
loca ed hitch poin ma
y
cause da
m
age to th
e
universal joi
n
ts of the
PT
O.
T
he reco
n
end
l
ength of e P
T
O sh
t
should
nge
om 3
5
.
8
3
to 51.42 inches
cen e
r
to
c
ente
r
o
f
the "U" joints.
I TO
I
-
·
..
)
5°
I3· 10
20
FEC(MME HIE I
j
Figure 2A - Specications r Connecting the Spr ad rractor Hitch
2-1

Operator's Manual: Mcreek 0P
&
125P PTO Spr ad rs
Attaching the Spreader to the Tracto PTO
1. Pu back e slide coar on e PTO yoke, and slide he spreader PTO assembly onto the
actor PTO sha. Be se the slide co snaps ard to indicate that the PTO sha is
propey seced.
2. Ften e PTO se chain to the actor drawbar to prevent tation of e sa shield dung
operation.
WAING:
Failure to secure the sa chain will llow the sa shield to rotate.
4
operang e spreader hout e sa shield in pper position may resu in serious person
inju or dea.
Assembling the Safety Chain
NOTE:
The safe chain may be ordered as an optio al component r the Micreek 100P/125P
PTO Spreaders and is strongly recommended
if
the spreader
to be moved any time on a pubc
roadway.
Rer to Fige 2B for usttion of the hook-up of the sa chain.
2. Loop the chain ad the spreader hi ch shown.
3. Wp e hook end of the chain ad the tctor dwbar suppor or other stctul member of
the actor e.
4. Depress he spring-loaded pin, and slide the hook lock away om e hook.
5. Aer hooking the chain, slide the hook lock toward the hook til the spring-loaded pin snaps in
place. This wi prevent acciden discoect of the hook.
A
WAING:
For the s chn
A
to be efctiv the insllion of
e chain should not aow more slack
than is necessa r movement ding
spreader opetion. Inspect the se
chain regularly to check the condition
of the lis and lockingoo
king
mechanis
m
s
;
repl
a
ce the ch
a
in soon
as we
e
s
s
/b
reakage is no ed.
/
Figure 2B - Attaching the Sa Chain
2-2

Operator's Manual: Millcreek 100P
&
125 PTO Spreaders
SECTION
3: OPERAON
Understanding Spreader Operation
Pper d sa opetion of the Mcreek 100P/12 P Spreader requires: (I) being mili with the
spreader's opeting components d (2) heeding a saty precautions as stated in this manua
The Spreader Operating Components
By denion, the le d right sides of the spreader e deteined while siing on the actor seat.
PTO model spreaders e powered tough the tctor dve ain. For her inrmation on engaging
the PTO drive line, please rer to the owing section,
Operang the Spreader.
Guideline r Loading the Spreader r Operation
• Millcreek recommends that you
load the spreader om the ont toward he back
to
tate easier unloading.
• ATTENTION:
NEVER store manure in the spreader between unloading times during
critical cold weather months when a ozen load could result in severe equipment damage
(i.e. to oor apron chain).
• DO NOT store wet me in the spreader (or keep the spreader outdoors with manure in it)-
doing so w accelete sting of the stee
Op rang the Spreader
WARNING! Bere proceeding with operation of the spreader, review a safe
statemen as provided in Section 1 of this manua ·
WAING:
The rear saty shield MUST be instaed as specied
prior to operation
(rer to
e
S reader Box Assembly Parts Detail
in A
ppenx A at the back of the manual r pr per
p
os
i
t
i
o
n
i
ng). NEVER
opete the spreader without
a
saty shields in
p
lace.
Fa
i
le t
o in
s
t
a
th
e
r
ea
r
safe
t
y s
hiel
d b
e
re opetion may res
u
in serious person
a
l in
ju
ry or
d
eath.
1. If y
o
u hav
e a spreader with the end gate option
,
l
i
t
h
e endgate.
2. With th
e
t
c
t
or at
i
dle
,
decompr
e
ss t
h
e
ut
ch
a
nd acti
v
ate the tctor
P
T
O l
e
v
e
R
e
l
ease the
clutch slowly so the PTO sha will start the spreader paddles and apron chain.
NOTE:
F n
ewer tctor models it may not
b
e necessar
y
to use the
utch to eng
a
ge the
P
T
O.
W
i
t
h the tctor at idle
,
simply act
iv
ate the switch to engage the
PTO
.
3. For best r
e
su
lts
, n
the t
ctor th
l
e at the
4
0 rp
m
P
TO
sha
speed and regulate the g
und
speed
to
no more than mph.
4. When th
e s
p
r
e
a
d
er
b
o
x
is em
p
ty
,
st
o
p the
PTO
by disengaging
the lever/switch on
the t
cto
5. L
ower the endgate
(
if applicable).
6. R
e
r t
o
S
ect
i
o
n 4 in
this manual r maint
e
nance to be perrmed owing ope
tion
f th
e
spreade
IMPORTANT! Be aware that it may be necessary to re-tighten bolts aer a w hours of initial
operation -- watch and listen r any loose components. Re-check the wheel bolts every hour (during
initial operation) unt torque
maintained.
3-1

Operatos Manual: Millcreek 100P & 1 5P PTO Spreaders
SECTION 4: MAINTENANCE
&
ADJUSTMENT
Guidelines for
Regular
Maintenance
A
WAING:
A selds must be replaced aer maintence or adjust ent pcedes e
4
perrmed. Fae to do so could result in serious personal inj or dea.
Pering rel maintence on you Mcreek Spreader help ense opti perce.
Please ow these gdelines r maintaing yo spreader:
• Cle e spreader aer each use.
• Check the spreader each time it is used r loose, bent, bken or issing pas.
ATTENTION:
Ding opetion, listen r abnoal sounds which ight indicate loose
pas or other equipment damage. Coect any ps pblems iediately; expanded pas
views of a spreader assemblies e pvided in the Appendixes at the back of this manua
• ATTENTION:
NEVER store mure in the spreader between loading times ding
ctical cold weather months when a ozen load could resu in severe equipment damage
(i.e. tom oor apnchain). Storing wet manure in the spreader ( or keeping the spreader
outdoors wi mure in it) w accelete sting of the stee
• Grease a lube in
g
s e
v
e
IO
l
oads.
ATTENTION:
A
lu
b
e
ings
e SA
E
standd.
L
ubcate non
-
sea
l
ed
ings
un
ti
l
g
r
ea
s
e
begins to seep om t
he
ing. D
O NOT
lubricate or oil t
h
e
b
us
hi
ngs
--
t
h
ey a
r
e
il
i
m
pre
gn
ate
d
.
(O
il w co
ect dust d di
,
causin
g
the bus
h
ing to wear
s
t
e
r.)
Wo
grease ttings that will not hold the un anr ttings with a stuck check ball must be
replaced.
i
BOTH
3IS
MACHINE PARTIALLY ASSEMBLED
FDR ILLUSTRATIVE PURPOSES ONLY
1-86097
Figure 4A - Location of Lub
e
Fitn
g
s
o
n Mod
e
l 100P/125P S
p
rea
d
er
4-1

Operator's Manual: Millcreek 100P
&
1 5P PTO Spreaders
Guidelines for Regular Maintenance continued)
• Check that implement tires have adequate air pressure.
• s ect the sa chain relly to check the condition of e s d lockinooking
mechisms; re lace the chain as soon as weaessreage is noted.
• Apply chain lube once a mon to e oor apn chn.
• Periodiy check the oor apn chain r tensioghtness (rer to Fire 4B).
Procedure r checnadjusting the oor apron chain:
a) Pu up on the center slat of e oor apn chain.
b)
you can li it higher an 9 inches, the chain is too loose.
c)
you c it no higher than 6 inches, the chain is too tight.
d)
e chain needs adjustment, use a 3/4" ench to loosen the two side nuts on each
side of the spreader box as shown in gure 4B. Tu the
front
nut ockwise or
counterockwise with a 96" wrench until coect tensiotightness is achieved.
Repeat r the other side.
ke sure that the chains on each ide of the apron are
equay taut.
e) Re-tighten the side nuts.
FIIIT
HIT
HUT
Fi ure 4B - Adjusting the Floor Apron Chain r Pper Tension
4-2

Operator's Manual: Millcreek 100P & 25P PTO Spreaders
Procedures for Spreader Adjustment
Pblems with spreader opetion may indicate that ceain adj sents e required to restore proper
ctioning. e owing pcedures address common problems which may be encotered in
spreader operation.
Adjusting the Apron Speed
Depending upon the consistency of mateal being spread or the desired cess of spreading,
adjusents to e apn chn speed may be made to achieve e desired spreading action. The speed of
the apn chain c be varied by adjusting the position of the Holding Pawl (as sho in Fige 4C).
Note that the ctory setting
at the sl w speed which hol every second notch.
For Maximum Apron Chain Speed:
(a) Rotate the Crm Sprocket until e sho c is in the horintal rward position.
(b) Loosen the nut that secures the Holding Paw
( c) Rotate the Apn Ratchet so at the Driving Pawl is touching e boom of the notch on e
Apn Ratche
(d) Adjust the Holding Pawl to obtain a 1/8" gap between the end of e pawl and boom of the
notch as shown in Figure 4C. Tighten the nut to secure e Holding Paw
For Slower Apron Chain Spee :
(a) Repeat steps (a) tough (c) above.
(b) Adjust the Holding Pawl to obtain an 3/8" gap between the end of the pawl and the boom of
the notch. Tighten the nut to secure the Holding Paw
HF T
Figure 4C- Adjusting the Apron Chain Speed
4-3

Operator's Manual: Millcreek 100P & 25P PTO Spreaders
APPENDIX A: PARTS REFERENCE
The owing inrmation is pvided r y rerence in understanding how the spreader is
assembled d how spe pas c be identied d ordered ppey.
General Spreader Specificaons
Mod l 100P Model 125P
Capaci, heaped
96 cubic
.
135 cubic
.
Body Length
114 inches 114 inch s
Body Wid
54inch s 54 inch s
Body eight
16.5 inches 25 inch s
Overa Length
13
.,
9 inches 13ft., 9 inch s
Overa Width
79 ines 79 inch s
Overall Height
46 inches 46 inch s
Loading eight
37.5 inches 46 inches
Construction
A st el, poly oor A st l, poly oor
Apron Chain
#67 steel detachable #67 st el d tachabl
(Optional Rod) (Oponal Rod)
Tires
205/60R15 (good used tires) 205/60R15 (good used tires)
(Op nal - new) (Optional - new)
Beater Bearings
Sealed ba bearings Seal d ba b arings
Beater Drive
Gearbox G arbox
Apron Drive
Ratch t Ratch t
Body Finish
Powder coating Powd r coang
Weight (with tires)
1325 lb 1425 lbs.
Tractor Weight or
1500Ibs. or 1800 lbs. or
HP required
25 HP & greater 30 HP & greater
A-1

Operatos Manual: Millcreek 100P & 1 5P PTO Spreaders
Ordering information
en ordering replacement ps, please provide the owin inaon to yo local Mcreek
dealer:
• Model d Serial Number of the unit ocated on the ont right comer of the spreader)
• P Number and Description as it appes on e owing dwingps lists
Spreader Box A sembly
&
Safety Shields
Figure A1-Spreader Box Assembly Parts De
IMPORTANT NOTE:
The Model 125P Spreader also include Extension Sides as part of the
standard spreader box embly. The par lt and drawg for the Exten n Sides are provided at
the end of Append A.
A-2

Operatos Manual: Millcreek 100P
&
12 P PTO Spreaders
Spreader Box Assembly (continued)
Item
#
Mcreek Pa
#
Component Descripon
I
260635
I
ght Re Seld
2 260444
I
Ge Box Seld
3 260583 Fnt Seld
4 260442 2 Side Sh Seld
5 260386 Le Beater Seld
6 34234 23 4 x 3/4 Bolt
7 260434 1 Hold Do
8 260435 Rubber Stp
9 34282
18
5/ 6 1-1/2 Caiage Bolt
0 34052 40 4 Washer
11
34203 22 5/16 Lock Washer
12 34057 20 5/16 Washer
34020 20 5/16 Nut
14 260433 1 Floor Hold-down
5 215103 9 Floor Bod
16 34235 17 1/4 ck Washer
7 34003 15 4 Nut
18 34214 1/4 x 1 Bolt
19 34251
I
1/4
x
1-1/2 Bolt
20 220 Rubber Stp
21 34124 8 4 Nylon Stop Nut
22 34200 2 5/16 3/4 Bolt
A-3

Operator's Manual: Millcreek 100P & 25P PTO Spreaders
Hitch
&
Jack Assemblies
3
Figure - Hitch and Jack Parts Detail
A-4
19
r-------------1
I I
14 {
13}
I I
I I
I I
I I
' '
\ ie'
I I
I I
I I
I I
I I
I I
I I
L
J

Operator's Manual: Millcreek 100P
&
1 5P PTO Spreaders
Hitch
&
Jack Assemblies (continued)
Item
#
Mcreek Pa
#
Component Descriptio
I 260432 2 Beater Gud
2 34203 8 5/16 ck Washer
3 34020 8 5/ 6 Nut
4 34221 4 5/ 6 x I Bo
5 34199 4 3/8 x
1
Bolt
6 34035 2 ½ Lock Washer
7 34034 2 ½Nut
8 34230 2 ½ x 3 Bo
9 2604
I
ght Hitch Extension
260414 I Le Hitch Extension
0 260464 I Hitch
11 215228 I ck Pin d Chain
12 2 5258 I Jack
215223 I Jk Hdle
14 215113
I
Complete Jack (inudes items 11-)
15 34224 4 3/8 x -4 Bo
6 34242 2 3/8 x 2-2 Bo
17 34018 8 3/8 Washer
18 34141 10 3/8 ck Washer
19 34087 0 3/8 Nut
20 34200 4 5/16 x 3/4 Bolt
A-5

Operator's Manual: Millcreek 100P
&
1 5P PTO Spreaders
Wheel and Hub Assembly
Figure A3 - Wheel and Hub Assembly Par s Detail
6

Operatos Manual: Millcreek 100P
&
12 P PTO Sprders
Wheel and Hub Assembly (continued)
Item # Millcreek Pa#
Comnent Desc tion
1 215158 2 Grease Seal
2 215203 2 Outer Beng Cone
3 2151 2 2 Hub (inudes items 12, 13)
4 215164 2 Washer
5 215161 2 Dust Cap
6 2151 0 2 Spindle Nut
7 34347 2 Coer Pin
8 2153 2 eel d New Tire
215130 2 eel and Used Tire
215119 2 Wheel
21512 2 New Tire
215290 2 Used Tire
9 215222 12 Wheel Lug
215159 2 Ier Bearing Cone
11 2154 2 Complete Hub (includes items 1-7, 10)
12 215279 2 Ier Being Cup
2152 2 Outer Bearing Cup
A-7

Operator's Manual: Mcreek 0P
&
125P O Spre ders
PTO Drive Line Assembly
/
23
Figure A4-PTO Drive Line Assembly Par De a
A-8
This manual suits for next models
1
Table of contents
Other Millcreek Spreader manuals

Millcreek
Millcreek TURF TIGER 3100 User manual

Millcreek
Millcreek 6700P User manual

Millcreek
Millcreek 57G User manual

Millcreek
Millcreek 25 User manual

Millcreek
Millcreek 6700P User manual

Millcreek
Millcreek 97 User manual

Millcreek
Millcreek 27+ User manual

Millcreek
Millcreek 27ss User manual

Millcreek
Millcreek 4300 TURF TIGER User manual

Millcreek
Millcreek 25G Series User manual