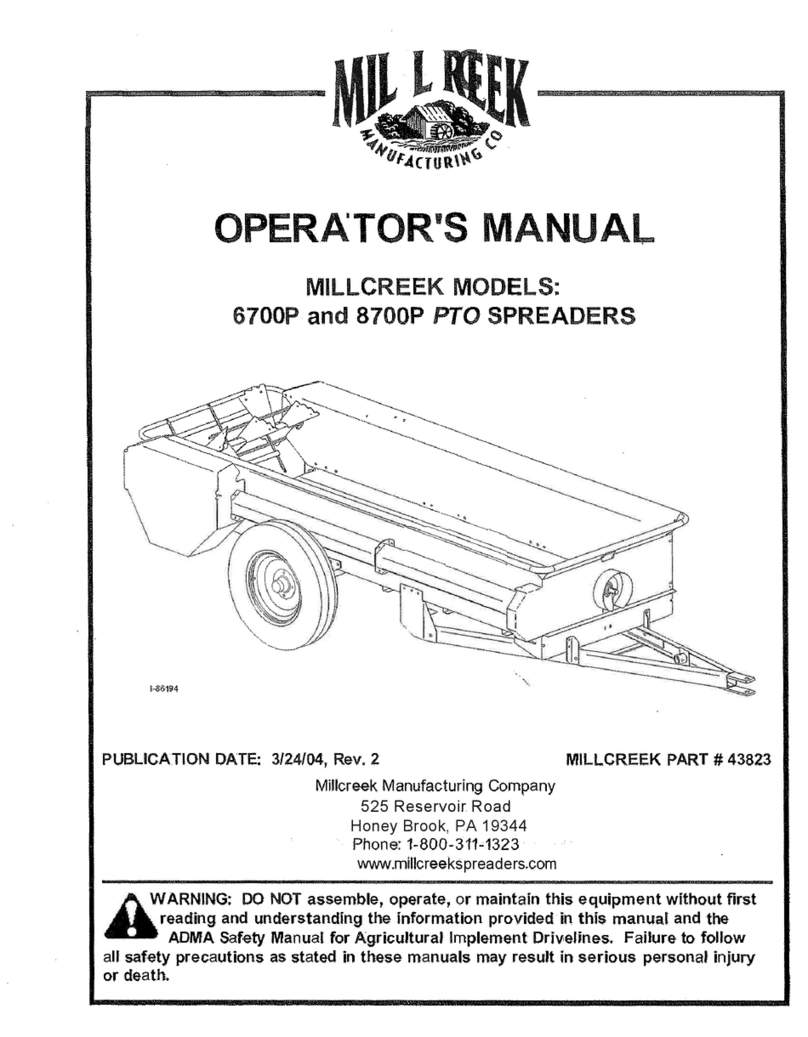
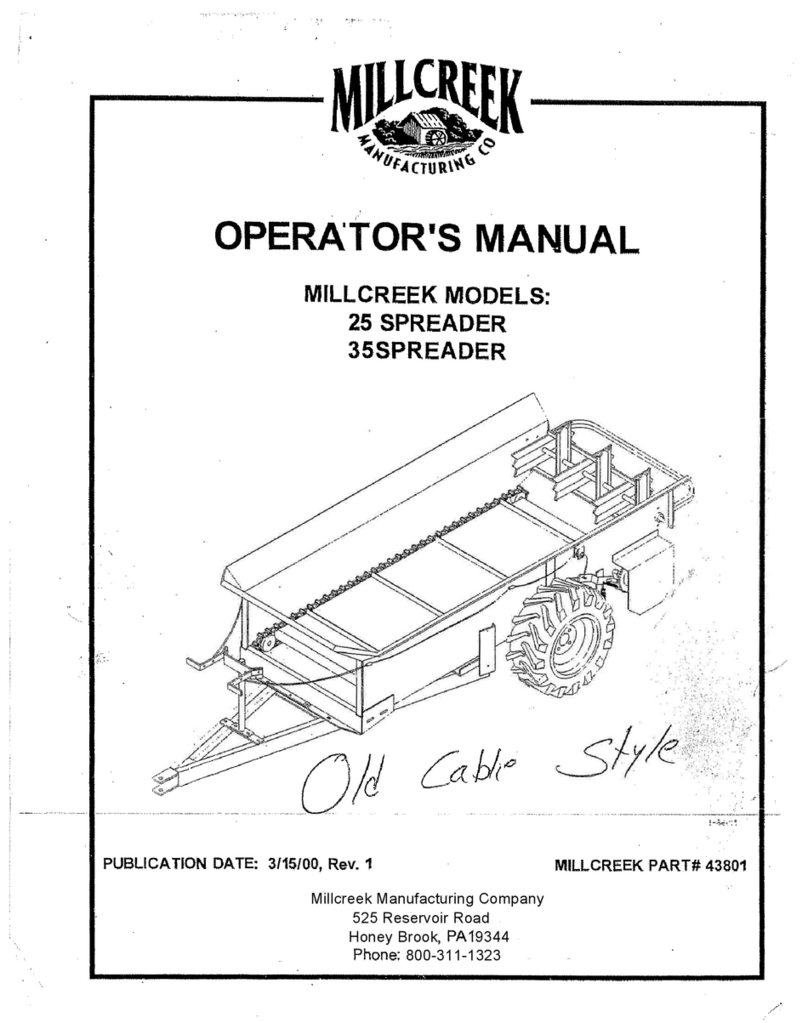
Millcreek 4300 TURF TIGER User manual

OPERATOR'S MANUAL
MILLCREEK MODEL:
4300 TURF TIGER®SPREADER
WARNING: DO NOT assemble, operate, or maintain this equipment without first
reading and understanding the information provided in this manual and the
ADMA Safety Manual for Agricultural Implement Drivelines. Failure to follow
all safety precautions as stated in these manuals may result in serious personal injury
or death.
PUBLICATION DATE: 8/16/04, Rev. 1 MILLCREEK PART # 43826
MillcreekManufacturingCompany
525 Reservoir Road
Honey Brook, PA 19344
Phone:1-800-311-1323
www.millcreekspreaders.com


WARRANTY INFORMATION
TRADEMARKS
TheTURF TIGERSpreader logois aregistered trademarkand theMillcreek logois a trademarkof theMillcreek
ManufacturingCompany. Allotherbrandorproductnamesmentionedaretheregisteredtrademarksortrademarks
oftheirrespectiveowners. COPYRIGHT
Copyright © 2004 Millcreek Manufacturing Company. All rights reserved. No part of this publication may be
reproduced,ordistributedwithoutthepriorwrittenpermissionofMillcreekManufacturingCompany,34Zimmerman
Road, Leola, PA 17540. Subject to change without notice.
MillcreekManufacturingCompany(hereinaftercalledtheCompany)warrantstotheoriginalPurchaser,the
Equipment,manufacturedbytheCompany,tobefreefromdefectsinmaterialandworkmanshipundernormal
use and service. The Company obligation under this Warranty shall be limited to replacement or repair of any parts
thereof,freeofcharge,totheoriginalPurchaserprovided,however,thatthepart(s)tobereplacedorrepaired,shall,
withinoneyearafterdeliveryto theoriginal Purchaser,bedemonstratedtobe defective;which determinationshallbe
madebythe Company. Thesaid componentsor parts mustbe returnedthrough theSellingDealer orDistributor
directly to the Company with all transportation charges prepaid. Notice of defect shall be furnished in writing to the
Seller and to the agent through whom the machinery was purchased, disclosing in full all known defects and failure
in operation and use. Reasonable time shall be given to the Seller to remedy any such defects and failures.
This Warranty does not cover, under any circumstances, any parts, components, or materials which, in the opinion
of the Seller and the Company, have been subjected to neglect, misuse, alteration, accident, or repaired with parts
otherthanthosemanufacturedbyandobtainedfromMillcreekManufacturingCompany.
ThisWarrantydoesnotcovercomponentswhicharealreadycoveredbyaseparatewarrantyprovidedbythe
supplierof saidpartsorcomponents.
This Warranty is made in lieu of all other warranties, expressed or implied, including any warranty of
merchantability and fitness for use and purpose and of all other obligations or liabilities on the Company
part and any implied warranty. The Company neither assumes nor authorizes any other person to
assume for it, any other liability in connection with the sale of this equipment. This Warranty shall
not apply to this equipment or to any part thereof which has been subjected to accident, negligence,
alteration, abuse, or misuse.
TheCompanymakes nowarranty whatsoever inrespect toaccessories or partsnot suppliedby the Company. The
term "original Purchaser," as used in this Warranty, shall be deemed to mean that person for whom the equipment
is originally supplied. This Warranty shall apply only within the boundaries of the continental United States.
Under this Warranty, the Company cannot guarantee that conditions existing beyond its control will not affect the
Company'sabilitytoobtain materialsormanufacturenecessaryreplacement parts.
The Company reserves the right to make design changes, or changes in specifications at any time, without any
contingentobligation onthe partof theCompany topurchasers ofmachinesandpartspreviously sold.
TheCompanywarrantsthe constructionofthe equipmentsold hereinandwill replaceatthe Company'sexpense for
aperiod ofone yearfromthe datehereof,any partswhich provedefectiveas determinedunderthe termsof this
LimitedWarranty.


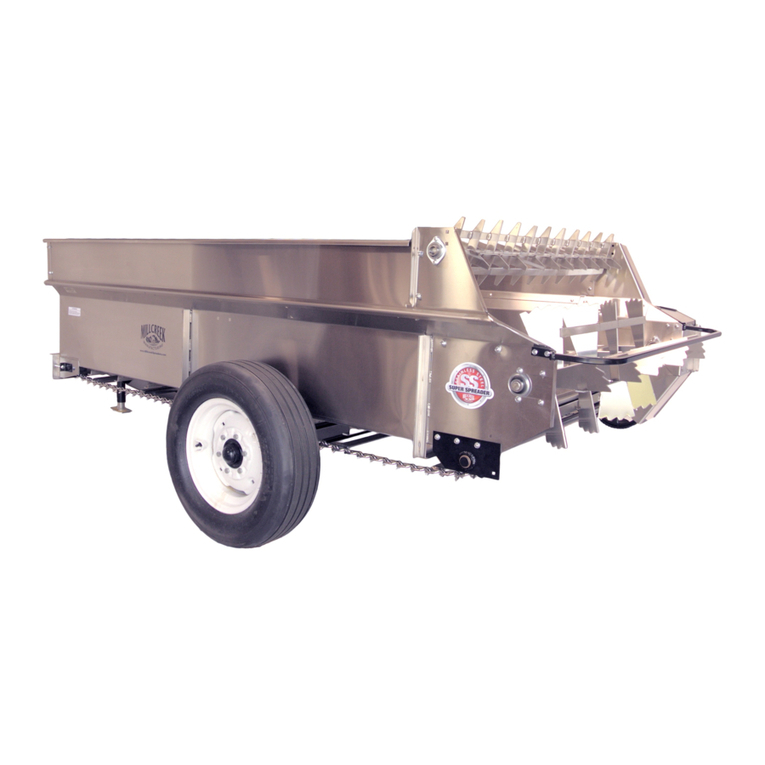
TABLE OF CONTENTS
SECTION 1: INTRODUCTION ................................................................................... 1-1
GuidetothisManual ..........................................................................................................1-1
ForYourSafety... ..............................................................................................................1-1
SafetyLabels ..............................................................................................................1-2
InspectionandWarrantyRegistration..................................................................................1-5
Standard/OptionalComponents ...................................................................................1-5
WarrantyRegistration ..................................................................................................1-5
SECTION 2: ATTACHING THE SPREADER TO THE TRACTOR............................. 2-1
ConnectingtheSpreaderHitch totheTractorDrawbar ......................................................2-1
AttachingtheSpreadertotheTractorPTO.........................................................................2-2
AssemblingtheSafetyTowChain.......................................................................................2-2
SECTION 3: OPERATION & ADJUSTMENT............................................................. 3-1
UnderstandingTURFTIGER®SpreaderOperation ............................................................3-1
TURFTIGERSpreaderOperatingComponents ..........................................................3-1
TURFTIGERSpreaderAttachments ..........................................................................3-2
GuidelinesforInstallingOptionalAttachments ..............................................................3-3
GuidelinesforLoadingtheTURFTIGERSpreader......................................................3-3
OperatingtheTURFTIGERSpreader ...............................................................................3-3
AdjustingtheTURFTIGERSpreader ................................................................................3-4
AdjustingTractorGroundSpeed .................................................................................3-4
AdjustingtheMeteringEndgate ...................................................................................3-4
AdjustingtheApronBeltSpeed...................................................................................3-4
AdjustingtheSaberTooth™BeaterAttachment ..........................................................3-5
AdjustingtheDualSpinnerAttachment ........................................................................3-6
AdjustingtheBrushAttachment ...................................................................................3-6
RecommendedSettingsforTURFTIGERSpreaderOperation ...........................................3-7
MaterialWeights(RangePerCubicYard) ...................................................................3-7
MaterialVolumeEstimation .........................................................................................3-7
InitialAdjustments .......................................................................................................3-8
SECTION 4: MAINTENANCE..................................................................................... 4-1
Guidelines for Regular Maintenance................................................................................4-1
General Maintenance.................................................................................................4-1
Wheel/Tire Maintenance ...........................................................................................4-2
Wheel Bearing Maintenance .....................................................................................4-2
Hydraulic System Maintenance.................................................................................4-2
DriveSystem(FloorApronBelt)Maintenance .............................................................4-3

APPENDIX A: SPREADER COMPONENT PARTS REFERENCE ...........................A-1
GeneralTURFTIGER®SpreaderSpecifications................................................................ A-1
ComponentPartsOrderingInformation ............................................................................ A-2
TURFTIGERSpreaderBoxAssembly ............................................................................. A-2
TURFTIGERSpreaderWheel/HubAssembly ................................................................. A-4
TURFTIGERSpreaderDriveAssembly .......................................................................... A-6
TURFTIGERSpreaderBeltScraperAssembly ............................................................... A-8
TURFTIGERSpreaderHydraulicsAssembly ................................................................ A-10
APPENDIX B: ATTACHMENTS & OPTIONS PARTS REFERENCE........................B-1
SaberTooth™BeaterAttachment .................................................................................... B-2
BrushAttachment.............................................................................................................. B-4
DualSpinnersAttachment ................................................................................................. B-6
HorizontalConveyorAttachment ....................................................................................... B-8
PTOHydraulicsAssembly .............................................................................................. B-10
ExtensionSides ............................................................................................................... B-12
12VDCRemoteApronControl ..................................................................................... B-13
FieldServiceProcedure:InstallingtheRemoteApronControl ................................... B-14
OperatingtheRemoteApronControl ....................................................................... B-15
TABLE OF CONTENTS

Operator'sManual: MillcreekModel4300TURFTIGER®Spreader
1-1
SECTION 1: INTRODUCTION
Guide to this Manual
ThismanualcontainsalltheinformationnecessarytosafelyoperateandmaintaintheMillcreekModel4300
TURFTIGER®Spreader. ConsulttheTableofContentsforadetailedlistoftopicscovered. You'llfindthis
manual'sstep-by-stepprocedureseasytofollowandunderstand. Shouldquestionsarise,pleasecontactyour
Millcreekdealerbeforestartinganyoftheproceduresinthismanual.
Regarding the information presented in this manual:
• All safety, operating, and servicing information reflects current production models at the time
of publication of this manual.
• References made to left, right, front, and rear are those directions viewed when facing the
unit from the rear.
Please read all sections in the manual carefully--including the important safety information found in
this section--before beginning any assembly/operation procedures; doing so allows you to use your
Millcreek Spreader safely with optimal performance.
For Your Safety...
For your safety, Millcreek documentation contains the following types of safety statements (listed here
in order of increasing intensity):
•NOTE: A clarification of previous information or additional pertinent information.
•ATTENTION: A safety statement indicating that potential equipment damage may occur if
instructions are not followed.
CAUTION: A safety statement that reminds of safety practices or directs attention to unsafe
practices which could result in personal injury if proper precautions are not taken.
WARNING: A strong safety statement indicating that a hazard exists which can result in
injury or death if proper precautions are not taken.
DANGER! The utmost levels of safety must be observed; an extreme hazard exists which
would result in high probability of death or irreparable serious personal injury if proper
precautions are not taken.
The best operator is a careful operator. By using common sense, observing general safety rules, and
adhering to the precautions specific to the spreader, you, the operator, can promote safe equipment
operation.

Operator'sManual: MillcreekModel4300TURFTIGER®Spreader
1-2
For Your Safety... (continued)
In addition to observing the specific precautions listed throughout the manual, the following general
precautions apply and must be heeded for proper, safe operation.
WARNING: Keep hands and feet from under the spreader at all times. Ensure that you are
safely distanced from any other persons before operating the spreader.
WARNING: DO NOT attempt to operate the spreader in areas with steep inclines, ditches,
large rocks, stumps, or holes which may endanger the operator by upsetting the tractor or cause
damage to the spreader.
WARNING: To prevent serious personal injury and to promote safe spreader operation, keep all
shields in place during operation. Ensure that all mounting hardware is properly tightened.
WARNING: Never clean, adjust, or repair the spreader while the tractor is running.
WARNING: Never get off the tractor while it is in motion, while the spreader is in operation,
and/or while the PTO is engaged.
WARNING: Never wear loose clothing when operating the spreader as it may become caught
in the moving parts of the machine.
WARNING: Never allow children or anyone else to ride on the spreader.
ATTENTION: For proper and safe operation of the spreader, periodically inspect all parts for
excessive wear. Replace worn components with factory-authorized parts.
Safety Labels
FollowingarethelocationsanddescriptionsofalllabelsonyourTURFTIGERspreader. Figure1Ashowsthe
locationofALLlabelsonyourspreader. Pleasenotethatsomelabelsdenotemodelnumber,modeldescrip-
tion,etc.whileotherscontainimportantsafetymessages.
Each Safety Label contains an important safety message starting with a key word as discussed earlier in
this section (e.g. ATTENTION, CAUTION, WARNING, DANGER). For your safety and the safe
operation of your spreader, review all labels and heed all safety messages as printed on the labels.
Be sure to keep the safety labels clean and readable. If the labels ever become damaged or illegible,
contact your Millcreek dealer for replacements.

Operator'sManual: MillcreekModel4300TURFTIGER®Spreader
1-3
I-86171-A
42791
42768
42772
42792
42793
42770
42773
42767
42710
42770
42772
42756
42710
42792
42778
42459
42778
Safety Labels (continued)
For your safety, be sure to locate all safety labels and review their content before proceeding with
operating the spreader!
Figure1A-SafetyLabelLocations
TURF TIGER Spreader Safety Labels
Label Part # Description
42792 DANGER-NO riders
42710 WARNING-FlyingDebris
42756 WARNING-Entanglement,DoNOToperatewithoutshields
42772 WARNING-Spreadercombinationsafetylabel-movingparts,readmanual
42794 SMV(SlowMovingVehicle)Sign
42767 HoseConnectionsLabel
42773 SpeedAdjustmentLabel
42778 MillcreekLogoLabel
42770 TURFTIGERSpreaderLogoLabel
42793 MillcreekSerialNumberLabel
42459 PatentedLabel
42791 Model4300Label
42768 AttentionLabel(maximumpayload)

Operator'sManual: MillcreekModel4300TURFTIGER®Spreader
1-4
Safety Labels (continued)
DO NOT EXCEED
7500 lbs (3400 kg)
PAYLOAD
NO RIDERS
42792
DO NOT STAND in back of machine
while engine is running and/or machine
is operating. Rotating beaters and/or
flying debris can cause serious personal
injury or death.
Approach the rear of the maching ONLY
when all power sources are shut OFF and
all moving parts have stopped. 42710
Entanglement / Flying Debris
Hazards.
Entanglement Hazard.
DO NOT OPERATE without
safety shield in place. Moving
parts can crush and cut.
42756
Moving parts can crush or cut.
STAY CLEAR of machine while engine is
running and/or machine is operating.
Keep hands, feet, clothing, and hair away from
operating parts.
Never adjust, lubricate, or clean machine while
engine is running and/or machine is operating.
Never operate machine without safety shields in
place.
Read and understand operator's manual and
safety labels before operating or servicing the
machine.
Failure to follow these warnings may result in
serious injury or death.

Operator'sManual: MillcreekModel4300TURFTIGER®Spreader
1-5
Inspection and Warranty Registration
The TURF TIGER™ Spreader is shipped from your Millcreek Dealer completely assembled and ready
for operation. Inspect your new spreader thoroughly upon receipt to ensure that it has been shipped to
you in a satisfactory manner. Immediately notify the freight company and your Millcreek dealer in case
of shipping damage, shortage(s), and/or errors.
Standard/Optional Components
TheTURFTIGERSpreaderissuppliedcompletelyassembledwiththefollowingoperating
features/components(standard):
• AdjustableMeteringGate
• TractorDrivenHydraulics
• DualFlowControlValves
• ApronBeltScraper
• 6-ply41-18LL-16.1TurfTires
AttachmentsandOptionsfortheTURFTIGERSpreader:
• SaberTooth™BeaterAttachment
• DualSpinnerAttachment
• BrushAttachment
• HorizontalConveyor
• Self-CleaningRoll(forextremelyfinematerials;soldasservicepart only)
• PTOHydraulicswithPump
• 12VDCRemoteApronControl
• 10-ply16.5x16.1RibTires
• 9.50Rx16.5LTTruckTires
Warranty Registration
Followinginspectionofyournewspreader,locatetheMillcreekWarrantyCardintheliteraturepacket
shippedwithyourspreader. Forproperwarrantyregistration,Millcreekrequiresthatyoufilloutthewarranty
registrationcardandreturnitwithin30daysto:
MILLCREEK WARRANTY REGISTRATION
Millcreek Manufacturing Company
34 Zimmerman Road
Leola, PA 17540

Operator'sManual: MillcreekModel4300TURFTIGER®Spreader
1-6

Operator'sManual: MillcreekModel4300TURFTIGER®Spreader
2-1
SECTION 2: ATTACHING THE SPREADER
TO THE TRACTOR
Figure 2A - Specifications for Connecting the Spreader to the Tractor Drawbar
WARNING: ForsafeoperationoftheTURFTIGERSpreader,connectthespreaderdirectlytothe
tractordrawbar;DONOTconnectthespreadertoathree-pointhitch.
TheTURFTIGERspreaderhitchisdesignedtoworkwithastandardizedtractordrawbar. Toconnectthe
spreaderhitchtothetractordrawbar,refertoFigure2Aandadheretothefollowingguidelines:
• Extend or shorten the tractor drawbar to obtain the horizontal distance from the end of the
tractor power take-off (PTO) shaft to the center of the hitch pin hole (as shown in Figure 2A).
• Locate the jack, which is stored under the front of the spreader box. Use the jack to adjust
theheightofthespreaderhitchsoitmatchestheheightofthetractordrawbar.
• Back the tractor into the hitch until the holes line up.
• Fasten the spreader hitch to the drawbar with a hitch pin that fits securely (i.e. so that it will
not come out during spreader operation).
• Remove the weight from the jack by lowering the spreader hitch on the drawbar.
• Return the jack to its storage bracket underneath the front of the spreader box.
ATTENTION: DO NOT store the jack by swinging it alongside the hitch; doing so allows
the handle to hang down and drag on the ground, which may hinder safe and proper
operation.
WARNING: Damage to the spreader or other vehicle, as well as injury to the operator,
may occur if a properly-sized (1" diameter) hitch pin is not installed as recommended. Secure
the hitch pin with the clip as shown.
Connecting the Spreader Hitch to the Tractor Drawbar
ATTENTION: An improperly
located hitch point may cause
damage to the universal joints of
the PTO. The recommended
length of the PTO shaft should
range from 35.83 to 51.42 inches
center to center of the "U" joints.

Operator'sManual: MillcreekModel4300TURFTIGER®Spreader
2-2
I-86169
QUICK LINK
Assembling the Safety Tow Chain
NOTE: The safety tow chain may be ordered as an optional component for the TURF TIGER
spreader and must be used if the spreader is to be moved any time on a public roadway. Be sure to
adheretoalllocal/statetransportationcodesfortravelonpublicroadwayswiththistypeofequipment.
WARNING: DONOTtowtheTURFTIGERspreader(loadedforoperation)athighwayspeeds;
doing so may cause the tires to overheat and/or loss of control.
1. Refer to Figure 2B for an illustration of the hook-up of the safety chains (one on each side).
Attaching the Spreader to the Tractor PTO
(For Optional PTO Hydraulic Models ONLY)
1. Pull back the slide collar on the PTO yoke, and slide the spreader PTO assembly onto the
tractor PTO shaft. Be sure the slide collar snaps forward to indicate that the PTO shaft is
properly secured.
ATTENTION: DONOTtransportthePTOhydraulicTURFTIGERspreaderwithouthavingthe
PTOshaftsecured.
2. FastenthePTOsafetychaintothelinkonthespreaderpumpmounttopreventrotationofthesafety
shieldduringoperation.
WARNING: Failure to secure the PTO safety chain will allow the safety shield to rotate.
Operating the spreader without the safety shield in proper position may result in serious personal
injury or death.
Figure2B-AttachingtheSafetyChains
2. Unscrew the quick link nuts (one on
each side).
3. Insert the chain link into the quick
link as shown (one on each side) and
retighten the quick link nuts to keep
the chains from slipping out.
4. Hook the other ends of the chains to
the appropriate anchor holes on the
vehicle hitch.
WARNING: For the safety chains
to be effective, the installation of the
chains should not allow more slack than is
necessary for movement during spreader
operation. Inspect the safety chains regularly
to check the condition of the links and
locking/hooking mechanisms; replace the
chains as soon as weakness/breakage is noted.
(one on each side)

Operator'sManual: MillcreekModel4300TURFTIGER®Spreader
3-1
SECTION 3: OPERATION & ADJUSTMENT
Understanding TURF TIGER®Spreader Operation
ProperandsafeoperationoftheMillcreekTURFTIGERSpreaderrequires: (1)understandinghowthe
spreaderworks,(2)beingfamiliarwiththespreader'soperatingcomponents,and(3)heedingallsafety
precautionsasstatedinthismanual.
TURFTIGER™spreaderTractorDrivenHydraulicmodelsdrawtheirpowerdirectlyfromthetractor
hydraulic system. For optimal operating performance, the hydraulic oil flow of 7 gallons per minute
(GPM)mustbemaintained. At 6GPM,thespreaderwillstilloperate butat aslowerspeed. Atflows
greaterthan8GPM,oilwillbereturnedtothetractorreservoirbythespreaderflowcontrolvalve.
The Optional PTO Hydraulic models include a hydraulic pump which draws power from the PTO
drivelinetorunthespreaderhydraulicmotors. ThePTOhydraulicpumpisdesignedtoprovide7GPMwitha
PTO speed of 540 RPM.
TURF TIGER Spreader Operating Components
TURFTIGERspreaderoperationiscontrolled,incombination,byfourvariables:
(1) tractorgroundspeed(mph)
(2) endgate opening (up to 7 inches)
(3) apron belt speed (0 to 48 feet per minute)
(4) attachmentspeed
NOTE: Thefirstthreevariablesdeterminetheapplicationrate. Thefourthvariableaffectsthespreading
pattern.
TheDualHydraulicControlValves,locatedontheleftrearsideofthespreader,provideseparatecontrolof
beltandattachmentspeedsformaximumcontrolandflexibility.
• The Front Control Valve controls the speed of the floor apron belt.
• The Rear Control Valve controls the speed of the spreading attachment.
RefertoFigure3AonthefollowingpageforthelocationsofthesecomponentsontheTURFTIGERspreader.

Operator'sManual: MillcreekModel4300TURFTIGER®Spreader
3-2
TURF TIGER Spreader Attachments
TURFTIGERspreadersaredesignedtobeoperatedwithanyoneoffourspreadingattachmentsavailablefrom
Millcreek,providingmaximumversatilityforspreadingortopdressingapplications.
• TheSaberTooth™beaterattachmentisdesignedformaximumversatilityandpower,whether
applyingwetordry,lightorheavymaterial. Itsspreadingpatternrangesfrom4to12feet,
dependingonthematerialandtheattachmentspeed(RPM).
• TheDualSpinnersareidealforlightapplicationsofmaterialandprovideabroadspreading
patternofupto35feet.
• The42-inchBrushattachmentprovidesprecisiondrop-spreadingcapabilities.
• TheHorizontalConveyorattachmentallowsforsidedischarge,directeddropapplications
(e.g.fillingsandtraps,fillingothervehicleswithmulchmaterial,etc.).
PRESSURE
RETURN
11
22
4
5
6
7
8
8
1 FLOW CONTROL INLET PORTS
2 FLOW CONTROL PRESSURE (DRIVE) PORTS
3 FLOW CONTROL EXCESS FLOW PORTS
4 BELT DRIVE HOSE
5 BELT RETURN HOSE
6 ATTACHMENT RETURN HOSE
7 ATTACHMENT DRIVE HOSE
8 QUICK CONNECT HOSE COUPLERS
3
Figure3A-DetailofControlComponents/ConnectionsontheTURFTIGERSpreader
Understanding TURF TIGER Spreader Operation (continued)

Operator'sManual: MillcreekModel4300TURFTIGER®Spreader
3-3
Operating the TURF TIGER Spreader
WARNING! Before proceeding with operation of the spreader, review all safety
statements as provided in Section 1 of this manual.
NOTE: Bydefinition,theleftandrightsidesofthespreaderaredeterminedwhilesittingonthetractorseat.
Foradditionaloperatinginformationontheoptional12VDCRemoteApronControl,alsorefertoAppendix
Batthebackofthismanual.
1. LoadtheTURFTIGERspreaderaccordingtotheguidelinesprovidedinthissection.
2. Determinethedesiredopeningoftheadjustablemeteringendgate(upto7inches)accordingtoyour
spreadingapplication. PleaserefertotheRecommendedSettingschartsprovidedattheendof
thissection.
3. Withthetractoratidle,activatethetractorPTOlever.
4. Forbestresults,runthetractorthrottleatthe540rpmPTOshaftspeed.
(procedure continued on next page)
Guidelines for Loading the TURF TIGER Spreader for Operation
•MaximumTURFTIGERspreaderpayloadis7500pounds.
•ATTENTION: NEVER store material in the spreader between unloading times during
critical cold weather months when a frozen load could result in severe equipment damage
(i.e. torn floor apron belt). DO NOT store wet material in the spreader (or keep the
spreader outdoors with material in it)--doing so will accelerate rusting of the steel. Be aware
that storing material in the spreader also makes the material difficult to unload (i.e. it may
solidify/harden).
GuidelinesforInstalling OptionalAttachments
• ForthesafehandlingofTURFTIGERspreaderattachments,wearheavyworkgloves.
• Millcreekrecommendsthatatleasttwopeopleworktogethertoremove/installattachments;
this will facilitate the lifting, positioning, and bolting of the attachments.
• Eachattachmentisboltedonto therear ofthe spreader,two boltsoneachside*. Refertothe
relatedpartsassemblydrawingsintheAppendixesatthebackofthemanual.
*NOTE: TheTURFTIGERspreaderhasthree(3)setsofmountingholes(i.e.threeholesoneach
sideattherearoftheunit)fortheattachments:
• TheSaberTooth™beater,theDualSpinners,andtheHorizontalConveyoralluse
themiddleandbottomsetsofmountingholes,whichhavefixedstudsforeaseof
assembly.
• TheBrushattachmentmountsdifferentlyfromtheotherthreeandusesthetopand
bottomsetsofmountingholes. NotethatthetopholedoesNOThasafixedstudand
thereforerequiresanadditional1/2"bolt(supplied).
• Wheninstallinganoptionalattachment,lifttheattachmentintoposition,beingcarefultoalignthe
boltsonthespreaderwiththecorrespondingholesontheattachment.
Understanding TURF TIGER Spreader Operation (continued)

Operator'sManual: MillcreekModel4300TURFTIGER®Spreader
3-4
Adjusting Tractor Ground Speed
Usingthetachometeronthetractor,selectthetractorgearthatwillgiveyouthedesiredgroundspeed(mph)
withtheenginespeeddelivering540RPM(PTOspeed),whichisrequiredforallTURFTIGERspreader
models. Groundspeedcanrangefrom2to8mph,dependingonthedesiredapplicationrate.
Adjusting the Metering Endgate
Themaximumopeningforthemeteringendgateis7inches. Recommendedendgatesettingsforeach
spreadingattachmentareprovidedinthefollowingchart:
TURFTIGERSpreadingAttachment MeteringEndgateOpening(inches)
SaberTooth™Beater 3 to 6
DualSpinners 1 to 2
Brush 1 to 2
HorizontalConveyor 1 to 4
Toadjusttheopeningofthemeteringendgate:
• Liftuponthespring-loadedleverandHOLD.
• Use the handle on the metering gate to rotate the gate to the desired opening.
• Release the spring-loaded lever to lock the metering gate in the desired position.
Adjusting the Apron Belt Speed
Theinfiniterangeofspeedforthefloorapronbeltis0to48feetperminute(FPM). Thisspeediscontrolledby
theFrontControlValvelocatedontheleftrearsideoftheunit. Whenthevalveisinthetwelve-o'clock
position(notch#1),theapronbeltspeedis0mph;thethree-o'clockposition(notch#10)providesthemaxi-
mumapronbeltspeedof48FPM. Turningthecontrolclockwiseincreasesthespeed;turningthecontrol
counterclockwise decreases the speed.
Toadjusttheapronbeltspeed:
• Startthefloorapronbeltspeedbyturningthecontrolvalvetotheone-thirtyposition(notch#5-
halfwaybetweentwelve-andthree-o'clockpositions).
• Setthetractorgroundspeedandthemeteringendgateopeningforthedesiredapplicationrate.
• Finetunetheapplicationratebydecreasingorincreasingthefloorapronbeltspeedsetting.
Operating the TURF TIGER Spreader (continued)
5. Observethespreadingapplicationanddetermineifadjustmentsarerequired. Ifadjustmentsare
desired,pleaserefertotheapplicableprocedure(s)inthissection. Keepinmindthatthree
variables affect the application rate: tractor ground speed, metering gate opening, and apron
belt speed. Attachment speed affects the spreading pattern.
6. When the spreader box is empty, shut off the control (for tractor hydraulic units) OR stop the
PTO by disengaging the lever/switch on the tractor (for PTO hydraulic units).
7. RefertoSection4inthismanualformaintenancetobeperformedfollowingoperation.
Adjusting the TURF TIGER Spreader for Optimal Operation

Operator'sManual: MillcreekModel4300TURFTIGER®Spreader
3-5
Adjusting the Saber Tooth™ Beater Attachment
TheSaberToothBeaterAttachmentprovidesanapplicationdepthgreaterthan1/8-inchanda4to12foot
spreadingwidth,dependingondensityofthematerialandattachmentspeed.
Therotationspeed(RPM)ofthebeaterisdeterminedbythesettingoftheRearControlValvelocatedon
theleftrearsideoftheunit.
• For maximum spreading width (and most aggressive beater action/speed), set the control
valve to the three-o'clock position.
• When a less agressive or more narrow spreading pattern is desired, reduce the RPM of the
beater by turning the control valve counterclockwise.
Thespreadingwidthofthebeatercanalsobefine-tunedbyadjustingitsheightwithrespecttotheapron
belt. Thebeaterisfactory-mountedinthemiddleholesinthebeaterbracket;thispositionisrecommendedfor
mostapplications. Ifthebeateractionneedstobeadjustedforyourapplication,adheretothefollowing
guidelines:
• Movingthebeatertoahigherpositioninthebeaterbracketwillincreasethespreadingwidth.
• Moving the beater to a lower position in the beater bracket will decrease the spreading width.
• When you adjust the vertical position of the beater, you must also adjust the horizontal
position to provide adequate belt clearance.
• To adjust the horizontal position, slide the hydraulic motor and the bearing in the slots on the
beater brackets. The recommended horizontal position of the beater is 5/16" +/- 1/16"
between the beater paddles and the apron belt.
NOTE: Pleasebeawarethatwhenthebeaterismovedintoahigherposition,materialmayfallbetweenthe
beaterandthebeltandmaynotbedistributedoutbythebeater.
ATTENTION: Topreventdamagetothespreader,aminimumclearanceof1/4-inchmustbemaintained
betweentheapronbeltandthebeaterpaddles.

Operator'sManual: MillcreekModel4300TURFTIGER®Spreader
3-6
I-86174-A
1234567
SPINNER
DECK
Figure3B-AdjustingtheDualSpinnerPositioning
Adjusting the Dual Spinner Attachment
TheDualSpinnerAttachmentprovideswide
spreadingpatternsfrom25to30feetwithlight
applicationdepth(lessthan1/8-inch).
Spinneradjustmentiscriticaltoproducingthedesired
spreadingpatternresults. Fromthefactory,the
spinnerattachment"deck"isinstalledinthe
secondandfifthholesfromtherear;this
positionprovidesthemostuniform30-foot
widespreadingpattern. Ifyouneedtomake
adjustmentstothispositioning,adheretothe
followingguidelines(seeFigure3B):
• Movingthe"deck"forwardtothe
thirdandsixthholeswillresultin
moreofthematerialbeingdirectedto
theoutsideofthespreadingpattern.
• Movingthe"deck"backwardtothe
firstandfourthholeswillresultin
moreofthematerialbeingdirectedto
thecenterofthespreadingpattern.
• Tiltingthe"deck"willdirectthematerialupwards. (Thisisaccomplishedbylooseningthefrontbolts
androtatingthe"deck"aroundtherearbolts.)
NOTE: Tiltingthe"deck"upwardsisrecommendedforlight,widespreadingapplicationswiththe
spinnersatmaximumRPM.
• Tiltingthe"deck"horizontallymaybehelpfulforheavierapplications.
Adjusting the Brush Attachment
TheBrushAttachment,witha10-inchdiameterbrush,isdesignedspecificallyfornarrowwidthapplicationsof
4 feet. The attachment should be mounted so that the bristles lightly brush against the apron belt. If
thebrushbecomeswornfromextendeduse,itcanbeadjustedverticallyandhorizontallytomakeupforthe
diminishedlengthofthebristles.
ATTENTION: Ifthebrushattachmentbristlesarerubbingagainsttheapronbelt,theywillweardown/
damage the belt. Care should be taken that the brush is adjusted properly so that the bristles just lightly
brushagainsttheapronbelt.
Adjusting the Horizontal Conveyor
TheConveyorAttachmentconsistsofa12-inchwideconveyorbeltthatstrictlydischargesmaterialtotheleftof
themachine. Thereisnovariationinthemountingoftheconveyor. Thespeedoftheconveyor,however,can
beadjustedwiththeRearFlowControlValve. Increasingthesettingofthiscontrolwillresultinmaterialbeing
thrownfarthertotheleftofthemachine.
Table of contents
Other Millcreek Spreader manuals

Millcreek
Millcreek 27ss User manual

Millcreek
Millcreek 57G User manual

Millcreek
Millcreek 25 User manual

Millcreek
Millcreek 100P User manual

Millcreek
Millcreek 6700P User manual

Millcreek
Millcreek TURF TIGER 3100 User manual

Millcreek
Millcreek 25G Series User manual

Millcreek
Millcreek 6700P User manual

Millcreek
Millcreek 27+ User manual

Millcreek
Millcreek 97 User manual
Popular Spreader manuals by other brands

Broadwood
Broadwood Wessex Country FS170T Operations manual and parts book

Hiniker
Hiniker 600P Operator's manual

SnowEx
SnowEx Bulk Pro SP-1575 Owner's manual and installation instructions

Amazone
Amazone ZA-X operating manual

Chapin
Chapin 81000A Assembly / operation instructions / parts

Amazone
Amazone E+S Operation manual