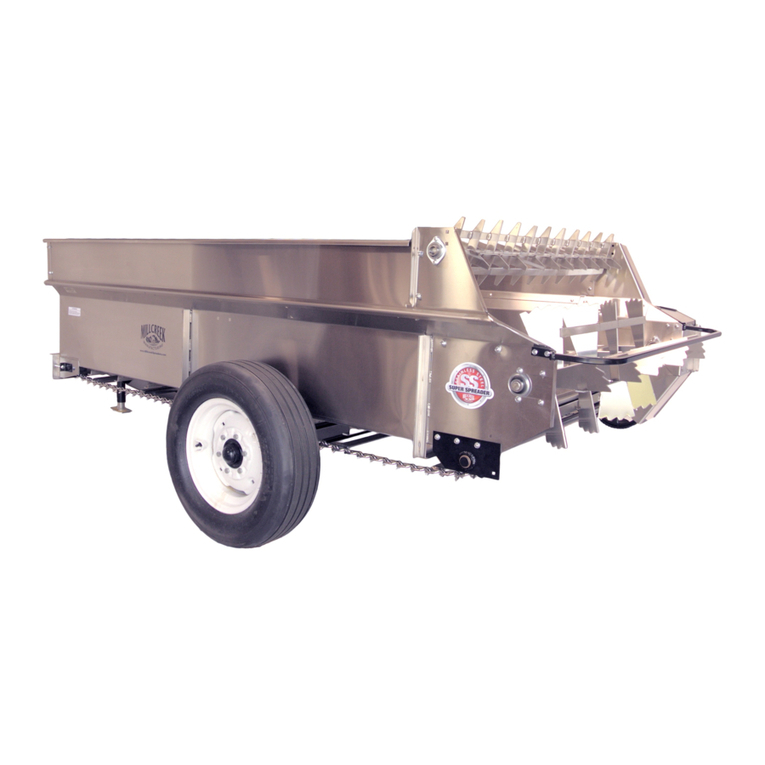
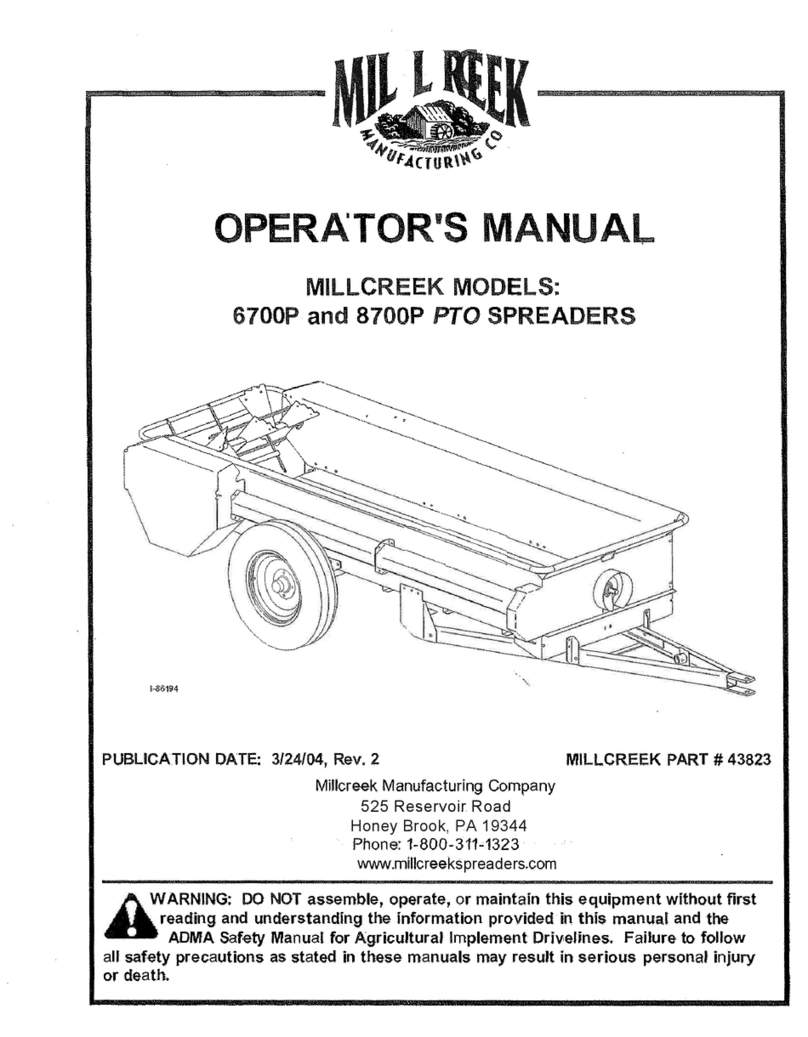
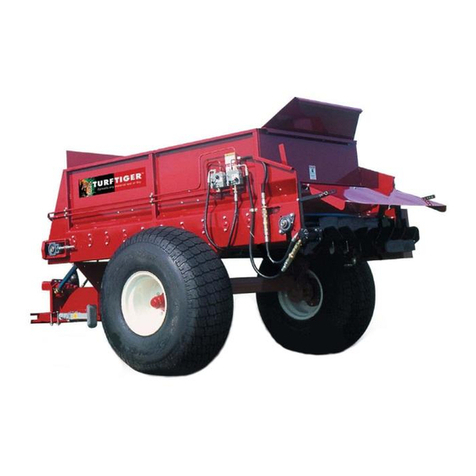
Millcreek 6700P User manual

[El}
7
4cu
OPERATOR'S MANUAL
MILLCREEK MODELS:
6700P and 8700P
PTO
SPREADERS
,
�
e
[
=
N
\
,
d
•
16194
PUBCATION DATE: 3/24/04, Rev. 2
WARNING:
DO NOT assemble, operate, or maintain this equipment without rst
reading and understanding the inrmation provided in this manual and the
ADMA
Safe Manual for Agricultural Implement Drivenes. Faure to ow
a safety precautions as stated in these manuals may result in serious personal inju
or death.
MILLCREEK PART
#
43823
Mcree Manucturing Company
525 Reservoir Road
Honey Brook, PA 19344
Phone: 1-800-311-1323
.mcree
kspreaders
.com
All manuals and user guides at all-guides.com
all-guides.com

WARNTY INFORMATION
Mcreek Manufacturing Company (hereinaer caed the Com any) warrants to the original Purchaser, the
Equipment, manufactured by the Company, to be ee from defects in material and workmanship under normal
use and seice. The Company obgaon under this Waanty sha be mited to replacement or repair of any
pas thereof, ee of charge, to the original Purchaser rovided, however, that the pa(s) to be replaced or repaired,
sha, within one year after deve to the original Purchaser, be demonstrated to be defecve; which determination
sha be made by the Company. The said components or pas must be retued through the Seng Dealer or
Distributor directly to the Company with a transpoation charges prepaid. Notice of defect sha be fuished in
writing to the Seer and to the agent through whom the machine was purchased, disclosing in fu a known
defects and faure in opeon and use. Reasonable me sha be given to the Seer to remedy any such defects
and faures.
This Warranty does not cover, under any rcumstances, any pas, components, or materials which, in the opinion
of the Seller and the Company, have been subjected to neglect, misuse, alteraon, acdent, or repaired with pas
other than those manufactured by and obtained fm Mcreek Manufacturing Company.
This Warnty does not cover components which are already covered by a separate waanty provided by the
supper of said pas or components.
This Warranty is made in eu of a other warranties, expressed r imped, including any warranty of
merchantabty and ness for use and purpose and of a other obgaons or liabties on the C mpany
pa and any imped warranty. The Company neither assumes n r authorizes any other person to assume
r it, any ther abty in c nnecon with the sale of this equipmen This Warranty sha not apply to
this equipment or to any pa thereof which has been subjected to accident, neggence, alteration, abuse,
or misuse.
The Company makes no warranty whatsoever in respect to accessories or pas not sup ed by the Com any.
The term "oginal Puraser," as used in this Waanty, sha be deemed to mean that person r whom the
equi ment is originay supplied. This Warranty sha a ply only within the boundaries of the continental United
States.
Under is Warranty, e Com
pany cannot guarantee at condition existing beyond its contr
ll
not aect the
Com any
'
s ab
i
ty to obtain materials or manufacture necessa replacement pas.
The Company reserves the ri
g
ht to make desi
g
n changes
,
or changes in speci
caons at any
me
,
without any
contingent obligation on the pa of the Company to purchasers of machines and part
s
previously sold.
The Company
w
arrants the construction of the eq
u
ipment sold herein and w
replace at the Compan
s e
x
pense for
a period of one year f
m the date hereof
,
any pa
s which p
ve defec
ve as determ
i
ned under the terms of this
mited Warranty.
H
igh density
,
polyethelene
oors are warranted
for 20 years
f
m crackin
g,
ng
,
sp
ing
,
or
peeling. Ten
(
) year
,
pro
-
rated warranty on s
i
des
(
e.
R
h
i
no
®
ning).
TDEMARKS
The M
cre
e
k logo is a trademark of the Mcree
k
Manufacturing Company.
A
other brand or
p
duct names
mentioned are the registered trademarks or trademarks of r respective owners.
COPYRI HT
C
opyright
© 2004
Micreek
M
anufacturing Company.
A
rights rese
ed. No pa o
f
this pubcaon may be
re
p
roduced
,
or distributed w
i
thout the prior written permission of Mcreek
M
anufacturing Company
,
34 Z
immerman
R
oad
, L
eola
,
P
A 17540
. Subject to change without notice.
All manuals and user guides at all-guides.com

TABLE OF CONTENTS
SECTION 1: INTRODUCTION
.......s.»s..s..sos.so.....ss.. ..................................
1-1
Guide to this Manual 1-1
For Your Sa 1-1
S e Labels 1-2
specon d W Resaon 1-5
SECTION 2: ATTAC ING THE SPREADER TO THE TCTOR 2-1
Coecting the Spreader to the Tctor 2-1
Attaching the Spreader PTO to the Tctor PTO 2-2
SECTION 3: OPETION .......s..sos..so..so.so.sos..sos............a.·................3-1
Understding Spreader Opetion 3-1
The Spreader Opeting Components 3-1
Guidelines r Loading the Spader 3-1
Opeting the Spreader 3-1
SECTION 4: MAINTENANCE
&
ADJUSTMENT .......as...sos.ass.s..a..cs......so.a.a....... 4-1
Guidelines r Rel Maintence 4-1
Pcedes r Spreader Adjustment 4-3
AdjusgeHoldgPawl 4-3
AdjustgtheDve Chs 4-4
APPENDIX A: PARTS REFERENCE A-1
Genel Spreader Specications A-1
deg oation A-2
tch Assembly A-2
eeldHubAssembly A-4
ReDveAssembly A-6
FntDveAssembly A-8
ApnChaindSprocketAssembly A-10
Sa Selds d Guds A-12
PTO Sh Assembly A-14
APPENDIX B: SPREADER OPTIONS PART
S REFERENCE .................... ........ B-1
Endgatesbly B-2
SaChaAssembly B-3
All manuals and user guides at all-guides.com

Operator's Manual: Millcreek 6700P
&
700P PTO Spreaders
SECTION 1: INTRODUCTION
Guide to this Manual
Ts mual contains a e inationnec ssto saly opete d maintn the Mcreek 67000P or
8700P PTO Spreader. Consu the Tabl of Contents r a detl d list of topics covered. You' nd this
manuas step-by-step procedes ey to ow d derstand. Should questions ase, please contact yo
Mcreek dealer bere sting y of e pcedes in this mua
NOTE: Procedures pvided in this manual pply to
both
spreader models (Model 67000P and
Model 8700P) unless specay noted otheise.
Regding the ination presented in this mual:
• A sa, opeting, d seicing ination reects cuent pduction models at the time
of publication of this manua
• Rerences made to le, ght, ont, d re e those directions viewed when cing the
unit o
m
the
r
e
.
Please read a sections in the man al carefully--including the important safe informatn found in
this section--bere beginning any assemblyperation procedures; doing so aows you to use your
Micreek Spreader safely with optimal performance.
For Your Safety ...
F
o
r yo
u
r
sat
y, M
i
cr
ee
k do
c
u
ment
a
t
ion contains the
owin
g
t
es of s
a
f
e
t
y
stateme
nt
s
is
t
ed
he
re
in o
r
der of increasin
g
intensi
t
y
)
:
•
NOTE:
A
cl
i
cati
on
o
f
pr vious ination o
r
addi
t
iona
l
pe
i
nent
inion.
• ATTENTION:
A sa
state
m
e
n
t indicatin
g
that pot
e
n
ti
al e
q
uipment d
a
g
e ma
y
occur if
in
st
ctions not
owed.
A
CAUTION:
A
sa
t
y st
a
tem
ent
t
hat
r
eminds of sa
t
y pctices or di
r
ects a
e
ntion
t
o unsa
p
ct
ices wh
ic
h
could res
u
i
n p
e
r
sonal in
j
u
if pper p
r
cautio
n
s e not ta
k
en.
A
WAING:
A
strong
sa
fe s
tat
em
ent indicatin
g
that a ha
z
d e
x
ists which can
r
esu
in
inj
or death if
pp
er p
r
ecautions e not t
en
.
A
DGER!
The utmost levels of sety must be obs d;
a
n e
x
treme ha
z
d e
x
ists wh
i
ch
w
o
ul
d r
e
s
ul
t in
h
igh
p
babi
l
it
y
of death or i
epable se
ous
p
ersonal in
j
if
p
ro
pe
r
p
re
c
a
u
tions
e not
t
a
k
en.
The best operator is a careful operator.
By
usin
g
co
on sense
,
o
b
se
in
g g
enel sa
les
, a
nd
a
dh
e
ng
to t
h
e
p
re
cau
t
i
ons s
p
eci
c
t
o
t
he spreader
,
you
, t
he ope
to
r,
c p
mote sa
e
q
ui
pmen
t
o
pe
t
ion
.
1-1
All manuals and user guides at all-guides.com

Operator's Manual: Millcreek 6700P & 700P PTO Spreaders
For ur Safet.. (continued)
addition to obseing e specic precautio s listed touout the manual,
e owing genel
precautions apply an
must be heeded
for proper, sa operation.
A
WING:
Keep hds d et om der the spreader at a times. Ense that you e
saly distced om any oer persons bere opeting the spreader.
h
WING:
DO NOT aempt to opete the spreader i eas with steep i clines, ditches,
large cks, smps, or holes wch may e da ger the opetor by upseing the actor or cause
dage to the spreader.
A
WING:
To prevent seous perso al inj d to pmote sa spreader opetion, keep a
shields in place dung opetion. E se that a moting hardwe is properly tightened.
A
WING:
Never e, adjust, or repair the spreader while the tctor is ing.
h
WING:
Never get o the tctor while it is in motio , wle the spreader is in opetion,
A
or while the PTO is enged.
A
WING:
Never we loose othi g whe opeting the spreader as it may become caut
in the moving ps of the macne.
A
WING:
Never aow children or yone else to de o the spreade
ATTENTION:
F
or p
pe
r
d sa opetio o
he spreader
,
pe
odicay in
s
pect a
ps
r
ex
ces
s
ive
w
e
. R
eplace wo
compo ents with
cto
-
autho
z
ed p
s.
ATTENTION:
To
pr
eve
n
t the
tch
om com
i
ng disco
ected d
ng opetio ,
u
se
e pro
p
er si
z
e
tch pin
w
ith a saty co
er at a times.
ATTENTION:
B
es
eto
u
seasa
t
y
chain
w
hent
v
elingwiththespreaderonapublicadway.
Safety Labels
F
o
o
w
i
ng
a
r
e
e
l
oc
at
io
n
s
d des
c
ptions o
f
a labels on the spreader
(l
abels e ide
n
tical r both
M
odels
6700P
a
n
d
8700P);
re
f
er to
F
igure
1 A
.
P
lease note that some labels de ote model
u
mber
, m
odel
d
esc
p
tion,
et
c.
w
leo
ersco ta
impo
tsa
messages.
E
ac
h
Safe Label
contains impo
t saty me
s
sage st
in
g
with a ke
y
word as discussed e
lier i
s
section ( e.
g
. AT
T
ENTI
ON
, CAU
ON,
WG, DGER)
.
F
or yo
sa
t
y
d the sa
opeti
o
n
o
f
yo
ur
e
qu
i
p
ment
,
revie
w
a
labels
d heed a sa
messa
g
es
p
ted on
e labels.
B
e
sur
e
t
o
ke
e
p t
he sat
y lab
els e d readable.
the label
s
ever
b
ecome d
aged or
e
g
ib
l
e
,
contact
y
o
M
creek dealer
rr
lacements.
1-2
All manuals and user guides at all-guides.com

Operator's Manual: Mcreek6700P
&
8700P TO Spreaders
Safety Labels (continued)
Spreader Safe Labels
Label P#
42792
42710
42756
42772
42783
42778
42779/42780
42786/42787
Despon
DGER-NO ders
WG Flng Debs
WG- Entglement, Do NOT opetion without selds
WG- Spreer combination saty label-moving ps, read mual
ATTEION -Do NOT exceed specied speed
Mcreekgo Label
Spreader Seal Nber Label
Spreader Model Nber Label
42778
NOTE: L 42756 is proded in ree
la ons: rear de shid (as shown),
bend the rear de sd, and behind
the ont shid.
42778
14
42783
42778
1.86196
Figure 1A-Spr ader Safety Label Locations
For your safe, be sure to locate a saf labels and review the content before proceeding wh
operang the spreader!
1-3
All manuals and user guides at all-guides.com
all-guides.com

Operator's Manual: Millcreek 6700P
&
700P PTO Spreaders
Safety Labels (connued)
'
DANGER
NO RIDERS_,
A
WARNING
Entanglement Hazards
A
WARNING
a
W
Entanglement Hazard.
DO NOT OPETE ithout
safety shield in place. Moving
pas can crush and cu
42756
422
Faure to ow these waings may result i
serious inju or death.
Read and understand operatos manual and
safe labs bere operang or secing the
machine.
STAY CLEAR
of maine while engine is
running and/or machine is operating.
Keep hands, feet, cloing, and hair away om
operating pas.
Never djust, lubrite, or clean maine ile
engine is running and/or machine is operang.
Never operate machine wiout safe shields in
place.
Moving pas can csh or cut.
A
WARNING
�
Entanglement / Fl ing Debris
Hazards.
DO NOT STAND in back of machine
while engine is nning nd/or machine
is openg. Rotating beaters nd/or
�
ying debris can cause serious personal
inju or death.
"
Appach the re r of the maching ONLY
when a power sources are shut OFF and
a moving pas have stopped.
42710
AENTION
DO NOT exc
6 mph when spreading.
DO NOT exceed
15 mph when tnsing a fu load.
en traveling on public adw ys, use a sa chain and
adhere to a appble tor vehie d.
427
1-4
All manuals and user guides at all-guides.com

Operator's Manual: Millcreek 6700P
&
700P PTO Spreaders
inspection and Warranty Registrati n
Most spader models are spped om yo Mcr ek Deal r completely sembled d ready r opetion.
spect yo new spreaderthoughlyuponreceipt to ense that it has b en shipped to you ina satiscto
me ediatelynotie eit compy d yo creekdealer ce of shipping dage,
shos ), or ors.
NOTE:
the spreer has not b n pre-assembled, please rer to e
Supplemental Assembly
Instructions.
Please contact yo local Mcreek D aler r assistce as needed. you ordered
optional endgate
with yo spreader, you may also have to ass mbl this component on your spreader; rer
to Appendix Bat th back of this mual r the coesponng ps awing.
Foowing inspection of your n w spreader, locate the Mcr ek Waty Cd in the li
t
e
re
p
ac
k
et
s
pped with yo
ur s
pr
e
a
d
e
r. F
or proper w
t
y
r
g
ist
tion
,
Mcree
k
re
qu
i
r
es t
h
at you
out
t
he
w
a
ty re
gi
s
at
i
on c
d r tu
it
whin 30 days
to
:
MLCEK
W
TY GISTON
M
cr
e
e
k
Mu
ct
n
g C
omp
y
34 Z
i
e
R
oad
L
eola
, PA 17540
For yonr sa, be snre to lo ate a sa decals and review their content bere proceeding with
operating the spreader.
1-5
All manuals and user guides at all-guides.com

Operator's Manna!: Mcreek 6700P
&
8700P P O Spreaders
SECTION 2: ATTACHING THE SPREADER
TO THE TCTOR
Connecting the Spreader to the Tract r
The spreader hitch is desied to work with a std rdized tctor hitch. To connect the spreader hitch
to the tctor tch, rer to Fie 2A nd adhere to the owing idelines:
• Adjust the dr wb r so th t it is to 20 inches bove the ound as sho in Fie 2
• Extend or shoen the tctor hitch to obt in the hozont l distce om the end of the
tctor power te-oTO) sh to e center of the hitch pin hole (as shown in Fie 2A).
• Adjust the heit of the spre der hitch with the jack so the tctor dr w b m tches e heit
of e spreader hitch.
• B ck the tctor into the hitch until the holes line up.
• F sten the spre der hitch to the drawb with a hitch pin th t ts secely (i.e. so that it w
not come out ding spre der oper tion) d lock in place with the ip as sho.
• Remove the weight om the j ck by loweng the spre der hitch on the dr wb.
• Swing the j ck to its hozont l position and lock it in position to pvide mimum od
clece.
WING:
Dam ge to the spre der or other vehicle, s we s inj to the opetor,
may occur if ppey-sized hitch pin is not inst ed asrecoended. Note that the installation of the
s clip, as noted in Fire 2A, is lso required r sa spreader oper tion.
ATTENTION:
imppey loc ted hitch point m y c use dage to the univers l joints of the PTO.
The recoended len
h of the PTO sha
should
nge
om
36 to 51 inches
ce
n
ter to center of
the "U" joi
T0
17°
\
t
CLIP
6 T0
12°
RECUMMENDED
3· TD 20°
15' RECOMMENDED
!
-8604%
Figure 2A - Specicat ons r Connecting the Spreader/Tractor Hitch
2-1
All manuals and user guides at all-guides.com

Operator's Manual: Millcreek 6700P
700P PTO Spreaders
Attaching the Spreader PTO to the Tra tor PTO
1. Ali the PTO splines on the spreader wi h he PTO splines on e ac or.
2. Pu back the slide co on the PTO yoke, d slide the spreader PTO assembly onto the
tctor PTO sha.
Be sure the sde coar snaps foard to indicate hat the spreader PTO
assembly is properly secured to the tractor PTO sha.
3. Fasten the PTO sa chain to the hitch css member to prevent taon ohe saty seld dg
opera ion.
WING:
Failure to secure the PTO sa chain will allow the sa shield to rotat
Operating the spreader without the sa shield in pper position may resu in seous personal
inj or death.
2-2
All manuals and user guides at all-guides.com

Operator's Manual: Millcreek 6700P
&
700P PTO Spreaders
SECTION 3:
OPETION
Understanding Spreader Operaon
Proper and safe operation of e Mcreek 67 P /87 P Spreader reqres: (1)bng fiar with the
spreader's opetg components d (2) heeding a satyprecautions stated in this mua
The Spreader Operating Components
By detion, the le d t sides of e spreader e detened wle sitting on e tctor sea PTO model
spreaders e powered tou the actor ve ain. The PTO powers the apn chn d the beater. For
heration on engaging the PTO ve line, please rer to the owing section,
Operating the
Spreader.
G idelines for Loading the Seader for Operation
• Mcreek recoends at you
load the spreader from the front toward the back
to
cilitate easier unloading.
• ATTENTION:
VER store mure in the spreader beeen loading times dng
critical cold weat
h
er mont
h
s when a
o
z
en load could res
u
in severe e
q
uipme
n
t dama
g
e
(
i.e. to
m
oor a
p
n chain)
.
• DO NOT
store
w
et
m
u
r
e in the spr
e
ader
(
or keep the spreader outdoo
w
ith
m
e
n it)-
doin
g
so
w
accelerate
sting o
f
the stee
Opera ng the Spreader
WARNING! Bere proceeding with operation of the spreader, review a safe
statements as provided in Section 1 of this manual.
6
2.
3.
4.
5.
WING:
To
pre
v
ent se
ou
s
pe
onal in
ju,
en
s
e at
L s
a
t
y
s
h
ields
e in
p
lace o
n
e
s
preader
b
e
re st
in
g
o
p
etion.
VER
ope
te the
sp
re
a
der
w
it
h
out
L
sa
f
et
y
shields in
p
lace
.
y
ou
h
a
v
e a
s
preader with the end
g
ate opt
i
on
,
li
the end gat
e.
W
it
h
t
h
e t
ctor at idle
,
si
m
pl
y
activate t
h
e s
w
itc
h
to engage the PT
O.
NOTE:
F
or ol
d
er
t
ctor mo
del
s
,
yo
u m
a
y
need to deco
mp
re
s
s the
utch d acti
v
ate th
e
tctor
PTO
le
v
e
R
e
l
e
a
se t
h
e
u
tc
h
s
l
o
wl
y
s
o th
e
PTO sha
w
st
t
h
e spreader a
p
n chai
n
d beaters.
F
or
b
est
r
es
ul
ts
,
t
h
e t
ctor
tole at the 540m
PTO sha
speed and re
l
a
te the
oun
d
sp
eed to no
m
ore th 6
m
ph.
W
he
n
t
h
e spr
e
a
d
er
b
o
x i
s e
m
pt
y,
st
o
p t
h
e
P
T
O
by disen
g
agin
g the lever/switch on
the acto
L
o
w
er
e endgate
(
i
pp
licable
).
R
e
f
er to
S
ec
ti
on
4
i
n
t
s
mu
a
l
r mainten
ce to be pe
o
ed
o
w
ing opetion o
f
e
s
p
reader.
IMPO TAN Be aware that it may be necessa to re-tighten bolts aer a few hours of initial
operation -- watch and sten for any loose components. Be sure to check the wheel bolts for proper
torque (75-80
.
lbs.)
3-1
All manuals and user guides at all-guides.com
all-guides.com

Operator's Manual: Millereek 6700P 8700P PTO Spreaders
SECTION 4: MAINTENANCE
&
ADJUSTMENT
Guidelines for Regular Maintenance
WIN
A shields must be replaced aer mainten ce or adjustment procedes e
pere Failure to do so could resu in seous personal inju or death.
Pering rel maintenance on you Mcreek Spreader w help ensure optimal perance.
Please ow these guidelines r maintaining yo spreader:
• Cle the spreader once a week and bere stong the unit r an extended peod oime.
ATTENTION:
VER store me in e spreader beeen uoading times dng
cticalcoldweaermonthswhenaozenloadcouldresusevereequipmentdage
(i.e. tom oor apn chain). Stong wet mure the spreader( or keeping the spreader
outdoorsthmeit)wacceletesngofestee
• Check e spreader each time it is used r loose, bent, bken or missing ps.
ATTENTION:
Dng opetion, listen r abnoal sodswchmitdicate loose
ps or other equipment dage. Coect ypspblems ediately; expded ps
views of l spreader assemblies e pvided in the
A
pp
e
ndi
x
es at the back os m
ua
ATTENTION:
F
or
s
a
and p
p
er ope
tion of the spreader, adhere to the
owin
g
speci
ca
on
s
r
te
g
e
tc
h
hd
w
e
;
ile to
ten a
tch hdwe secel
ma
y
result e
qu
ipment d
age.
Hardware Torquepeccation
1/2 60 .
lbs
.
3/8" 25 .
lbs.
5/16" 15
. lbs.
• Ch
ec
k and
ease th
e lu
be
ing at the
PTO (
at the
ont o
f
the spreader) once
a y
e
. R
em
o
ve
t
he
te
l
es
c
oping sha
,
c
l
ean, and add alig
h
t coati
ng
o
f
ease.
• Check that
i
mplement t
ir
es have ade
q
uate air
p
resse
(30 p
si).
eel bolts sho
u
ld be to
rqu
ed
to
7 5
to
80
. lbs.
•
s
p
ec
t the sa chn relly to check
e conditio
n
of the li
s d loc
ng
/h
oo
n
g
m
e
c
h
is
m
s
;
re
p
lace the chain as soon as we
ess
reakage is noted.
•
P
eriodica
y c
heck e be tension
.
Re
r to the
Front Dr ve Assembly Parts Deta
in
A
p
pen
di
x A
at the
b
ack o
his m ual to locate the be tension components
. T
he bel
t
d
tensio
ng
sp
n
g e
located
der the ont be s
eld.
A
s needed, re
-
tension e be
b
ti
ten
i
n
g
the e
y
ebolt
til the s
p
ng s
etches to
ve (
5)
inches.
• Ap
p
l
y
c
h
ai
n lub
e
o
nce a month to the dve chains (shownin
F
i
r
e
4B);
use ve
g
etable o
i
l
o
r a
co
on s
p
y lube
r chains.
4-1
All manuals and user guides at all-guides.com

Operator's Manual: Millcreek 6700P
&
700P PTO Spreaders
Guidelines for Regular Maintenance continued)
• Peodically check the oor apnchai rppertensiotiess (rer to Fi 4A).
Procedurerchecng/adjusngthe or apron chain;
a) Check the distance beeen the apn chain d the boom of the side sheet at the apron's
lowest point Gust bend the wheels). the distce is more th six ( 6) inches, e chain
must be titened.
NOTE:
The recommended oor apn chain tension is aceved when e apn's lowest
point is 4 to 4-1/2inches below the e end the tire).
b) Use a9/16" wrench to loosen the o side nuts o each side of the spreader box as shown
inFie4A. Then, the
ont
nut clocise with a 9/16" wrench uil p
roper tension is
a
c
hie
v
e
d. R
e
p
eat
r
the othe
r s
ide
.
Make sure that the chains on each side of the
apr n are equay taut.
c) en
the a
pr
on cha
n a
dju
s
ent is accomplis
h
ed
,
re
-
ti
ten the side n
u
ts
.
• Apply
cha
lu
b
e once a
m
on
to the
oor apn chain
;
use ve
g
etab
l
e oil or a co
on s
p
ra
y lube
r
1-86197
Figure4A-Adjusting the Floor Apron Chain r Proper Tension
4-2
All manuals and user guides at all-guides.com

Operator's Manual: Millcreek 6700P
&
700P PTO Spreaders
Procedures for Spreader Adjustment
Pblems wi spreader opetion may ind ate that ceain adjustments are required to restore proper
nctiong. The owing pcedes address coon pblems which may be encountered in
spreader opetion.
Adjusting the Holding Pawl
the apn chain is not advancing pperly, the holding pawl may need to be re-adjusted to restore pper
apron cha speed d ctiong.
To Reset the Holding Pawl (rer to Figure 4 ):
(a) Rotate the cr spcket t the sho l is in e hozontal red position.
)
Loosen thenuhatseces the holdg paw
(c) Adjust the holding pawl to obtain a 1/8" gap beeen the end of the pawl d bottom of e
notch as sho in Fie 4B. Titen e nut to sece the holdin
g pawl.
Crank Arm Sprocket
¢
1-86199
Holding Pa
Tighten
Idler Sprocket
0
Loosen
Sho nk
Dve Pawl
Figure 4B-Adjusting the Holding Pawl and Drive Chains
4-3
All manuals and user guides at all-guides.com

Operator's Manual: Millcreek 6700P
&
700P PTO Spreaders
Procedures for Spreader Adjustment continued)
Adjusting e Dve Chains
NOTE:
The ve chains e cto-set r the pper oper tg tension d should not require djusen
The owing insctions e pvided r rerence oy, in re cases where re- djusent oep lacement
m y become necess.
Refer to Figure 4B
on the previous page r an usttion of the dve ch ins d rel ted components. The
chains should be snug, but not too ti
e chains e too tit, they may cause excessive we on the
busngs in e cra sprocket (resug in premae fle).
e chns are too loose, they c slip d
jump spckeeeth when the spreader is opeting wi load.
• Check the drive ch ins in o positions:
( )
Gearbox to Be ter Chain:
check the bottom sp.
)
Ratchet Drive Chain:
check top or boom sp.
NOTE:
enpushingonthemiddleofthespwithonenger( bout20lbs.presse),
the chain should deect about 3/8 to 2 inch. A strai-edge ler maybe help
l i
n
ve
g
epperse
g.
• Adjust the drive ch ins
accord
g to
F
i
e
4B
d the
owin
g
idel
i
nes
:
( )
Gearbox to Be ter Chain:
ad
ju
st the
idler sprocket
as indic ted.
)
Ratchet Drive Chain:
adjust the
bracket position
by loosening the
o (2 1/
b
cket bo
s
d sliding the b
cket
d or b c
rd s shown
.
4-4
All manuals and user guides at all-guides.com

Operator's Manual: Mcreek 6700P
8700 PTO Spreaders
APPENDIX A: PARTS REFERENCE
The owing ination is pvided r y ur rerence in derstding how the spreader is
assembled and how spe pas c be identied and ordered ppey.
General Spreader Specications
Mode 6700P Model 8700P
Capacity,
struck
30 cubic . 39 cubic .
Capacity,
heaped
56 cubic . 72 cubic .
Body Length
89.5inches 114 inches
Body Width
37i ches 37i ches
Body He ght
17.5inches 17.5inches
Overa Length
11.,6 inches 13,6 i ches
Overa Width
61 inches 61 inches
Overa Height
33 inches 33i ches
Load ng Height
33 inches 33i ches
Construction
A steel, polyoor A steel, poly floor
Apron Chain
#62 steel detachable #62 steel detachable
Optional Rod 112 Optional Rod 11/ 2
Tires (30 psi)
R15 (good used res) R 15 (good used res)
Beater Bearings
Sealed ba bearings Sealed ba bearings
Beater Drive
Gearbox Gearbox
Apn Dr ve
Ratchet Ratchet
Body Finish
Powder coang Powder coang
Weight (w th t res)
660 lbs. 740Ibs.
Tractor Weight and
1200 lbs. and 1400 lbs. a d
HP required
18 HP
&
gater 22 HP
&
greater
A-1
All manuals and user guides at all-guides.com
all-guides.com

Operator's
Manual:
Millcreek 6700P
&
8700P PT Spreaders
Ordering Information
When ordeng replacement pas, please p vide the owing ination to yo local Mcreek
dealer:
• Model d Seal Number of the ut (located on e ont ght comer of e spreader)
• P Number and Descpon as it appears on the owing dwings/pas lists
Hitch Assembly
1-851
Figure A1 - Hitch Assembly Pas Deta
A-2
All manuals and user guides at all-guides.com

Operator's Mannal: Milreek 6700P
&
8700P TO Spreaders
Hitch Assembly (continued)
Item# MC Pa#
Qt
Component Description
1 191 14 3/8 x 3/4 Carriage Bolt
2 009 14 3/8 Flan e Nut
3 261204 1 Le Hitch Bracket
4 215323 1 Jack Pin
&
Chain
5 215331 1 Jack Crank
6 261203 1 Right Front Hitch Bracket
7 215320 1 Complete Jack (inudes items 25
&
26)
8 112 2 1 /2 x 1 Carria e Bolt
9 261202 1 Le Fnt Hitch Bracket
10 261199 1 Hitch
11 3 4 1 /2 Flange Nut
12 085 2 1 /2 x 1 Flange Bolt
13 099 4 5/16 Flange Nut
14 261209 1 le
15 274 4 5/16 x 3/4 Caiage Bolt
16 261207 1 Right Hitch Bracket
17 2613 1 Box6700PTO
261187 1 Box8700 PTO
A-3
All manuals and user guides at all-guides.com

Operator's Manual: Millcreek 6700P 8700P PTO Spreaders
Wheel and Hub Assembly
Figure A2 - Wheel and Hub Assembly Parts Det
A-4
6
/
1-86074
All manuals and user guides at all-guides.com

Operator's Manual: Mcreek 6700P & 870 P PTO Spreaders
Wheel
and
Hub Assembly
(continued)
Item# MC Pa#
Component Description
1 215109 2 Complete Hub
2 209 2 Coer Pin
3 2151 4 2 Wheel and Used Tire (includes items 4,11)
215131 2 Model 6700 PTO Wheel and New Tire (includes items 4,11)
215132 Model 8700 PTO Wheel and New Tire (inudes items 4,11)
4 215106 Wheel
5 215205 2 Spindle Nut
6 2152 2 8 Wheel Lug
7 215204 2 Hub (includes items 13, 14)
8 215203 2 Inner Bearing Cone
9 215 02 Hub Seal
10 215215 Dust Cap
11 215122 2 New Model 6700 Tire
215125 2 New Model 8700 Tire
215209 2 Used Tire
12 215229 2 Outer Bearing Cone
13 215277 2 Inner Bearing Cup
14 215278 Outer Bearing Cup
15 201 2 3/4" SAE Washer
A-5
All manuals and user guides at all-guides.com
Other manuals for 6700P
1
This manual suits for next models
1
Table of contents
Other Millcreek Spreader manuals

Millcreek
Millcreek 100P User manual

Millcreek
Millcreek 4300 TURF TIGER User manual

Millcreek
Millcreek 97 User manual

Millcreek
Millcreek 27+ User manual

Millcreek
Millcreek 27ss User manual

Millcreek
Millcreek 6700P User manual

Millcreek
Millcreek 57G User manual

Millcreek
Millcreek 25 User manual

Millcreek
Millcreek 25G Series User manual

Millcreek
Millcreek TURF TIGER 3100 User manual