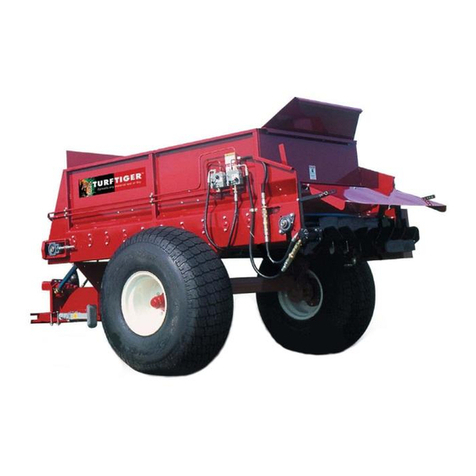
Millcreek TURF TIGER 3100 User manual

I-86219
OPERATOR'S MANUAL
MILLCREEK MODELS:
3100/3200 TURF TIGER®SPREADERS
WARNING: DO NOT assemble, operate, or maintain this equipment without first
reading and understanding the information provided in this manual and the
ADMA Safety Manual for Agricultural Implement Drivelines. Failure to follow
all safety precautions as stated in these manuals may result in serious personal injury
or death.
PUBLICATION DATE: 1/13/09, Rev. 3 MILLCREEK PART # 43827
MillcreekManufacturingCompany
34ZimmermanRoad
Leola, PA 17540
Phone: 1-800-311-1323 / Fax: 717-656-0952
www.millcreekmfg.com


WARRANTY INFORMATION
TRADEMARKS
The Millcreek logo is a trademark of the Millcreek Manufacturing Company. All other brand or product names
mentioned are the registered trademarks or trademarks of their respective owners.
COPYRIGHT
Copyright © 2009 Millcreek Manufacturing Company. All rights reserved. No part of this publication may be
reproduced,ordistributedwithoutthepriorwrittenpermissionofMillcreekManufacturingCompany,34Zimmerman
Road, Leola, PA 17540. Subject to change without notice.
Millcreek Manufacturing Company (hereinafter called the Company) warrants to the original Purchaser, the
Equipment, manufactured by the Company, to be free from defects in material and workmanship under normal
useand service. The Company warrants the construction of the equipment sold herein and will replace at the
Company'sexpense for a period of two years from the dateof delivery to the original Purchaser, any partswhich
provedefectiveasdeterminedunderthetermsofthisLimitedWarranty. The Company obligation under this
Warrantyshall be limitedto replacement orrepair of anyparts thereof, freeof charge, to the original Purchaser,
provided,however,thatthe part(s)tobereplacedorrepaired,shall,withintwoyearsafterdeliverytotheoriginal
Purchaser,be demonstratedto bedefective; whichdetermination shallbe madeby the Company. The said
components or parts must be returned through the Selling Dealer or Distributor directly to the Company with all
transportationcharges prepaid. Notice of defect shall be furnished in writing to the Seller and to the agent through
whomthe machinery was purchased, disclosing in full all known defects and failure in operation and use.
Reasonable time shall be given to the Seller to remedy any such defects and failures.
Likewise,aten(10)year,pro-ratedwarrantyisprovidedonthespray-onpolyurethanelining (applied to internal
sidesofunit,excludingexteriornon-linedsurfaces). Thehighdensity,polyethelenefloorboardsarewarrantedforthe
lifetime of the machine from cracking, rotting, splitting, or peeling.
This Warranty does not cover, under any circumstances, any parts, components, or materials which, in the opinion
of the Seller and the Company, have been subjected to neglect, misuse, alteration, accident, or repaired with parts
other than those manufactured by and obtained from Millcreek Manufacturing Company.
This Warranty does not cover components which are already covered by a separate warranty provided by the
supplier of said parts or components.
This Warranty is made in lieu of all other warranties, expressed or implied, including any warranty of
merchantability and fitness for use and purpose and of all other obligations or liabilities on the Company
part and any implied warranty. The Company neither assumes nor authorizes any other person to assume
for it, any other liability in connection with the sale of this equipment. This Warranty shall not apply to
this equipment or to any part thereof which has been subjected to accident, negligence, alteration, abuse,
or misuse.
The Company makes no warranty whatsoever in respect to accessories or parts not supplied by the Company.
The term "original Purchaser," as used in this Warranty, shall be deemed to mean that person for whom the
equipment is originally supplied. This Warranty shall apply only within the boundaries of the continental United
States.
Under this Warranty, the Company cannot guarantee that conditions existing beyond its control will not affect the
Company's ability to obtain materials or manufacture necessary replacement parts.
The Company reserves the right to make design changes, or changes in specifications at any time, without any
contingent obligation on the part of the Company to purchasers of machines and parts previously sold.


TABLE OF CONTENTS
SECTION 1: INTRODUCTION ................................................................................... 1-1
GuidetothisManual ..........................................................................................................1-1
ForYourSafety... ..............................................................................................................1-1
SafetyLabels ..............................................................................................................1-2
InspectionandWarrantyRegistration..................................................................................1-5
WarrantyRegistration ..................................................................................................1-5
SECTION 2: ATTACHING THE SPREADER TO THE TRACTOR............................ 2-1
ConnectingtheSpreaderHitch totheTractorDrawbar ......................................................2-1
AttachingtheSpreadertotheTractorPTO.........................................................................2-2
SECTION 3: OPERATION & ADJUSTMENT ............................................................ 3-1
UnderstandingTURFTIGER®SpreaderOperation ............................................................3-1
TURFTIGERSpreaderOperatingComponents ..........................................................3-1
GuidelinesforLoadingtheTURFTIGERSpreader......................................................3-1
OperatingtheTURFTIGERSpreader ...............................................................................3-1
AdjustingtheTURFTIGERSpreader ................................................................................3-2
AdjustingTractorGroundSpeed .................................................................................3-2
AdjustingtheMeteringEndgate ...................................................................................3-2
RecommendedSettingsforTURFTIGERSpreaderOperation ...........................................3-3
MaterialWeights(RangePerCubicYard) ...................................................................3-3
MaterialVolumeEstimation .........................................................................................3-3
InitialAdjustments(SampleSettings)............................................................................3-4
SECTION 4: MAINTENANCE & ADJUSTMENT ....................................................... 4-1
GuidelinesforRegularMaintenance ....................................................................................4-1
GeneralMaintenance ...................................................................................................4-1
Wheel/TireMaintenance ..............................................................................................4-1
WheelBearingMaintenance ........................................................................................4-2
ProceduresforSpreaderAdjustment ..................................................................................4-2
CheckingandAdjustingtheFloorApronChain............................................................4-2
CheckingandAdjustingtheApronDriveChains ..........................................................4-3

APPENDIX A: PARTS REFERENCE .........................................................................A-1
GeneralTURFTIGER®SpreaderSpecifications................................................................ A-1
ComponentPartsOrderingInformation ............................................................................. A-2
TURFTIGERSpreaderBoxandHitchAssembly ............................................................. A-2
TURFTIGERSpreaderWheel/HubAssembly .................................................................. A-4
TURFTIGERRearDriveAssembly.................................................................................. A-6
TURFTIGERFrontDriveAssembly................................................................................. A-8
TURFTIGERApronChainandSprocketAssembly ....................................................... A-10
TURFTIGERSafetyShieldsandGuards ........................................................................ A-12
TURFTIGERPTOShaftAssembly ................................................................................ A-14
TURFTIGERMeteringEndgateAssembly ..................................................................... A-16
APPENDIX B: OPTIONAL PARTS REFERENCE .....................................................B-1
SafetyChainAssembly...................................................................................................... B-1
PathmakerAssembly......................................................................................................... B-2
PathmakerMountingInstructions ................................................................................ B-2
SlowMovingVehicleSign................................................................................................. B-4
APPENDIX C: ENGINE DRIVE...................................................................................C-1
TABLE OF CONTENTS

Operator'sManual: Millcreek3100/3200TURFTIGER®Spreaders
1-1
SECTION 1: INTRODUCTION
Guide to this Manual
ThismanualcontainsalltheinformationnecessarytosafelyoperateandmaintaintheMillcreekModel3100and
3200TURFTIGER®Spreaders. ConsulttheTableofContentsforadetailedlistoftopicscovered. You'll
findthismanual'sstep-by-stepprocedureseasytofollowandunderstand. Shouldquestionsarise,please
contactyourMillcreekdealerbeforestartinganyoftheproceduresinthismanual.
NOTE: Proceduresprovidedinthismanualapplytobothspreadermodels(Model3100andModel
3200)unless specificallynotedotherwise.
Regardingtheinformationpresentedinthismanual:
• Allsafety,operating,andservicinginformationreflectscurrentproductionmodelsatthetime
of publication of this manual.
• References made to left, right, front, and rear are those directions viewed when facing the
unit from the rear.
Please read all sections in the manual carefully--including the important safety information found in
this section--before beginning any assembly/operation procedures; doing so allows you to use your
Millcreek Spreader safely with optimal performance.
For Your Safety...
For your safety, Millcreek documentation contains the following types of safety statements (listed here
in order of increasing intensity):
•NOTE: A clarification of previous information or additional pertinent information.
•ATTENTION: A safety statement indicating that potential equipment damage may occur if
instructions are not followed.
CAUTION: A safety statement that reminds of safety practices or directs attention to unsafe
practices which could result in personal injury if proper precautions are not taken.
WARNING: A strong safety statement indicating that a hazard exists which can result in
injury or death if proper precautions are not taken.
DANGER! The utmost levels of safety must be observed; an extreme hazard exists which
would result in high probability of death or irreparable serious personal injury if proper
precautions are not taken.
The best operator is a careful operator. By using common sense, observing general safety rules, and
adhering to the precautions specific to the spreader, you, the operator, can promote safe equipment
operation.

Operator'sManual: Millcreek3100/3200TURFTIGER®Spreaders
1-2
For Your Safety... (continued)
In addition to observing the specific precautions listed throughout the manual, the following general
precautions apply and must be heeded for proper, safe operation.
WARNING: Keep hands and feet from under the spreader at all times. Ensure that you are
safely distanced from any other persons before operating the spreader.
WARNING: DO NOT attempt to operate the spreader in areas with steep inclines, ditches,
large rocks, stumps, or holes which may endanger the operator by upsetting the tractor or cause
damage to the spreader.
WARNING: To prevent serious personal injury and to promote safe spreader operation, keep all
shields in place during operation. Ensure that all mounting hardware is properly tightened.
WARNING: Never clean, adjust, or repair the spreader while the tractor is running.
WARNING: Never get off the tractor while it is in motion, while the spreader is in operation,
and/or while the PTO is engaged.
WARNING: Never wear loose clothing when operating the spreader as it may become caught
in the moving parts of the machine.
WARNING: Never allow children or anyone else to ride on the spreader.
ATTENTION: For proper and safe operation of the spreader, periodically inspect all parts for
excessive wear. Replace worn components with factory-authorized parts.
Safety Labels
FollowingarethelocationsanddescriptionsofalllabelsonyourTURFTIGERspreader. Figure1Ashows
thelocationofALLlabelsonyourspreader. Pleasenotethatsomelabelsdenotemodelnumber,model
description,etc.whileotherscontainimportantsafetymessages.
EachSafetyLabelcontainsan importantsafetymessagestartingwithakeywordasdiscussedearlierinthis
section(e.g.ATTENTION,CAUTION,WARNING,DANGER). Foryoursafetyandthesafeoperationof
yourspreader,reviewalllabelsandheedallsafetymessagesasprintedonthelabels.
Be sure to keep the safety labels clean and readable. If the labels ever become damaged or illegible,
contact your Millcreek dealer for replacements.

Operator'sManual: Millcreek3100/3200TURFTIGER®Spreaders
1-3
Safety Labels (continued)
For your safety, be sure to locate all safety labels and review their content before proceeding with
operating the spreader!
Figure1A - SafetyLabelLocations
TURF TIGER Spreader Safety Labels
Label Part # Description
42792 DANGER- NO riders
42710 WARNING-FlyingDebris
42756 WARNING-Entanglement,DoNOToperatewithoutshields
42772 WARNING-Spreadercombinationsafetylabel-movingparts,readmanual
42778 MillcreekLogoLabel
42781 Model3100SerialNumberLabel
42782 Model3200SerialNumberLabel
42788 Model3100Label
42789 Model3200Label
42790 TURFTIGERSpreaderLogoLabel
42810 Model3100LoadLimitLabel
42811 Model3200LoadLimitLabel
42756
42778
42772
42790
42788-3100
42789-3200
42792
3200-42782
3100-42781 42710
42792
42790
I-86220
3100-42810
3200-42811
42811-3200
42810-3100
Under Shield

Operator'sManual: Millcreek3100/3200TURFTIGER®Spreaders
1-4
Safety Labels (continued)
NO RIDERS
42792
DO NOT STAND in back of machine
while engine is running and/or machine
is operating. Rotating beaters and/or
flying debris can cause serious personal
injury or death.
Approach the rear of the maching ONLY
when all power sources are shut OFF and
all moving parts have stopped. 42710
Entanglement / Flying Debris
Hazards.
Entanglement Hazard.
DO NOT OPERATE without
safety shield in place. Moving
parts can crush and cut.
42756
Moving parts can crush or cut.
STAY CLEAR of machine while engine is
running and/or machine is operating.
Keep hands, feet, clothing, and hair away from
operating parts.
Never adjust, lubricate, or clean machine while
engine is running and/or machine is operating.
Never operate machine without safety shields in
place.
Read and understand operator's manual and
safety labels before operating or servicing the
machine.
Failure to follow these warnings may result in
serious injury or death.
DO NOT EXCEED
3750 lbs PAYLOAD
10 mph max loaded
DO NOT EXCEED
3000 lbs PAYLOAD
10 mph max loaded
Model 3100
Model 3200

Operator'sManual: Millcreek3100/3200TURFTIGER®Spreaders
1-5
Inspection and Warranty Registration
MostspreadermodelsareshippedfromyourMillcreekDealercompletelyassembledandreadyforoperation.
Inspectyournewspreaderthoroughlyuponreceipttoensurethatithasbeenshippedtoyouinasatisfactory
manner. ImmediatelynotifythefreightcompanyandyourMillcreekdealerincaseofshippingdamage,
shortage(s),and/orerrors.
TheTURFTIGERSpreaderissuppliedwiththefollowingoperatingfeatures/components(standard):
• AdjustableMeteringGate
• LoadingFlares
• PTOShaft
• Jack
• 26.5x14x12(4-ply)TurfTires
NOTE: Ifthespreaderhasnot beenpre-assembled,pleaserefer totheSupplementalAssembly
Instructions. PleasecontactyourlocalMillcreekDealerforassistanceasneeded.
Yourspreadershipmentmayalsoincludethefollowingoptions:
• SafetyChain
• SlowMovingVehicleSign
• Pathmaker
• EngineDrive*
InstructionsforassemblingtheseitemsareprovidedinAppendixBandCatthebackofthismanual. Please
contactyourlocalMillcreekDealerforassistanceasneeded.
*NOTE: IfyouorderedaModel3100EngineDrive,pleasealsorefertotheSupplementalInstructions,
MillcreekPart#43837,foradditionalimportantinformationabouttheoperationofthatunit.
Followinginspectionofyournewspreader,locatetheMillcreekWarrantyCardintheliteraturepacket
shippedwithyourspreader. Forproperwarrantyregistration,Millcreekrequiresthatyoufilloutthewarranty
registrationcardandreturnitwithin30daysto:
MILLCREEK WARRANTYREGISTRATION
MillcreekManufacturingCompany
34ZimmermanRoad
Leola, PA 17540
Foryoursafety, be sure tolocate all safety decalsand review their contentbefore proceeding with
operatingthespreader.

Operator'sManual: Millcreek3100/3200TURFTIGER®Spreaders
1-6

Operator'sManual: Millcreek3100/3200TURFTIGER®Spreaders
2-1
SECTION 2: ATTACHING THE SPREADER
TO THE TRACTOR
Figure 2A - Specifications for Connecting the Spreader/Tractor Hitch
Connecting the Spreader to the Tractor
Thespreaderhitchisdesignedtoworkwithastandardizedtractorhitch. Toconnectthespreaderhitchtothe
tractorhitch,refertoFigure2Aandadheretothefollowingguidelines:
• Adjust the drawbar so that it is 13 to 20 inches above the ground as shown in Figure 2A.
•ForPTOunitsonly: Extendorshortenthetractorhitchtoobtainthehorizontaldistancefromthe
endofthetractorpowertake-off(PTO)shafttothecenterofthehitchpinhole(Figure2A).
• Adjusttheheightofthespreaderhitchwiththejacksothetractordrawbarmatchestheheight
of the spreader hitch.
• Back the tractor into the hitch until the holes line up.
• Fasten the spreader hitch to the drawbar with a hitch pin that fits securely (i.e. so that it will
notcomeoutduringspreaderoperation)andlockinplacewiththeclipasshown.
• Remove the weight from the jack by lowering the spreader hitch on the drawbar.
• Swingthejacktoitshorizontalpositionandlockitinpositiontoprovidemaximumground
clearance.
•ATTENTION: Besure the3-pointhitchbrackets onthetractorare adjusted toclearthe
spreaderhitchwhileturning,orequipmentdamagemayoccur.
WARNING: Damagetothespreaderorothervehicle,aswellasinjurytotheoperator,mayoccurif
aproperly-sizedhitchpinisnotinstalledasrecommended. Notethattheinstallationofthesafetyclip,
asnotedinFigure2A, isalsorequiredforsafespreaderoperation.
ATTENTION: AnimproperlylocatedhitchpointmaycausedamagetotheuniversaljointsofthePTO. The
recommendedlengthofthePTOshaftshouldrangefrom36to51inchescentertocenterofthe"U"joints.

Operator'sManual: Millcreek3100/3200TURFTIGER®Spreaders
2-2
Attaching the Spreader PTO to the Tractor PTO
NOTE: If you have a Model 3100 Engine Drive, these instructions do NOT apply.
1. ReleasetheballbungeethatsecuresthePTOtothePTOHolder.
2. FolddownthePTOHoldersoitlaysagainstthehitch.
CAUTION: FailuretofolddownthePTOHolderbeforethePTOisconnectedtothetractorwill
resultinequipmentdamage.
3. AlignthePTOsplinesonthespreaderwiththePTOsplinesonthetractor.
4. PullbacktheslidecollaronthePTOyoke,andslidethespreaderPTOassemblyontothe
tractor PTO shaft. Be sure the slide collar snaps forward to indicate that the spreader PTO
assembly is properly secured to the tractor PTO shaft.
WARNING: MakesurethatthePTOsafetychainisattachedtooneofthehitchbracketsonthefront
of the spreader (fasten to upper unused hole in bracket). Failureto securethe PTO safety chain
willallowthesafetyshieldtorotate. Operatingthespreader withoutthesafetyshield inproperposition
mayresultinseriouspersonalinjuryordeath.

Operator'sManual: Millcreek3100/3200TURFTIGER®Spreaders
3-1
SECTION 3: OPERATION & ADJUSTMENT
Understanding TURF TIGER®Spreader Operation
ProperandsafeoperationoftheMillcreek3100/3200TURFTIGERspreadersrequires: (1)beingfamiliar
withthespreaderoperatingcomponentsand(2)heedingallsafetyprecautionsasstatedinthismanual.
NOTE: If you have a Model 3100 Engine Drive, be sure to also review the important information on operation
(specific to that unit) provided in the separate addendum, Millcreek Part #43837. Please disregard any
discussion in the following pages with regard to PTO shafts or PTO operation.
TURF TIGER Spreader Operating Components
TheTURFTIGERspreadersaresuppliedstandardwithaPTOshaft,whichispoweredthroughthetractor
drivetrain. ThePTOpowerstheapronchainandthebeater. ForfurtherinformationonengagingthePTO
driveline,pleaserefertothefollowingsection,OperatingtheTURFTIGERSpreader.
Thestandardadjustablemeteringendgateiseasytoopen/closeandadjustasneededforthedesired
spreadingapplication.
Guidelines for Loading the Spreader for Operation
• MaximumTURFTIGERpayloadis3,000poundsforModel3100and3,750poundsfor
Model 3200.
•ATTENTION: NEVERstorematerialinthespreaderbetweenunloadingtimesduringcriticalcold
weathermonthswhenafrozenloadcouldresultinsevereequipmentdamage(i.e.tornfloorapron
chain). DONOTstorewetmaterialinthespreader(orkeepthespreaderoudoorswithmaterialin
it)--doingsowillacceleraterustingofthesteel. Beawarethatstoringmaterialinthespreaderalso
makesthematerialdifficulttounload(i.e.itmaysolidify/harden).
WARNING! Before proceeding with operation of the spreader, review all safety
statements as provided in Section 1 of this manual.
WARNING: Topreventseriouspersonalinjury,ensurethatALLsafetyshieldsareinplaceonthe
spreaderbeforestartingoperation. NEVERoperatethespreaderwithoutALLsafetyshieldsinplace.
WARNING: Topreventseriouspersonalinjuryand/orequpimentdamage,DONOTexceed10mph
whentransportingaloadedspreader.
1. Loadthespreaderaccordingtotheguidelinesprovidedinthissection.
2. Determinethedesiredopeningoftheadjustablemeteringendgate(upto7inches),accordingto
thedesiredspreadingapplication. PleaserefertotheRecommendedSettingschartsprovidedat
theendofthissection. (Procedure continued on the following page.)
Operating the TURF TIGER Spreader

Operator'sManual: Millcreek3100/3200TURFTIGER®Spreaders
3-2
3. ActivatethePTO(thisactionmayvarybytractor):
Fornewertractors: withthetractoratidle,simplyactivatetheswitchtoengagethePTO.
ATTENTION: DO NOT engage the PTO while running at full throttle; doing so may tear
thefrontdrivebeltorcauseittojumpoffthepulley.
Foroldertractors: Withthetractoratidle,decompresstheclutchandactivatethetractorPTOlever.
ReleasetheclutchslowlysothePTOshaftwillstartthespreaderpaddlesandapronchain.
NOTE: Toprevent"pilingup"ofmaterial(orprematuredischarge)atinitialstartup,putthetractorin
gearandbeginforwardmotionimmediately.
4. Forbestresults,runthetractorthrottleatthe540rpmPTOshaftspeedandregulatetheground
speedtonomorethan6mph.
5. Observethespreadingapplicationanddetermineifadjustmentsarerequired. Ifadjustmentsare
desired,pleaserefertothefollowinginformationforAdjustingtheTURFTIGER. Thevariables
affecting the application rate are (a) tractor ground speed and (b) metering gate opening.
6. Whenthespreaderboxisempty,stopthePTObydisengagingthelever/switchonthetractorandlower
theendgate.
7. RefertoSection4inthismanualformaintenancetobeperformedfollowingoperationofthe
spreader.
IMPORTANT! Be aware that it may be necessary to re-tighten bolts after a few hours of initial
operation -- watch and listen for any loose components. Be sure to check the wheel bolts for proper
torque (75-80 ft. lbs.)
Operating the TURF TIGER Spreader
Adjusting Tractor Ground Speed
Usingthetachometeronthetractor,selectthetractorgearthatwillgiveyouthedesiredgroundspeed(mph)
withtheenginespeeddelivering540RPM(PTOspeed),whichisrequiredforallTURFTIGERspreader
models. Groundspeedcanrangefrom2to8mph,dependingonthedesiredapplicationrate.
Adjusting the Metering Endgate
Themaximumopeningforthemeteringendgateis7inches. Therecommendedendgatesettingfor
normaloperationis3to6inches.
Toadjusttheopeningofthemeteringendgate:
• Pushdownonthespring-loadedleverandHOLD.
• Use the handle on the metering gate to rotate the gate to the desired opening.
• Release the spring-loaded lever to lock the metering gate in the desired position.
Adjusting the TURF TIGER Spreader for Optimal Operation
CAUTION: When spreading sand, be sure to make a "dry run" every third load to
allow accumulated sand to dislodge from the apron chain. Failure to do so will result
in extreme tension in the chain, which may cause serious damage to the unit.

Operator'sManual: Millcreek3100/3200TURFTIGER®Spreaders
3-3
Recommended Settings for TURF TIGER Spreader Operation
CAUTION: ForsafeoperationoftheTurfTigerspreader,DONOTexceedtheloadcapacitiesfor
thematerialslistedinthefollowingcharts/specifications. Themaximumpayloadis3,000poundsfor
Model 3100 and 3,750 pounds for Model 3200.
Material Weights (Range Per Cubic Yard)
Material Volume Estimation
Conversion Factors: One cubic yard = 27 cubic feet
One square yard = 9 square feet
Estimation Formula: Cubic yards of material required to cover a specified area
Area to cover X Material X 0.0031 = Cubic Yards of Material
(square feet) (depth in inches) Needed
Example: Determine the amount of material needed to cover 5,000 square feet with a 1/2" depth.
(5,000) X (0.5 inches) X 0.0031 = 7.75 cubic yards
Quantity Needed to CoverDepth of Material 1,000 Square Feet One Acre
1/8” 0.375 cubic yds. 17 cubic yds.
1/4" 0.75 cubic yds. 34 cubic yds.
1/2" 1.5 cubic yds. 67 cubic yds.
1” 3.0 cubic yds. 134 cubic yds.
2” 6.0 cubic yds. 269 cubic yds.
3” 9.0 cubic yds. 402 cubic yds.
Material Consistency Max. Weight
Max. Yds. (Wet)
Spreader
Model Material Dry Wet
Model
3100 Model
3200
Sand 2000 lbs./cu. yd. 2700 lbs./cu. yd. 1.1 cu. yd. 1.3 cu. yd.
Topdress Mix
(80% sand + 20% peat) 1600 lbs./cu. yd. 2200 lbs./cu. yd. 1.3 cu. yd. 1.7 cu. yd.
Compost 900 lbs./cu. yd. 1800 lbs./cu. yd. 1.6 cu. yd. 2.0 cu. yd.
Model 3100 or
3200 with
Loading Flares
(hauling 2-3 cubic
yards)
Mulch 600 lbs./cu. yd. 1400 lbs./cu. yd. 2.1 cu. yd. 2.6 cu. yd.

Operator'sManual: Millcreek3100/3200TURFTIGER®Spreaders
3-4
Initial Adjustments for the TURF TIGER Spreader (Sample Settings)
Recommended Settings for TURF TIGER Spreader Operation (continued)
SampleApplication: SandwithSaberTooth™Beater(approx.10ft.wide,variabledepth)
NOTE: Thesettingsprovidedinthischartwillchangewithdifferentmaterials. Finetuningoperationisbest
accomplishedbyvaryingthegroundspeedandselectionofgears. MaintainingaPTOspeedof500-540rpm
willprovideoptimalspreading. Beawarethatthegearselectionmayvarywithdifferenttractors.
Saber Tooth Beater
(10 ft. wide)
Turf Tiger
Adjustment 1/8” depth 1/4" depth 1/2" depth
Ground Speed
(Approx. mph)
(Approx. tractor gear)
6 mph
(high range)
(low gear)
4 mph
(low range)
(med. gear)
3 mph
(low range)
(low gear)
Metering Gate
Opening 3” 5” 7”
Tractor PTO
(Engine approx. 2000-
2200 rpm)
540 rpm 540 rpm 540 rpm

Operator'sManual: Millcreek3100/3200TURFTIGER®Spreaders
4-1
SECTION 4: MAINTENANCE & ADJUSTMENT
Guidelines for Regular Maintenance
WARNING: Allshieldsmustbereplacedaftermaintenanceoradjustmentproceduresare
performed. Failuretodosocouldresultinseriouspersonalinjuryordeath.
PerformingregularmaintenanceontheTURFTIGERSpreaderwillhelpensureoptimalperformance. Please
followtheseguidelinesformaintainingyourspreader.
General TURF TIGER Maintenance
• Cleanthespreaderonceaweekandbeforestoringtheunitforanextendedperiodoftime.
ATTENTION: NEVERstorematerialinthespreaderbetweenunloadingtimesduringcriticalcold
weathermonthswhenafrozenloadcouldresultinsevereequipmentdamage(i.e.tornfloorapron
chain). DONOTstorewetmaterialinthespreader(orkeepthespreaderoutdoorswithmaterialin
it)--doingsowillacceleraterustingofthesteel. Beawarethatstoringmaterialinthespreaderalso
makesthematerialdifficulttounload(i.e.itmaysolidify/harden).
• Checkthespreadereachtimeitisusedforloose,bent,brokenormissingparts.
ATTENTION: Duringoperation,listenforabnormalsoundswhichmightindicateloose
partsorotherequipmentdamage. Correctanypartsproblemsimmediately;expandedparts
viewsofallspreaderassembliesareprovidedintheAppendixesatthebackofthismanual.
ATTENTION: Forsafeandproperoperationofthespreader,adheretothefollowing
specificationsfortighteningthehitchhardware;failuretotightenallhitchhardwaresecurelymay
resultinequipmentdamage.
Hardware TorqueSpecification
1/2" 60 ft.lbs.
3/8" 25 ft.lbs.
5/16" 15ft.lbs.
• CheckandgreasethelubefittingatthePTO(atthefrontofthespreader)onceayear. Removethe
telescopingshaft,clean,andaddalightcoatingofgrease.
• Inspectthesafetychainregularlytochecktheconditionofthelinksandlocking/hooking
mechanisms;replacethechainassoonasweakness/breakageisnoted.
Wheel/Tire Maintenance
• Onceamonth,checkthewheellugbolttorque. Therecommendedtorqueis75-80ft.lbs.
• Checkthetiresandmaintainpropertirepressure:
• 18PSIforTurfTires
ATTENTION: Whenstoringthespreaderforaperiodoftime,blockupthespreadertoremove
weightfromthetires. Doingsohelpstopreventanypossibledamagetothetires.
CAUTION: When spreading sand, be sure to make a "dry run" every third load to
allow accumulated sand to dislodge from the apron chain. Failure to do so will result
in extreme tension in the chain, which may cause serious damage to the unit.

Operator'sManual: Millcreek3100/3200TURFTIGER®Spreaders
4-2
Nut
Guidelines for Regular Maintenance (continued)
Procedures for Spreader Adjustment
Foroptimalspreaderfunctioning,Millcreekrecommendsthatyouperiodicallycheckthetensionofthefloor
apronchainandthedrivechains. Proceduresforcheckingandadjustingthesecrucialoperatingcomponents
areprovidedinthissection.
Figure4A-AdjustingtheFloorApronChainforProperTension
Checking and Adjusting the Floor Apron Chain
Therecommendedfloorapronchaintensionisachievedwhentheapron'slowestpointis 4to4-1/2inches
belowtheframe(behindthetire).
• Checkthedistancebetweentheapronchainandthebottomofthesidesheetattheapron'slowest
point(justbehindthewheels).
• Ifthedistanceismorethansix(6)inches,thechainmustbeadjusted(tightened).
Adjustingthefloorapronchainisaccomplishedbytighteningtheapronchainadjustmentnutsonthe
spreaderbox(lowerfrontleftandright).
• Usea9/16"wrenchtotightentheadjustmentnutonthelowerleft/rightfrontofthespreaderboxas
showninFigure4A.
• Observethechainpositioningwithrespecttothefloor/apron.
• Make sure that the chains on each side of the apron are equally taut.
Wheel Bearing Maintenance
• Adjustthewheelhubbearingsafter100loadsandonceeachseasonthereafter.
• Useajacktoraisethespreadertoremoveweightfromthewheel.
CAUTION: Besuretoblockupthespreadertopreventpersonalinjurywhile
workingonthewheels.
• Rotatethewheelandtorquethewheelhubbearingsto25ft.lbs.
• Backoffthenutoneflat,plusenoughtoinstallthecotterpin(1/6turnmin.,
1/3turnmax.)
This manual suits for next models
1
Table of contents
Other Millcreek Spreader manuals

Millcreek
Millcreek 27+ User manual

Millcreek
Millcreek 27ss User manual

Millcreek
Millcreek 6700P User manual

Millcreek
Millcreek 100P User manual

Millcreek
Millcreek 6700P User manual

Millcreek
Millcreek 25 User manual

Millcreek
Millcreek 57G User manual

Millcreek
Millcreek 25G Series User manual

Millcreek
Millcreek 97 User manual

Millcreek
Millcreek 4300 TURF TIGER User manual