Miller Edge MEL-II User manual

-----------P.O. Box 159 • West Grove, PA 19390 • 800-220-3343 • 610-869-4422 • Fax: 610-869-4423 • www.milleredge.com
6809 South Harl Avenue, Suite A • Tempe, AZ 85283 • 800-887-3343 • 480-755-3565 • Fax: 480-755-3558
MEL-II-K10_Inst_20170323
Model: MEL-II-K10
INSTALLATION INSTR CTIONS
IMPORTANT:
READ AND NDERSTAND ALL INSTR CTIONS BEFORE BEGINNING INSTALLATION
The Monitored Edge Link II (MEL-II) transmitter/receiver system is intended to provide a wireless connection
between a monitored safety edge and a motorized operator that controls the associated door. MEL-II meets
the UL 325 requirements for monitored devices and has been certified as a UL 325 Recognized Component. It is
designed for use on operators that comply with UL 325 using a 10K (T2) terminated sensing edge.
Please note: It may be easier to pre-learn the Transmitter to the Receiver prior to physically mounting the devices.
A Miller Edge 10K Sensing Edge is not needed for the learn process.
1. Apply power to the receiver using a plug-in 12-24V wall transformer.
2. Insert the two AA batteries into the Transmitter battery holder.
3. Press CH1 learn button until the yellow status LED starts to blink rapidly (this is now learn mode).
4. Within 60 seconds, press the test button on the Transmitter and observe on the Receiver that the CH1 and
status LEDs are blinking rapidly and alternately. Release Transmitter test button.
5. The CH1 red LED will continue to blink rapidly until the 10K sensing edge is connected to the Transmitter.
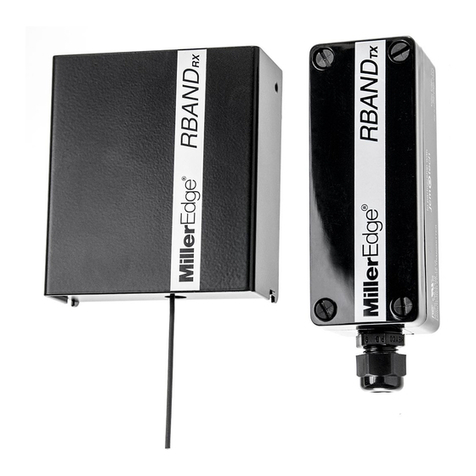
MEL-II-RX10
MEL-II-TX10
MEL-II-K10 COMMERCIAL DOOR INSTALLATION
Kit Contents:
MEL-II-TX10 Transmitter unit•
MEL-II-RX10 Receiver unit•
Receiver antenna •
(2) AA lithium batteries •
(4) #6 pan head Transmitter mounting screws•
1-Parts List
Required:
1/8” flat blade screwdriver•
1/4” flat blade screwdriver•
Miller Edge 10K (T2/blue band) Sensing Edge•
Recommended:
VOM for test purposes•
Mounting screws as required for Receiver•

P.O. Box 159 • West Grove, PA 19390 • 800-220-3343 • 610-869-4422 • Fax: 610-869-4423 • www.milleredge.com
6809 South Harl Ave., Suite A • Tempe, AZ 85283 • 800-887-3343 • 480-755-3565 • Fax: 480-755-3558
3-Learn Mode
3-1. Prior to mounting the Transmitter, remove the lid and insert the batteries, noting their polarity. The
green power LED should blink once every second. Press the test button, next to the green power
LED, and note that the green power LED flashes rapidly 3 times.
3-2. To enter learn mode for channel 1, press and hold the learn button on the Receiver for ~2 seconds
until the yellow status LED blinks rapidly and both red CH 1 and CH 2 LEDs turn on.
3-3. Press the Transmitter test button for ~2 seconds. Note that the yellow status LED and the red CH 1
LED on the Receiver blink rapidly. Immediately release the Transmitter test button. Channel 1 is now
programmed. CH 1 LED will be blinking rapidly (indicating no edge has been connected) until your
10K sensing edge is connected to the Transmitter. Press the Transmitter test button again and note
that the red CH 1 LED on the Receiver turns on solid.
3-4. To start over or erase programming, press and hold both test buttons for ~3 seconds until the yellow
status LED stays on steady. CH 1 LED will be blinking and CH 2 will go out after ~15 seconds and
release. Both red CH 1 and CH 2 LEDs will blink slowly. Restart the learn procedure.
ANTENNA
8-PIN
CONNECTOR
MEL-II-RX10
MEL-II-RX10 CONNECTOR DIAGRAM
2-1. Turn the power off to the commercial door operator.
Mount the Receiver on or near the operator.
2-2. Attach the antenna to the Receiver. The antenna
should be in line-of-sight of the Transmitter.
2-3. On the 8-pin connector, connect the power source
(12-24 VAC/DC) to the terminals marked power (not
polarity sensitive). Next, connect the channel 1 COM
and the pulsed terminals to the operator photo eye
inputs (not polarity sensitive). The output select dip
switch 1 must be set to P. Switch 2 has no function.
2-4. Apply power to the Receiver. Observe that the green
power and yellow status LEDs are on. The red CH 1
LED will blink, and the CH 2 LED will be on solid. After
15 seconds, the CH 2 LED will go out. If the yellow
status LED is blinking randomly, the Transmitter has
been learned and is working.
2-5. In limited instances, if you need to utilize the relay
output of Ch 1, instead of the pulsed output, simply
utilize the 10K/N.O. and COM terminals (instead of the
pulsed and COM) and set the output select to “R”.
FOR NORMALLY OPEN O TP T
The P18 jumper on the Receiver circuit board will need to be
cut. Simply remove the 4 screws on the rear of receiver and
then remove 4 standoffs to access P18, which is located
near the 8-pin connector.
2-Install Receiver

Frequency: 916 MHz, FSK modulation
Indicator Lights: Green LED: Tx Data, flashes upon activation and release of the
external safety device to indicate transmission. Flashes every 2 seconds to indicate monitoring.
Mounting: 4 corner screws (provided)
Power Source: Batteries: 2 AA, 1.5v lithium* or alkaline
*Recommended for extended life in prolonged cold environments. Life expectancy: 2 years
Dimensions: 1.80”W x 4.78”H x 1.75”D
Test Button: Momentary push button—forces the transmission of the Transmitter's address
and sensor status. Reports the edge is activated.
5-Specifications and Controls: Transmitter Unit
P.O. Box 159 • West Grove, PA 19390 • 800-220-3343 • 610-869-4422 • Fax: 610-869-4423 • www.milleredge.com
6809 South Harl Ave., Suite A • Tempe, AZ 85283 • 800-887-3343 • 480-755-3565 • Fax: 480-755-3558
TOP LID
SCREWS
TRANSMITTER
PCB
STRAIN RELIEF
FITTING
(4) CORNER
MO NTING HOLES
TEST B TTON
REMOVABLE
TERMINAL BLOCK
4-Install Transmitter and Test
4-1. Strip back approximately 4 inches of outer covering of sensing edge cable, then feed through
Transmitter strain relief fitting. Connect the two edge wires to the removable terminal SE1 (not
polarized). Dress the wires next to the battery holder and tighten the strain relief. Mount unit utilizing the
corner mounting holes at the 4 corners of the Transmitter box. Place lid onto Transmitter, noting
alignment pin.
4-2. Test all safety edges for functionality.
MEL-II-TX10 ENCLOS RE & PCB
ALIGNMENT PIN
GREEN LED

Transmitter:
MODEL: MEL-II-TX10
FCC ID: OYE-MGL916
THIS DEVICE COMPLIES WITH PART 15 OF THE FCC RULES. OPERATIONS IS SUB ECT TO THE FOLLOWING TWO
CONDITIONS:
1) THIS DEVICE MAY NOT CAUSE HARMFUL INTERFERENCE AND
2) THIS DEVICE MUST ACCEPT ANY INTERFERENCE RECEIVED INCLUDING INTERFERENCE THAT MAY CAUSE
UNDESIRED OPERATION.
Receiver:
MODEL: MEL-II-RX10
This equipment has been tested and found to comply with the limits for a Class B digital device, pursuant to Part15 of the FCC Rules.
These limits are designed to provide reasonable protection against harmful interference in a residential installation. This equipment
generates, uses and can radiate radio frequency energy and, if not installed and used in accordance with the instructions, may cause
harmful interference to radio communications. However, there is no guarantee that interference will not occur in a particular installation. If
this equipment does cause harmful interference to radio or television reception, which may be determined by turning the equipment off
and on, the user is encouraged to try to correct the interference by one or more of the following measures:
1- Re-orient or relocate the receiver antenna
2- Increase the separation between the equipment and the receiver
3- Connect the equipment into an outlet on a circuit different from that to which the receiver is connected.
4- Consult the dealer or an experienced radio/TV technician for help.
Changes or Modifications Not Expressly Approved By The Party Responsible For Compliance Could Void The User’s Authority To
Operate The Equipment.
7-FCC Compliance
P.O. Box 159 • West Grove, PA 19390 • 800-220-3343 • 610-869-4422 • Fax: 610-869-4423 • www.milleredge.com
6809 South Harl Ave., Suite A • Tempe, AZ 85283 • 800-887-3343 • 480-755-3565 • Fax: 480-755-3558
6-Specifications and Controls: Receiver Unit
Power: 12-24 VAC/DC nominal (8-30 V max); power may be supplied from the operator or
alternatively from an external supply
Cable Connections: Screw clamp type terminal blocks for 18-26 AWG wire
Learn Buttons: Used to associate a Transmitter with the desired receiver channel
Output Selector: Select “P” for Pulsed, or “R” for Relay (10K or N.O.) mode; switch 2 is not used
Dimensions: 4”W x 4.74”H x 1”D
Indicator Lights:
Green LED: Indicates power•
– On solid: Device is powered on
Yellow LED Blinks off: Indicates reception of message with our selected address•
– On solid: No Transmitters Learned
– Fast blink: Termination fault
– Random blink: Transmitters are Learned and sending
Red LED: Indicates safety device is active•
– On solid: Active sensing edge
– Fast blink: Termination fault
– Medium blink: Comunications fault
– Slow blink: Low battery
– Off: No faults (Note: CH 2 LED will go off after ~15 seconds if not used)
Connections:
• Power (2)
• Output (3 per channel – COM, Pulsed, N.O./10K)
Modes: Refer to your operator’s manual
• Pulsed (photo eye)
• N.O. (Normally Open)
• 10KResistor
This manual suits for next models
1
Table of contents
Other Miller Edge Gate Opener manuals
Popular Gate Opener manuals by other brands
Serai
Serai SR 24.85/24A F installation manual

Riello Elettronica
Riello Elettronica CARDIN ACE FAST Instruction handbook

CAME
CAME F500 installation manual
Chamberlain
Chamberlain Elite SL3000 installation manual

Mighty Mule
Mighty Mule TS571W installation manual
O&O
O&O ZERO14-230V Installation, use and maintenance
