manuals.online logo
Brands
  1. Home
  2. •
  3. Brands
  4. •
  5. Milwaukee
  6. •
  7. Tools
  8. •
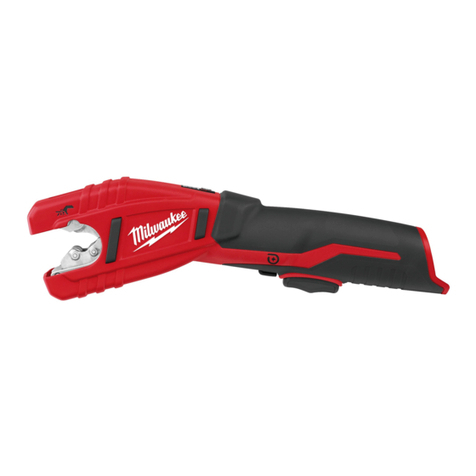
  9. Milwaukee 49-16-2774 User manual

Milwaukee 49-16-2774 User manual

WARNING
To reduce the risk of injury,
read and understand this in-
struction sheet, as well as the operator’s
manual packaged with your power tool, bat-
tery pack, and charger.
REPLACEMENT BLADES
LAMES DE RECHANGE
CUCHILLAS DE REEMPLAZO
IMPORTANT SAFETY
INSTRUCTIONS
READ AND SAVE THESE
INSTRUCTIONS.
Keep hands away from all cut-
ting edges and moving parts.
Laceration and amputation can
occur.
ASSEMBLY
WARNING
Always remove battery pack
before changing or removing
accessories. Only use accessories speci-
cally recommended for this tool. Others may
be hazardous.
Blades are sharp. Keep hands away from cut-
ting edge. Laceration can occur.
Changing the Blades
Replace the blades when they become chipped or
damaged. Always replace blades as a set.
1. Pull the trigger to close the blades slightly. The
retaining rings must be exposed.
2. Remove the battery pack.
3. Use a wrench or pliers to remove the blade
nuts and remove the blade bolt.
4. Remove the retaining ring and pull out the pin
from one of the blades.
5. NOTE: Take notice of the blade orientation so
the new blades can be installed the same way.
The blades should be oriented so the at sides
contact and the bevels face away from each
other, like a pair of scissors.
6. Carefully remove the blade.
7. Install the new blade in the same orientation.
8. Slide the pin through the blade and bracket.
Replace the retaining ring.
NOTE: Take notice of the pin
Flat side of blade
Retaining ring
orientation so that the retain-
ing ring is on the at side of
the blade.
9. Repeat steps 4 to 8 for the other blade.
10.Insert the blade bolt.
11. Thread the inner blade nut onto the blade bolt
and hand-tighten.
12.Thread the outer blade nut onto the blade bolt.
Holding the inner blade nut motionless, tighten
the outer blade nut to 130 in-lbs to lock the nuts
together.
Cat. No. / No de cat.
49-16-2774
AVERTISSEMENT
Pour réduire le risque
de blessure, lisez et
comprenez ce manuel, ainsi que le manuel
fourni avec votre outil électrique, batterie et
chargeur.
CONSIGNES DE SÉCURITÉ
IMPORTANTES
LIRE ET CONSERVER CES
INSTRUCTIONS.
Garder les mains à l’écart des
rebords tranchants et des
pièces en mouvement. Une
lacération ou une amputation
peut se produire.
ASSEMBLÉE
AVERTISSEMENT
Il faut toujours retirer la
batterie et verrouiller la
détente de l’outil avant de changer ou d’enlever
les accessoires. L’emploi d’accessoires autres
que ceux qui sont expressément recomman-
dés pour cet outil peut comporter des risques.
Les lames sont tranchantes. Garder les mains
à l'écart du rebord tranchant. Une lacération
peut se produire.
Remplacement des lames
Remplacer les lames ébréchées ou endomma-
gées. Les lames doivent toujours être remplacées
en paires.
1.
Tirer lagâchette pourfermer légèrementles lames.
Les anneaux de retenue doivent être exposés.
2. Retirer le bloc-piles.
3. Use a wrench or pliers to remove the blade
nuts Utiliser une clé ou une pince pour retirer
les écrous et les boulons des lames.
4. Retirer l’anneau de retenue et tirer la goupille
de l’une des lames.
5. REMARQUE : Noter l’orientation des lames
pour installer les nouvelles lames de la même
façon. Les lames doivent être orientées de
façon que les côtés plats soient en contact et
les biseaux doivent faire face à l’opposé l’un
de l’autre, comme une paire de ciseaux.
6. Retirer la lame avec précaution.
7. Installer la nouvelle lame dans la même direction.
NOTE: To ensure proper installation, perform a
test cut. If the blades bind when opening, loosen
the blade nuts slightly until the blades no longer
bind.
ADVERTENCIA
Para reducir el riesgo de lesiones, lea y comprenda este manual, así como el
manual del operador empaquetados con su herramienta, batería y cargador.
INSTRUCCIONES IMPORTANTES DE SEGURIDAD
LEA Y GUARDE ESTAS
INSTRUCCIONES.
Mantenga las manos alejadas
de todos los bordes de corte y
partes movibles. Puede sufrir
una laceración y amputación.
ENSAMBLAJE
ADVERTENCIA
Para reducir el riesgo de
lesiones, extraiga siempre
la batería antes de acoplar o desacoplar ac-
cesorios. Utilice únicamente accesorios es-
pecícamente recomendados para esta her-
ramienta. El uso de accesorios no recomen-
dados podría resultar peligroso.
Las hojas están aladas. Mantenga las manos
alejadas del borde de corte. Pueden ocurrir
laceraciones.
Cambiar las cuchillas
Reemplace las cuchillas cuando se hayan astil-
lado o dañado. Siempre reemplace las cuchillas
en conjunto.
1. Jale el accionador para cerrar ligeramente las
cuchillas. Los anillos de retención deben estar
expuestos.
2. Retire las baterías.
3. Use una llave inglesa o pinzas para retirar las
tuercas de la cuchilla y retirar el perno de la
cuchilla.
MILWAUKEE TOOL
13135 West Lisbon Road • Brookeld, Wisconsin, USA 53005
Printed in China
58-22-2774d2 01/17 961016212-02(A)
4. Retire el anillo de retención y jale el pasador
de una de las cuchillas.
5. NOTA: Tenga en cuenta la orientación de la
cuchilla para que las nuevas cuchillas puedan
instalarse del mismo modo. Las cuchillas de-
ben estar orientadas de modo que los lados
planos tengan contacto y los biseles se vean
en lado contrario, como un par de tijeras.
6. Retire la hoja cuidadosamente.
7. Instale la nueva cuchilla en la misma orientación.
8. Deslice el pasador por la cuchilla y el soporte.
Vuelva a colocar el anillo de retención.
NOTA: Revise la orientación
Lado plano de
la hoja
Anillo de
retención
del broche para que el anillo
de retención esté en el lado
plano de la hoja.
9. Repita los pasos 4 a 8 para la otra cuchilla.
10.Inserte el perno de la cuchilla.
11. Enrosque la tuerca de la hoja interior al perno
de la hoja y apriete con la mano.
12.Ensarte la tuerca de la cuchilla exterior en el
perno de la cuchilla. Sosteniendo la tuerca de
la cuchilla interior sin mover, apriete la tuerca
de la cuchilla exterior a 15 N-m (130 in-lbs)
para cerrar las tuercas juntas.
NOTA: Para garantizar la instalación correcta,
realice un corte de prueba. Si la hoja se dobla al
abrirla, aoje ligeramente las tuercas de la hoja
hasta que las hojas ya no se doblen.
8. Faire glisser la goupille à travers la lame et le
support. Replacer l’anneau de retenue.
REMARQUE : Remarquez
Côté plat de la lame
Anneau de
retenue
l'orientation de la goupille
pour que l'anneau qui reste
soit positionné sur le côté plat
de la lame.
9. Répéter les étapes de 4 à 8
pour l’autre lame.
10.Insérer le boulon de la lame.
11.Vissez l'écrou de l'intérieur de la lame sur le
boulon de la lame et serrez à la main.
12.Fileter l’écrou externe de la lame sur le boulon. En
maintenant l’écrou interne de la lame en place,
serrer l’écrou externe de la lame à 15 N-m (130
in-lbs) pour verrouiller les écrous ensemble.
REMARQUE : Pour vous assurer que le tout soit
bien installé, faites une coupure d'essai. Si les
lames plient lors de l'ouverture, desserrez légère-
ment l'écrou de la lame jusqu'à ce que les lames
cessent de plier.

Other Milwaukee Tools manuals

Milwaukee M18 BP User manual

Milwaukee

Milwaukee M18 BP User manual

Milwaukee HD28 H User manual

Milwaukee

Milwaukee HD28 H User manual

Milwaukee 5336-22 User manual

Milwaukee

Milwaukee 5336-22 User manual

Milwaukee M18 FUEL 2819-20 User manual

Milwaukee

Milwaukee M18 FUEL 2819-20 User manual

Milwaukee M12 Fuel User manual

Milwaukee

Milwaukee M12 Fuel User manual

Milwaukee M18 ONEFHIWF1D User manual

Milwaukee

Milwaukee M18 ONEFHIWF1D User manual

Milwaukee 5318-DE User manual

Milwaukee

Milwaukee 5318-DE User manual

Milwaukee M12 Fuel User manual

Milwaukee

Milwaukee M12 Fuel User manual

Milwaukee M18 User manual

Milwaukee

Milwaukee M18 User manual

Milwaukee M18 2970-20 User manual

Milwaukee

Milwaukee M18 2970-20 User manual

Milwaukee K900 K User manual

Milwaukee

Milwaukee K900 K User manual

Milwaukee M18 HCC45 User manual

Milwaukee

Milwaukee M18 HCC45 User manual

Milwaukee HEAVY DUTY L4 NL400 User manual

Milwaukee

Milwaukee HEAVY DUTY L4 NL400 User manual

Milwaukee M12 JS User manual

Milwaukee

Milwaukee M12 JS User manual

Milwaukee K 1528 H User manual

Milwaukee

Milwaukee K 1528 H User manual

Milwaukee PHDE 72 User manual

Milwaukee

Milwaukee PHDE 72 User manual

Milwaukee 5337-20 User manual

Milwaukee

Milwaukee 5337-20 User manual

Milwaukee 49-16-3697 User manual

Milwaukee

Milwaukee 49-16-3697 User manual

Milwaukee M18 CHM User manual

Milwaukee

Milwaukee M18 CHM User manual

Milwaukee M12HPT-0 User manual

Milwaukee

Milwaukee M12HPT-0 User manual

Milwaukee M12 FUEL 2482-20 User manual

Milwaukee

Milwaukee M12 FUEL 2482-20 User manual

Milwaukee M18 AL User manual

Milwaukee

Milwaukee M18 AL User manual

Milwaukee M18 2646-20 User manual

Milwaukee

Milwaukee M18 2646-20 User manual

Milwaukee Rattle Stick User manual

Milwaukee

Milwaukee Rattle Stick User manual

Popular Tools manuals by other brands

AGI Westfield MKX16 Assembly manual

AGI

AGI Westfield MKX16 Assembly manual

GYS HAND-DUCTION 056923 Translation of the original instructions

GYS

GYS HAND-DUCTION 056923 Translation of the original instructions

Grizzly H7583 instruction manual

Grizzly

Grizzly H7583 instruction manual

Sealey VS0462.V2 instructions

Sealey

Sealey VS0462.V2 instructions

Makita HR2650 instruction manual

Makita

Makita HR2650 instruction manual

Forza 1100H Series manual

Forza

Forza 1100H Series manual

Aventics EBS-PI operating instructions

Aventics

Aventics EBS-PI operating instructions

Martor SECUNORM 175 quick start guide

Martor

Martor SECUNORM 175 quick start guide

jbc N4473 instruction manual

jbc

jbc N4473 instruction manual

FEINMETALL FZWZ-SET-001 quick start guide

FEINMETALL

FEINMETALL FZWZ-SET-001 quick start guide

Worx Professional Sonicrafter WU676 Original instructions

Worx Professional

Worx Professional Sonicrafter WU676 Original instructions

Gage Bilt GB713SH Original instructions

Gage Bilt

Gage Bilt GB713SH Original instructions

Hilti DX 9-ENP Original operating instructions

Hilti

Hilti DX 9-ENP Original operating instructions

norbar NORTRONIC 34399 Operator's manual

norbar

norbar NORTRONIC 34399 Operator's manual

BGS technic 8578 manual

BGS technic

BGS technic 8578 manual

axing BWZ 5-02 Operation instructions

axing

axing BWZ 5-02 Operation instructions

Makita DHR241 instruction manual

Makita

Makita DHR241 instruction manual

Motor Guard JMB-1250 instructions

Motor Guard

Motor Guard JMB-1250 instructions

manuals.online logo
manuals.online logoBrands
  • About & Mission
  • Contact us
  • Privacy Policy
  • Terms and Conditions

Copyright 2025 Manuals.Online. All Rights Reserved.