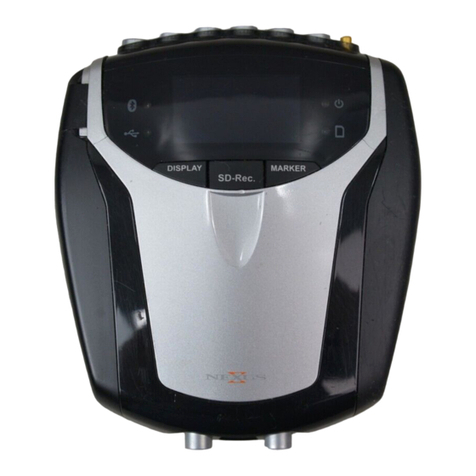
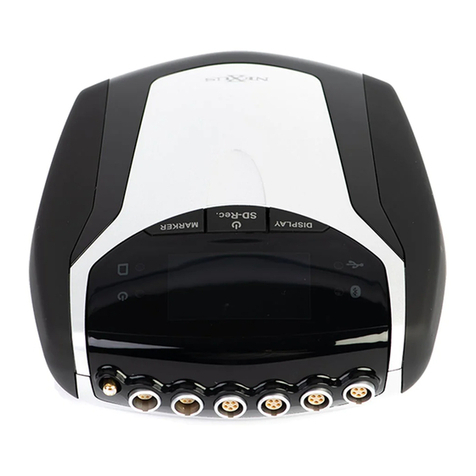
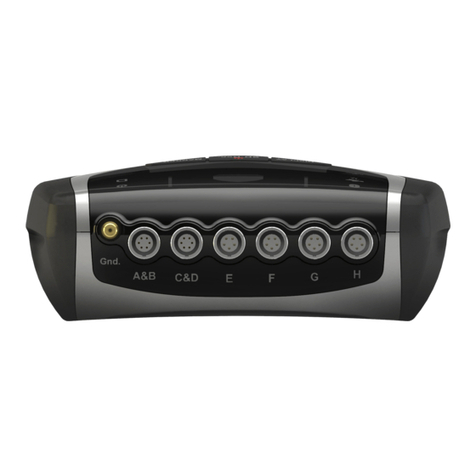
Mind Media NeXus-10 MKII User manual

Quick Start
NeXus-10 MKII
Version 1.0

2
Contents
Install BioTrace+ Software .................................................................................... 3
Power supply........................................................................................................ 3
Connect the NeXus ............................................................................................... 4
Bluetooth pairing.............................................................................................................................4
USB connection ............................................................................................................................... 4
Activate BioTrace+ ................................................................................................ 5
Start a session....................................................................................................... 6
Select a training screen ...................................................................................................................6
Screen controls ................................................................................................................................ 6
Connect sensors and check signal quality .......................................................................................7
Start a recording..............................................................................................................................7
Client feedback ..................................................................................................... 8
Select type of feedback ...................................................................................................................8
Set thresholds..................................................................................................................................8
Score controls .................................................................................................................................. 9
Review & Analysis................................................................................................10
Change display of signals...............................................................................................................10
Selecting and zooming data ..........................................................................................................10
Segments .......................................................................................................................................11
Artifact areas .................................................................................................................................11
Session statistics............................................................................................................................12
Intra-session trends.......................................................................................................................12

3
For an elaborated overview, please refer to the hardware and software manual. These can be
accessed on our website https://www.mindmedia.com/documentation/
Install BioTrace+ Software
Make sure to check latest system requirements on
https://www.mindmedia.com/products/biotrace-software/?tab=specifications
Insert the supplied BioTrace+ DVD or download the latest version from
https://www.mindmedia.com/downloads/
Select 'Full' for a new installation. Select 'Update' to update to a current version.
Run setup.exe.The Welcome screen will appear. Click Next and follow instructions.
Power supply
Insert a fully charged battery pack into the NeXus-10. Hearing a ‘click’ indicates that the
battery pack is placed correctly.

4
Connect the NeXus
The NeXus-10 can be connected wirelessly by using (1) Bluetooth. The NeXus-10 also allows
for (2) USB connection.
Bluetooth pairing
Use the internal Bluetooth of the computer or connect the Bluetooth dongle to the
computer and deactivate the internal Bluetooth of the computer.
Switch the NeXus on by pressing and shortly holding the power button.
Select Start > Settings >Devices >Bluetooth
Open Bluetooth > select the NeXus device > Pair.
Enter the passcode for the device. These are the last 4 digits of the serial number displayed
on the screen.
Follow further instructions.
USB connection
Connect the USB cable (1) to a USB input on the computer. Connect the micro USB cable (2a)
to the NeXus micro USB input (2b).
Switch the NeXus on by pressing and shortly holding the power button (3).
A notification will appear in the bottom right corner. A notification is shown once driver
installation has finished.
(1)
(2a)
(2b)
(3)

5
Activate BioTrace+
Open BioTrace+. Make sure your NeXus device is connected to the computer.
The Introduction screen will appear. Click 'Continue'.
Click 'Sign Up' to register a Mind Media account or visit
https://www.mindmedia.com/register/
Fill out your account details on our website and click 'Send'.
Confirm your e-mail address by clicking the link in the confirmation e-mail.
No confirmation e-mail? Check your Spam folder!
Go back to the Sign in screen and enter your e-mail and password.
Click 'Activate'. Once the BioTrace+ has been successfully activated, a message will appear.
No internet connection? An Offline Activation screen will appear. To manually activate offline, click the
button ‘Offline Activation’. Send the 'Request Key' and your registered email address to
support@mindmedia.com to receive an 'Activation Key'.

6
Start a session
Select a training screen
At the startup of BioTrace+, Home will appear. Home contains the following libraries:
Choose between various types of signals or modalities.
This library provides a series of protocols for specific
biofeedback and neurofeedback applications.
This library provides psychophysiological stress profiling
protocols and stress assessment protocols.
Select Signal Library and choose a signal or modality (e.g. EEG).
Select a screen in the list (e.g. 1x EEG SMR). This will open a training screen.
Screen controls
Tool bar
Use the Toolbar on top of the screen to get more information about the signal, to learn how
to connect sensors or perform a signal check:
1 2 3 4 5 6
1. Back to previous
2. Home
3. Open Client Database
4. More about...
5. Connecting...
6. Signal check
Session control bar
Use the Session Control Bar on the bottom of the screen for controlling a session. This
toolbar contains the following options:
1 2 3 4 5 6 7
1. Open Screen Browser
2. Session Overview/
Real-time mode
3. Add marker
4. Play/ replay session
5. Stop session
6. Pause session
7. Record session

7
Connect sensors and check signal quality
Click the Connecting button to check how to connect the sensors.
Connect the sensors to the correct input and make sure the red dot of the connector is
facing downward. Sensors can be disconnected by pulling the silver ribbed part of the
connector backward.
Click the Signal check button to check signal quality.
Start a recording
Use the Session Control Bar on the bottom of the screen to control a session. Click the
Record button to start a recording.
Select a client and click Continue... or click Add New to add a new client.
Click Start recording to start recording a session.
In order to stop a recording, click Stop.
An alert box will appear. Click Yes to save the session and to enter a description of the
session. Confirm by clicking OK, the session is now saved.

8
Client feedback
Press the Windows logo key +P for extending display to dual monitor setup
Select type of feedback
Feedback Type Controls are shown on the right side of a training screen. Just select one of
the buttons that are available on the screen.
Select other content during a recording by clicking the change feedback icon in the right top
corner. This can only be used with videos, animations, games, puzzles, and audio.
Set thresholds
The threshold setting controls are displayed on the right side of a bar graph:
A dotted line indicates that no feedback options have been set for this object. A solid line
indicates feedback options have been activated.
Threshold enabled Threshold disabled
The threshold direction controls are displayed on the right side of a bar graph:
Graph
Audio
Video
Water ripple
Puzzle
Clock
Animation
Zoomer
Game
Mandala
Disc
Protocol
Manual threshold
Automatic threshold
Disable threshold
Train up
Train down

9
It is possible to show and hide the bar graph feedback on the client screen:
Score controls
The controls for score are located in the bottom right corner of a screen:
Show graph on client screen
Hide graph on client screen
Show score on client screen
Hide score on client screen
Reset score

10
Review & Analysis
Data can be reviewed and edited in Session Overview by clicking the following symbol in the
Session Control Bar. This will open the Session Overview.
Use the right mouse click for using several options
Change display of signals
Right-click the y-axis for changing the display of signals.
Change the Y-scale range by choosing YScale range.
Set the range manually or automatically.
In order to save these settings, make sure to go to file in the upper left corner and choose save screen
Selecting and zooming data
Select data by clicking the left mouse button on the time axis and dragging the mouse to the
left or right.
When releasing the mouse button, a drop down menu will appear. Choose Zoom selected
data to zoom in to the data. Alternatively use the +and -keys on the numerical keyboard to
zoom in.
The Size of TIME axis can also be changed by clicking the right mouse button in the session
overview and choosing the length of the time axis from a drop down menu.
Right click and choose Time-axis <Fit Session> under Size of TIME axis to display the full
session again. Press backspace to quickly show all data.

11
Segments
There are several predefined segment types available, like baseline, train, stressor, relax etc.
Add specific segments in sessions to distinguish different phases in a recording.
After selecting a part of the data, a segment can be defined by using the Add Segment
option.
Artifact areas
Artifact areas are special types of segments that mark a part of the session as being ‘invalid’.
These artifact areas will be excluded for analysis. The data in the artifact area will not be
deleted, it is only ‘marked’ as being artifact.
Manually marking artifact areas
Create an artifact area by selecting data, and choosing Segment: add Artifact area.
The artifact segment will appear as a red cross hatched area.
Automatic artifact rejection
Enable automatic artifact rejection by right clicking the screen and open Automatic artifact
rejection > Enable rejection.
One or two criteria for data rejection can be set. Whenever a signal meets a criterion, red
marks will appear just above the time axis.
The automatic artifact rejection option will be enabled for all future recordings. In order to disable it,
choose Automatic artifact rejection > Disable rejection

12
Session statistics
Right click the Session Overview screen and choose Compute statistics: > On entire session
or > On all segments.
It is also possible to compute statistics over a selected data area. Select an area and click
Segment: compute statistics.
The Session Statistics screen will appear.
This will show basic statistics (min, max, mean, etc.) for each signal that is displayed.
Selected text from this dialog box can be copied and pasted.
Click the Print! (preview) button to print or export the report as a PDF file.
Intra-session trends
Right-click the Session Overview screen and choose Intra-session trend.
The Trend Report screen will appear.
Intra-session reports can be generated for sessions with several segments. At least 2
segments must be defined. Choose the type of statistics.
Choose the type of output:
1. Copy/paste the report.
2. Create an ASCII file.
Click OK to generate the report.
Table of contents
Other Mind Media Medical Equipment manuals
Popular Medical Equipment manuals by other brands

Motion Concepts
Motion Concepts Matrx FLIPP LOXX Installation and setup

Mazet Sante
Mazet Sante Biostim 2.2+ user manual

bort medical
bort medical Dr. Schütz ManuDisc quick guide

Choice Electronics
Choice Electronics MD300W628 instruction manual

DGSHAPE
DGSHAPE VL-300 user manual

Zeiss
Zeiss VISUPHOR 500 user manual