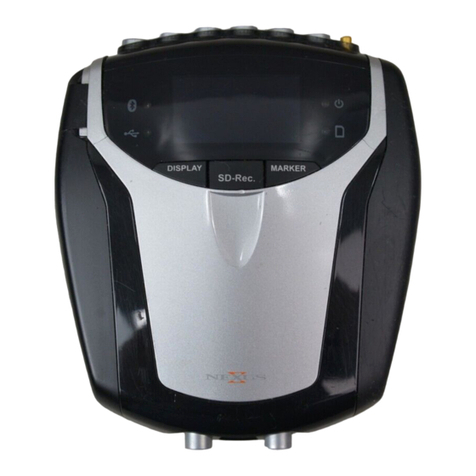
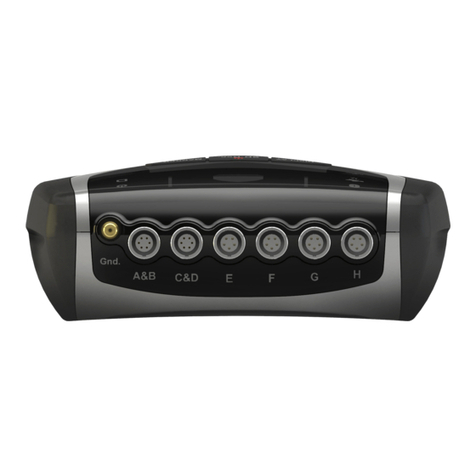
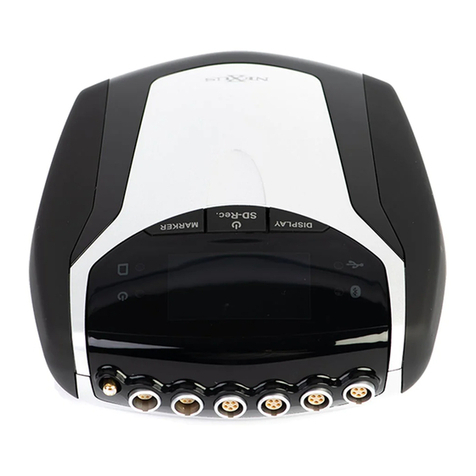
Mind Media NeXus-32 User manual

Quick Start
NeXus-32
Version 2.0

2
Contents
Install BioTrace+ Software .................................................................................... 3
Power supply........................................................................................................ 3
Connect the NeXus ............................................................................................... 4
Bluetooth pairing.............................................................................................................................4
USB connection ...............................................................................................................................4
Activate BioTrace+ ................................................................................................ 5
Start a session....................................................................................................... 6
Select a training screen ................................................................................................................... 6
Connect sensors and check signal quality .......................................................................................6
Start a recording..............................................................................................................................7
Client feedback ..................................................................................................... 8
Select type of feedback ................................................................................................................... 8
Set thresholds..................................................................................................................................8
Review & Analysis................................................................................................. 9
Change display of signals.................................................................................................................9
Selecting and zooming data ............................................................................................................ 9
Segments .......................................................................................................................................10
Artifact areas .................................................................................................................................10
Session statistics ............................................................................................................................11

3
For an elaborated overview, please refer to the hardware and software manual. These can be
accessed on our website https://www.mindmedia.com/documentation/
Install BioTrace+ Software
Make sure to check latest system requirements on
https://www.mindmedia.com/en/products/biotrace-software/?tab=specifications
Insert the supplied BioTrace+ DVD or download the latest full version from
https://www.mindmedia.com/downloads/
Run setup.exe.The Welcome screen will appear. Click Next and follow instructions.
Power supply
The NeXus-32 can be powered using batteries or through a power supply. Use of batteries
will minimize the chance of artifacts.
For battery placement unscrew and remove the battery cover on the backside of the NeXus.
Place AA batteries according to the details shown inside the battery compartment, close the
cover and tighten the thumbscrew.
To use the power supply, connect the power supply cable into the power supply socket in
the right top corner of the NeXus-32. Make sure the notch of the connector is facing
upwards, turn the connector part to secure connection.

4
Connect the NeXus
The NeXus-32 can be connected wirelessly by using (1) Bluetooth. The NeXus-32 also allows
for (2) USB connection.
Bluetooth pairing
Use the internal Bluetooth of the computer or connect the Bluetooth dongle to the
computer and deactivate the internal Bluetooth of the computer.
Switch the NeXus on by pressing and shortly holding the power button.
Select Start > Settings >Devices >Bluetooth
Open Bluetooth > select the NeXus device > Pair.
Enter the passcode for the device. These are the last 4 digits of the serial number displayed
on the screen.
Follow further instructions.
USB connection
Connect the USB cable (1) to a USB input on the computer. Connect the micro USB cable (2a)
to the Fusbi micro USB (2b). Connect the optical fiber (3) to the input of the Fusbi and the
other end to the fiber connector on the back of the NeXus-32 (4).
Switch the NeXus on by pressing and shortly holding the on/off button.
A notification will appear in the bottom right corner. A notification is shown when the driver
installation is finished.
(1)
(2a)
(3)
(1)
(2a/b)
(3)
(4)

5
Activate BioTrace+
Open BioTrace+. Make sure your NeXus device is connected to the computer.
The Introduction screen will appear. Click Continue.
Click Register to register a Mind Media account or visit
https://www.mindmedia.com/register/
Fill out the account details and click Send.
Confirm e-mail address by clicking the link in the confirmation e-mail.
No confirmation e-mail? Make sure to check the Spam folder.
Go back to the Sign in screen and enter e-mail and password.
Click Activate. Once BioTrace+ has been successfully activated, a message will appear.
No internet connection? An Offline Activation screen will appear. Send the 'Request Key' and the
registered email address to support@mindmedia.com to receive an 'Activation Key'.

6
Start a session
Select a training screen
At the startup of BioTrace+, Home will appear.
Select Signal Library and choose a signal or modality (e.g. EEG).
Select a screen in the list (e.g. 1x EEG SMR). This will open a training screen.
Connect sensors and check signal quality
Click the Connecting button to check how to connect the sensors.
Sensor input will also be shown between brackets in graph titles
Although there are multiple configurations possible for the NeXus-10, the most common
configuration is:
1-24
EEG Cap
25&26
EEG / EMG
27&28
EEG / EMG
29
Skin Conductance
30
Blood Volume Pulse
31
Respiration
32
Temperature
Connect the sensors to the correct input and make sure the red dot of the connector is
facing upward. Sensors can be disconnected by pulling the silver ribbed part of the
connector backward.

7
Click the Signal check button to check signal quality after starting a recording.
Start a recording
Use the Session Control Bar on the bottom of the screen to control a session. Click the
Record button to start a recording.
Select a client and click Continue... or click Add New to add a new client.
Click Start recording to start recording a session.
In order to stop a recording, click Stop.
An alert box will appear. Click Yes to save the session and to enter a description of the
session. Confirm by clicking OK, the session is now saved.

8
Client feedback
Press the Windows logo key +P for extending display to dual monitor setup
Select type of feedback
Feedback Type Controls are shown on the right side of a training screen. Just select one of
the buttons that are available on the screen.
Select other content during a recording by clicking the change feedback icon in the right top
corner. This can only be used with videos, animations, games, puzzles, and audio.
Set thresholds
The threshold setting controls are displayed on the right side of a bar graph:
A dotted line indicates that no feedback options have been set for this object. A solid line
indicates feedback options have been activated.
Threshold enabled Threshold disabled
The threshold direction controls are displayed on the right side of a bar graph:
Graph
Audio
Video
Water ripple
Puzzle
Clock
Animation
Zoomer
Game
Mandala
Disc
Protocol
Manual threshold
Automatic threshold
Disable threshold
Train up
Train down

9
Review & Analysis
Data can be reviewed and edited in Session Overview by clicking the following symbol in the
Session Control Bar. This will open the Session Overview.
Use the right mouse click for using several options
Change display of signals
Right-click the y-axis for changing the display of signals.
Change the Y-scale range by choosing YScale range.
Set the range manually or automatically.
In order to save these settings, make sure to go to file in the upper left corner and choose save screen
Selecting and zooming data
Select data by clicking the left mouse button on the time axis and dragging the mouse to the
left or right.
When releasing the mouse button, a drop down menu will appear. Choose Zoom selected
data to zoom in to the data. Alternatively use the +and -keys on the numerical keyboard to
zoom in.
The Size of TIME axis can also be changed by clicking the right mouse button in the session
overview and choosing the length of the time axis from a drop down menu.
Right click and choose Time-axis <Fit Session> under Size of TIME axis to display the full
session again. Press backspace to quickly show all data.

10
Segments
There are several predefined segment types available, like baseline, train, stressor, relax etc.
Add specific segments in sessions to distinguish different phases in a recording.
After selecting a part of the data, a segment can be defined by using the Add Segment
option.
Artifact areas
Artifact areas are special types of segments that mark a part of the session as being ‘invalid’.
These artifact areas will be excluded for analysis. The data in the artifact area will not be
deleted, it is only ‘marked’ as being artifact.
Manually marking artifact areas
Create an artifact area by selecting data, and choosing Segment: add Artifact area.
The artifact segment will appear as a red cross hatched area.
Automatic artifact rejection
Enable automatic artifact rejection by right clicking the screen and open Automatic artifact
rejection > Enable rejection.
One or two criteria for data rejection can be set. Whenever a signal meets a criterion, red
marks will appear just above the time axis.
The automatic artifact rejection option will be enabled for all future recordings. In order to disable it,
choose Automatic artifact rejection > Disable rejection

11
Session statistics
Right click the Session Overview screen and choose Compute statistics: > On entire session
or > On all segments.
It is also possible to compute statistics over a selected data area. Select an area and click
Segment: compute statistics.
The Session Statistics screen will appear.
This will show basic statistics (min, max, mean, etc.) for each signal that is displayed.
Selected text from this dialog box can be copied and pasted.
Click the Print! (preview) button to print or export the report as a PDF file.

Mind Media BV
Louis Eijssenweg 2B
NL6049 CD, Herten
The Netherlands
t: +31 (0)475-410123
e: info@mindmedia.com
w: www.mindmedia.com
Table of contents
Other Mind Media Medical Equipment manuals
Popular Medical Equipment manuals by other brands

Nellcor
Nellcor OxiMax N 5500 Service manual

NRS Healthcare
NRS Healthcare N43504 User instructions

Shenzhen mindray
Shenzhen mindray BeneHeart R3 Operator's manual

ORTHOSERVICE RO+TEN
ORTHOSERVICE RO+TEN malleonite manual

SeQual Technologies
SeQual Technologies Eclipse 2 PROVIDER TECHNICAL MANUAL

Breas
Breas NIPPY ST+ instruction manual

Fresenius Medical Care
Fresenius Medical Care 2008K2 Service bulletin

Physio Control
Physio Control LIFEPAK 15 Upgrade manual

EyeQue
EyeQue Insight Pro product manual

OLYMPIC VETERINARY
OLYMPIC VETERINARY 50901 owner's manual

Simulaids
Simulaids SMART STAT BASIC 8002 Instruction and Care Manual

SECHRIST
SECHRIST 3500 CP-G user manual