Milk Frother - English manual 2
EN
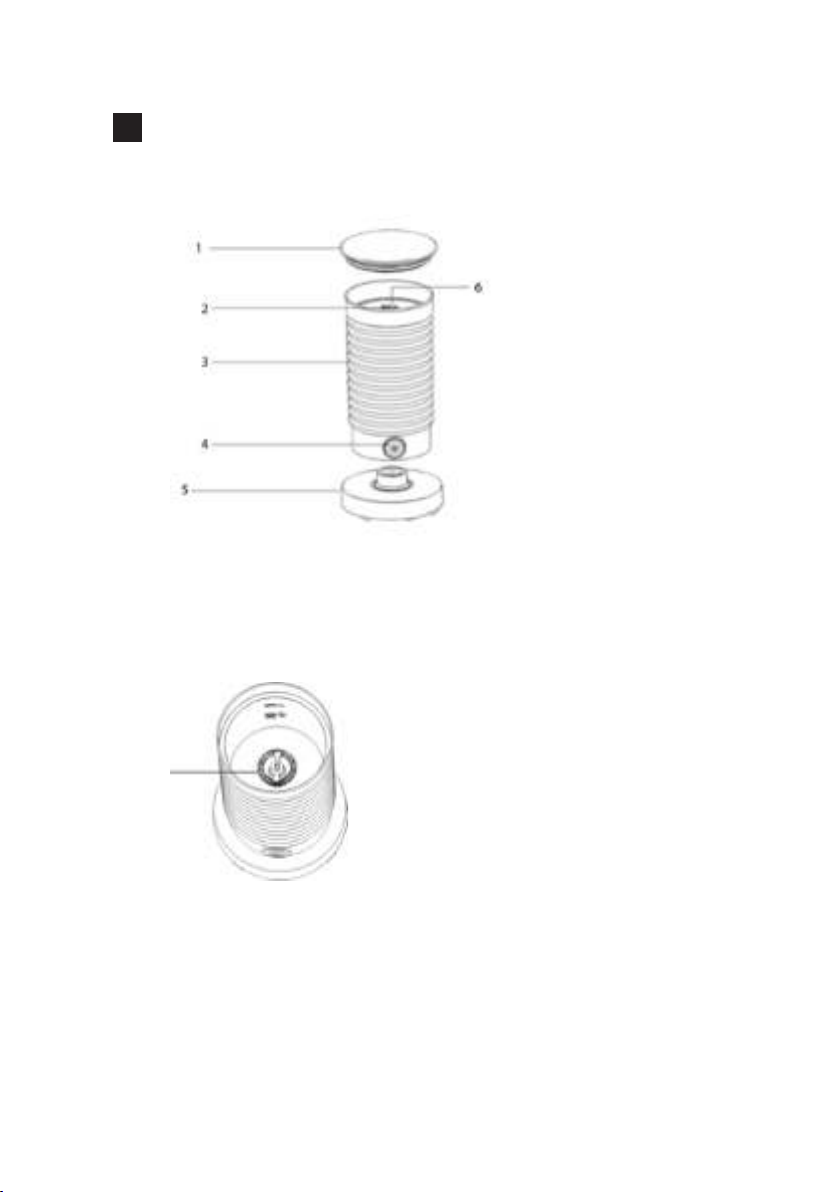
BEFORE USE
Before use, please read this manual carefully.
Only connect the appliance to an earthed wall socket.
This appliance is for household use only. When using electrical
appliances, basic safety precautions should always be followed to
avoid res, electric shocks, burns, or other injuries and damage. Read
these operating and safety instructions carefully.
IMPORTANT SAFEGUARDS (1/2)
When using electrical appliances, basic precautions should always be
followed to reduce the risk of re, electric shock, and injury to persons,
including the following:
1. Read all instructions before using.
2. In case of emergency, immediately unplug the machine from the
power outlet.
3. Check that the voltage indicated on the rating label of the appliance
does in fact match that of your electrical system.
4. This appliance is not intended to for use by persons (including
children) with reduced physical, sensory or mental capabilities, or lack
of experience, and knowledge, unless they are supervised or instructed
concerning the use of the appliance by a person responsible for their
safety. Never leave the appliance unattended during operation. Keep it
out of the reach of children.
5. Do not operate the appliance with a damaged cord or plug or
after the appliance malfunctions, has been dropped or damaged in
any manner. Return the appliance to an authorized service facility for
examination, electrical or mechanical adjustment, or repair.
6. Always unplug the appliance when not in use or before cleaning.
Allow it to cool before adding or removing parts, and before cleaning
the appliance.
7. To protect against re, electric shock and personal injury, do not
immerse cord, plug or appliance in water or other liquid. Never clean
the appliance or the power cord if they are humid. Avoid touching the
appliance with wet hands.