Mobiclinic Libra User manual


DEITFRPTENES
Manual de Instrucciones Libra
El scooter modelo Libra de la marca Mobiclinic ofrece una ayuda para solucionar los problemas de movilidad, en
aquellas personas con dicultad para caminar o que no pueden hacerlo en largas distancias. El scooter Libra está
diseñado para usarse tanto en exteriores como dentro del hogar. Este scooter le proporcionará la ayuda que ne-
cesita para moverse de manera cómoda y autónoma.
Las presentes instrucciones están concebidas para ayudarle cuando reciba el scooter. Sígalas para desembalarlo
de manera rápida y sencilla. Solo necesitará unas tijeras o un cúter.
Lea y observe todas las advertencias e instrucciones que guran en el manual antes de operar con este scooter.
Consérvelas para futuras consultas.
Primero, corte las tiras de plástico que envuelven la caja del producto con la ayuda de las tijeras o el cúter. A con-
tinuación, abra la caja. Para ello, levante la tapa y retire los elementos que se encuentran alrededor, así como los
módulos de cartón que mantienen cada objeto en su lugar. De esta manera, evitará que se caigan cuando abra la
caja totalmente. Levante la caja que cubre el scooter, de manera que quede totalmente expuesta. Cuando la caja
esté totalmente abierta, retire los accesorios y los plásticos de protección que cubren el scooter. Corte uno de los
lados para sacarlo. Asegúrese de que el freno no está activado; el scooter debería poder sacarse fácilmente.
Ajuste el manillar con la palanca lateral en una de las tres alturas disponibles. Para colocar el asiento en la pla-
taforma, utilice la pequeña palanca situada en la parte inferior. Gracias a esta palanca, podrá también reclinar el
respaldo para facilitar su almacenaje. Para colocar los reposabrazos, localice los dos oricios situados detrás del
asiento. Ajuste los reposabrazos de forma que queden jos al atornillarlos al asiento, pero permitan que la anchura
se ajuste y plegarlos hacia abajo. Por último, coloque la cesta (para transportar objetos) en la parte delantera y el
espejo retrovisor en su lugar correspondiente.
MEDIDAS DE SEGURIDAD IMPORTANTES
1. Solo una persona podrá montar en el Scooter.
2. El peso máximo del usuario es de 135 kg.
3.Desconecte el scooter antes de subirse en él o bajarse de él.
4. Circule con cuidado y atención.
5. Utilice los cruces peatonales siempre que sea posible y tenga especial cuidado al cruzar carreteras.
6. No conduzca en áreas con una pendiente superior a los 12 grados, y preste especial atención en los giros.
7. Reduzca la velocidad al girar, así como cuando circule marcha atrás, por supercies en desnivel o poco rmes,
o por rampas.
8. Reduzca la velocidad cuando circule por pendientes descendentes o terrenos irregulares.
9. Es posible que el scooter no funcione de forma óptima en un ambiente con altos niveles de humedad.
10. Evite que la lluvia moje el scooter; no lo utilice en la ducha. La humedad puede estropear los mecanismos de
funcionamiento y oxidar los elementos.
11. No ponga el scooter en punto muerto cuando se encuentre en zonas con pendiente.
12. Respete las normas de circulación cuando circule por el exterior. Evite circular de noche o en condiciones cli-
matológicas adversas.
13. No use el scooter mientras lo transporta en un vehículo en movimiento.
14. Recuerde que este producto se debe de utilizar solo en supercies lisas.
El scooter puede superar obstáculos y bordillos de hasta 7 cm de altura, no debe superar un obstáculo cuando
está subiendo o bajando una pendiente. Debe
acercarse a los obstáculos de frente y no debe detenerse en medio del obstáculo.
Cuando circule por una rampa, debe ajustar el centro de gravedad de su cuerpo para mantener seguro el scooter.

DEITFRPTENES Manual de Instrucciones Libra
El funcionamiento de las sillas de ruedas eléctricas y de los scooters motorizados puede verse afectado por
interferencias electromagnéticas (EMI). Estas son el resultado de la interferencia de las ondas de energía elec-
tromagnética (EM) que emiten algunas fuentes como estaciones de radio, estaciones de televisión, transmisores
de radioacionados, radios de dos vías y teléfonos móviles. Las interferencias (procedente de fuentes de ondas
de radio) podrían provocar que se libere involuntariamente el sistema de frenado, que el scooter se mueva solo o
que se mueva en dirección indeseada. También podrían causar un daño irreparable en el sistema de control del
scooter. La intensidad de la energía electromagnética que genera la interferencia puede medirse en voltios por
metro (V/m). Los scooters motorizados pueden tolerar las interferencias electromagnéticas hasta una determina-
da intensidad. Este concepto se denomina “nivel de inmunidad”. Cuanto mayor sea el nivel de inmunidad, mayor
será el nivel de protección. Actualmente, la tecnología es capaz de alcanzar, como mínimo, un nivel de inmunidad
de 20 V/m, lo que proporciona protección frente a las fuentes más habituales de interferencias electromagnéticas.
El nivel de inmunidad de este modelo de scooter no está denido.
ADVERTENCIAS:
Las interferencias electromagnéticas (EMI) procedentes de fuentes tales como estaciones de radio y televisión,
transmisores de radioacionados (HAM), radios de dos vías y teléfonos móviles pueden afectar al scooter. Debe
seguir las advertencias enumeradas a continuación, orientadas a reducir las posibilidades de que ocurra una libe-
ración involuntaria de los frenos, ya que esto podría ocasionarle lesiones graves.
1. No opere con transceptores portátiles (transmisores-receptores), como radios de banda ciudadana (CB). No ac-
tive dispositivos de comunicación personal, como teléfonos móviles, mientras el scooter está encendido.
2. Infórmese acerca de la existencia y ubicación de posibles transmisores cercanos, como estaciones de radio o
televisión, y evite aproximarse demasiado a ellos.
3. Si se produjera un movimiento involuntario o una liberación de los frenos, apague el scooter.
4. Tenga en cuenta que el hecho de incorporar accesorios o componentes al scooter o modicarlo de alguna ma-
nera podría hacerlo más susceptible al efecto de las interferencias electromagnéticas.
INFORMACIÓN IMPORTANTE
1. El nivel de inmunidad de 20 V/m es, por lo general, un nivel de protección frente a las interferencias electromag-
néticas asequible y práctico (según lo establecido a partir de mayo de 1994). Recuerde que cuanto mayor sea el
nivel de inmunidad, mayor será el nivel de protección.
2. Este producto tiene un nivel de inmunidad de al menos 10 V/m.
IDENTIFICACIÓN DE LAS PARTES
Antes de usar el scooter, es importante que conozca las partes que lo conforman y el funcionamiento de los man-
dos y dispositivos de control.
ADVERTENCIAS SOBRE INTERFERENCIAS ELECTROMAGNÉTICAS
PRECAUCIÓN: Es muy importante que lea esta información sobre los posibles efectos de las
interferencias electromagnéticas en el scooter.

DEITFRPTENES
Manual de Instrucciones Libra
FUNCIONAMIENTO DE LAS PARTES
Panel de control
Control de velocidad:
El icono de la tortuga indica un nivel de velocidad lento. El icono de la liebre indica un nivel de velocidad rápido.
Al girar este mando, controlará la velocidad total que se transere a los mandos que se activan con los pulgares.
Indicador de advertencia de autodiagnóstico:
Si muestra una luz que parpadea, signica que existe algún problema con el scooter.
Indicador de nivel de batería:
Debajo de este indicador, hay tres gamas de color: rojo, amarillo y verde. Cuando la luz está encendida y se mues-
tran los tres colores, la batería está totalmente cargada. Cuando la luz está encendida, pero solo muestra el color
rojo, o zonas en color rojo y zonas en color amarillo, signica que debe volver a cargar la batería.
Debajo del panel de control
Acelerador:
Debajo de este indicador, hay tres gamas de color: rojo, amarillo y verde. Cuando la luz está encendida y se mues-
tran los tres colores, la batería está totalmente cargada. Cuando la luz está encendida, pero solo muestra el color
rojo, o zonas en color rojo y zonas en color amarillo, signica que debe volver a cargar la batería.
Base del manillar
Ajuste del manillar de dirección:
Presione el manillar hacia abajo para ajustarlo. Tire hacia arriba para bloquear el giro de la columna de dirección
en un ángulo que le resulte cómodo.
Debajo del asiento
Palanca de regulación del asiento:
- Ajuste de la distancia respecto al manillar: tire hacia arriba de la palanca situada en la parte frontal del asiento
para ajustar la distancia respecto al manillar.
- Ajuste de la rotación: presione la palanca hacia atrás para girar el asiento; presiónela hacia adelante para jarlo
en la posición deseada.
- Ajuste del reposabrazos: aoje los dos tornillos de mariposa para ajustar el ancho entre los reposabrazos. Vuelva
a apretarlos para jarlos en la posición deseada.
Parte trasera
Cubierta trasera: Sirve para proteger la batería frente a posibles daños.
Ruedas antivuelco: Sirven para evitar que el scooter vuelque.
La palanca de arranque: Con la palanca de arranque puede cambiar al modo manual (N) o al modo automático
(D). El modo manual permite al usuario mover el scooter sin utilizar la batería, es decir, empujándolo, mientras que
el modo automático le permitirá tanto conducir el scooter como mantenerlo inmóvil cuando quede aparcado.
Los indicadores de la palanca le ayudarán a determinar en qué modo se encuentra el scooter. Cada vez que desee
cambiar del modo manual al automático, deberá desactivar previamente el scooter. A continuación, debe cambiar
el modo con la palanca. Después, encienda el scooter para comenzar a usarlo.
Antes de usar el scooter, es importante que conozca las partes que lo conforman y el funcionamiento de los man-
dos y dispositivos de control.
PUESTA EN MARCHA DEL SCOOTER
Puede realizar los siguientes ajustes en el scooter para incrementar su comodidad mientras circule:
- La altura del asiento y la distancia hasta el manillar.
- La columna de dirección.
- El espacio para las piernas.

DEITFRPTENES Manual de Instrucciones Libra
1. Para comenzar a usar el scooter, lleve a cabo los siguientes pasos:
-Quite la carcasa trasera y conecte las baterías.
- Compruebe que la palanca de inmovilización esté en modo D.
- Compruebe que el control de velocidad está en el modo de velocidad baja (tortuga).
2. Colóquese en el scooter y gire la llave. Se encenderá el indicador de la batería. Conrme que el indicador de
autodiagnóstico no parpadea.
3. Al colocar las manos en el manillar, debería llegar cómodamente a las palancas de control, que se accionan con
los pulgares. La palanca derecha activa el movimiento del scooter hacia adelante y la de la izquierda, hacia atrás.
Si suelta ambas palancas, el scooter se detendrá.
4. Para girar el scooter, deberá girar la columna de dirección hacia donde desee ir.
5. Comience a practicar en zonas libres de obstáculos. Inicie la marcha a la velocidad mínima y circule hacia ade-
lante y hacia atrás. Pruebe a realizar algún giro. A medida que se sienta más cómodo, puede aumentar la veloci-
dad. Para ello, gire el control hacia el icono de la liebre.
6. Cuando solo se enciendan dos de las barras del indicador LED de nivel de batería, deberá volver a cargar la
batería cuanto antes.
7. Si el scooter se detiene, localice el interruptor del circuito que se encuentra en la parte superior de la batería.
Presiónelo y vuelva a probar el scooter.
8. Cuando termine de utilizar el scooter, gire la llave para desconectarlo antes de bajarse.
9. Si no va a usar más el scooter hasta el día siguiente, recargue la batería.
RECUERDE LAS SIGUIENTES NORMAS DE USO:
- Suelte el acelerador y permita que el scooter se detenga por completo antes de pasar de desplazarse hacia
adelante a desplazarse hacia atrás, o viceversa.
- Procure abrir el ángulo de giro al tomar una curva, ya que las ruedas traseras del scooter se cerrarán más en el
ángulo.
- Utilice el scooter solo por zonas por las que sería seguro caminar.
- Circule a baja velocidad cuando se desplace marcha atrás, en pendientes, supercies irregulares o al subir bor-
dillos.
INFORMACIÓN ADICIONAL SOBRE EL FUNCIONAMIENTO:
A la hora de subir cuestas, es posible que tenga que emplear una velocidad mayor. Recuerde volver a reducir la
velocidad antes de bajar la cuesta.
Cuando se disponga a bajar una cuesta, modere la velocidad. Para ello, ajuste el control de velocidad colocándolo
hacia el icono de la tortuga. Esto posibilita que el usuario tome un mayor control sobre la dirección del scooter, ya
que mientras más cerca del icono de la tortuga se sitúe el control, más despacio se desplazará el scooter. Sin em-
bargo, este modelo de scooter no se autoacelerará al desplazarse pendiente abajo gracias al sistema de frenado
automático que se activará si el usuario trata de circular a una velocidad demasiado alta.
Si el scooter deja de funcionar y debe trasladarse, coloque la palanca de arranque en la posición N, mueva el
scooter con cuidado hasta un lugar seguro y vuelva a colocar la palanca en la posición D.

DEITFRPTENES Manual de Instrucciones Libra
DESMONTAJE DEL SCOOTER
Para desmontar el scooter no necesitará ninguna herramienta. Puede desmontarlo cuando necesite transpor-
tarlo.
En primer, retire el asiento. Para ello libere la palanca de rotación del asiento (A) y levántela.
Levante con cuidado la tapa del compartimento trasero del scooter (B).
Libere los arneses de los cables del controlador (C).
Retire la cubierta trasera del scooter (D).
Retire el velcro de sujeción de la batería (E).
Desconecte los dos arneses de la batería (F) y retire la batería (G).
Desconecte las secciones delantera y trasera. Para ello, sujete la tija del asiento (J) con una mano y, con la otra,
presione la palanca hacia la parte trasera del scooter. Levante la tija del asiento para separar el bastidor trasero (H)
del delantero.
(J)(H)
(B)
(A)
(C)
(D)
(E)
(F)
(G)

DEITFRPTENES Manual de Instrucciones Libra
CARGA DE LA BATERÍA
La batería debe estar cargada antes de usar el scooter por primera vez y debe recargarse después de cada día de
uso. La primera vez, es aconsejable dejar que la batería se cargue durante toda la noche y debe recargase des-
pués de cada uso diario. Para ello, necesitará el scooter y el cargador de la batería. Para ello, necesitará el scooter
y el cargador de la batería.
1. Inserte el cable de la batería en el conector correspondiente.
2. Conecte el otro extremo del cable a una toma de corriente.
3. Encienda el scooter. Normalmente, el indicador LED de potencia se encenderá cuando la corriente eléctrica
comience a circular.
4. De esta manera comenzará el proceso de carga. Durante este proceso, el indicador LED de carga mostrará una
luz naranja. Cuando la luz pase a ser verde, signica que la batería está totalmente cargada.
5. Indicador LED
- LED (Potencia) - Luz verde: scooter encendido
- LED (Carga) - Luz naranja: carga activada/Luz verde: batería totalmente cargada
6. Resolución de problemas de carga
(A) Si el indicador LED (Potencia) está apagado
- Compruebe que el voltaje de entrada (115V/230V) es el mismo que el que se ha congurado.
- Si el indicador sigue sin encenderse, compruebe y repare el cargador de batería.
(B) Si el indicador LED (Batería) está apagado
- Compruebe que el sistema de conexión funciona correctamente.
- Si la batería está totalmente cargada, el indicador LED (Carga) se apagará.
- Si la luz sigue apagada, es posible que la batería esté defectuosa.
(C) Si la luz NARANJA pasa a color VERDE
- La batería no puede cargarse. Deberá comprobar si puede repararse.
(D) Si la luz NARANJA pasa inmediatamente a color VERDE
- Compruebe si la batería está totalmente cargada. En caso contrario, es posible que esté defectuosa. Deberá
consultar si puede repararse.
Se recomienda cargar por completo las baterías para no dañar la vida útil de estas. Si las baterías no se cargan por
completo, el scooter podría presentar
fallos.
MONTAJE EL SCOOTER
Para montar el scooter, siga las instrucciones de desmontaje a la inversa. A continuación, se incluyen unas bre-
ves indicaciones para orientarle:
1. Levante la columna de dirección utilizando la palanca.
2. Incline el respaldo hasta que quede en posición horizontal. Inserte el tubo del bastidor en el scooter. Asegúrese
de haber retirado las clavijas de seguridad.
3. Encaje las dos partes de la unidad hasta que la parte delantera haga tope.
4. Inserte las dos clavijas de seguridad en los agujeros correspondientes. Ambas clavijas deben quedar totalmente
insertadas cuando el scooter esté montado.
5. Coloque la batería, utilice el velcro para jar la posición y conecte las tomas de corriente.
6. Coloque la cubierta trasera.
7. Atornille los arneses de los cables del controlador.
8. Coloque la tapa del compartimento trasero.
9. Libere la palanca de rotación del asiento girándola en el sentido contrario a las agujas del reloj. Coloque el asien-
to en la tija correspondiente. Vuelva a apretar la palanca girándola en el sentido de las agujas del reloj. Recuerde
jar la palanca de control del asiento antes de sentarse en el scooter.
LIMPIEZA DEL SCOOTER
Limpieza del scooter: Si el scooter está sucio, use un paño húmedo o ligeramente jabonoso para limpiarlo. No lo
moje directamente ni lo aclare, ya que tiene partes eléctricas que no deben entrar en contacto directo con el agua.,
Puede utilizar líquido abrillantador para automóviles.

DEITFRPTENES Manual de Instrucciones Libra
Longitud total: 128 cm
Anchura total (con reposabrazos) 61 cm
Alto total: 111 cm
Ruedas delanteras: 26 cm
Ruedas traseras: 26 cm
Peso: 87,9 kg
Máxima velocidad: 8 km/h
Peso máximo soportado: 135 kg
Distancia al suelo: 4 cm
Grado de inclinación: 12 grados
Altura máxima de bordillos: 7 cm
Radio de giro: 152 cm
Freno: Electromecánico
Tipo de asiento: Asiento giratorio y corredizo con reposacabezas
Anchura del asiento: 45,5 cm
Tamaño del motor: 500W, 3400 r.p.m
Baterías: (2) 12V. 36Ah
Peso del pack de baterías: 22,5kg
Autonomía: 30 km
Cargador de batería: 5A externo
Especicaciones técnicas
MANTENIMIENTO DEL SCOOTER
Todas las tareas de mantenimiento y reparación del scooter deberá llevarlas a cabo un especialista.
Las siguientes áreas exigen inspecciones periódicas:
- La presión de los neumáticos debe estar entre los 30 y los 50 psi.
- Deberá comprobarse que todas las conexiones eléctricas están rmemente conectadas.

DEITFRPTENES
Manual de Instrucciones Libra
DIAGNÓSTICO DE PROBLEMAS
Cuente el número de veces que la luz azul de su scooter parpadea para saber su fallo.
Número de par-
padeos
Descripción
Signicado
1Batería baja Las baterías se han agotado.
• Recargue la batería.
2Batería agotada Las baterías se han agotado.
• Recargue la batería.
3Fallo de sobrecarga
de batería
El voltaje de la batería es demasiado alto. Si está conectado el car-
gador, desconéctelo. Puede haber ocurrido por una sobrecarga o por
haber bajado una cuesta.
• Cuando baje por una cuesta, reduzca la velocidad.
• Compruebe sus condiciones y conexiones.
4Fallo en tiempo de
uso del motor
El tiempo de uso del motor se ha excedido. Apague el scooter y déjelo
unos minutos antes de volverlo a encender
• Compruebe el motor, sus conexiones y cableado por si existiera
algún cortocircuito.
• Apague el controlador y deje unos minutos antes de volver a en-
cender.
5Fallo en el freno de
inmovilización
El freno de inmovilización está activado o presenta un fallo:
• Asegúrese de que la palanca de arranque esté en Modo Automá-
tico (D).
• Si la luz parpadeante no se enciende hasta que se hace uso del
acelerador, compruebe que no exista un cortocircuito en el freno.
• Si la luz aparece nada más encender el scooter revise que no haya
ningún fallo de circuito abierto.
• Compruebe dicho freno, sus conexiones y cableado.
6Fallo en el acelerador El acelerador no está en punto muerto cuando se enciende el scooter.
• Asegúrese que el acelerador está en modo neutro antes de encen-
der su scooter.
• Puede que el acelerador necesite ser graduado de nuevo.
• Compruebe las conexiones del acelerador.
7Fallo de velocidad El acelerador o sus conexiones dan fallo.
• Compruebe su cableado por si existiesen cortocircuitos o conexio-
nes abiertas.
• Puede que el acelerador no se haya instalado correctamente.
8Fallo en el motor El motor o sus cableados presentan un fallo.
• Compruebe el motor, sus conexiones y cableado.
9Otro error El controlador puede tener un fallo interno.
• Compruebe las conexiones y su cableado.

DEITFRPTENES Instruction Manual Libra
Scooter LIBRA offers help to solve mobility problems in people with difficulty walking, or who cannot travel long
distances. Scooter Libra is designed to be used both outdoors and indoors. This scooter will give you everything
you need to go out in a comfortable and autonomous way. This text is intended for when your package arrives, you
can follow the instructions and unpack it easily and quickly. You will only need a pair of scissors or a cutter.
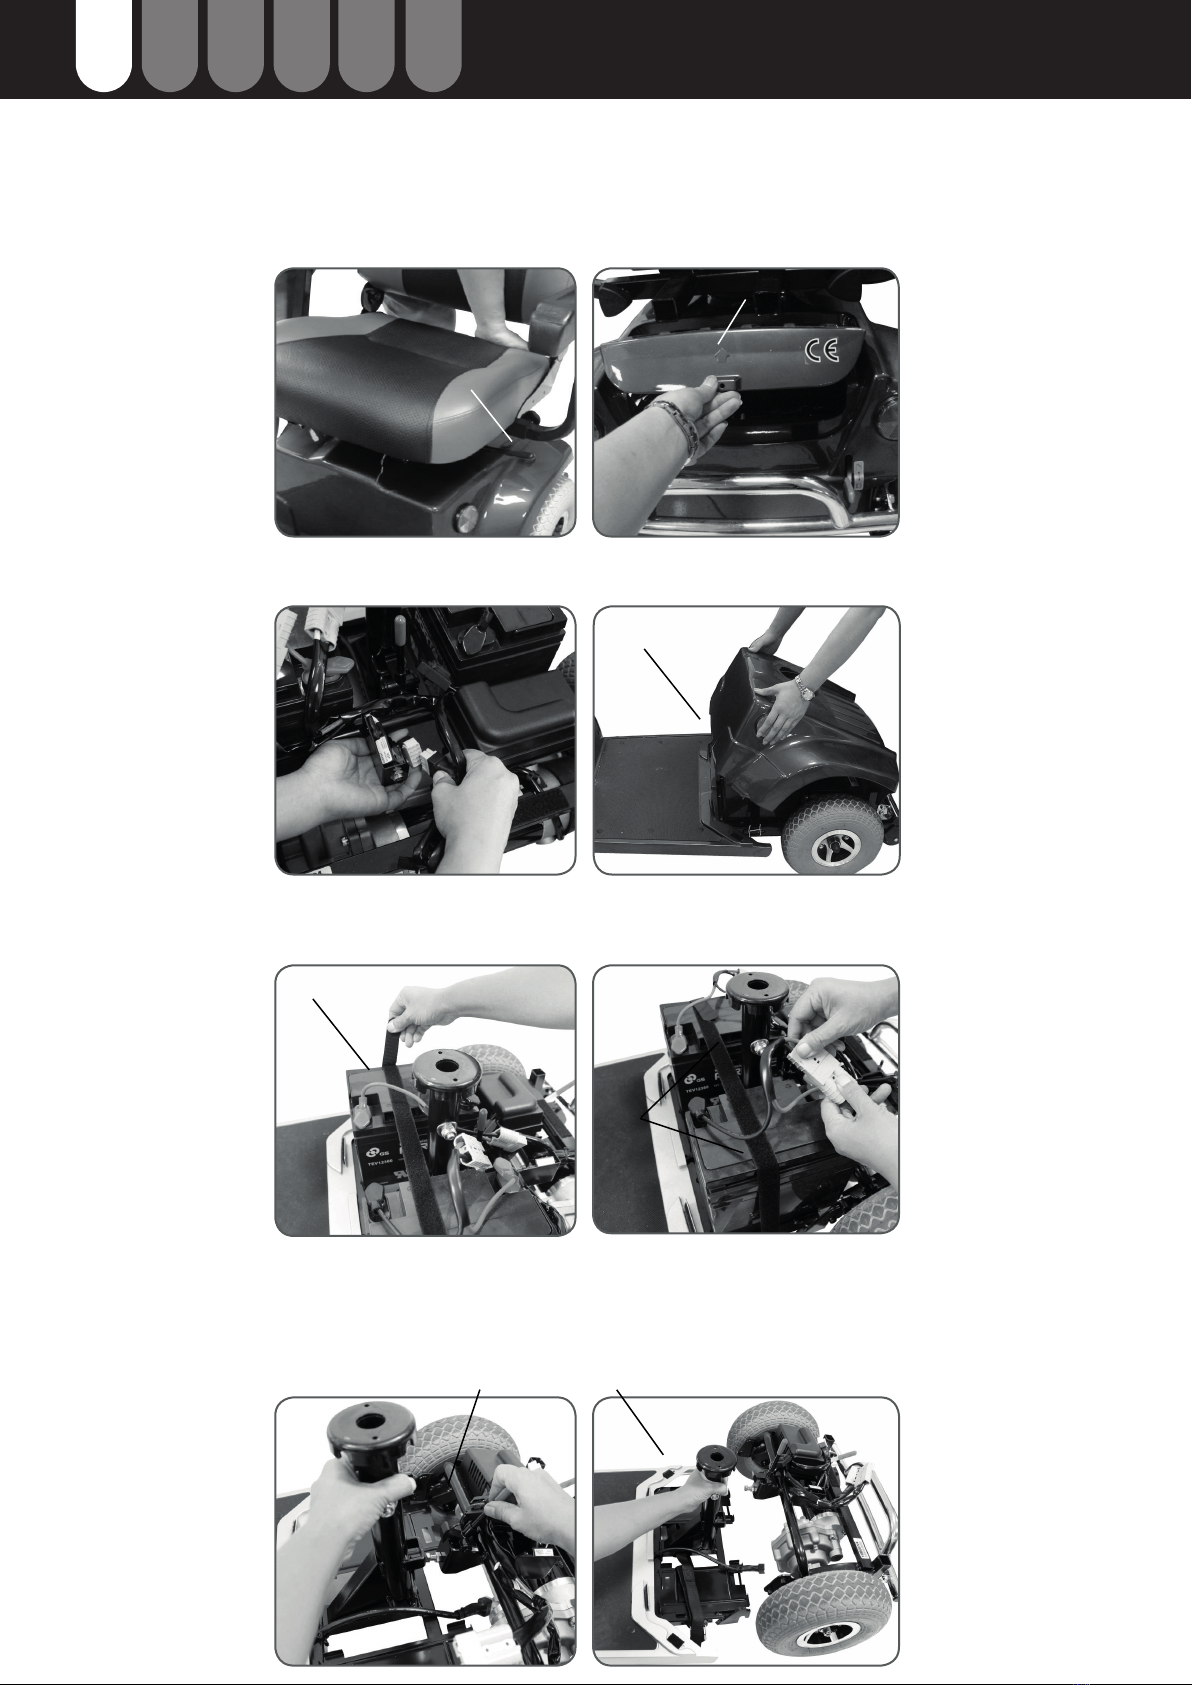
First, cut the plastic strips that wrap the box of our product with a pair of scissors or cutters as we mentioned above.
Next, open the box by lifting the top cover to then remove the objects that are around it and the cardboard that
holds them in place, to prevent them from falling when we open the box completely. Then lift the box that covers
the scooter, leaving it exposed. Once the box is completely opened, get rid of the protective plastics that cover the
scooter and the accessories that are there. Cut one of the sides to remove our scooter and making sure you do not
have the brake pulled pull the scooter and it will come out easily. Once out of the box raise the handlebar of the
scooter, which has three heights to adapt to the needs of the user thanks to the lever that has on the side of this. To
be able to place the seat on its platform, it has a small lever at the bottom that allows the chair to be placed on the
scooter, while having a reclining backrest that facilitates its storage. To put the armrests, we nd two holes behind
the seat provided in a way that secures them by screwing them to the chair, and check that they can be adjusted
in width and are foldable. To nalize the assembly, it has a practical basket in the front part allowing to keep any
object
IMPORTANT PRECAUTIONS
1. Only one person at a time could ride the scooter.
2. Maximum load is 135kg / 300lbs.
3. Turn the key off before getting on or off.
4. Always drive carefully and be aware of others using the same area.
5. Always use pedestrian crossings wherever possible. Take extreme care when crossing roads.
6. Do not drive on slope exceeding 12 degree and take extreme care when turning on slope.
7. Take great care and drive in low speed when backing up, riding downhill or on uneven surface and soft or loose
surfaces (such as gravel or grass), and climbing curb.
8. Please use the lowest speed when driving through the descending road or uneven terrain. If speed is too fast,
leave your hand of the handlebar, let the scooter stop. Make sure safety and start again.
9. To prevent any danger, do not turn around at high speed on ascending, descending ramp.
10. Scooter may not operate well in high humidity.
11. Do not leave the powered scooter in a rainstorm of any kind.
12. Follow traffic laws when riding outside and try not to drive scooter at night or in a rain or bad weather.
13. when scooter on moving transport vehicles, do not sit or stay on scooter.
14. Remember this product should only be used on smooth surfaces.
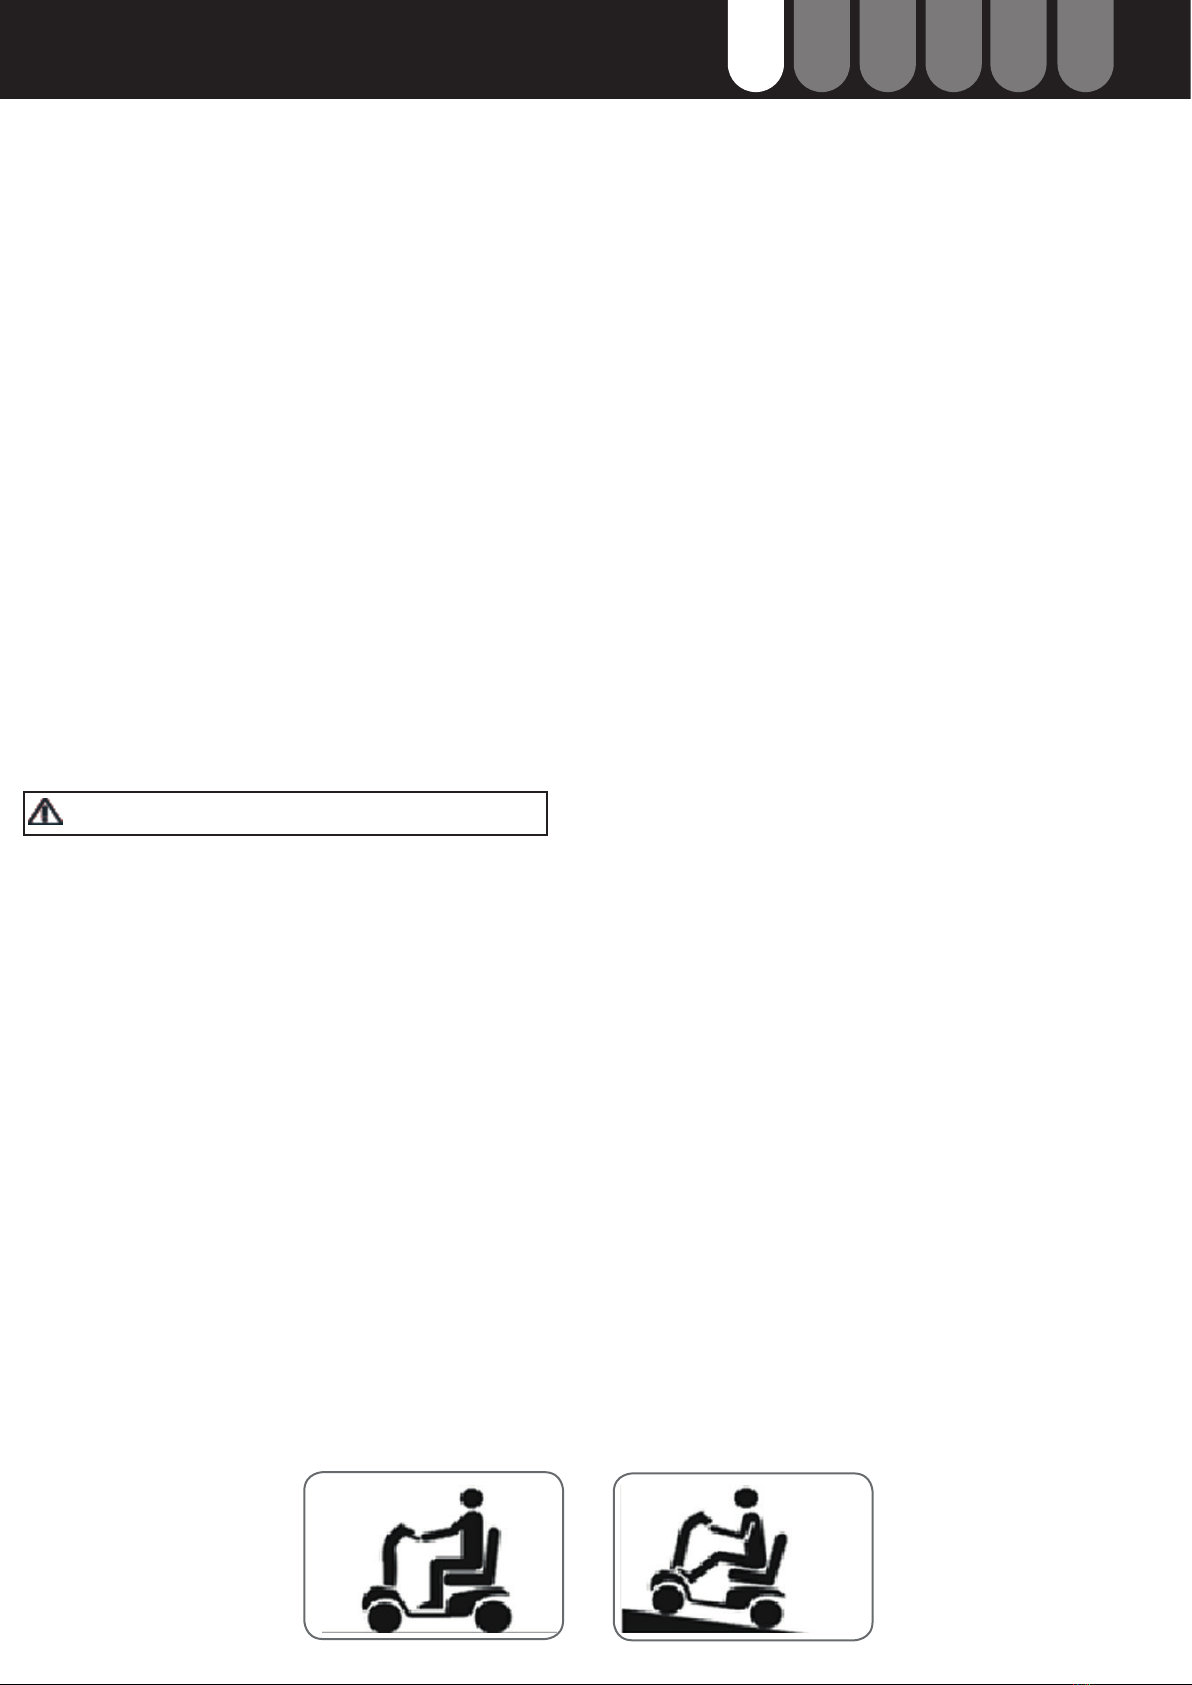
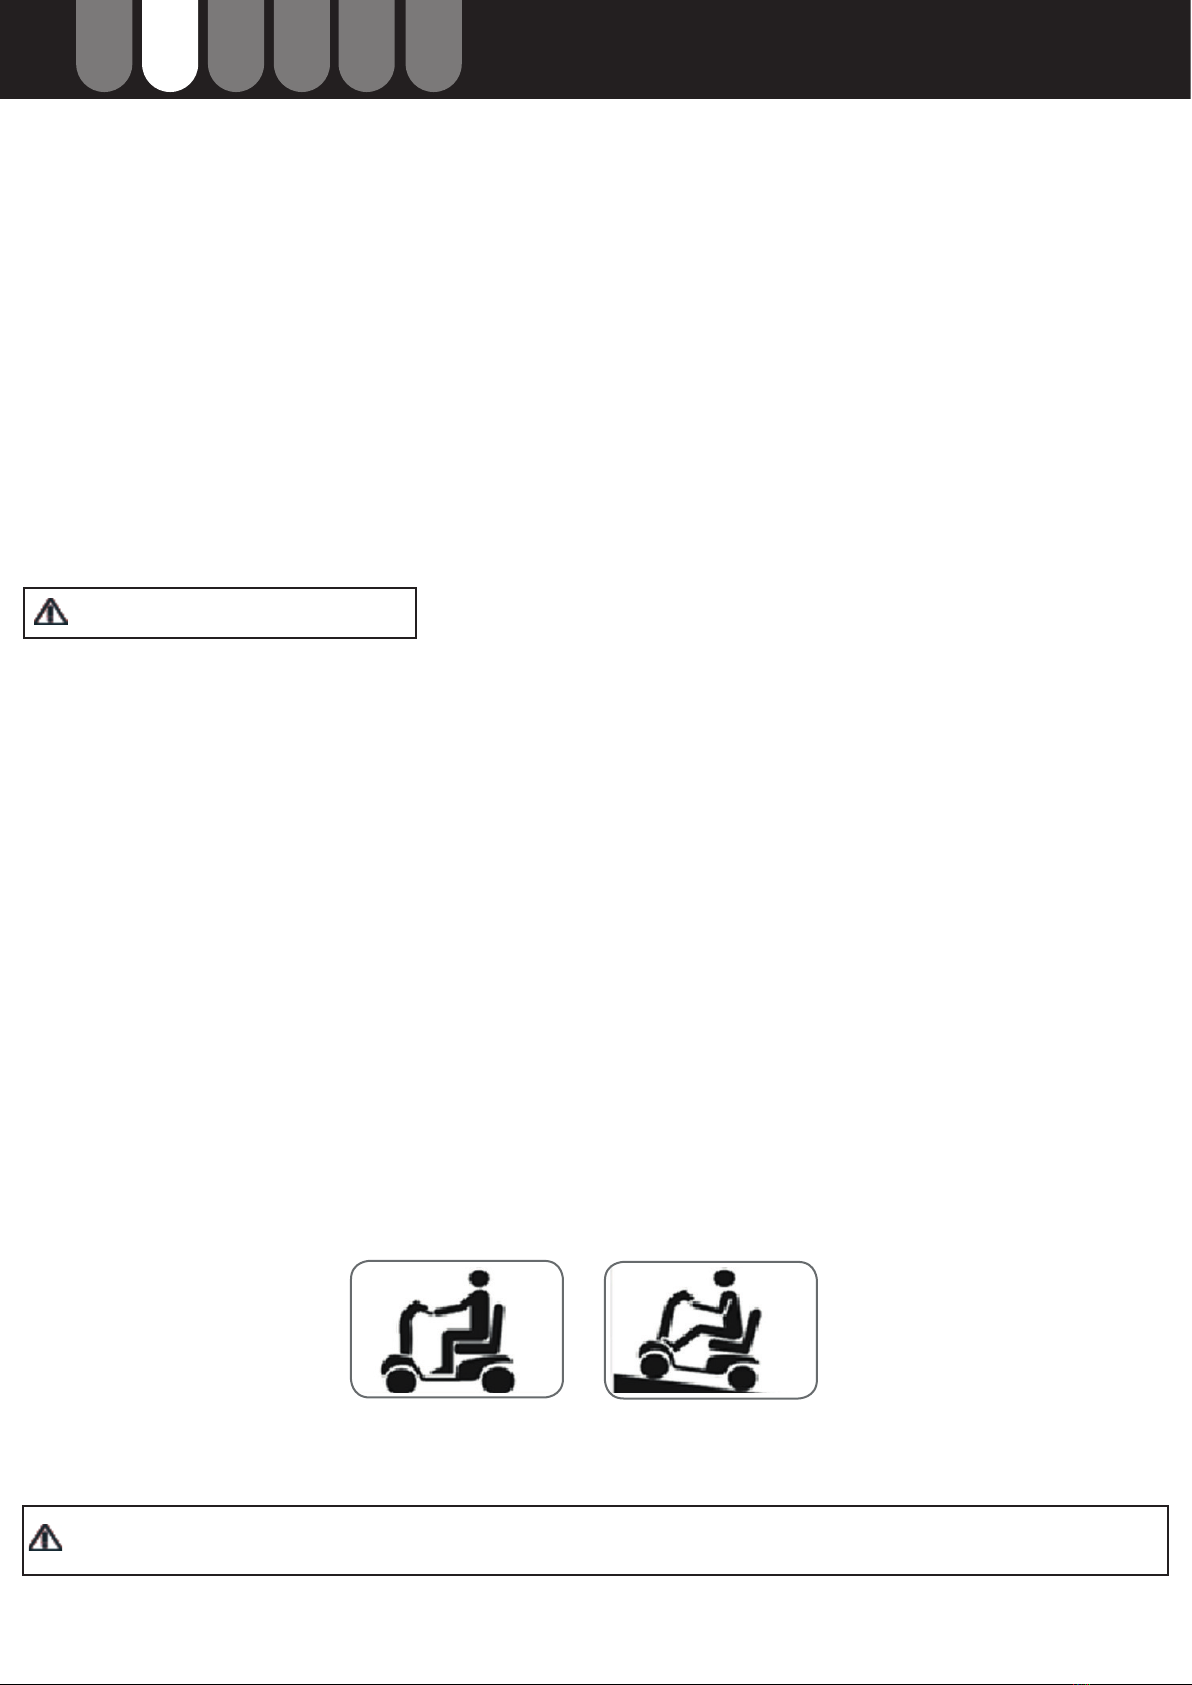
Your scooter can climb obstacles and curbs of up to 7 cm in height. Never attempt to overcome an obstacle when
on an uphill or downhill gradient! Always approach obstacles straight on! Ensure that the front wheels and rear
wheels move over the obstacle in one stroke, do not stop halfway!
When driving scooter on ramp, adjust body center of gravity to keep scooter more safety.
ELECTROMAGNETIC INTERFERENCE AND WARNINGS
CAUTION: It is very important that you read this information regarding the possible efects of
Electromagnetic Interference on your motorized scooter.
Powered wheelchairs and motorized scooters may be susceptible to electro- magnetic interference (EMI), which
is interfering electromagnetic energy (EM) emitted from sources such a radio stations, TV stations, amateur radio

DEITFRPTENES
Instruction Manual Libra
damage the motorized scooter control system. The intensity of the interfe- ring EM energy can be measured in
volts per meter (V/m). Each motorized scooter can resist EMI up to certain intensity. This is called its “immunity le-
vel.” The higher the immunity level, the greater the protection. At this time, current technology is capable of achie-
ving at least a 20 V/m immunity level, which would provide useful protection from the more common sources of
radiated EMI. This immunity level of this motorized scooter model is not known.
WARNINGS
Electromagnetic interference (EMI) from sources such as radio and TV stations, amateur radio (HAM) transmitters,
two-way radios, and cellular phones can affect motorized scooters. Following the warnings listed below should re-
duce the chance of unintended brake release or motorized scooter movement which could result in serious injury.
1. Do not operate hand-held transceivers (transmitters-receivers), such as citizens band (CB) radios, or turn ON
personal communication devices, such as cellular phones, while the motorized scooter is turned ON.
2. Be aware of nearby transmitters, such as radio or TV stations, and try to avoid coming close to them.
3. If unintended movement or brake release occurs, turn the motorized scooter OFF as soon as it is safe.
4. Be aware that adding accessories or components, or modifying the motori- zed scooter, may make it more sus-
ceptible to EMI.
IMPORTANT INFORMATION
1. 20 volts per meter (V/m) is a generally achievable and useful immunity level against EMI (as of May 1994). The
higher the level, the greater the protection.
2. This product has an immunity level of at least 10 V/m.
IDENTIFICATION OF PARTS
Before attempting to drive this scooter on your own, it is important that you familiarize yourself with the controls,
and how to operate
(HAM) transmitters, two-way radios, and cellular phones. The interference (from radio wave sources) can cause the
motorized scooter to release its brakes, move by itself, or move in unintended directions. It can also permanently

DEITFRPTENES Instruction Manual Libra
FUNCTION OF PARTS
Top control panel
Speed Control Knob.
The Rabbit means fast and Turtle is slow. By turning this, you control the total speed transferred to the thumb con-
trols.
Self Diagnostic Warning Light
Flashing indicates problems with the scooter.
Battery Gauge:
This light is yellow. Below you will nd three color ranges: red, yellow and green. When the light is on in all three
color ranges, the batteries are fully charged. When the light is on only in the red, or red and yellow areas, the ba-
tteries need to be recharged
Beneath top control panel
Throttle:
Pushing the right Throttle moves the scooter forward. Pushing the left Throttle moves the scooter backward. (This
can be reversed if required by local dealer.) Releasing both engages the automatic brake. This is also your accele-
rator. The further you depress them, the faster you go. (Subject to the position of the Rabbit/Turtle control).
At base of steering tiller
Seat Control Levers:
Seat Control Slide - Lift up on lever under front edge of seat to adjust forward and backward. Seat Rotation Lever
- Push lever back to rotate seat; push forward to lock seat in position.
Rear body
Rear Cover:
Protects batteries from damage.
Anti-tip wheels:
Helps keep the scooter from tipping over.
The Free-Wheeling Lever:
It will let you change the Mode of your scooter (Neutral Mode or Drive Mode). The Neutral Mode (N) will let you
move the scooter without energy, you will be able to push it, whereas the Drive Mode (D) will let you drive the scoo-
ter and immobilize it when you want to park it.
You will nd some stickers next to the lever, they will help you to know the Mode of your scooter.
If you would like to change from Neutral Mode to Drive Mode, you must turn off the scooter. After changing the
Mode, you will be able to turn on again your scooter.
OPERATING YOUR SCOOTER
You can make the following adjustments to increase your comfort when driving:
-Remove rear shround and connect the battery wire.
· Adjust seat height and location
· Adjust steering column to comfortable position.
· Adjust legroom
1. Before operating your scooter, check the following:
-free-wheeling device on D -speed dial is at the turtle picture.
2. Sit on scooter and turn on key. The Battery Gauge light should be lit in the green, yellow, and red color zones.
The Self-Diagnostic Warning Light should not be blinking.

DEITFRPTENES
Instruction Manual Libra
3. When your hands rest comfortably on the handlebars, the thumb control levers should be within easy reach. The
right lever moves the scooter forward, the left one moves it backward. When you release both levers the scooter
will stop.
4. Steer the scooter by turning the whole steering column the way you want to go.
5. Practice driving where there are no obstacles. Start at the slowest speed and drive forward and backward; make
some turns. As you get more comfortable you can increase the speed by turning the speed dial toward the picture
of the rabbit.
6. If two Battery Gauge LED Lights be lit, you should plan to recharge the batteries very soon.
7. If the scooter stops, locate the circuit breaker on the top of the battery pack. Push it and try the scooter again.
8. When you are nished riding, turn off the key before getting off .
9. If you are nished riding for the day, immediately recharge the batteries.
OTHER OPERATING INFORMATION
-Release Throttle and allow scooter to stop completely before changing from forward to reverse or reverse to
forward.
-When turning a corner, swing the front wheels wide, because the back wheels will turn more tightly.
-Use the scooter only where it would be safe to walk.
-Use low speeds for reverse, downhills, ramps, curbs, or uneven surfaces.
OTHER OPERATING INFORMATION
Hill climbing: You may need to use a higher speed. Turn to lower speed before going downhill.
Down slopes: To proceed down steep slopes slowly, set speed control in proximity of the turtle. This enables driver
control, as the closer the speed control is set toward the turtle, the slower it will become. However, this scooter
will not self-accelerate down hills due to the automatic braking taking effect should you attempt to drive too fast.
If the scooter breaks down and must be moved, get off the scooter, push the Free-Wheeling Lever to N, move the
scooter slowly to a safe location, and move the lever back to D.
DISASSEMBLING YOUR SCOOTER
NO TOOLS ARE NECESSARY. YOU CAN DISASSEMBLE SCOOTER FOR TRANSPORT
Remove seat by releasing Seat Rotation Lever(A)and then lift off.
Gently lift rear storage cover (B).
(B)
(A)

DEITFRPTENES Instruction Manual Libra
Unscrew controller wiring harnesses (C).
Remove rear shroud off of the scooter (D).
Remove battery xing Velcro (E).
Unplug both battery harnesses (F) and remove batteries (G).
Detach the front and rear sections by holding the Seat Post (J) with one hand and the other hand pushing the
release lever to the rear of the scooter. Lift the seat post to separate the Rear Frame Assembly (H) from the Front
Frame Assembly.
CHARGING THE BATTERIES
Batteries must be charged before using the scooter for the rst time and should be charged after each day use.
You will need scooter and the battery charger.
1. Insert battery charger cord into the charger connector on the charger output. Refer to above gure for correct
position
2. Plug the other end of the battery charger cable into a standard electrical outlet.
3. Turn the power on. Normally, The LED (Power) Light will turn on when electric current passes.
4. Charging starts. During charging, LED (Charge) will indicate orange light, when it turns to green light, that means
well-charged.
(C)
(D)
(E)
(F)
(G)
(J)(H)

DEITFRPTENES Instruction Manual Libra
5. LED indication
- LED(POWER) - GREEN LIGHT ON: Power On.
- LED(CHARGE) - ORANGE LIGHT ON: Charging / GREEN LIGHT ON: Fully Charged
6.Charger Trouble Shooting
(A)If LED (POWER) light is off.
- Check the input voltage (115V/230V) is the same as you adjust.
- If light is still off, please check and repair the battery charger.
(B)If LED (CHARGE) light is off.
- Check to see clips connection is correct.
- If the battery is fully charged, the LED (CHARGE) light will be off.
- If light is still off, the battery may be defective.
(C) If ORANGE light can turn to GREEN.
- The battery can not be charged. Please check and recover it.
(D)If ORANGE light turns to GREEN immediately
- Check to see the battery is fully charged, if not, The battery may be defective Check and recover it.
Batteries must be fully charged in order to not hurt their lifetime. If not, faults may result
ASSEMBLING YOUR SCOOTER
To assemble the scooter, you can repeat the disassembly directions in reverse. Abbreviated directions are given
below:
1. Use the Steering Column Lever to move the Steering Column up out of the way.
2. Tilting the rear end to a horizontal position, insert the scooter frame tube of the front end into the rear section rst,
making sure that the locking pins are removed.
3. Slide the two sections of the unit together until the front half reaches its limit.
4.I nsert the two locking pins into their corresponding holes. Both locking pins must be fully inserted whenever the
scooter is assembled.
5. Place batteries, use Velcro to x the position and attach the battery power plugs.
6. Place rear shroud.
7. Screw together controller wiring harness.
8. Place rear storage cover.
9. Loose Seat Rotation Lever counterclockwise. Place seat on seat post. Tighten Lever again by turning clockwise.
Lock Seat Control Lever on bottom of seat before sitting down.
CLEANING YOUR SCOOTER
If your scooter is dirty, use a damp or lightly soapy cloth to wipe it down. Do not use running water to wash or rinse
the scooter in order to protect the electrical parts. Polish with an automotive liquid polish.
MAINTAINING YOUR SCOOTER
All maintenance and repair of your scooter should be done by an authorized dealer.
The following areas required periodic inspection:
- Tire pressure between 30-50 psi.
- All electrical connections are rmly attached.

DEITFRPTENES Instruction Manual Libra
Overall Length 128 cm / 50.4”
Overall Width 61cm / 24”
Overall Height 111 cm / 43.7”
Front Wheels 26 cm / 10”
Rear Wheels 26 cm / 10”
Weight W/ Batteries 87.9 kg / 194 lbs
Max. Speed 8 kmph / 5 mph
Weight Capacity 135 kg / 300 lbs
Ground Clearance 4 cm / 1.6”
Grade Climbable 12 degree
Curb Climbable 7 cm / 2,75”
Turning Radius 152 cm / 59.8”
Brake Electro-Mechanical
Seat Type Swivel Mid-Back W/ Headrest & Seat Sliding Mecha-
nism
Seat Width 45,5 cm / 18”
Motor Size 500W, 3400 r.p.m
Battery Size (2) 12V. 36Ah
Weight of Battery Pack 22.5 kg / 49.6 lbs
Travel Range 30 km / 18.6 Miles
Battery Charger 5A Off Board
Specications

DEITFRPTENES Instruction Manual Libra
Flash Description Meaning
1Low Battery The batteries are running low.
•Recharge the batteries
2Low Battery Fault Battery charge is empty.
• Recharge the batteries.
3Battery voltage
too high
Battery voltage is too high. This may occur if overcharged &/or traveling down a
long slope.
• Turn the scooter power off then on again
• If traveling down a slope, reduce your speed.
4Current limit
time-out
The motor has been exceeding its maximum current rating for too long. This may
be due to a faulty motor
• Check the motor and associated connections and wiring.
• Turn the controller off, leave for a few minutes and turn back on again.
5Brake fault Either a park brake release switch is active or the park brake is faulty.
• Check if the lever is in Automatic Mode (D).
• If this ash code does not appear until the throttle has been moved out of neu-
tral, check for a short in the park-brake circuit.
• If this ash code appears at power-up, check for an open circuit in the park-
brake circuit.
• Check the park brake and associated connections and wiring
6Out of neutral at
power-up
The Throttle is out of neutral when turning the controller on.
• Ensure the throttle is in neutral when turning the scooter on.
• The Throttle may require re-calibration.
• Check the its associated connections and wiring.
7Speed Pot Fault The throttle, speed limit pot or their associated wiring may be faulty.
• Check the throttle and speed pot and associated connections and wiring.
8Motor Voltage
Fault
The motor or its associated wiring is faulty.
• Check the motor and associated connections and wiring.
9Other error The controller may have an internal fault.
• Check all connections & wiring.
TROUBLESHOOTING
To check the Self-Diagnostic Warning Light, turn on the key and count the number of ashes

PTDEITFRENES
Manuel D’Utilisation Libra
Le scooter LIBRA offre une solution aux problèmes de mobilité des personnes ayant des difficultés à marcher, ou
ne pouvant pas parcourir de longues distances. Le scooter Libra est conçu pour être utilisé en intérieur comme en
extérieur. Ce scooter vous apportera tout ce dont vous avez besoin pour sortir de façon autonome et avec confort.
Ce document est destiné à être utilisé à l’arrivée de votre colis, pour que vous puissiez suivre les instructions et le
déballer facilement et rapidement. Vous n’aurez besoin que d’une paire de ciseaux ou d’un cutter.
Dans un premier temps, coupez les bandes de plastique qui enveloppent la boîte du produit. Ensuite, ouvrez-la
en soulevant le couvercle supérieur, puis retirez la boîte qui recouvre le scooter. Débarrassez-vous des plastiques
protecteurs qui recouvrent le scooter et les accessoires. Pour sortir le scooter, assurez-vous que le frein n’est pas
verrouillé. Tirez ensuite sur le scooter et il sortira facilement. Relevez le guidon à l’aide du levier qui se trouve sur
son côté. Le guidon possède trois hauteurs différentes an de s’adapter au mieux aux besoins de l’utilisateur. Pour
placer le siège sur sa plate-forme, vous disposez d’un petit levier sur la partie inférieure. Il permet de le placer le
scooter ainsi que d’incliner le dossier an de faciliter le rangement. Pour placer les accoudoirs, vous trouverez deux
trous à l’arrière du siège pour les xer en les vissant à la chaise. Vériez ensuite qu’ils sont bien réglables en largeur
et pliables. Pour terminer le montage, xez le rétroviseur et le panier sur la partie avant. Très pratique, le panier vous
permettra de transporter tous vos effets personnels.
MESURES DE SÉCURITÉ IMPORTANTES
1. Une seule personne à la fois peut conduire le scooter.
2. Le poids maximum supporté est de 135kg.
3. Éteignez le scooter avant d’y monter ou d’en descendre.
4. Conduisez toujours prudemment et faites attention aux personnes autour de vous.
5. Dans la mesure du possible, utilisez les passages piétons. Soyez extrêmement prudent lorsque vous traversez.
6. N’empruntez pas de pentes de plus de 12 degrés et soyez extrêmement prudent en tournant sur une pente.
7. Réduisez la vitesse dans les virages, ainsi qu’en marche arrière ou sur les surfaces inégales, les rampes et les
surfaces molles ou instables (comme le gravier ou l’herbe).
8. Veuillez utiliser la vitesse la plus basse lorsque vous conduisez en descente ou sur un terrain irrégulier. Si la
vitesse est trop rapide, retirez votre main du guidon et laissez le scooter s’arrêter. Redémarrez lorsque vous vous
sentez plus sûr.
9. An d’éviter tout danger, ne faites pas demi-tour à grande vitesse en montée ou en descente.
10. Il se peut que le scooter ne fonctionne pas normalement dans des conditions d’humidité élevée.
11. Ne laissez pas le scooter électrique sous la pluie.
12. Respectez le code de la route lorsque vous roulez à l’extérieur et essayez de ne pas conduire le scooter de nuit
ou dans des conditions météorologiques défavorables.
13. Ne montez pas sur le scooter lorsque vous le transportez dans un véhicule en mouvement.
14. On vous rappelle qu’on peut utiliser ce produit seulement sur des surfaces planes.
Le scooter peut franchir des obstacles et des trottoirs de jusqu’à 8 cm de hauteur. N’essayez jamais de passer un
obstacle en montant ou en descendant une pente. Vous devez approcher les obstacles de front. Veillez à ce que
les roues avant et arrière franchissent l’obstacle d’un seul coup, ne vous arrêtez pas à mi-chemin !
Lorsque vous conduisez sur une rampe, vous devez ajuster le centre de gravité de votre corps pour assurer la
sécurité.
INTERFÉRENCES ÉLECTROMAGNÉTIQUES ET AVERTISSEMENTS
ATTENTION: Il est important de lire ces informations sur les éventuels eets des interférences
électromagnétiques sur votre scooter électrique.
Les fauteuils roulants et scooters électriques peuvent être sensibles aux interférences électromagnétiques (EMI).
Elles sont le résultat d’interférences d’ondes d’énergie électromagnétique (EM) émises par des sources telles

PTDEITFRENES Manuel D’Utilisation Libra
que les radios, les télévisions, les émetteurs radio amateurs (HAM), les radios émetteur-récepteur et téléphones
portables. Les interférences (provenant de sources d’ondes radio) peuvent provoquer un relâchement des freins,
un déplacement involontaire du scooter ou un déplacement dans des directions non souhaitées. Elles peuvent
également endommager de façon permanente le système de contrôle du scooter motorisé. L’intensité de l’éner-
gie électromagnétique perturbatrice peut être mesurée en volts par mètre (V/m). Chaque scooter électrique peut
résister aux interférences électromagnétiques jusqu’à une certaine intensité. C’est ce qu’on appelle son « niveau
d’immunité ». Plus le niveau d’immunité est élevé, plus la protection est grande. La technologie actuelle permet
d’atteindre un niveau d’immunité d’au moins 20 V/m, ce qui assurerait une protection utile contre les sources les
plus courantes d’interférences électromagnétiques rayonnantes. Le niveau d’immunité de ce modèle de scooter
électrique n’est pas connu.
AVERTISSEMENTS :
Les interférences électromagnétiques (EMI) provenant de sources telles que les radios, les télévisions, les éme-
tteurs de radio amateur (HAM), les radios émetteur-récepteur et les téléphones portables peuvent affecter les
scooters électriques. En suivant les avertissements énumérés ci-dessous, vous devriez réduire les risques de
desserrage des freins ou de déplacement involontaire du scooter, ce qui pourrait entraîner des blessures graves.
1. N’utilisez pas de radios portatives (émetteurs-récepteurs), telles que les radios de radioamateurs, et n’allumez
pas les appareils de communication personnels, tels que les téléphones portables, lorsque le scooter électrique
est allumé ;
2. Soyez à l’affût des émetteurs à proximité, comme les stations de radio ou de télévision, et essayez d’éviter de
vous en approcher ;
3. Si un mouvement involontaire ou le desserrage des freins se produit, éteignez le scooter électrique dès qu’il est
en sécurité ;
4. Notez que l’ajout d’accessoires ou de composants, ou la modication du scooter électrique, peut le rendre plus
sensible aux interférences électromagnétiques.
INFORMATIONS IMPORTANTES
1. 20 volts par mètre (V/m) est un niveau d’immunité généralement atteignable et utile contre les EMI (depuis mai
1994). Plus le niveau d’immunité est élevé, plus la protection est grande.
2. Ce produit a un niveau d’immunité d’au moins 10 V/m.
IDENTIFICATION DES COMPOSANTS
Avant de conduire ce scooter seul, il est important que vous vous familiarisiez avec les commandes et leur fonc-
tionnement.

PTDEITFRENES
Manuel D’Utilisation Libra
FONCTIONS DES COMPOSANTS
Panneau de commande supérieur
Interrupteur de contrôle de vitesse:
Le lièvre signie la vitesse la plus rapide et la tortue la plus lente. En tournant ce bouton, vous contrôlez la vitesse
totale transférée aux commandes.
Témoin lumineux d’auto-diagnostic:
Le clignotement indique un problème avec le scooter. Reportez-vous à la page 14 pour plus d’informations.
Jauge de batterie:
Ce voyant lumineux est jaune. Ci-dessous se trouvent trois couleurs : rouge, jaune et vert. Lorsque le voyant est
allumé dans les trois couleurs, la batterie est complètement chargée. Lorsque le voyant n’est allumé que dans les
zones rouge ou rouge et jaune, la batterie a besoin d’être rechargée.
Sous le panneau de commande supérieur
Accélérateur:
Appuyez sur l’accélérateur droit pour faire avancer le scooter. Appuyez sur l’accélérateur gauche pour faire reculer
le scooter (ceci peut être inversé sur demande du distributeur). Le relâchement des deux enclenche le frein au-
tomatique. C’est aussi votre accélérateur. Plus vous les poussez, plus vous allez vite (selon la position de la com-
mande lièvre/tortue).
À la base du timon
Levier de la colonne de direction :
Poussez la poignée vers le bas pour l’ajuster. Tirez vers le haut pour verrouiller la colonne de direction à un angle
confortable.
Sous le siège
Leviers de réglage du siège :
Coulisse de réglage du siège : Soulevez le levier sous le bord avant du siège pour le régler vers l’avant et vers
l’arrière.
Levier de rotation du siège :
Poussez le levier vers l’arrière pour faire pivoter le siège ; poussez-le vers l’avant pour verrouiller le siège dans la
bonne position.
Vis à oreilles :
Desserrez les deux vis à oreilles pour régler la largeur de l’accoudoir. Resserrez à nouveau pour le verrouiller dans
la position souhaitée.
Carrosserie arrière
Couvercle arrière: Protège les batteries des dommages.
Roues anti-basculement: Empêchent le basculement du scooter.
Levier de démarrage: Utilisez le lévrier de démarrage pour changer du Mode Manuel (N) au Mode Automatique
(D). Avec le Mode Manuel, on peut utiliser le scooter sans besoin d’aucune énergie, c’est à dire, on peut le pousser
pour le déplacer; le Mode Automatique, au contraire, vous aidera à vous déplacer avec le scooter. Il assure aussi
que le scooter reste immobile quand vous voulez vous arrêter.
On peut conrmer le Mode du scooter grâce à l’étiquette qui se trouve sur le lévrier de blocage.
Éteignez le scooter pour changer du Mode Manuel au Mode Automatique. Actionnez le lévrier, changez de mode
et nalement actionnez le scooter aussi, pour vous déplacer automatiquement.
FONCTIONNEMENT DU SCOOTER
Pour votre confort, vous pouvez adapter certaines caractéristiques du scooter:
- Retirez le boîtier et branchez les batteries.
- L’hauteur du siège et la distance jusqu’au guidon.
- La colonne de direction.
- La place pour les jambes.
Other manuals for Libra
1
Table of contents
Languages:
Other Mobiclinic Scooter manuals
Popular Scooter manuals by other brands

URBANGLIDE
URBANGLIDE RIDE 100s Translation of the original instructions

Stiga
Stiga TRICK SCOOTER ZAP STREAM Assemble, instruction manual

Yamaha
Yamaha XMAX YP250R owner's manual

JAWA
JAWA babetta 28 Servicing instructions

Pride Mobility
Pride Mobility Sonic owner's manual

Wottan motor
Wottan motor REBBE 125 user manual