manuals.online logo
Brands
  1. Home
  2. •
  3. Brands
  4. •
  5. Mobotix
  6. •
  7. Intercom System
  8. •
  9. Mobotix T25 Original operating instructions

Mobotix T25 Original operating instructions

www.mobotix.com EN
T25 Quick Installation
HiRes Video Innovations
The German company MOBOTIX AG is known as the leading pioneer in network camera technology and
its decentralized concept has made high-resolution video systems cost ecient.
MOBOTIXAG•D-67722Langmeil•Phone:+49-6302-9816-103•Fax: +49-6302-9816-190•[email protected]
31.847_EN_V1_02/2014
HD Super Panorama – No Blind Spots From Wall To Wall
180°
Step 1
Start Auto Configuration
Step 2
Enter Super PIN
Step 3
Set Up RFID Cards
Step 4
Protect System
EN
T25 Quick Installation
MOBOTIX AG • D-67722 Langmeil • Phone: +49-6302-9816-103 • Fax: +49-6302-9816-190 • www.mobotix.com
Congratulations On Purchasing Your T25M Complete Kit!
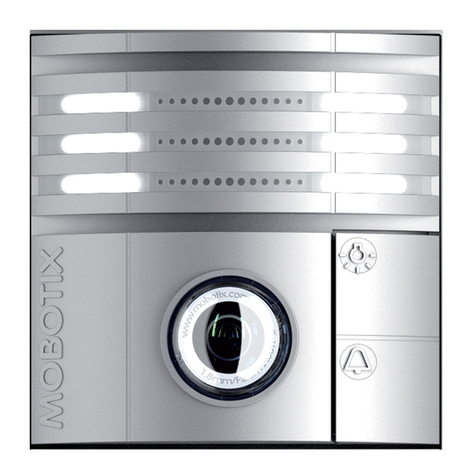
You complete kit comes complete with a door camera T25M-CamCore, KeypadRFID, Info2wire+
info module and indoor unit for connecting the door station via a two-wire cable plus an MX-DoorMaster,
on-wall and in-wall housing and installation material. Before starting the installation, release the
modules from the frame by inserting the blue key into the opening on the module frame and pushing
the key in (bottom left). The installation and wire connection process is described in Part 1 of the
enclosed System Manual.
Key for unlocking
modules
RFID cards
(1 x Admin, 6 x User)
USB stick, marker pen
Lens wrench
MX-DoorMaster and
Info2wire+ installation material
Outdoor station installation
material
Cable binders
Documentation
In-wall housing MX-DoorMaster
Info2wire+
indoor unit
MX-DoorMaster and
Info2wire+ indoor unit frames
T25M-CamCore, KeypadRFID,
Info2wire+ info module, frame
with anti-theft protection, on-wall
housing
MOBOTIX AG • D-67722 Langmeil • Phone: +49-6302-9816-103 • Fax: +49-6302-9816-190 • www.mobotix.com MOBOTIX AG • D-67722 Langmeil • Phone: +49-6302-9816-103 • Fax: +49-6302-9816-190 • www.mobotix.com
Step 1 – Start The Auto Configuration
Connect And Start Up The Devices
Connect all the devices as shown in the connection diagram in the enclosed System Manual Part 1,
Chapter 2.1.3.
Switch on the power supply (videophone via a power supply unit, door station via a PoE
switch). After the videophone has started up, disconnect the door station briefly from the power supply
(for example, remove network connector).
Press The Bell Button On The Camera Module
As soon as the light and bell buttons on the camera module light up white, press the bell button until
the two buttons start to flash briefly. The auto configuration process starts and the network data is
announced (for example, IP address). Afterwards, the camera LEDs light up, the keypad number buttons
flash white, the ESC/ALARM button flashes red and the OK/MENU button flashes blue.
Step 2 – Enter Super PIN
Choose an 8 to 16 digit number. The number should not be composed only of zeros and must be
dicult to guess. Important: Make a note of the Super PIN straight away and keep it in a safe place!
Enter the Super PIN and press the OK/MENU button. Enter the Super PIN again and press
the OK/MENU button.
0 9
Super PIN
OK 0 9
Super PIN
OK
EN
T25 Quick Installation
MOBOTIX AG • D-67722 Langmeil • Phone: +49-6302-9816-103 • Fax: +49-6302-9816-190 • www.mobotix.com
Step 3 – Set Up RFID Cards
Set Up Red Admin Card
After you have entered your Super PIN, the keypad number buttons light up white, the bell, key and
OK/MENU buttons flash blue and the ESC/ALARM button flashes red.
Now hold the Admin card in front of the keypad for approximately five seconds until you no longer
hear any beeps.
Set Up Blue User Cards
Afterwards, the keypad remains in Add mode for two minutes to allow you to train the User cards, i. e.,
the bell button, key button, OK/MENU button and ESC/ALARM button all flash blue.
Hold a User card to be set up in front of the keypad until a beep sounds. You can now set up as many
additional User cards as you choose, simply by holding them in front of the keypad. To exit the Add
mode before completion, press the ESC/ALARM button.
Step 4 – Protect System Via Videophone
By protecting your system, you can prevent unauthorized persons from accessing the individual networked
devices via their IP address. The door camera was previously assigned secure access data when you
set up the Super PIN: user name: admin, camera admin password: current Super PIN
Pick up the receiver and press the ‘*’ button three times to go to the configuration menu. Press the ‘4’
button to select the Admin setup option and log in with your Super PIN.
Now change the Grandstream web password, disable auto configuration (by removing the check mark)
and save your current system configuration (item: Backup and restore). For a detailed description
of how to protect your system, please see Chapter 2.4 in Part 2 of the System Manual (PDF file on the
enclosed USB stick).
Add mode Hold in front for five seconds Confirm
Add mode Hold briefly in front Confirm

Other manuals for T25

4

This manual suits for next models

1

Other Mobotix Intercom System manuals

Mobotix T24 User guide

Mobotix

Mobotix T24 User guide

Mobotix MxDisplay Plus Instructions for use

Mobotix

Mobotix MxDisplay Plus Instructions for use

Mobotix T24 User manual

Mobotix

Mobotix T24 User manual

Mobotix T25 User guide

Mobotix

Mobotix T25 User guide

Mobotix PC-IP102ID User manual

Mobotix

Mobotix PC-IP102ID User manual

Mobotix T26 User guide

Mobotix

Mobotix T26 User guide

Mobotix T26 Original operating instructions

Mobotix

Mobotix T26 Original operating instructions

Mobotix T24 User manual

Mobotix

Mobotix T24 User manual

Mobotix T24 Guide

Mobotix

Mobotix T24 Guide

Mobotix T25 Quick start guide

Mobotix

Mobotix T25 Quick start guide

Mobotix T24S User guide

Mobotix

Mobotix T24S User guide

Mobotix T25 User manual

Mobotix

Mobotix T25 User manual

Mobotix T24 User guide

Mobotix

Mobotix T24 User guide

Mobotix T24S Instruction Manual

Mobotix

Mobotix T24S Instruction Manual

Mobotix BellRFID MX-Bell1-Core Instructions for use

Mobotix

Mobotix BellRFID MX-Bell1-Core Instructions for use

Mobotix MxDisplay Plus User manual

Mobotix

Mobotix MxDisplay Plus User manual

Mobotix T25 Original operating instructions

Mobotix

Mobotix T25 Original operating instructions

Popular Intercom System manuals by other brands

Alcad 967 Series manual

Alcad

Alcad 967 Series manual

Aiphone LC-10S instructions

Aiphone

Aiphone LC-10S instructions

Toa N-XC65-W user manual

Toa

Toa N-XC65-W user manual

Dnake 290M-S8 user manual

Dnake

Dnake 290M-S8 user manual

LEGRAND IC5004 Series Instruction/installation sheet

LEGRAND

LEGRAND IC5004 Series Instruction/installation sheet

Axis A8004 installation guide

Axis

Axis A8004 installation guide

HiVisionTech DS-KV9503-WBE1 Technical References

HiVisionTech

HiVisionTech DS-KV9503-WBE1 Technical References

Zamel VP-809B manual

Zamel

Zamel VP-809B manual

Alcad CIC-231 manual

Alcad

Alcad CIC-231 manual

Technaxx TX-59+ user manual

Technaxx

Technaxx TX-59+ user manual

KOCOM KDP-602G user manual

KOCOM

KOCOM KDP-602G user manual

Aiphone IS SERIES Setting manual

Aiphone

Aiphone IS SERIES Setting manual

Robin Compact manual

Robin

Robin Compact manual

Toa N-8000EX Specifications

Toa

Toa N-8000EX Specifications

Unitech Tashi MT200 Quick reference guide

Unitech

Unitech Tashi MT200 Quick reference guide

Hyundai Telecom HA-201 Operating	 instruction

Hyundai Telecom

Hyundai Telecom HA-201 Operating instruction

GVI Security GV-VP410Y Installation and operation manual

GVI Security

GVI Security GV-VP410Y Installation and operation manual

NuTone im-406 Service manual

NuTone

NuTone im-406 Service manual

manuals.online logo
manuals.online logoBrands
  • About & Mission
  • Contact us
  • Privacy Policy
  • Terms and Conditions

Copyright 2025 Manuals.Online. All Rights Reserved.